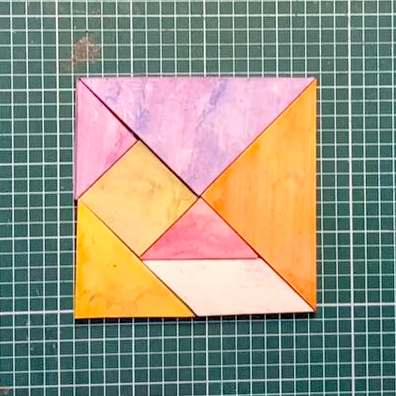
How to Make a Set of Rubber Tangrams

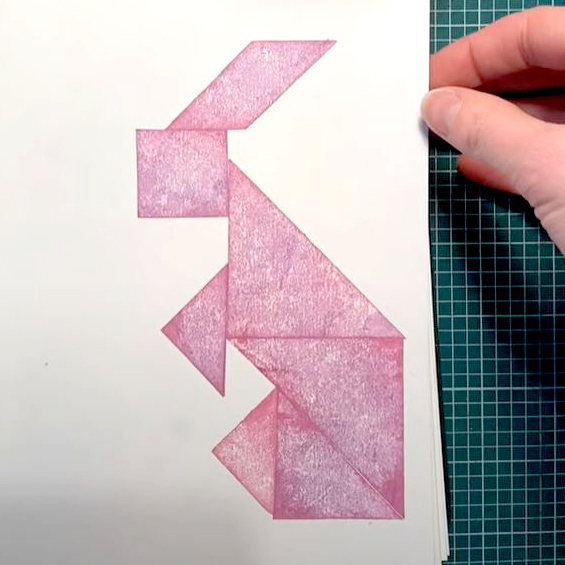
Tangrams are a set of seven puzzle pieces all cut from one square. The pieces can be rearranged into lots of different designs, making them a great activity for children. We can make our own set of tangram stamps from a square of Mastercut or other stamp carving material, to be stamped onto paper or fabric using Versacraft Ink pads.

Read on for instructions or scroll down to the video at the bottom of the page.

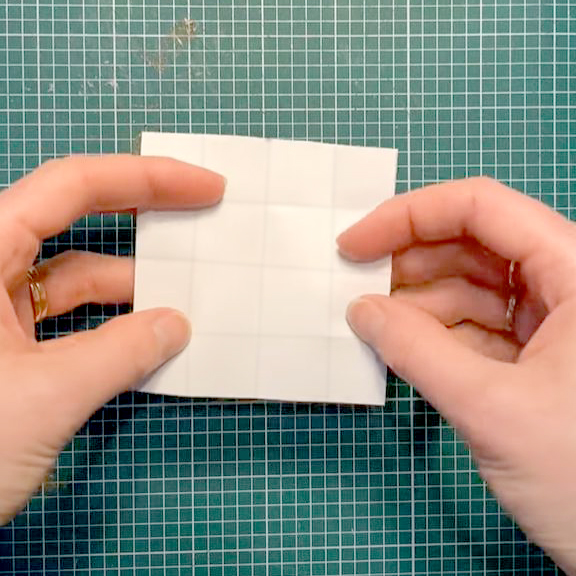
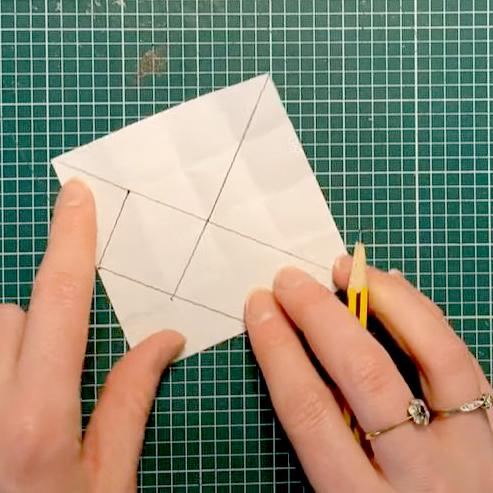
Start with a square piece of paper the same size as your Mastercut. Fold it in half and then half again so that it is divided up into four long strips. Fold it in the other direction into 4 strips too. You should now have a four by four grid when you open out the paper.

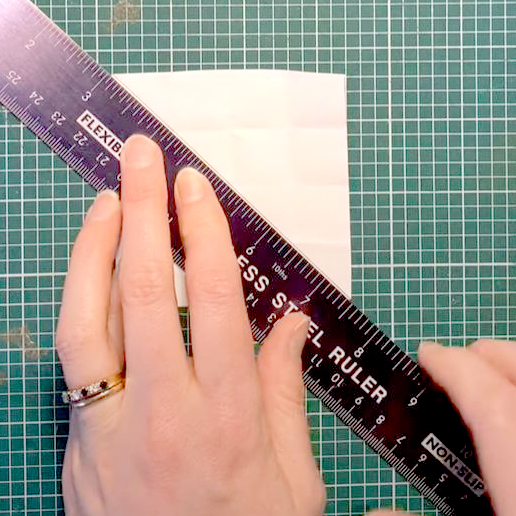
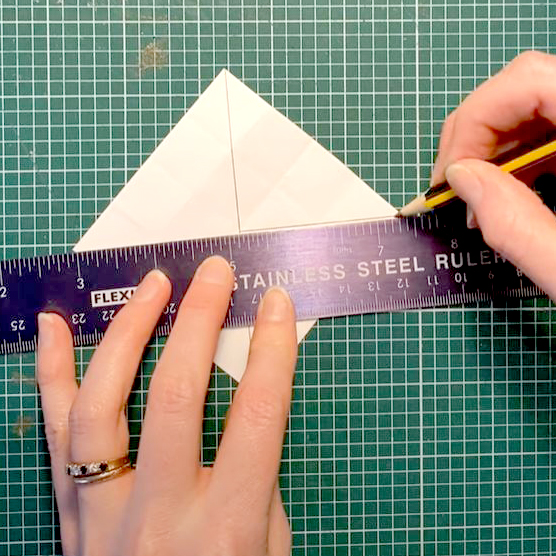
Use a ruler to draw a diagonal line through the centre of the paper from one corner to the other. Draw a line from the centre to another corner. This should give you your first two right angled triangles.

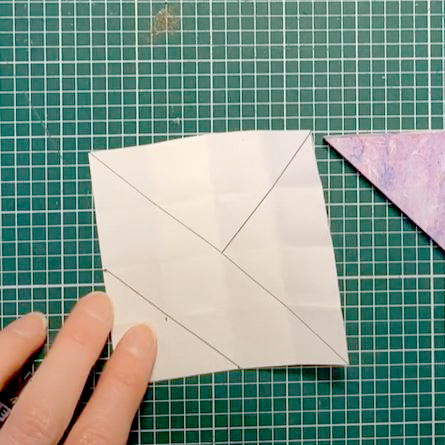
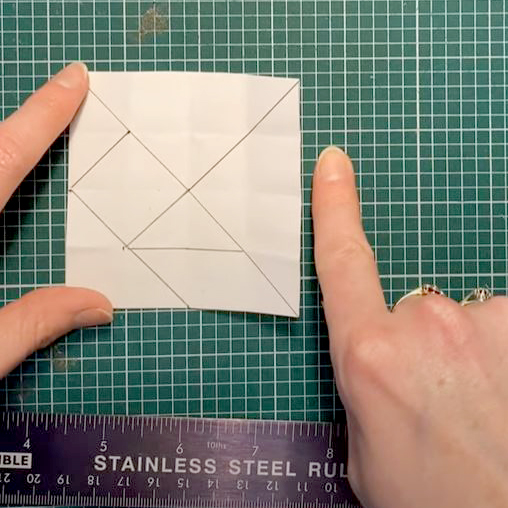
At the edges of the paper, on the sides of the largest triangle, mark a half way point. Connect these two marks to draw a smaller right angled triangle.

Connect a line from the centre point to the middle of the smaller triangle we just made. Create a small square up from the corner of the small triangle.

Divide the final section into a tiny triangle and a parallelogram.

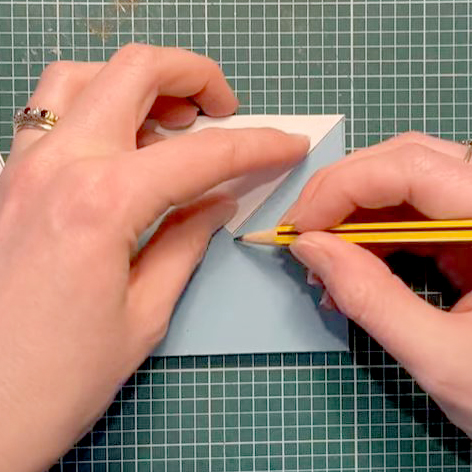
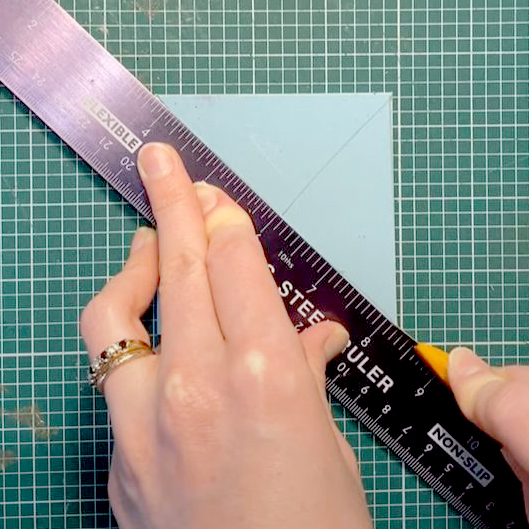
Cut these shapes up, careful to not lose their position, and transfer them onto the square of stamping material with a pencil. Use a metal ruler and a scalpel or craft knife to cut the pieces apart.

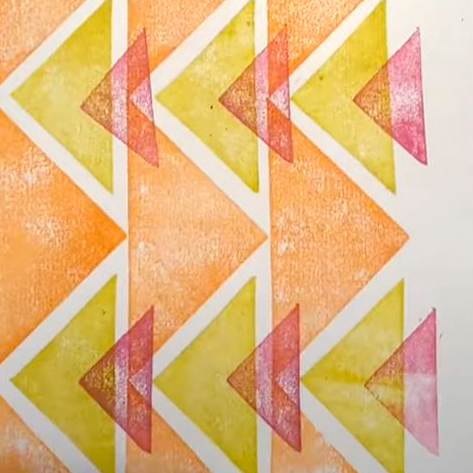
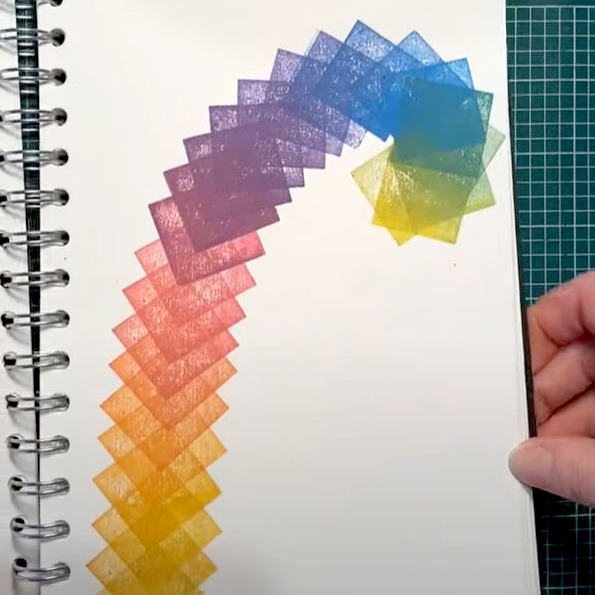
These pieces can now be used with Versacraft Ink Pads to create lots of designs! The game is to use each piece only once to make a picture, but you can use these shapes for whatever designs you can imagine.

For this project you will need:

Meet the Maker: Jack Hancock

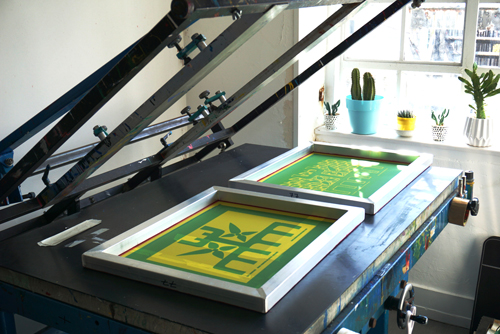
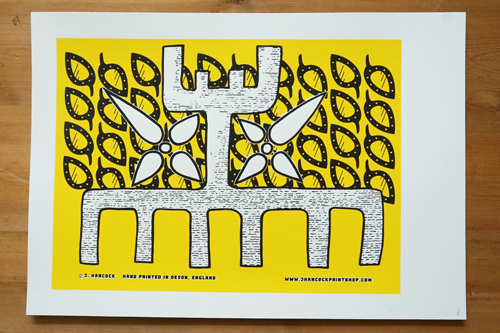
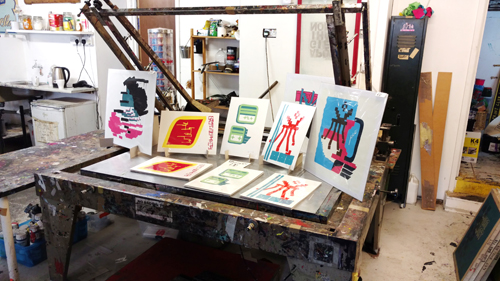
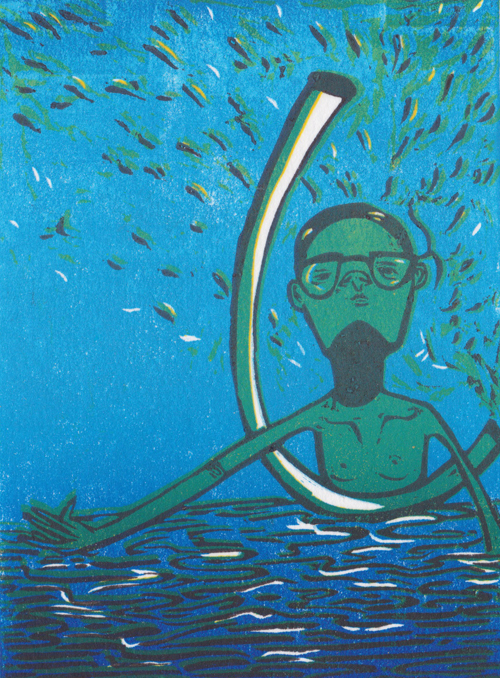
Hi, I’m Jack, I am an interdisciplinary artist, craftsperson and keen screen-printer. I live on the edge of Dartmoor in Devon with my partner and baby daughter. My day job involves making handmade pewter giftware. I try to squeeze printmaking in between work and family life.

Describe your printmaking process.

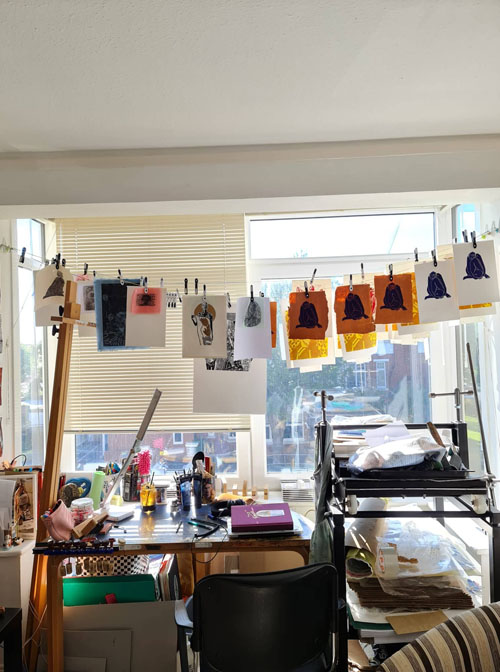
I would love to say free and spontaneous! But really my printmaking is meticulous. I don’t have my own studio so I spend a lot more time designing, drawing and prepping than actual printmaking. I have to use my studio time really efficiently so don’t have much time for experimentation. I always have the finished result totally planned out so as not to waste time and materials.

How and where did you learn to print?

I found it hard to get into screen printing and spent a couple of years wanting to start but not being able to afford any courses or equipment. I eventually found an affordable intro course at Gloucestershire Print Co-operative. The work I took away from that weekend I ended up selling at the gallery I worked in at the time. That must have given me the confidence to invest further but it was still a year or two before I got on a course at Print Club London and became a member there afterwards. The course there was much more in-depth and my time spent there as a member honed my skills.

Why printmaking?

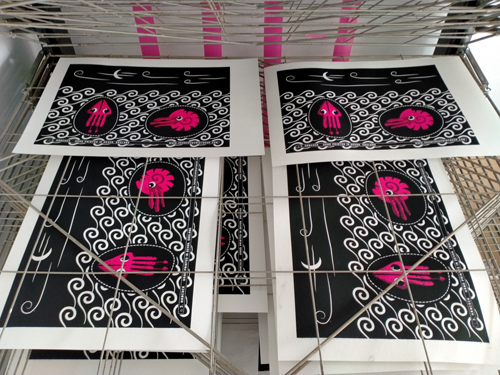
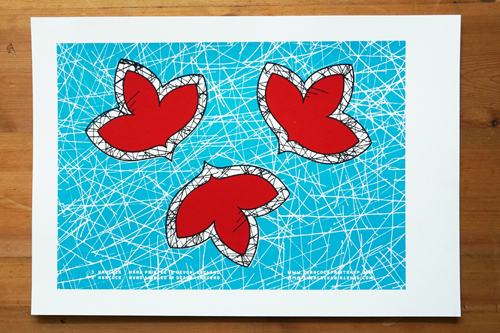
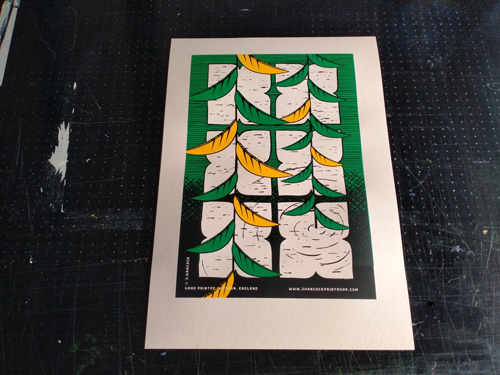
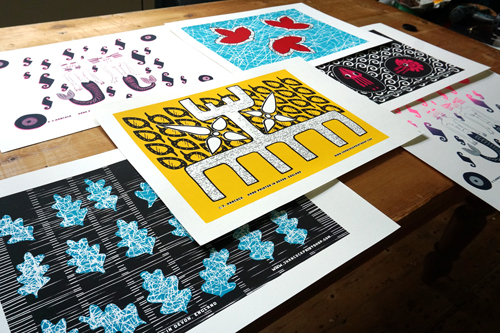
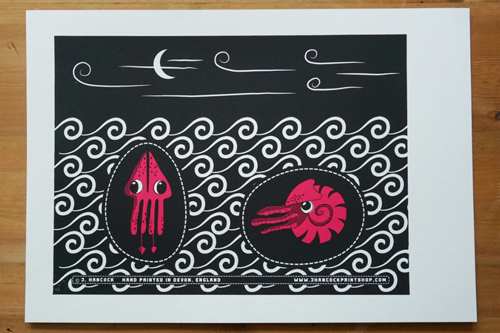
I love the very definite lines and the flat, even layers of colour that I could never achieve with a paintbrush, I enjoy working with a very limited palette as well, making an image work with just two or three colours can lead to some interesting and striking design choices.

Where do you work?

I currently hire the facilities at The Printery in Plymouth. It is a very pleasant place to work, I recommend checking it out if you are in the area.

Describe a typical day in your studio.

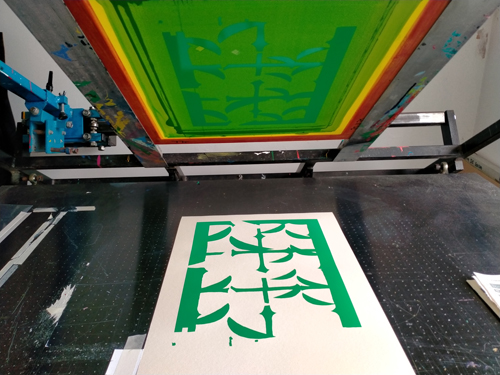
When I’m actually printing it’s very mechanical. I coat and expose my screens, lay down the colours, try not to get ink everywhere, wash and reclaim my screens, pack up, and go home as soon as the ink is dry. I always use a vacuum table and have a nice thick sheet of transparent film for registration.

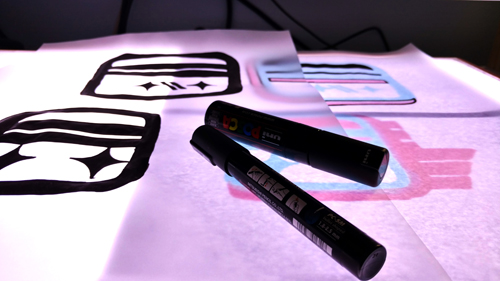
My drawing time is much more liberating. I do a lot of hand drawing, initial sketches in pencil and Pro-Markers and making positives with Posca pens on to tracing paper with a lightbox. I have been trying out using the computer more lately in an effort to speed things up but I still end up incorporating a lot of hand-drawn elements. I don’t think it’s made anything quicker, just made different things possible.

How long have you been printmaking?

I started screen printing in 2014. I started drawing with screen printing in mind a couple of years before that.

What inspires you?

My biggest inspiration to keep printing is seeing the crisp wet ink freshly laid on the paper. It looks so perfect and beautiful. The inspiration for my subject matter comes in many shapes and forms. Mythology and symbolism weave a thread through most of my work. Visual inspiration comes from a lot of the shapes and colours of 1970’s graphic design as well as the comic books I read as a kid; 2000 AD, Judge Dredd and the odd Manga comic I would come across before anybody knew what Manga was. I don’t read comics much now, but they burned an image on the back of my brain of halftones and incredible ink work.

What is your favourite printmaking product?

Speedball acrylic inks. They are so bright and opaque. I love using them.

What have you made that you are most proud of?

I don’t have one single thing I’m proud of. I’m proud of all the work I make if I have put my passion into it. I don’t feel like I have done my best work yet in print. The ultimate creative vision is like the pot of gold at the end of the rainbow, I keep chasing it but it keeps moving just out of reach!

Where can we see your work? Where do you sell?

My big project at the moment is starting my own online shop for my work that lets me sell completely independently. I am launching it with a collection of affordable poster designs and hope to introduce limited edition and fine art prints later on. It’s early days yet but hopefully, by the time you read this it will be online!

You can reliably find me on Instagram where I share my works in progress and new design ideas. Drop by and say hi!

What will we be seeing from you next?

I’m really enjoying designing bright, high contrast posters at the moment. I have a couple of rules; no more than three colours and the image must fit in off the shelf frame sizes. Other than that, anything goes. I would like to end up with a varied catalogue of designs for people to browse through online. It’s really making me question myself as an artist. If I can do anything I like, what do I really want to do? Which styles do I want to work in? When I started, I thought I would just print everything that came out, but there is a growing pile of designs that have not made the cut. So even when anything goes, not everything goes!

Do you have any advice for other printmakers and creatives?

 Gosh, I don’t feel qualified to dish out advice! I was once told, “Knowing what you don’t want to do is sometimes more important than knowing what you do want to do.” I get a lot of mileage out of that one.

To see more from Jack follow him on Instagram.

Meet the Maker: Moatzart

Describe your printmaking process.

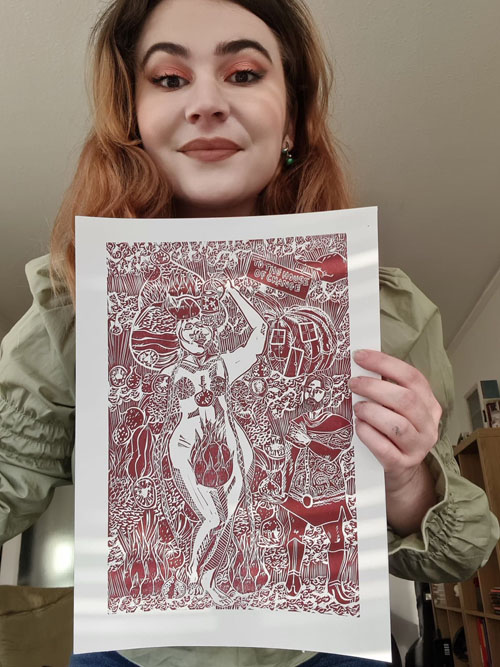
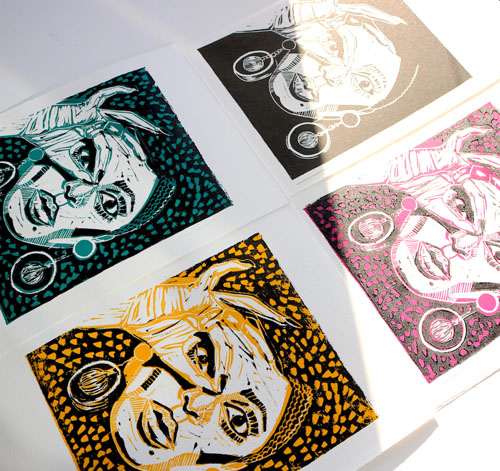
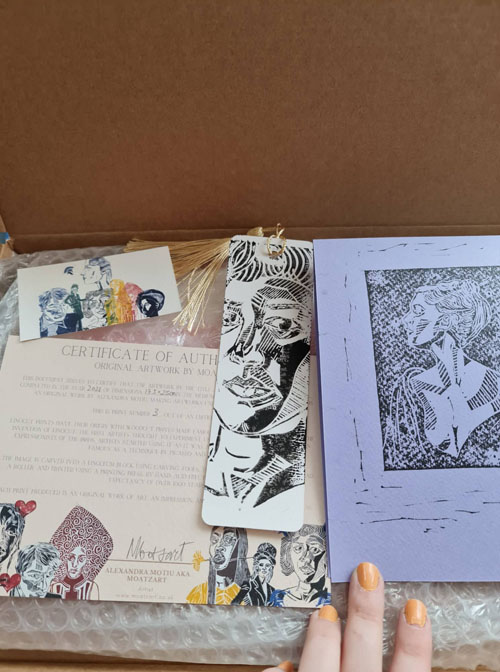
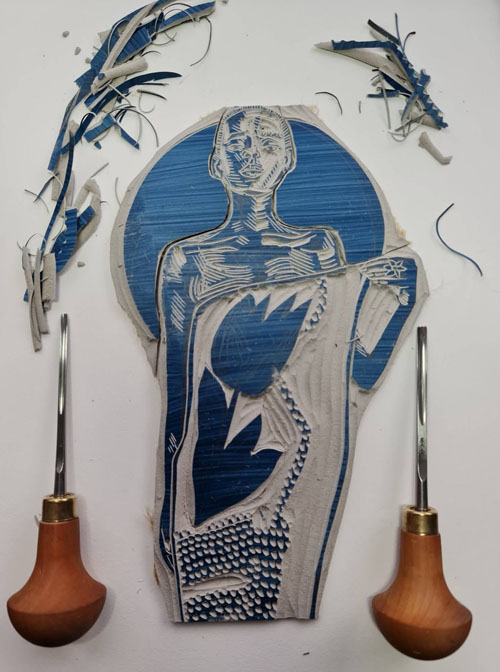
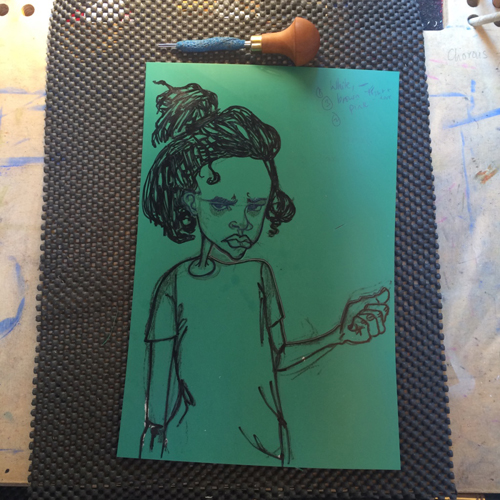
My printmaking process is quite straightforward. I start by sketching out a composition straight on the lino. I sketch this out mainly to see where everything goes, but I don’t do this in a lot of detail regarding how every element or character will look. I then start carving, and that’s when I make my decisions, I love “listening” to the lino block for this.

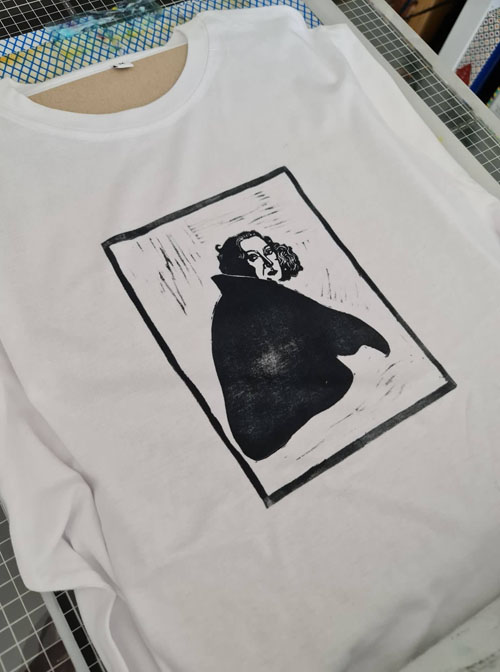
I look at reference photos throughout and carve the images and faces intuitively from the lino, which gives the characters a unique flair, which could not be achieved through any other process. I apply this to any other material I work with, be it wood or metal, and try to respect and “listen to” the medium I use and stay true to the tools and the marks they can make, which is ultimately what I think constitutes my “style”.

How and where did you learn to print?

I learned to print as an apprentice of a masterful Romanian contemporary painter and printmaker, Matei Serban Sandu, in my teen years. He introduced me to the technique as soon as he saw my first ever sketches, as I had just discovered I could draw when I was around 15.

I then went to university, studied a very conceptual art course, made more collage, installation and relational artwork, and didn’t make any prints for three years! I started printmaking again when Covid hit, and I have been making prints ever since, and I am now able to do this pretty much full time!

Why printmaking?

I get along so incredibly well with printmaking. I think this is because I like complicated works with many elements, and my work can be very chaotic. I think prints have, firstly, a very natural limit to what can be carved, and secondly, a nice and exact finish, no matter how all over the place all the elements are. They always appear as a nicely finished and considered piece of work, and this is an inherent quality of the process.

Where do you work?

When Covid hit, I lost some of the work I was doing for a few galleries. I started working in hospitality again, so I was furloughed a lot, which meant I had time to be a full-time working artist, and I constantly made prints all throughout! I had never been happier! Carving is also a very therapeutic practice so I think it helped a lot during these tough times.

I am now able to keep working full time as an artist, as my prints started selling through Instagram. I managed to get my work into a few galleries and shows, and I also started getting commissions! Gallery work has picked up again, so I do still pick up whatever part-time freelance work comes up.

Describe a typical day in your studio.

I divide my days into admin days and making days. So if it’s a making day, it will either be a carving or printing day. I have a home studio with a large A2 printing press, which takes up the whole living room when I print. So I keep my printing days few and far between, with a large to-do list so I make the most of them.

On carving days, I normally start by making a few smaller prints for some of my series, which I film as content for Instagram reels. I then go on to carve larger works, which I also document in some ways, but less so, as I want to be more focused and “in the zone”.

How long have you been printmaking? 

For two years during my A levels alongside Matei Serban Sandu, and now full time for one year. So not very long really.

What inspires you?

People are my biggest inspiration. I love portraiture, and I love stories, which is why my work is so illustrative. I like busy looking illustrations and artworks and grandiose scenes. I like work where you can look back at it for a long time and every time you discover something new.

The Chapman Brothers are definitely my favourite artists by far, as they have a YBA (Young British Artist) sense of humour but have the old masters’ practice. They deal with a lot of topics that interest me such as artistic authorship, even heaven and hell.

I take a lot of inspiration from very classical artists, such as Albert Durer or Francisco Goya in terms of printmaking. I love large paintings like the Wedding at Cana by Paolo Veronese (did you know that he included himself and some painters of the time in this painting, such as Tintoretto and Titian? I love this fact so much). I also do a lot of collages and I love the surrealist movement. Hannah Hoch, Victor Brauner (my favourite painter, incidentally Romanian), Max Ernst, DeChirico are some of my favourite artists. Nowadays, I love Toilet Paper Magazine and David Shrigley.

What is your favourite printmaking product?

Well, let’s say the products I use regularly, and that I don’t imagine will ever change, the Caligo Safe Wash Inks, my Pfeil tools, and the classic grey hessian backed Lino! I feel like once you have the inks and tools down, you stick with them in printmaking! The Abig rollers are also good for the price!

I love experimenting with papers like the beautiful new Khadi papers, they are to die for! I also love Awagami Factory papers!

What have you made that you are most proud of?

My most detailed prints are definitely my favourite. I am really excited about the series of work I am currently adding to and I think every new work I make becomes my favourite.

Where can we see your work? Where do you sell?

You can see and buy my work and other printed merch from my website. This is where my main shop is, including a blog and a gallery of all my work. I am also on view permanently with the IO gallery in Brighton, where you are also able to buy my work!

I have a few fairs coming up in Brighton as well, so if you follow me on Instagram, I will keep you posted!

What will we be seeing from you next? 

I have three main series I am adding to at the moment, and they are all equally wonderful. One based on Heaven and Hell, one on the children’s novel The Neverending Story, and one called They Are Dreaming, about dreams and ideals. I also have a few exciting collaborations in the works, so keep your eyes peeled.

As we slowly come out of lockdown I am excited to see what I can do with my work and hopefully set up some shows. I am new at being a full-time artist so I have a lot of plans and ideas, it feels like there are so many things I can do.

Do you have any advice for other printmakers and creatives?

I think people just starting out don’t realise how much artists actually steal from their surroundings. I know I was under the impression that everything came from an artist’s “imagination” (whatever that is), when it’s actually a load of research and looking at references, combining and deciding on things and experimentation.

A good tip I was once told, that I absolutely stand by, is to go as far back in time with your references as possible. Everything is copied and further copied from century to century, by artists admiring and responding to the artists before them, so if you make art like the artists of today your work will pale in comparison, as it is a copy of a copy of a copy. Always go to the source for inspiration, and your work will have depth. So if you’re interested in Abstract Expressionism, for example, go to the artists who first started the movement.

To see more from Moatzart follow her on Instagram!
Uses for Zest It Printmakers Washdown

We have found Zest It Printmakers Washdown an incredibly useful addition to our studio. It’s designed to remove dried on acrylics and so far has got us out of a couple of scrapes. Here are a few ways to use it in your studio:

Removing dried on water-based relief printing inks from rollers, blocks and inking plates.

Using water-based relief printing inks is a wonderfully easy, mess-free option… until the ink dries. You can remove dried-on ink with Printmakers Washdown – simply add a little to a rag and rub the affected area until clean. This is particularly good for rollers as it doesn’t require any scrubbing or scraping that could cause damage.

Removing dried ink from a screen

Ink drying in a screen is a printmaker’s nightmare. Normally, it’s an issue that can only be fixed by re-meshing the screen which can be expensive, time-consuming and wasteful if not otherwise necessary. Most screen printers will have experienced an ink blockage in their mesh once or twice. Zest It Printmakers Washdown removes dried-on water-based screen printing inks from mesh. Paint on a little and work it into the affected area until it comes away. Rinse afterwards.

Removing parcel tape glue residue from screens

When screen printing, parcel tape is often used to cover areas we don’t want to print, usually around the edges. Sometimes, when it’s removed, it leaves behind a sticky residue. Printmakers Washdown can be used to remove this residue and restore the mesh. Different tapes have different types of glue. We’ve found it to work well on the tape we use in our studio, but other tapes may vary.

https://www.youtube.com/watch?v=gHjpFOar7q4

Zest It Printmakers Washdown can be found here!
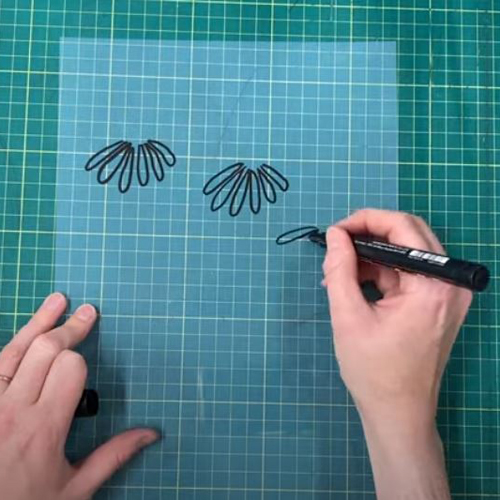
Creating Hand-Drawn Designs for Exposed Screens

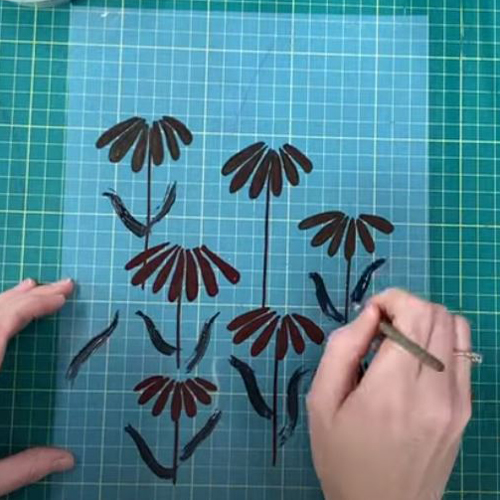
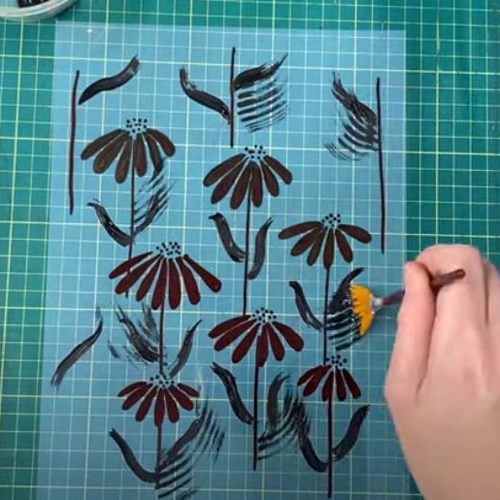
Making exposed screens is a fantastic way of creating screen prints from your bespoke artwork. If you’d like to make exposed screens at home but would rather skip the digital processes then we have a great way of creating screen films with analogue methods!
For detailed advice about exposing your own screens at home, head over to this blog post. To learn about creating hand-drawn designs, read on or scroll to the bottom for a video.

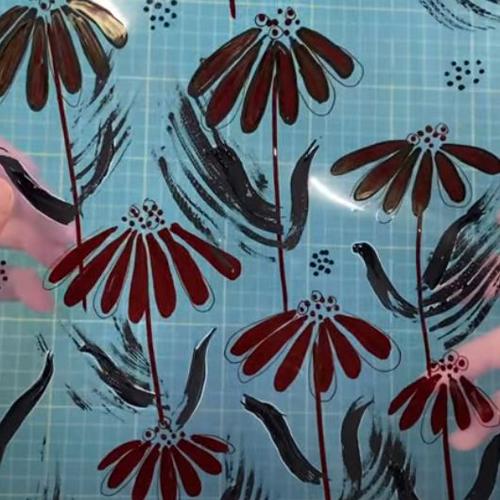
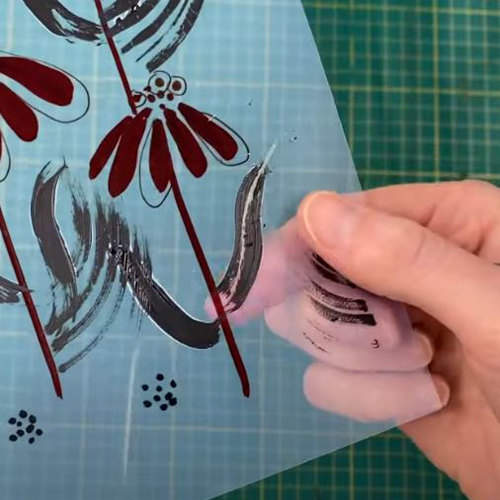
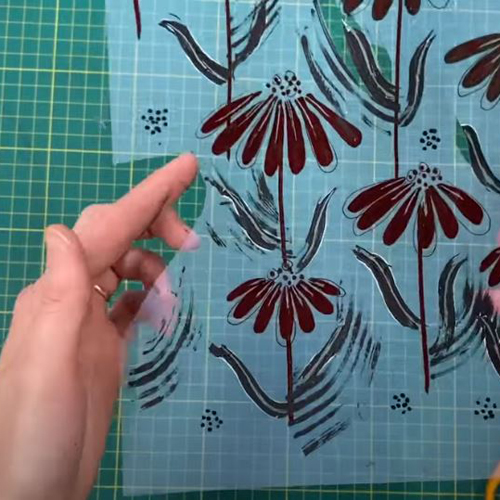
When a screen film is made, it’s important that the design is opaque on a transparent film. In the exposure process, the opaque areas of design will block the light and create areas of open mesh. These areas will let ink through the mesh and create your print. The transparent areas of the screen film will allow light to reach the emulsion, hardening it and crating screen areas that will block ink.

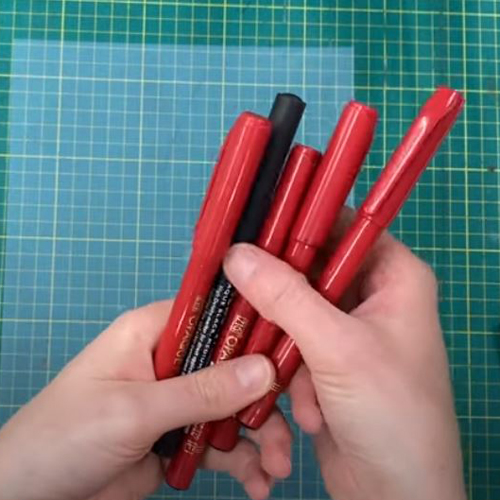
Inkjet Screen Film is designed to be drawn or printed onto (with an inkjet printer). Opaque pens are needed to block the light – ordinary permanent pens won’t do. Zig Opaque Pens, Jacquard Film Markers, Posca paint pens or acrylic paint can be used.

Make sure to draw on the slightly squeaky side – one side will be smoother than the other. To check, wet your finger and touch the corner of both sides of the film. The correct side is the side that leaves a mark.

Begin making your marks using the pens and paint. Use the different pen tips to create various lines, use different brushes with the paint to create different marks. Any marks on the film will print on the screen. Acrylic paint is particularly good for filling large solid areas.

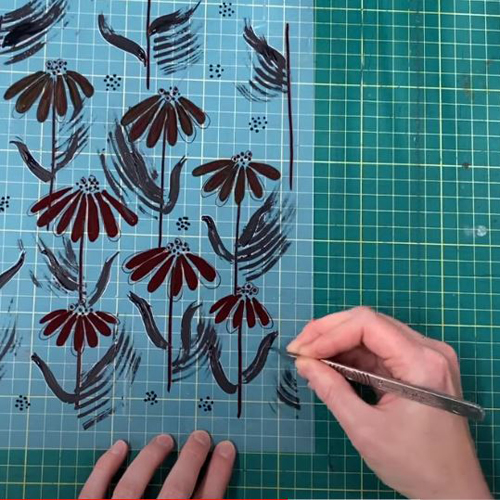
When the pen and paint are dry, you can work into the marks with a scalpel. Scratch the scalpel into the marks to remove pen or paint and add detail. Cut out whole sections of the film to remove marks that you’re not fond of. You can also cut up the film and rearrange it using transparent sticky tape.

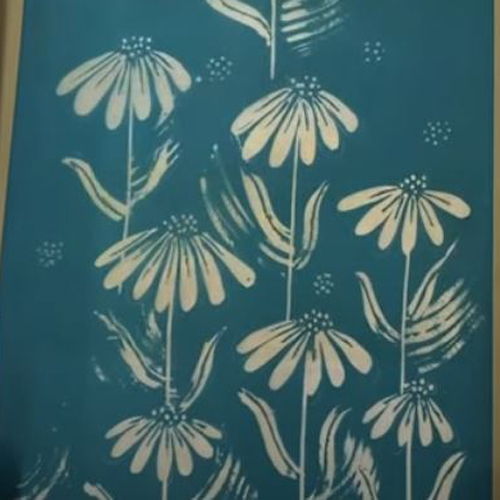
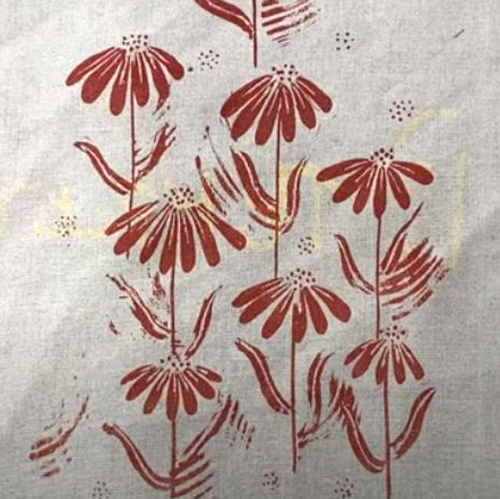
When you are happy with the film, it’s ready to expose onto a screen! Read Bridget’s blog post for detailed information on how to do this at home.

For this project you will need:
Inkjet Screen Film
Zig Opaque Pens, Jacquard Film Markers, Posca pens or acrylic paint
– Brushes
– Scalpel
Cutting mat
– Scissors
– Transparent tape (optional)

Meet the Maker: Harriet Popham

Describe your printmaking process.

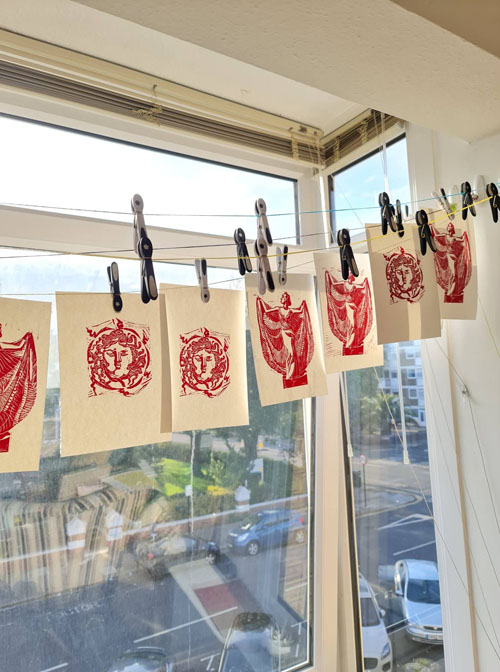
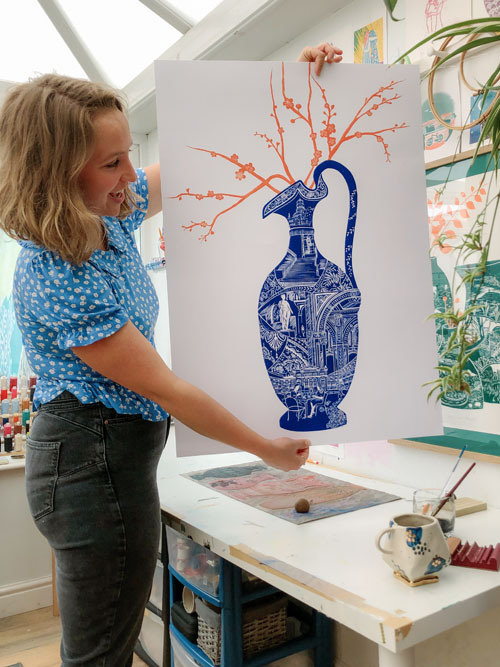
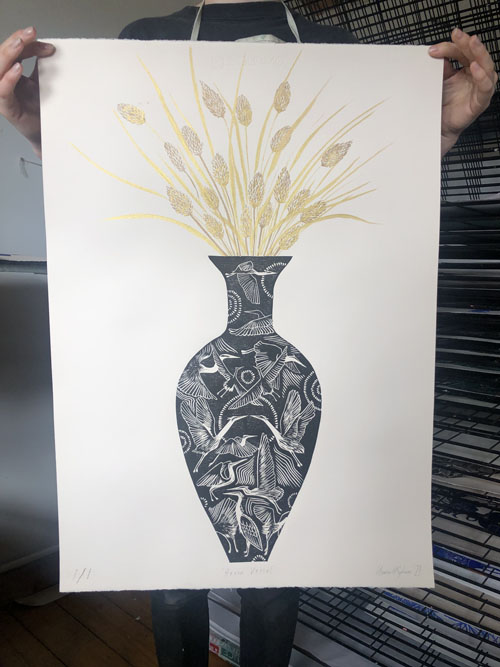
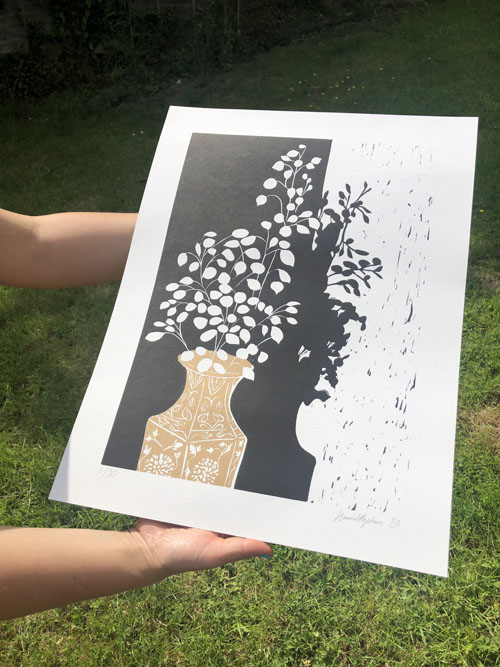
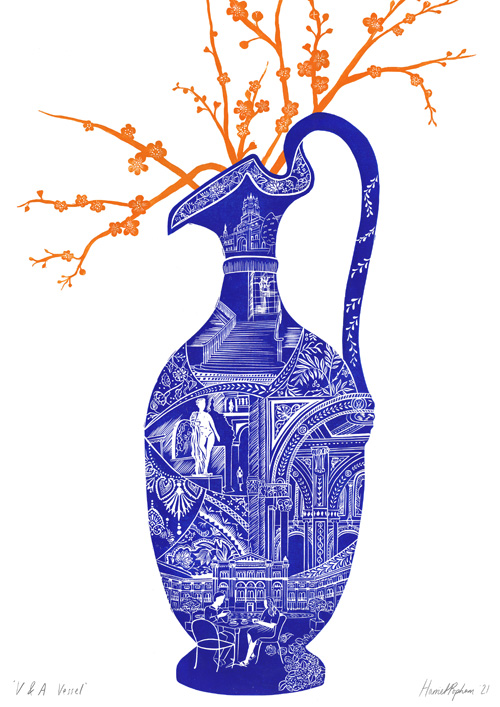
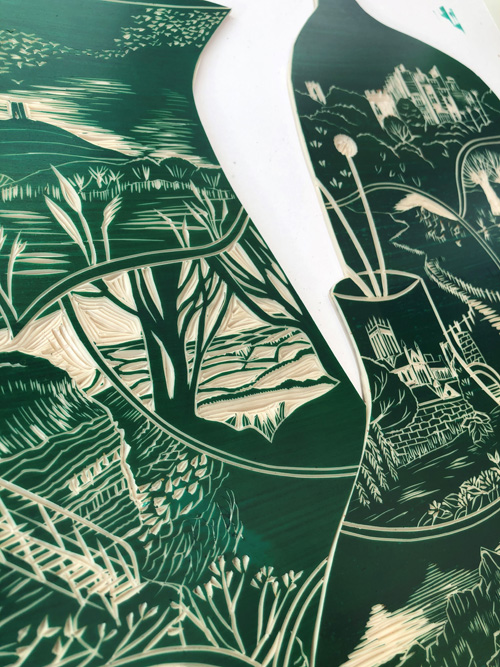
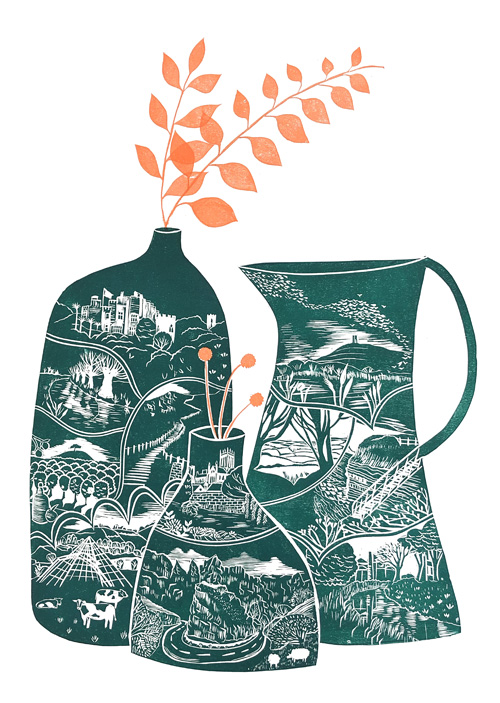
I create cheerful illustrative lino prints that often celebrate places or moments in time. In the last year, I’ve been exploring vessel silhouettes and placing all of the detail inside those shapes. I contrast this using a pop of colour in the form of a bold botanical element.

How and where did you learn to print?

I trained in printed textiles at Swansea College of Art, creating busy hand-drawn prints for interiors. At the time I was working with silkscreen, digital textile printing and embroidery. I started lino printing several years after I graduated and am now completely hooked on the process.

Why printmaking?

Despite the obvious labour intensity of printmaking, the hours of carving, inking, the trial and (plenty of) error – I find printmaking and the finality of the decisions involved a real positive. I find the planning exciting, the carving calming. For the first inking up I’m all adrenaline and that first peel back is (hopefully) super satisfying. I think any form of making with our hands is so beneficial, especially today.

Where do you work?

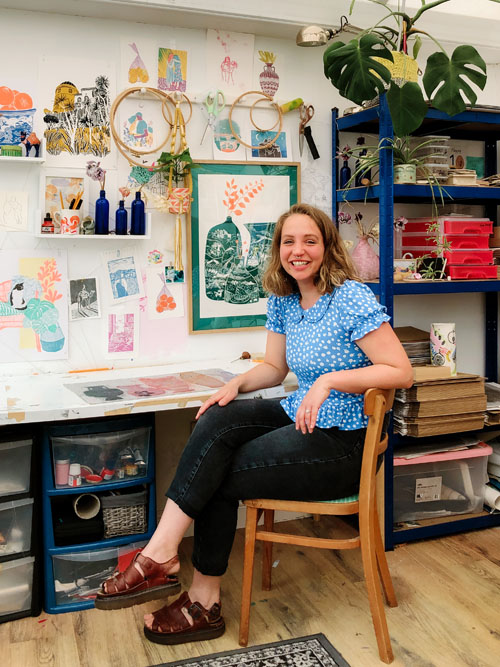
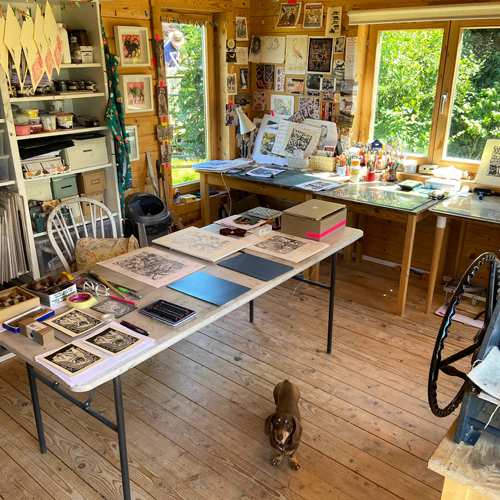
I work in a shed at the bottom of my Dad’s garden in Glastonbury. It was actually my bedroom when I first graduated but now my printmaking has fully outgrown my little house, I’ve reclaimed the “hut” solely for printmaking and it’s an ideal studio. I also have a studio in the conservatory at home where I do most of my carving and drawing.

How long have you been printmaking?

I had my first go with some lino in 2018. At the time I was doing illustrations for books and didn’t get a chance to take it any further. When I decided I wanted some variety in my work life and started running creative workshops, I realised it would be a great one to teach. It’s so accessible to people with different creative confidence levels.

I started working with lino regularly for demos and creating examples but it wasn’t until 2020 that I started properly dedicating time to making lino prints just for me, and challenging myself to work bigger.

What inspires you?

So many things! but here are some top ones… Places and moments in time, wonderful things my friends say, close embraces, vessels, shadows, stories. Everything is potential inspiration for a print and I find that adds to the experience of a walk, holiday, and golden hour shadows.

What is your favourite printmaking product?

Cranfield Oil Based Safewash ink tubes. 

What have you made that you are most proud of?

Earlier this year I was commissioned to design a print for the V&A Museum shop. This was a dream project for me. The print aims to capture the experience of a visit to the museum, from cake and coffee in the iconic John Madejski Gardens, to the unfolding layers of ornate architecture, the vast sculptures, delicate jewellery and decorative textiles. 

Where can we see your work? Where do you sell? 

I have a website and online shop. The V&A print is for sale on their website and in-store.

What will we be seeing from you next?

I’ve got lots of print ideas I’m really looking forward to carving and I’ve got a very exciting collaboration that will launch in 2022. I’ve teamed up with a beautiful brand on a textile design pieced together from individual lino printed scenes and I look forward to being able to share the details! 

Do you have any advice for other printmakers and creatives?

Play, experiment, make time for drawing and development. I still feel I’ve barely touched the surface of all I want to learn about lino printing. I didn’t start selling my lino prints properly until I stopped worrying about selling them and started just really enjoying making them regularly.

Another important piece of advice for navigating Instagram as a creative – The only comparison worth making is the one between yourself then and now. That could be the way your printing has developed since last month or how much more time you are spending creatively than you did last year. All things to celebrate! ”Comparison is the thief of joy.” – Theodore Roosevelt.

To see more from Harriet, follow her on Instagram.

Using Drawing Fluid and Screen Filler to Print a Design onto Fabric

Using Drawing Fluid and Screen Filler can create a semi-permanent design on a screen, allowing you to print multiples of your design without stencils, over several sessions if you like. This is not a photographic technique so there’s no need for a light source, a computer or a dark space. This makes it accessible to so many more people. Scroll to the bottom of the page for a video or read on for instructions.

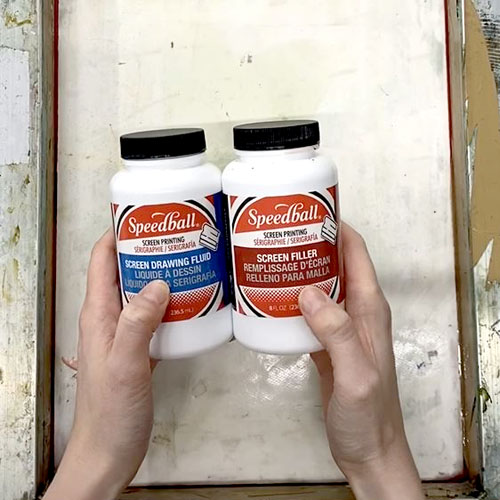
Speedball Drawing Fluid and Screen Filler are designed to work with one another. The Screen Filler works as a block to stop ink from going through the mesh. Drawing Fluid is designed to resist the Screen Filler and is washed out before printing. This creates an area of open mesh that will allow ink through where the Drawing Fluid was applied.

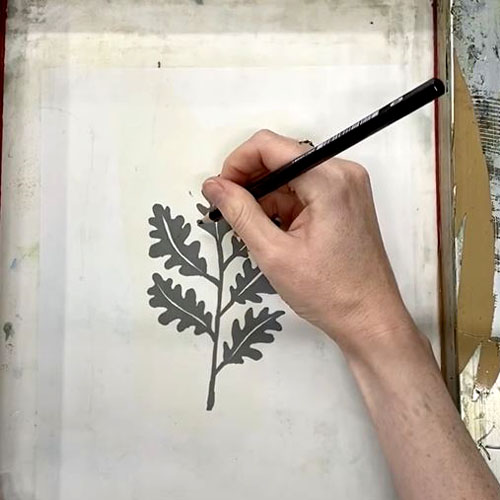
Begin with a design on paper. Lay the screen flat on top of the design so that the mesh is against the paper. We are using a 43T meshed screen which is perfect for printing onto fabric. Use a soft pencil to gently sketch the design onto the mesh.

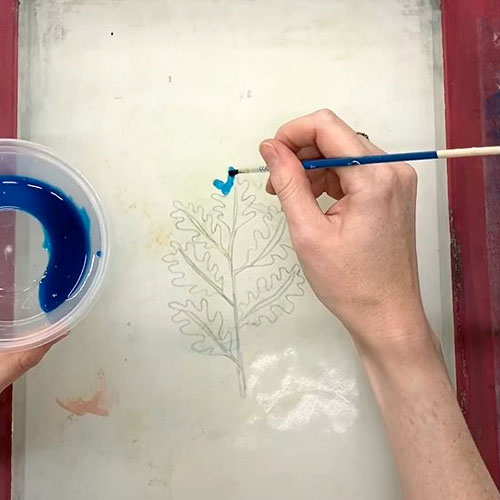
Next, flip the screen over: we are going to work on the back. The mesh should now be off the surface of the table. Pour a little Drawing Fluid into a pot. It’s best to decant it rather than dipping your brush into the bottle to avoid contamination and spoilage.

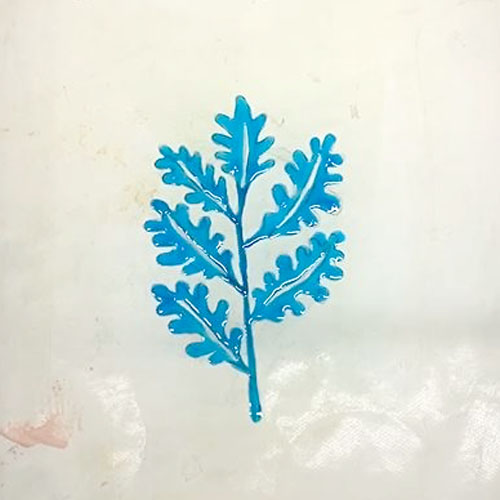
Use a small brush to fill in the design on the screen, using the pencil lines as a guide. Note, we are painting the area that we eventually want to print with our ink (the positive design). The design should look backwards at this point as we are working on the back of the mesh.

The Drawing Fluid is quite viscous so it can be tricky to get sharp corners and very fine edges with a paintbrush. We can adjust the edges later if needed.

Wait for the Drawing Fluid to dry completely.

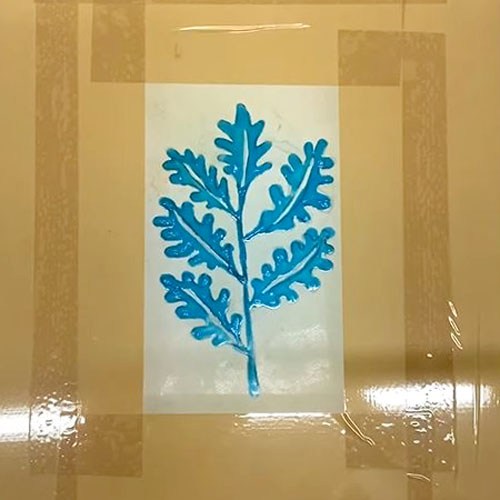
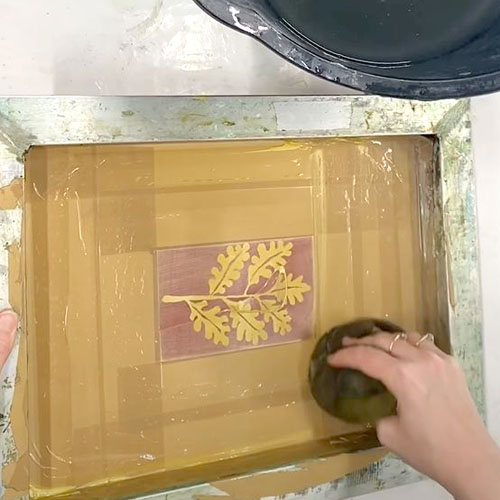
When the Drawing Fluid is dry, use parcel tape to mask off a rectangle around the design (still on the back of the screen). This is to use less Screen Filler which would be wasteful but is also a little time consuming to remove from the screen at the end of the project.

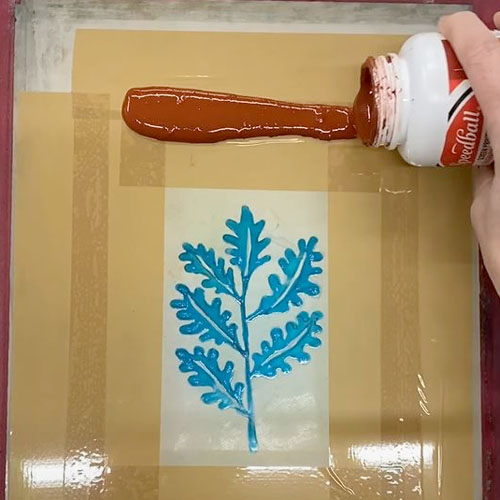
We are now ready to add our Screen Filler. The Screen Filler will be used to block all the negative space around the design and stop the ink from going through. Working on the back of the screen still, pour a line of Screen Filler onto the tape above the design, making sure that the pool of Filler is slightly wider than the rectangle of open mesh around the design.

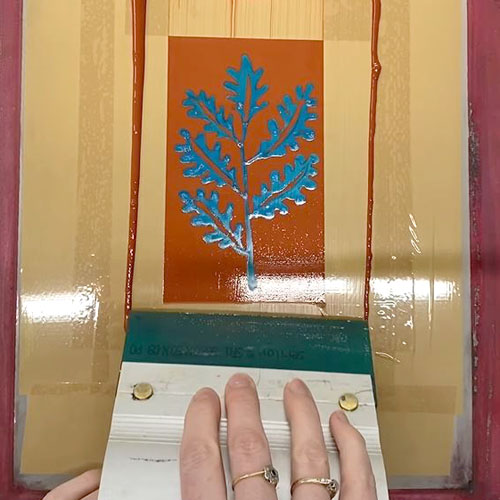
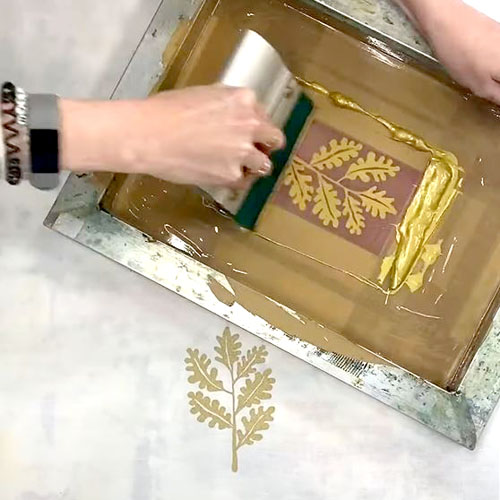
Use a squeegee to pull the Screen Filler down the screen to cover the design. Hold the squeegee at a 45′ angle for best results.

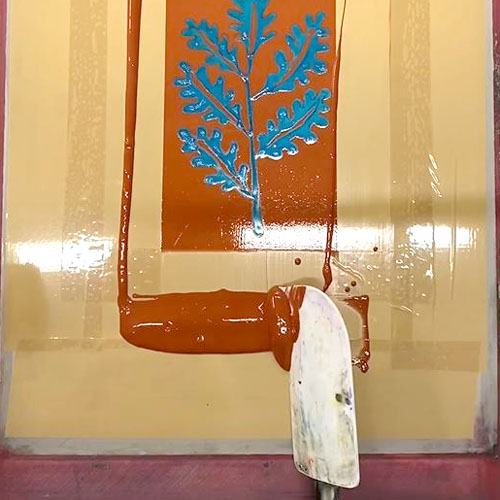
Use a spatula to scrape any excess screen filler from the tape so that it can go back into the pot.

Wait for the Screen Filler to dry completely.

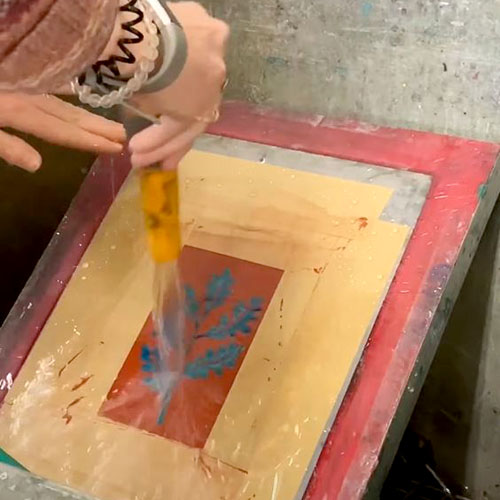
Now it’s time to wash the Drawing Fluid from the screen. Use a shower or garden hose to rinse the screen until the Drawing Fluid has all come out.

Wait for the screen to dry again. When it is dry, touch up any edges or gaps with Screen Filler if needed. Leave to dry again.

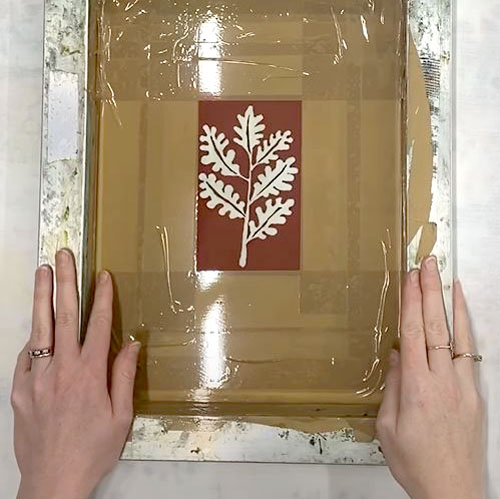
Use parcel tape to cover the edges of the screen to stop ink from going through any areas of mesh that we don’t want to print.

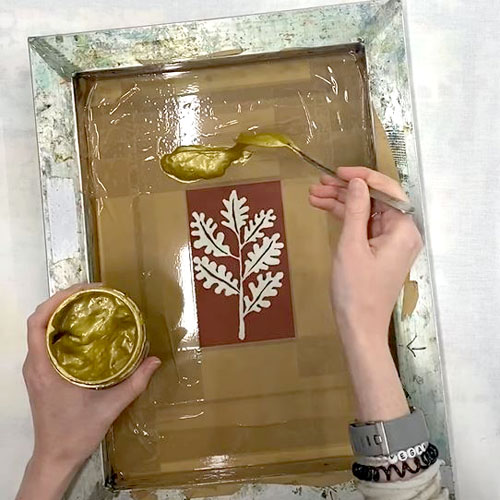
Lay your fabric onto a padded surface and pin it down if necessary. Place the screen on top. Use a spoon or spatula to place a generous line of ink above the design.

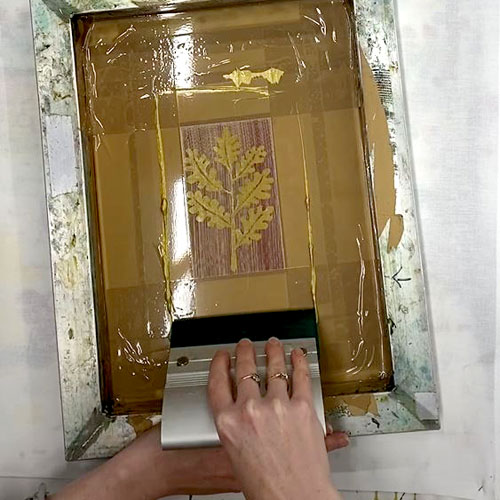
Hold the screen still with one hand. With the squeegee in the other hand at a 45′ angle to the mesh, drag the ink gently down the screen.

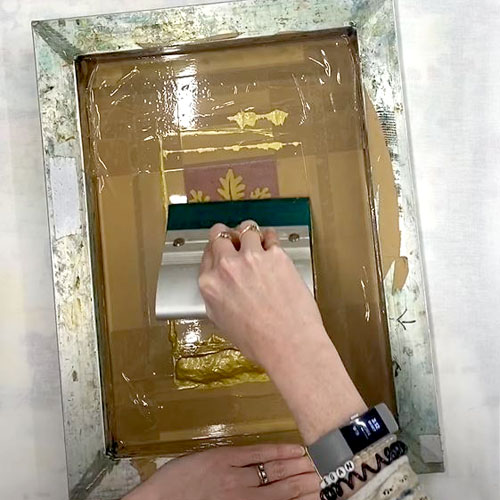
Leave the ink at the bottom of the screen. Return the squeegee to the top of the screen and drag down again, pressing more firmly this time.

Peel the screen from the fabric and place it back down in a new spot (or replce with a new garment). Be careful not to place the screen on a wet print. Use a hair dryer on the wet prints if necessary but be careful not to let any ink dry in your mesh. You will need to work quite quickly.

When you have finished printing, scrape any excess ink from the screen and put it back into the pot.

Use a bucket of cold water and a soft sponge to clean the screen on both sides. Remove the tape and rinse again.

The screen can be used again for more of the same design or cleaned using Speed Clean and hot water to remove the Screen Filler.

For this project you will need:

  • Speedball Drawing Fluid
  • Speedball Screen Filler
  • 43T screen
  • Soft pencil (8B or similar)
  • Pot/ jam jar/ palette
  • Small paintbrush
  • Parcel Tape
  • Squeegee
  • Fabric Screen Printing Ink (like this Gold ink)
  • Fabric or garments to print onto
  • Padded surface
  • Pins (if necessary)
  • Bucket of cold water and a soft sponge
  • Speed Clean to remove the Screen Filler

Meet the Maker: Olu Oke

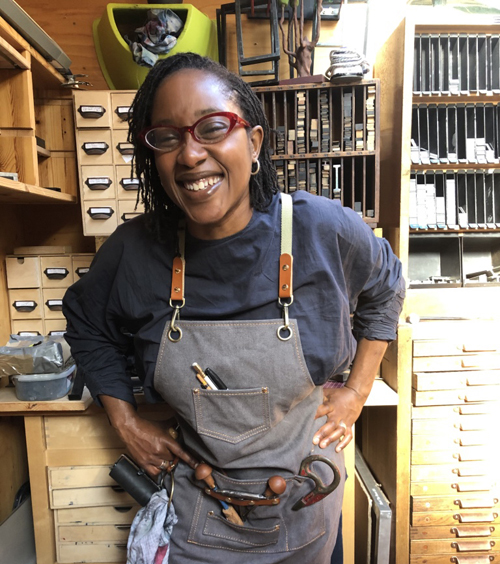
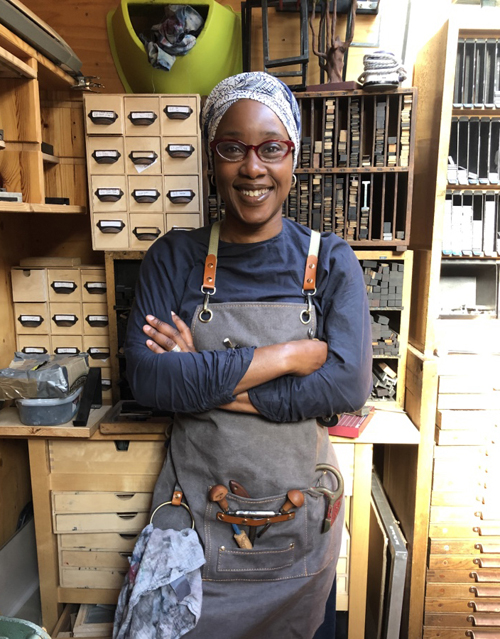
Hello! My name is Olu. I’m an illustrator, printmaker and skills-based tutor. I use a variety of printmaking techniques including Screen-Printing, Photopolymer Etching, and Gocco.  My favourite processes are lino cutting and letterpress.  I own far too many printing presses, machines and books… although can you ever really have too many of those things?

Describe your printmaking process.

Loads of procrastination and a dash of hoping for the best! No, not really; my main processes are lino cutting and letterpress. With both, I start with detailed sketches. With letterpress, this means the process of setting type with different fonts is easier, although trying to make everything fit is the fun bit.

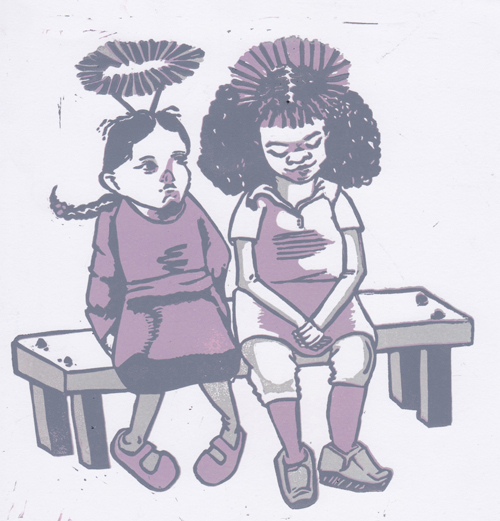
With my lino blocks, I transfer my images using a laser printer printout, nail polish remover, iron and loads of open windows. Then I carve.  If it’s a reduction print then I’ve planned out the cuts using watercolours to make sure I understand how the layers will work and what secondary colours will be created.  I’ve recently started using mono screen printing to colour in with my lino line work.  I often combine letterpress text with my linocut illustrations.

How and where did you learn to print?

Secondary School and University. I had two fantastic art teachers at school, Miss Owens and Mrs Holmes.  They taught me screen printing and linocut.  Unusually, they taught us the whole process from coating and cleaning screens to designing and cutting tessellated patterns and printing. The technicians at university, Ronnie and Brian, were the next big teachers.  They taught me about photopolymer etching and started my endless love of letterpress.

Why printmaking?

The smell of a print room. The machines. The communities.  The problem-solving. The unpredictable journey from the first sketch to the final print.  The list is endless.  I can get bogged down with rendering a ‘perfect image,’ printmaking relieves that anxiety.  At some point, it is about what the ink, the paper and the printing press, are going to do. When I print I let the left side of my brain make the decisions that are creatively technical. 

Where do you work?

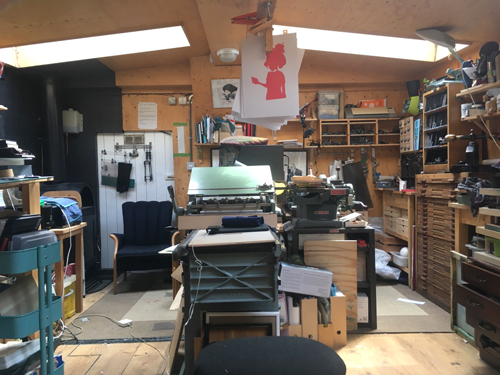
I’m lucky enough to live on a boat (a big one!) and have a studio on that.  It’s a great space, with loads of natural light from the skylights, but no side-facing windows to stare out.  I’m easily distracted.  Over the years it’s got pretty packed with machines and books.  I’ve been telling myself for the past year that I need a cull, but I’m not sure that I know a printmaker or artist that actually manages to get rid of anything. 

Describe a typical day in your studio.

My days start early, about 5am.  I plan the day, go for a walk and get breakfast and school stuff ready. After the school drop off, I get into the studio at about 9:30am.  I tidy up my space, putting everything in order so that I can mess it up again. I’ve usually organised my day into 3 to 4 tasks.  If I’m carving or printing a block this takes up the whole day.  If I’m illustrating then I tend to bounce between that and admin like lesson planning and answering emails.  I’ve found that I can only listen to drama radio plays, or podcasts when I’m carving. Every other task, including printing, is done in silence. On a good day, I can get about 6 hours of work done.

How long have you been printmaking?

I remember doing my first linocut in Year 9 at secondary school… Man, don’t make me tell you my age!  Hummm, so I’ve been printmaking for about 34 years.  Oh, it was hard answering that!

What inspires you?

LIFE!  I know, I know it sounds corny but it’s true.  I draw a lot from observation.  So, I sit around watching people (sounds creepy but I promise you it’s not). I get to listen to conversations and finishing them off in my head or turning them into stories that become illustrations. Also, the nonsensical ramblings of my kids are constant sources of inspiration. 

What is your favourite printmaking product?

Caligo inks. Because I live on a boat, all of my waste goes directly into the river.  These are the most eco-friendly inks I’ve found.  3 years ago I had to overhaul all of my art products. So, no acrylics down the sink. That stuff has to be flushed down the loo into a tank, so I limit their use.  Caligo has freed me from all of the chemicals when I relief print.

What have you made that you are most proud of?

I had to really think about this question.  Even after all of these years, I’m surprised that my large hands can create the work that I do and there is always room for improvement. I won’t pick one piece of work, but rather the last 3 years.  Where I fell off the edge of the world to complete my MA in Children’s Book Illustration.  With the support from my partner, family and friends, I’m most proud of completing this massive undertaking.  It has totally changed my work and practice.

Where can we see your work? Where do you sell?

You can see my work on Instagram, and my website. This will be where you will (eventually) be able to buy my work.  When I get the shop up! Which should happen soon… promise I’m not procrastinating!

What will we be seeing from you next?

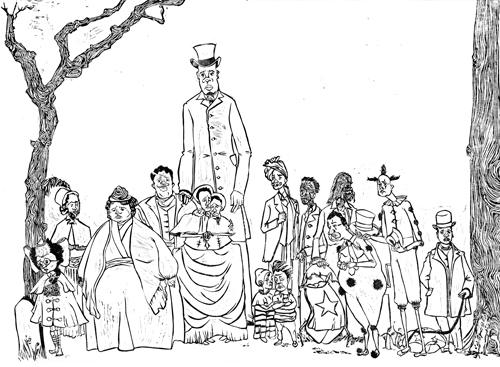
I’m working on three children’s book projects of my own at the moment: A Victorian Flea Circus mystery, a modern fantasy of fable invading reality and ‘The urbanites Guide to City Fairies,’ which could turn into anything at this stage. There are loads of things in the pot bubbling away and different doors may be opening for me.  I’ve got the aforementioned website to finish, the shop to put up and the MA exhibition to sort out too.  The MA Graduate’s exhibition is happening, if Covid-19 allows, from 4 – 9th September at Candid Arts Trust, London.

Do you have any advice for other printmakers and creatives?

KISS – Keep It Simple Stupid!  I recently was told this and think that it’s a solid piece of advice for everything from buying equipment to planning an image. I’m one for throwing everything into the mix in a single print! To try and give an image more ‘depth’ and ‘meaning’!  But I’ve found that the images that work the best are the ones that I’ve kept simple.  Plus it’s a good piece of advice for life in general.

To see more from Olu follow her on Instagram.

Meet the Maker: Sam Marshall

How and where did you learn to print?

I studied Fine Art at the Slade for my BA but never even knew the print room existed, which is such a shame. I ended up in the media department making films instead, however, there was something about printmaking that always intrigued me so in my late 20’s I took an etching course at the Royal Drawing School, and I’ve never looked back.

Why printmaking?

I love its versatility and the whole physicality of it. There are just limitless possibilities within printmaking that I get so excited about. I’m a naturally impatient person and as printmaking is process orientated, it has enabled me to see the benefits of taking my time, not rushing and reflecting as I go. I will also never ever tire of pulling back a print for the first time and seeing what surprises it has in store. It always feels a bit like magic!

Where do you work?

I have a studio in my garden which is a dream. I lived in London for 22 years and I had a studio in Hackney for a time that I never went to, and which caused me lots of guilt (and lots of wasted money!) During my last few years in London, I just printed in my bedroom, and I was amazed at how much I could get done in such a small space.

Describe a typical day in your studio.

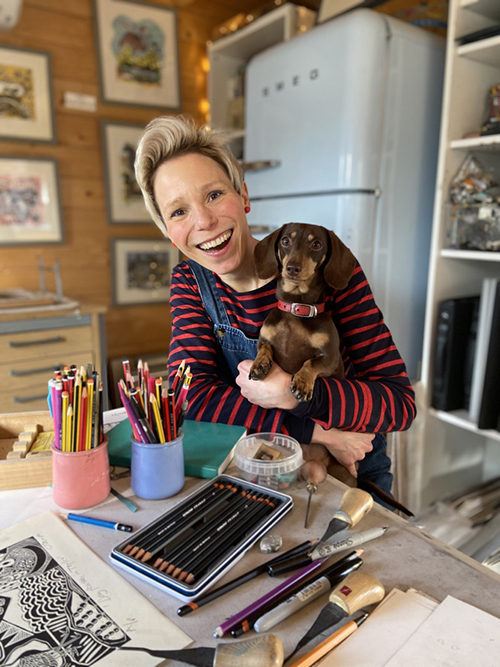
I’m quite disciplined when it comes to my working day. Spending 4 years at Art school, where I was pretty much left alone for the whole time meant that I had to develop an ability to structure my own time and work independently. I get up and go for a run with Marple in the woods, listen to a podcast and plan my day. After breakfast I’m in the studio where I prioritise packing orders, answering emails and DM’s. I also plan and post my Instagram post for the day. Instagram is a massive part of my business and a big part of my work. After lunch is where I get down to the creative stuff – carving and drawing. At the moment, I’m writing a book about it so there is a lot to do for that. I’m pretty much always finished by 5pm which is Marple’s teatime. I sit down with a cuppa and post my daily story. I rarely work past 5pm, I have to be strict about this otherwise I would keep working. When you work from home it’s so hard to switch off so for the past few years, I’ve been working on setting boundaries and ensuring that I have time off. It’s still a work in progress though!

How long have you been printmaking?

I started printmaking when I was 29, I’m 46 now so umm – 17 years.

What inspires you?

Oh goodness, pretty much everything!  I consider myself a storyteller so it’s my everyday life that inspires me. I always have my sketchbook with me, on the lookout for interesting incidents or landscapes. My work is autobiographical, it’s the way I process and make sense of my life – it’s a bit like a visual diary. For example, when I was in my 30’s I undertook a 3-month period of internet dating. I found the only way to get to grips with the experience was to draw each date and this ended up turning into a series of etchings called ‘A Box of Dates’.

What is your favourite printmaking product?

It must be Pandora, my Gunning etching press from Ironbridge printmakers. I saved up for it for a year and was finally able to treat myself earlier this year. It has transformed my practice. Before, I was using an old A3 press, and it was so hard to get the right pressure for my linocuts but now they are pretty much perfect every time. The best purchase I’ve ever made (apart from Marple of course!).

What have you made that you are most proud of?

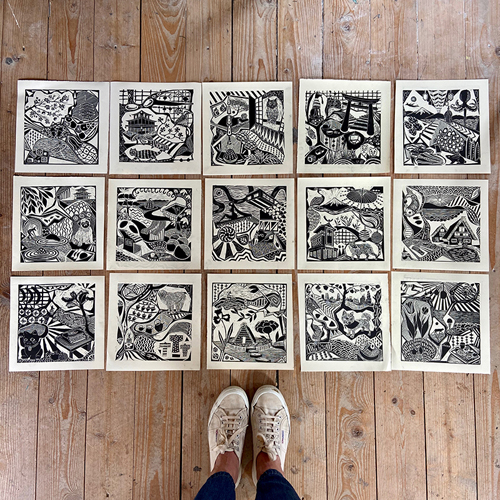
I think it’s my Japan series. I took a solo trip to Japan in 2019 for 3 weeks, it was a totally wonderful and completely overwhelming experience. When I got back, I wanted to document the whole trip to commit it to memory and to share it with others. I ended up making a linocut for every day I was there, telling a daily story of my adventures.

Where can we see your work? Where do you sell?

I have an online shop that can be found on my website.  

What will we be seeing from you next?

As I mentioned earlier – I’m writing a book!  Bloomsbury Publishing approached me in January to see if I would be interested in writing a book about linocut.  After collecting my jaw from the floor, I said yes, and I’m now fully immersed in the process.  All the projects start with a drawing, something I’m passionate about.

Do you have any advice for other printmakers and creatives?

I’m often asked, ‘how do I find my style?’ and my advice is to draw. We often lose confidence in our drawing ability at an early age, we’re taught that if it doesn’t look like what it is we are drawing, then it isn’t any good. I truly believe we can all draw, we all have our own unique way of mark-making – like our handwriting. Through drawing, I think we can discover how we see the world. So my advice is to try and ignore the self-critical voice in your head that says you can’t draw and get out there with your sketchbook and pencil and see what happens!

To see more from Sam follow her on Instagram.

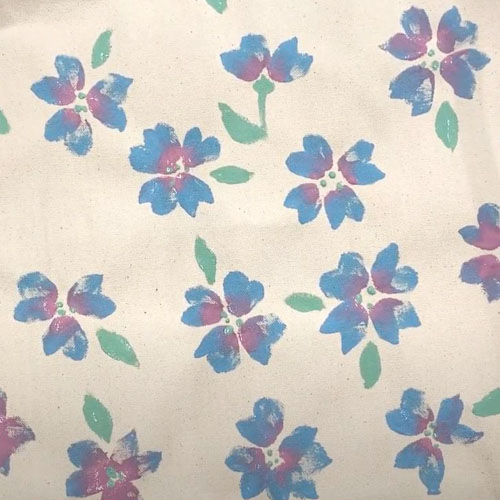
A Quick and Easy Fabric Paint Project

Handprinted Fabric Paints come in loads of colours and are so easy to use! Here’s a quick, easy project that’s great for adults and kids alike. Read on for instructions or scroll to the bottom for a video.

Cotton fabrics are best for fabric painting. This project uses a heavyweight cotton tote bag but you can use garments, homewares or lengths of fabric if you prefer. If you’re painting onto a thin garment, you may want to put some scrap paper in the middle to stop the paint from going through onto the back.

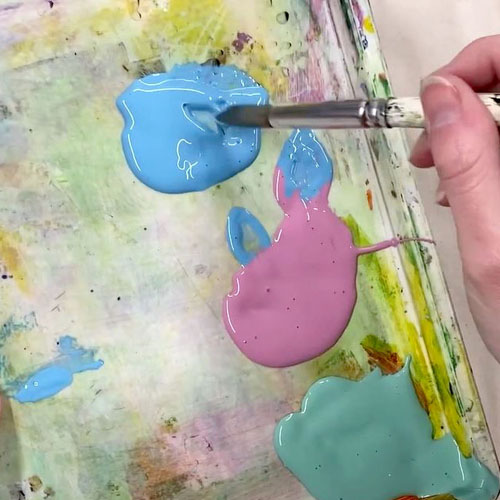
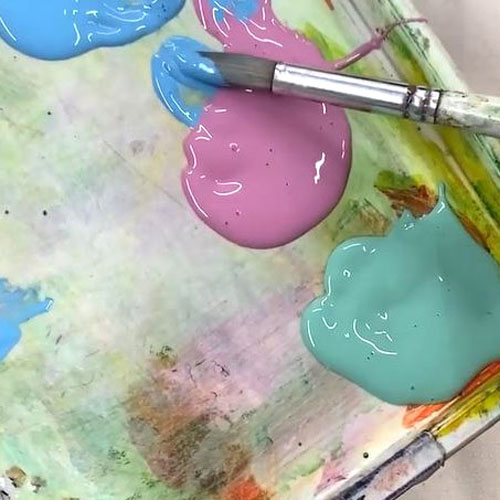
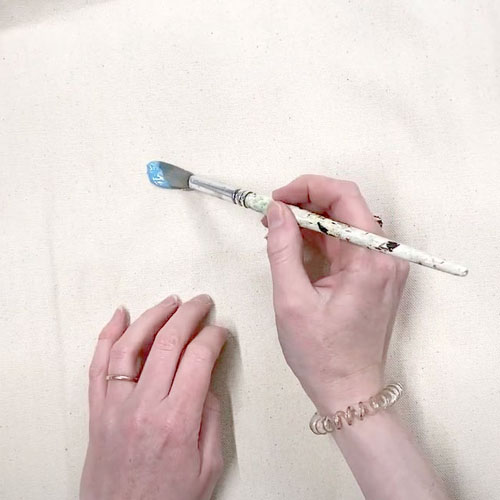
Choose three colours. We have chosen Sea Green, Dusky Rose and Cloudy Blue. Spoon a little of each colour onto an inking tray or palette. Select a fairly large round brush. Dip the end of the brush in one colour…

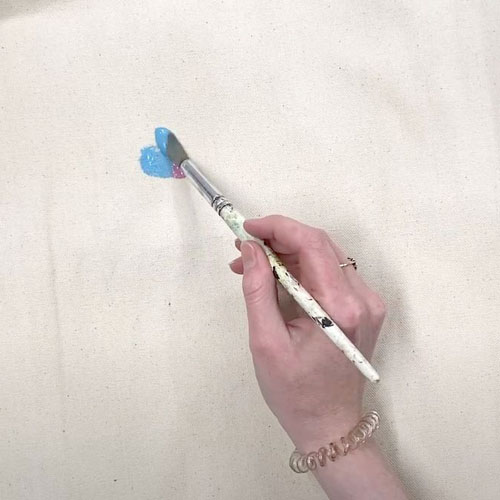
…and then rest the lower part of the brush end in the second colour.

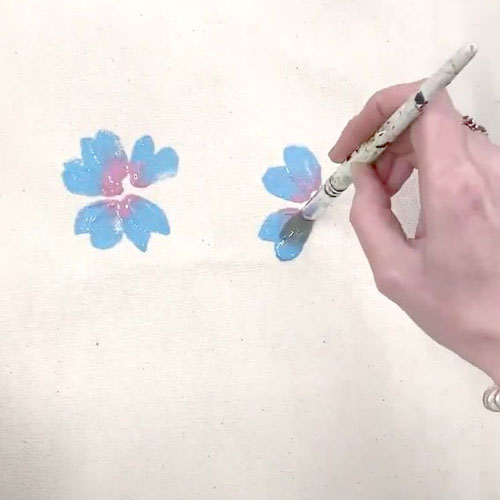
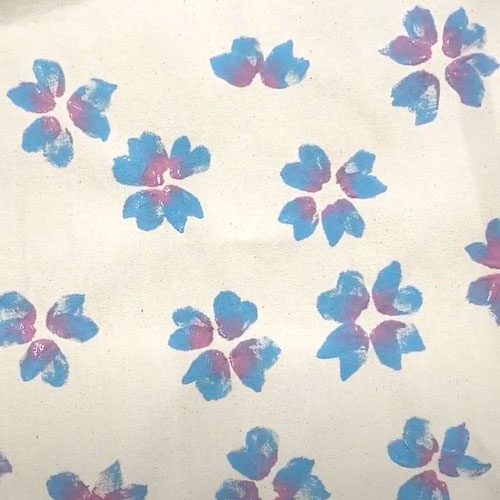
Press the brush onto the fabric and give it a wiggle to loosen the shape a little. We are almost using the brush as a stamp to create a petal.

Reload the brush with paint and continue to add petals.

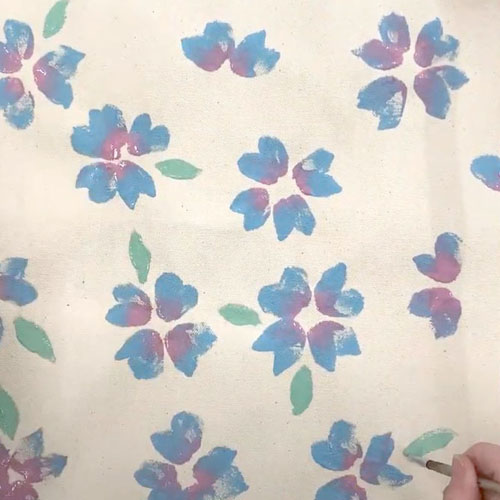
Select a smaller round brush and use your third colour to paint leaves around the flowers. You can use the handle end of the brush to add dots of paint to the centre of the flowers.

When the paint is completely dry, use a hot, dry iron to heat set your design.

For this project you will need: