Making a Stamp with Japanese Transparent Stamp Carving Block

This new Japanese Transparent Stamp Carving Block enables you to carve your design and bake it in the oven until it appears clear. Clear stamps are so handy as they let you see where you’re printing! This is great for repeat patterns, accurate registration, multi-colour designs and lots more.

Begin by tracing your design onto the block – there’s a sheet of tracing paper included with the stamp.

You can firm up any lines with a pencil so they’re nice and clear. We also used the edge of the pencil to gently shade over the drawing, making it easier to see where we’ve carved. The block isn’t transparent at first, but will be baked in the oven until it turns clear later.

Use a lino cutting tool or scalpel to carve the design. We used a Pfeil 12/0.5 Tool for the tiny detail here.

When the design is carved, cut it out using a scalpel or craft knife. It may be best to cut in a loose shape around the design rather than up to the edge, as it will be less fiddly to cut and create a more sturdy finished stamp.

When the stamp is carved it needs to be baked in the oven to make it transparent. Place it on a baking tray and bake for 20-25 minutes (or until it turns clear) at 130’C. Leave it to cool before picking up from the tray.

Once cooled, you can print with your new stamp! We are using a Versacraft Ink Pad in black to print onto cards. You can also print onto fabric with these ink pads.

For this project you will need:

Meet the Maker: Thomas Mitchell

DHi, my name is Tom Mitchell, and I am a printmaker in my spare time, based in Dorset. I specialise in multi-block linocuts of mostly architectural, and urban themes although I’ve also produced a few fun animal prints.

How and where did you learn to print?

I learnt the basics of lino cutting at school but fell in love with the process when studying Illustration at University in Bristol (UWE). I have continued making prints in my spare time since graduating in 2017, alongside my full-time job.

Why printmaking?

Printmaking, and lino cutting, in particular, are my favourite media because I particularly like the crisp, graphic nature that the process produces.

I enjoy the precision of intricate cutting and the different marks you can make using various tool shapes. I also love how I can use a combination of several different stages to create a print; pencil drawings for the design, cutting the lino, inking, and printing. When I reveal the print from my press and I’m happy with the result, it makes the lengthy process worthwhile and very satisfying.

Where do you work?

My work is designed at my desk in my bedroom at home; I regard it as my mini studio. I have an etching press in the garage as it’s too big to keep in the house.

Describe a typical day in your studio.

 I tend to come home from work and either start printing more editions ready for sale on my online shop or sketching some new ideas for my next print.

How long have you been printmaking?

I have been lino printing on a consistent basis since graduating in 2017.

What inspires you?

My work tends to be of places I’ve visited, mostly involving an urban/architectural theme. I love cutting buildings, cranes, and cables so most of my work is based on cityscapes. I have particularly enjoyed making lino prints of London.

What is your favourite printmaking product?

It would be between my Etching Press and my Japanese Baren, as they have both helped me produce crisp prints a lot quicker than when I used to use a cheaper hand press. I almost prefer to use the Baren now as my Etching Press is only A3 size and most of my recent prints are larger.

What have you made that you are most proud of?

My London Landmarks print that I produced during the first lockdown. It took a long time to design, cut out and print, but as I was furloughed for 8 weeks, I spent some quality time focused on it. It was worth the effort as I’ve received many compliments and made several sales so far.

Where can we see your work? Where do you sell?

I set up my own website in 2017, to showcase my work online and to enable people to contact me. I use social media, mainly Instagram and Facebook to show the process of how I create my linocuts. I think it’s helpful for people to see and follow the process so they can relate to the prints. I set up an Etsy shop in 2018 so that people can purchase my art easily; this is linked to my website. You can buy all my linocuts and I also sell greetings cards for each print.

What will we be seeing from you next?

As already mentioned, I enjoy creating prints of London which have been very popular, so I’m planning to produce more London scenes. I would also like to attend more art fairs this year but have found this difficult to do when having a full-time job. In parallel, I will try to arrange for my work to be displayed in more galleries while expanding my portfolio further.

Do you have any advice for other printmakers and creatives?

Be true to your way of working and continuously experiment with new ideas. This is important to discover what works for you best and to establish your individual style.

To see more from Tom follow him on Instagram.

Speedball Block Printing Ink – Black and Extender

Speedball Block Printing Ink is a great water-based ink for relief printing! We love the combination of black and extender to make beautiful grey tones, like this graduated moon, made using the rainbow roll technique!

Start by drawing your design onto a block. We are using a piece of Speedy Carve to create two blocks that will be printed one on top of the other but you could use any kind of relief block. We made a circle by drawing round a tape roll.

We also free-hand drew a tree silhouette. You could use red carbon paper or tracing paper to transfer a design instead.

When the design is ready, use cutting tools to carve the design. The fine V blade of this Speedball Cutting Tool is perfect for the edges of our tree.

The U blade is great for carving out larger areas of the block.

If you are creating smaller blocks like ours, you can use a scalpel to cut them out.

To create a black to grey rainbow roll, squeeze out a little Speedball Block Printing Ink in black and a little extender onto an Inking Plate. Use the width of your roller to judge the distance apart – we want the ink to be apart but not right on the edges of the roller. We are using a Speedball Soft Rubber Roller. The roller you are using should be slightly wider than the block you are inking.

Use the roller to draw the ink down in two stripes.

Gradually start to roll the roller up and down, picking it up and placing it very slightly to the left and right of centre. This will begin to let the two inks join in the middle where they will start to blend. Blend in this way until you like the look of the colour graduation.

Roll the ink onto the block, keeping it in the same direction all the time.

Place the inked up block face up. Use a piece of paper underneath as a guide for where to place your printing paper.

Place the printing paper on top of the block. We are using Hosho paper. Take the print by rubbing on the back of the paper with a baren, your hand or a spoon.

Peel away the paper to reveal the print! Speedball Block Printing Ink is water based which means it’s ready to print a second layer on top very quickly, especially in hot weather!

Ink up the second block. We are using a 1.5″ Deluxe Speedball Roller and inking up with Speedball Block Printing Ink in black.

Arrange the block ink side up on the registration paper.

Lay your first print over the top.

Take the print using a baren, your hand or a spoon.

Lift the paper to reveal your print!

Speedball Block Printing Ink is a great water-based ink for high quality prints that dry quickly. Clean up simply with cold water. The ink should wash away really easily. When using any water-based ink in hot weather, you may need to work more quickly and not roll out too much ink in one go.

We have an exciting giveaway of these inks in black and extender – grab your free tube while stocks last!

For this project you will need:

Meet the Maker: Salty’s Studio

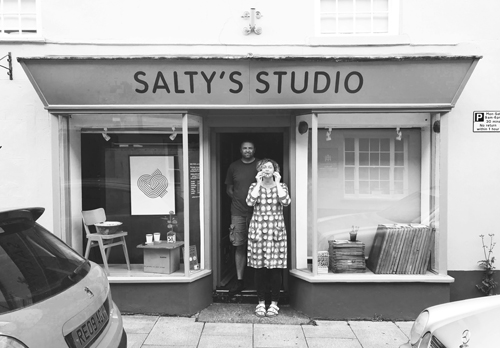
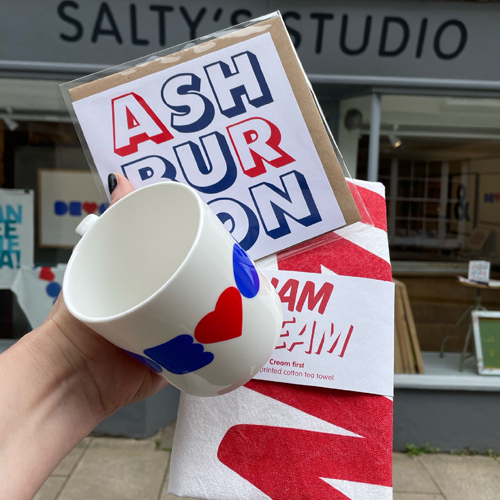
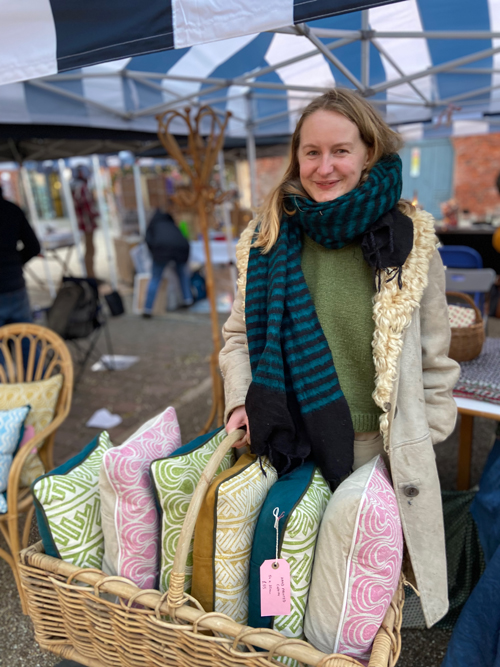
We are Sandra and Jim Salter and we live with our family above the Salty’s Studio shop in Ashburton, Devon. We moved here three years ago, looking for a home with studio space, but then we saw this shop with a house attached and thought let’s give a workshop/shop a go. We saw other makers/shops in the town and thought we would be in good company – we weren’t wrong, the town is brimming with creatives juggling their businesses, and family life and there is a real community spirit.

Sandra, an animator, grew up in Paignton, South Devon and Jim, a graphic designer/art director from Wolverhampton, met in London working on an animated film together and they have continued to work creatively together, sometimes as films, promotional products to branding and graphic design. With young children in tow, it became increasingly difficult to tend to clients and so they turned their efforts to making cards and gifts which would not only serve to provide friends and family with greetings and presents but also started the process of becoming their Salty’s Studio business.

How and where did you learn to print?

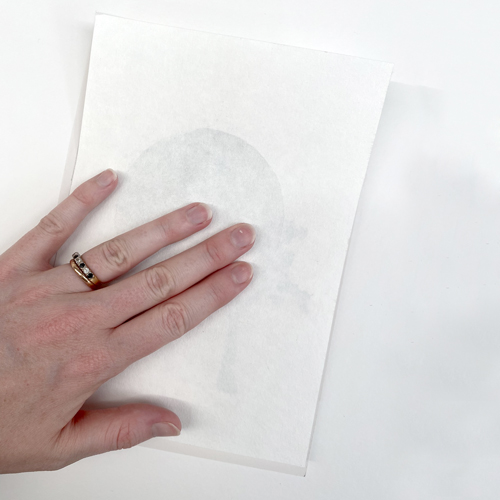
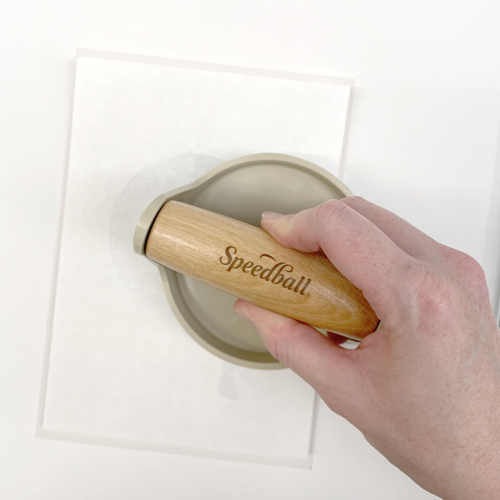
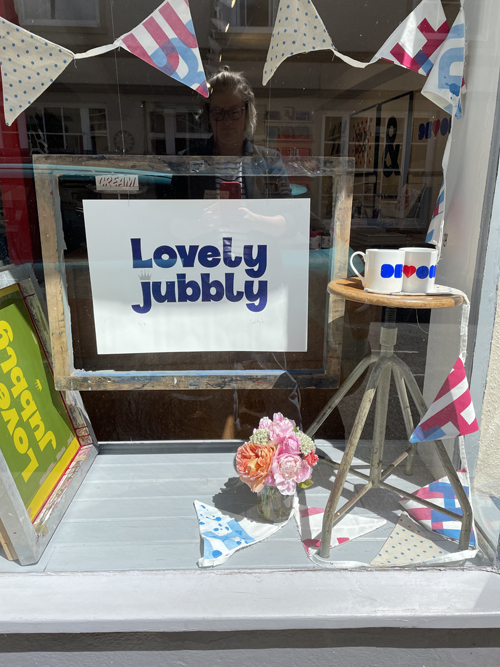
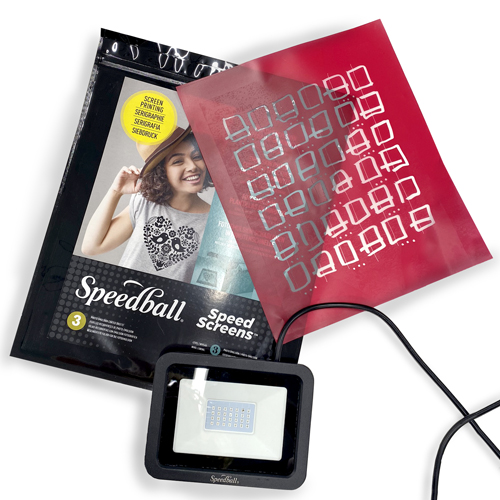
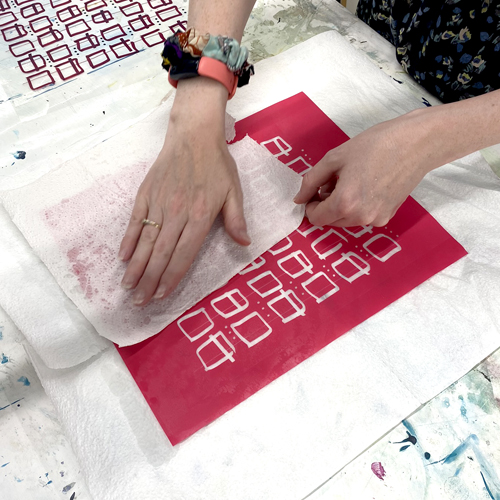
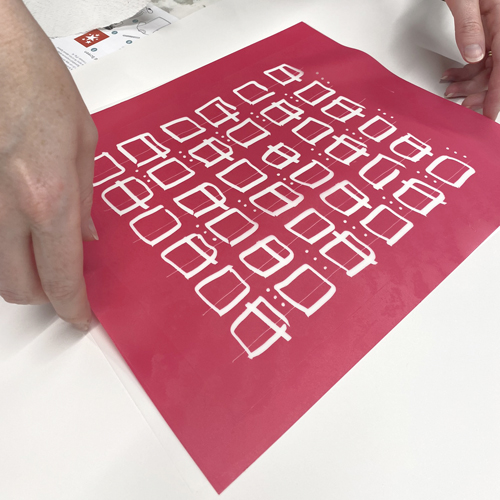
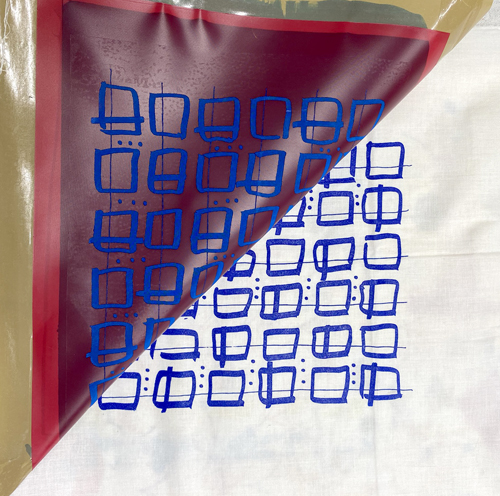
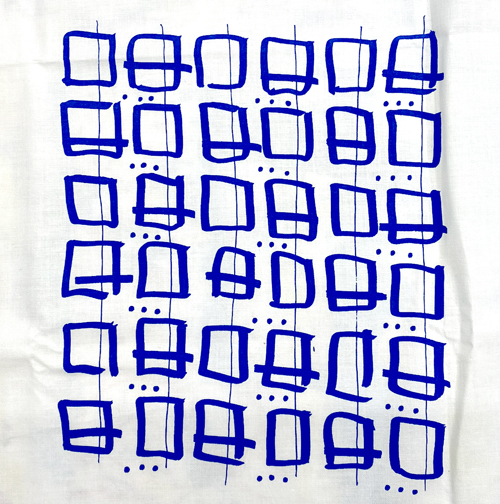
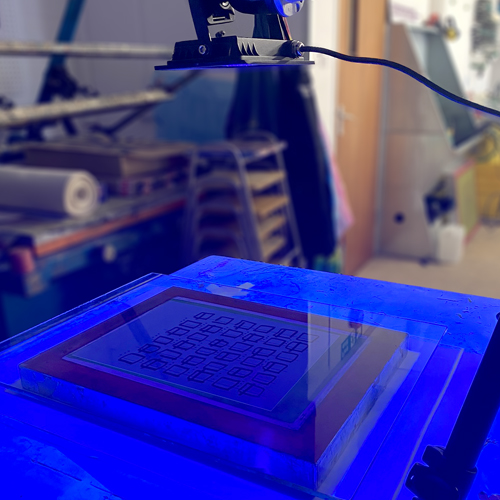
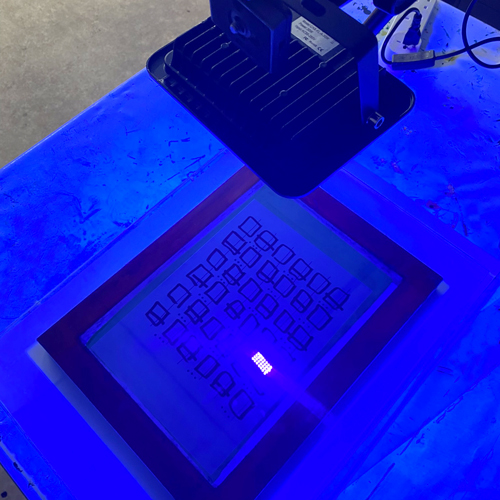
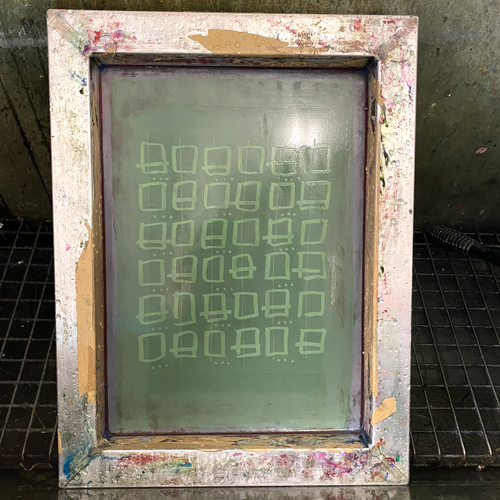
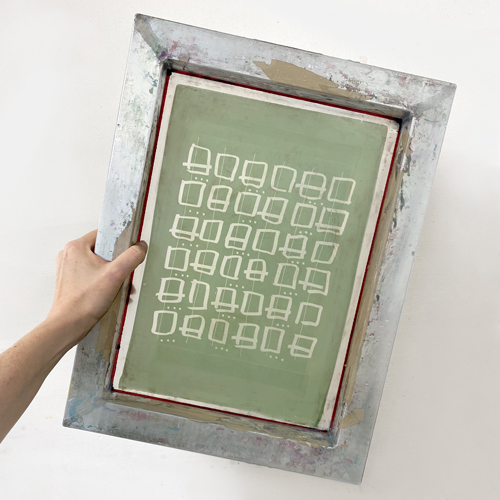
We are self-taught screen printers, using online tutorials and some really great books to learn, plus a lot of trial and error – and now we are channelling our past lives and experience through the printmaking process. In our shop, we sell a range of handprinted cards, limited edition prints, and some experimental products – and we get to see how customers respond first-hand. When a product is successful we can develop it further – if a card doesn’t sell well we won’t reprint it. It is a good test bed.

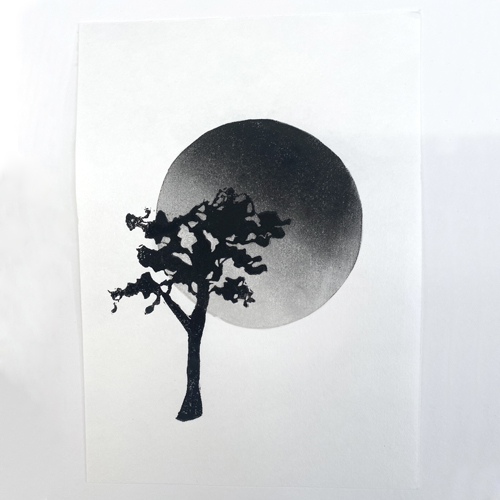
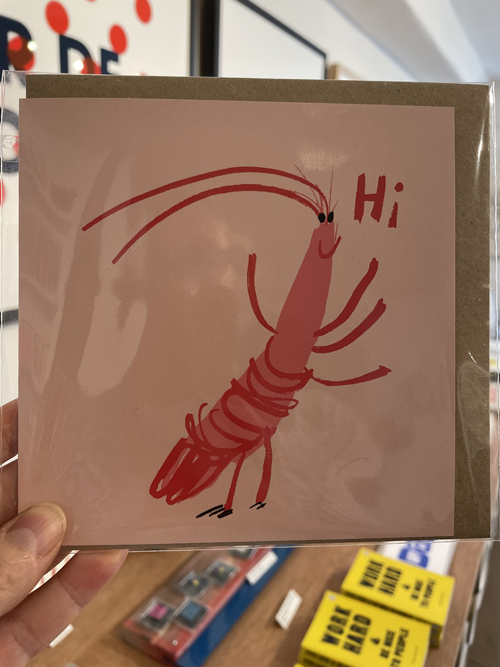
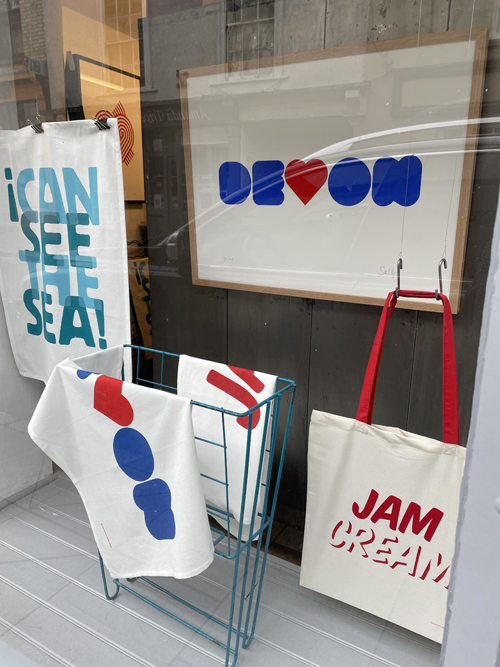
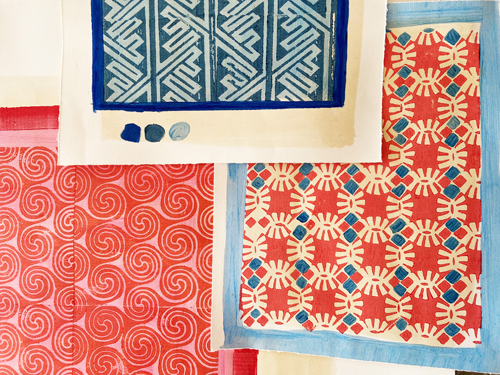
You can see the work falls into two camps – Jim has a very graphic/typography style – he likes clean communication and is very considered, often with a visual pun or clever use of negative space. Sandra’s style is more fluid and sketchy, a lover of brush strokes and images with lots of movement in the marks, I think you can see her animation background. Between us, we catch the eye of anyone passing the shop who likes a colourful, contemporary, upbeat vibe.

Why Printmaking?

Printmaking has enabled us to present our work as prints, gifts and homewares which are rewarding for us to actually touch and see our work exist in the world. Previously, working in digital media and film, often a lot of our hard work went into things that are not really seen by many or have any further connection to us and were less likely to be credited for that work. We now have a process and a format for working that feels more rewarding, and we are only just beginning to properly explore that potential. It’s exciting for us to be connected and responsible for the work we put our skills and name into.

Describe a typical day in your studio.

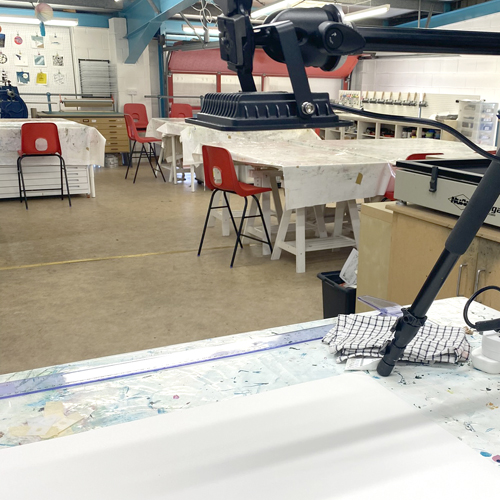
Like most families, we start with a mad-arse-scramble to get everyone up, breakfasted and out the door to school. The dog is walked – then we finally get that second coffee and the day of work can begin. We open the shop Wednesday to Saturday which leaves us a small window of Monday and Tuesday to get organised, to see what we need to achieve in the week – and put orders in for any materials we might need. We are still finding our rhythm working in and for the shop, and still have clients outside of that that also need tending – so some weeks time will be taken with a client, which means no progress in the shop, but we still need to balance income and keep the wolf from the door!

In a good week, we will rustle up a couple of new card designs – and print them in-house – or develop a new limited edition print. We know they slowly sell and we also have an online shop and newsletter – which is building our following too. We are on a gradual path to adding designs, increasing our stock of prints and meeting new stockists. We also realise that this is a slow approach. It’s only us and we can only do what fits in the time. That can be frustrating, but in a way, it’s realistic, less wasteful and keeps us invested in the whole process.

What inspires you?

We love food – eating out – cooking in – the kids love making sushi – we also love an art gallery shop, namely Tate modern shop – and then shops like Ikea and Flying Tiger – any feast of modern colourful handy things. Any rebrand that has a fresh rethink about what works and what they offer – we watched a Netflix show about Christina Tosi’s Milk Bar and the whole family got into it, the idea of channelling bake sale goods into a whole cafe/concept. I think we like retail/design/art school/we are ideas people first and then handy skills second. Screenprinting gives us the chance to implement our ideas into sellable things, with a satisfying process.

What is your favourite printmaking product? 

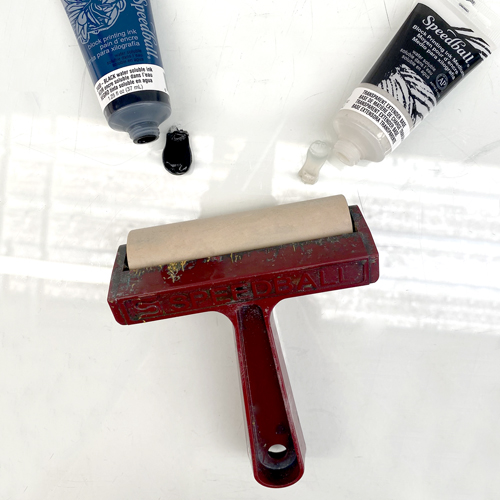
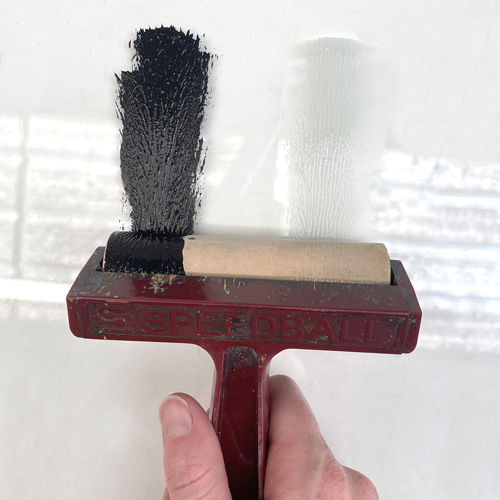
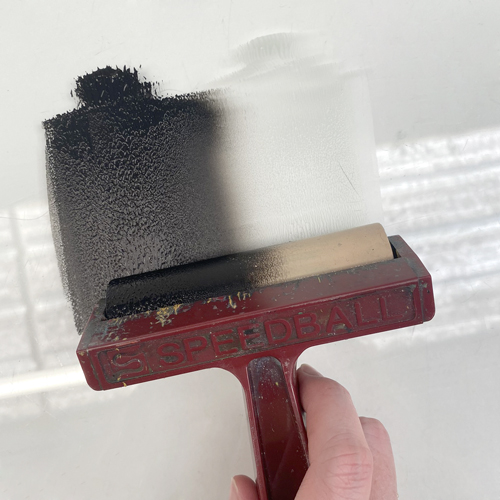
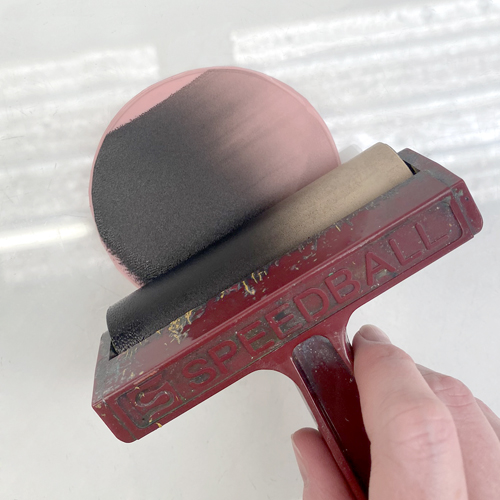
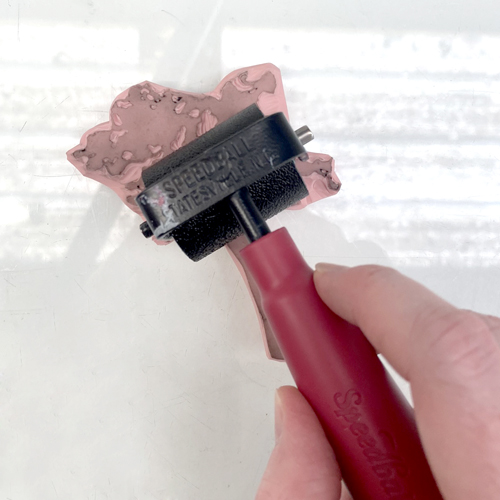
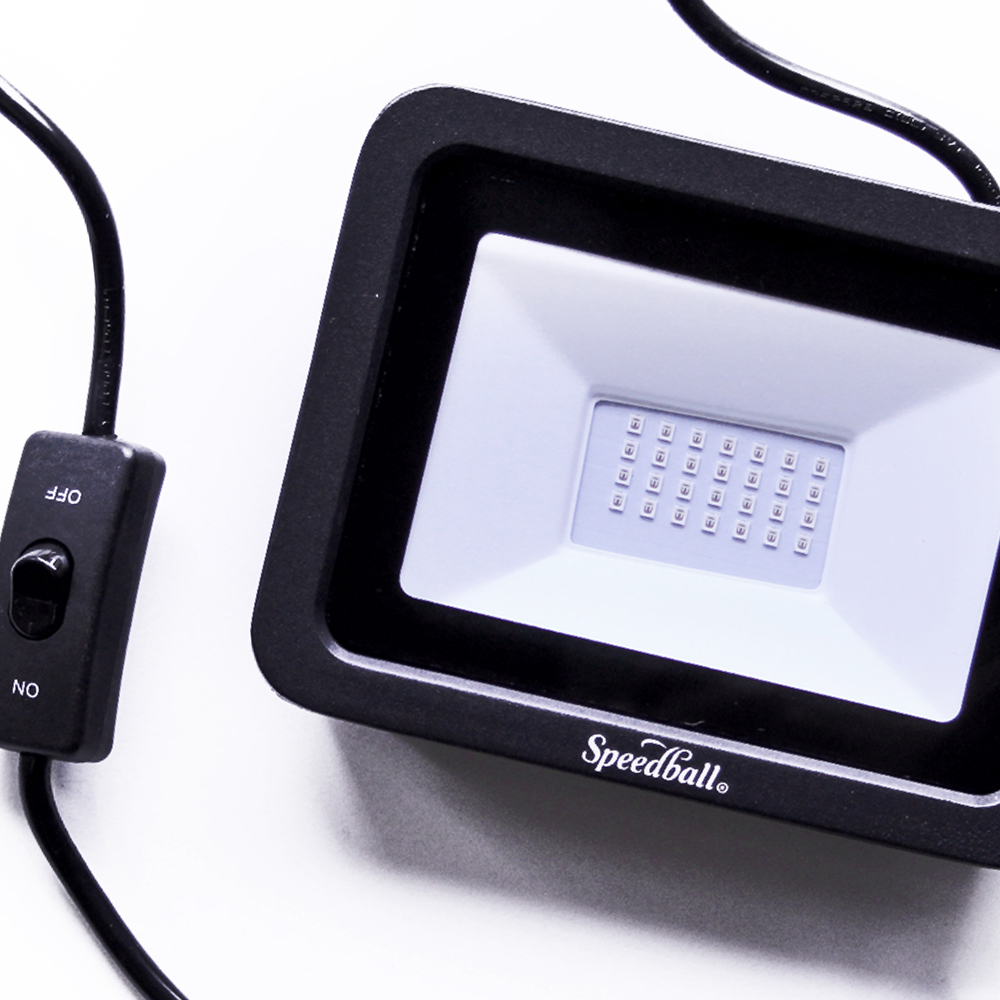
We love Somerset Satin paper with Speedball ink, we know it is archival as we have had prints in our shop window with the sun on them and they never fade! I’m sure there are plenty of other ink systems out there – but this has worked well for us so we’re keeping this as our formula for the time being.

What have you made that you are most proud of? 

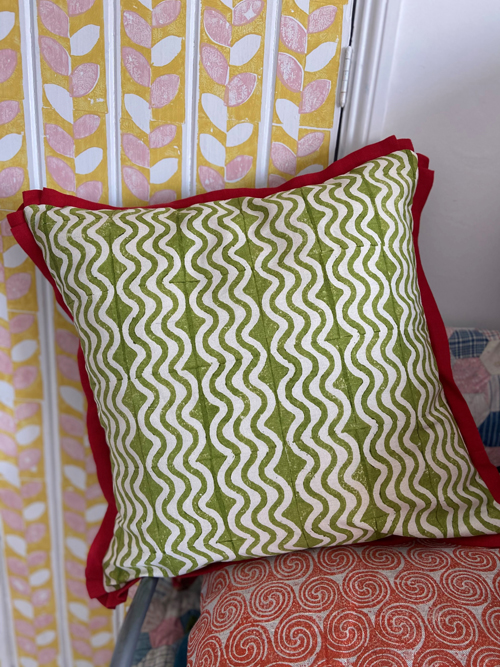
Our range of greetings cards makes me feel proud. They look great together and it is something everyone understands when they walk into our shop. It’s like entry-level art!

Where can we see your work? Where do you sell? 

We have our shop, 30 North Street, Ashburton, Devon. It’s on the edge of Dartmoor halfway between Exeter and Plymouth on the A38. We have an online shop and also a few stockists dotted around. We are really proud to have been noticed by Dartington Trading Co. which now stocks our work in three of their shops – also Maker South West, formerly Devon Guild of Craftsmen) in Bovey Tracey.

What will we be seeing from you next? 

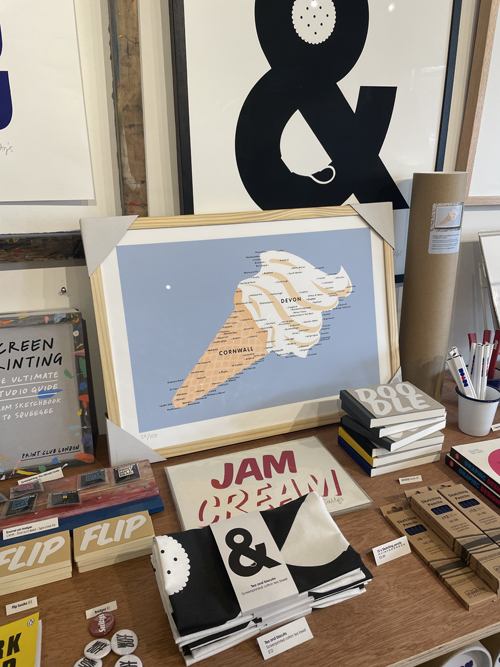
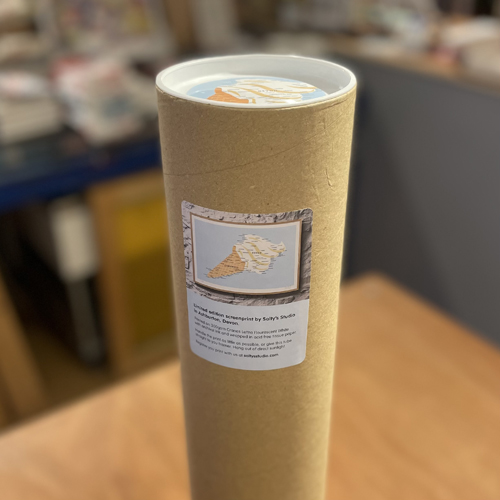
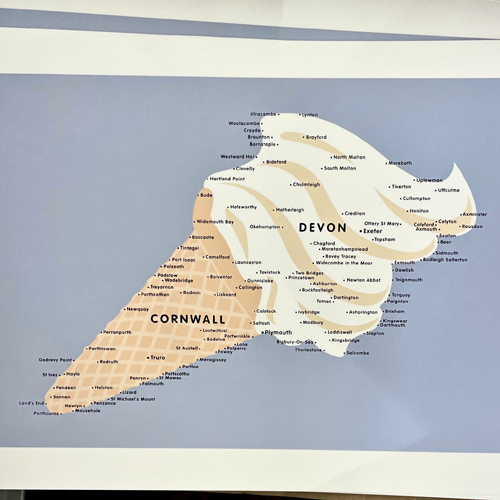
Jim has just finished ‘Ice Cream Map’ – he was waiting for ice creams (and cheesy chips) after a day on the beach, and it struck him how the map of Devon and Cornwall looked like an ice cream! Maybe he was hungry, but there we have it – his latest print. He isn’t one to ponder for long, he has a flash of inspiration and then sets about making it into a clean, smart print! The edition has already sold 45 out of 150.

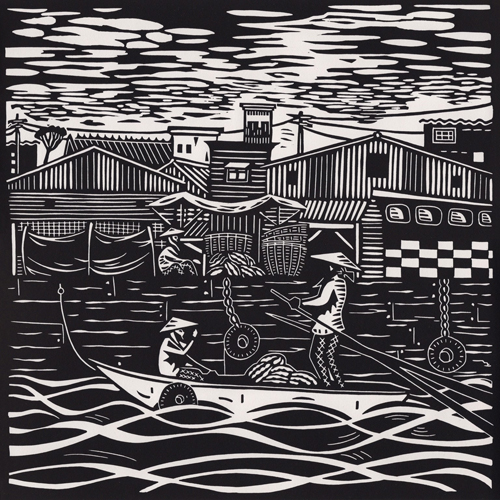
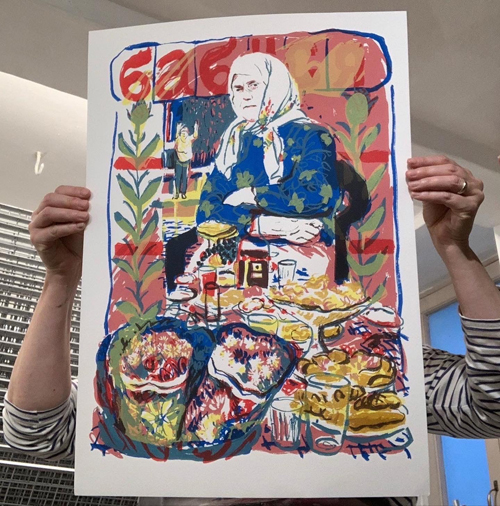
Sandra also recently created a piece called ‘Stranger’s Welcome’ is a fluid and energetic medley of drawn elements, composed to make a joyful proud poster celebrating the Ukrainian hospitality I’d experienced on a boat trip in Ukraine in 2003 – working with flower ladies, a picnic in the woods and a feast on fisherman’s island, I put the grandmother character centre stage as a hero and embodiment of working with what you’ve got, making the best of ingredients and perhaps limited resources, but still welcoming people in.

We are also starting to offer workshops – tentatively we’re uploading new dates to our website and hope to grow our offering as we gain more experience and see how people respond.

Do you have any advice for other printmakers and creatives?

We have become connected to the whole process through printmaking, from designing to making to selling. You become responsible for sourcing materials, finding inspiration, to managing your retail (and online) space. I think that attention to all those details comes across as a very unique-to-us experience – trying to keep aligned with our reasons for wanting to have creative careers. And in turn, we offer something unusual for passers-by to stumble upon that is a reflection of us and our setup. We know we don’t speak to everyone, but we’re learning that by being and believing in yourself will keep producing work that we’re proud of.

You can see more from Salty’s Studio on Instagram!

Speedball Speed Screens for Easy Screen Printing at Home

Speedball’s Speed Screens are a great new way of exposing a design at home without the mess of Photo Emulsion. Speed Screens are light sensitive, pre-coated emulsion mesh sheets. This means they’re ideal for a home studio setup as you don’t need anywhere dark for a screen to dry. They come in packs of three 10 x 12 inch sheets in a light sealed packet so you can pull out a sheet right when you’re ready and seal the others away from the light to use another day.

Begin by preparing your screen artwork. We are using an Inkjet Film drawn with Zig Opaque Pens and a Jacquard Film Marker. You could also print out your design using an inkjet printer.

Please note that the design needs to be flipped on the film. This means that the design will print as a mirror image compared to your drawing on the film. We are using a pattern design which works printed either way but if you’re using words, numbers or a design that has a right way round, please flip it before making the screen film.

It’s important that your design is solid black and white, without grey areas. The black areas need to be as opaque as possible. Zig and Jacquard opaque Markers work very well. The black areas will be the parts that print.

To expose the film, use Speedball’s UV light. It should be held 14 inches above the film for 1 minute. You can suspend the light from a tripod, chair or table, or simply hold it by the handle. Work in an environment with subdued lighting if you can, out of direct sunlight.

When you’re ready to set up, peel the white film off the Speed Screen sheet. Keep this for later. The Speed Screen is two sided – one side is brighter red (the exposure side), the other is paler pink (the squeegee side). Place the film on top of a black piece of paper on a table or floor red exposure side up.

Quickly position the artwork on top. It’s important that the inky side of the film is face up and not in contact with the film. The artwork should appear as a mirror image when placed down. Place a piece of acetate or glass over the top of the film to hold it still.

Turn on the UV light, holding it 14 inches away from the Speed Screen. Leave it on for 1 minute. If you’re using a different light source, you may need to experiment with different distances and exposure time.

As soon as the time has elapsed, turn off the light, remove the acetate or glass and screen film and run the Speed Screen under hot water. This should reveal the image. Use a spray hose if you have one with hot water – a shower hose is ideal. Do not soak the screen or lay it in the bottom of a sink. Placing the Speed Screen on a sheet of glass or similar at an angle is ideal.

It’s important not to touch the design at all. Be very careful not to scratch the emulsion as it is very prone to marking at this point.

Now the design is visible, you can rise it with a gentle hose until all the excess pink emulsion washes from the design. Do not use a sponge, brush or your hands to try to wipe the emulsion from the design as it will damage the screen. Just let the water rinse it until the whole design is clear. You can hold it up to the light to check that no excess emulsion remains in the design.

Lay the Speed Screen down on some paper towel and very gently blot it.

The move it to sit on top of the white sheet we peeled away earlier. Leave it to dry for 45 minutes (or longer if you can). You can use a hairdryer to dry it if you wish. The screen is very tacky at this point so be very gentle with the surface. The colour should get a little darker as it dries and it should become more rigid.

Before the screen is ready to print with, it needs exposing again to harden the emulsion. Again, place the Speed Screen emulsion side up 14 inches under the UV light. Expose it for 1 minute again. When making our Speed Screen, we did this the day after the first exposure.

When the screen is exposed for a second time, it is ready to print with! If you wish, you can stretch the screen onto a frame but you can also use it loose.

We are printing onto fabric so we have pinned a piece of cotton onto a padded surface. It’s helpful to keep your fabric as still as possible so pinning it tightly out works really well. You can also print onto paper if you prefer – thicker paper works best as it is more stable.

Tape the Speed Screen down on the fabric using painters tape or parcel tape. Spoon a row of ink along the top of the screen. We are using Speedball Fabric Screen Printing Ink.

Use a Speedball Textile Squeegee at a 45 degree angle to force the ink through the mesh. We found that it’s best not to flood when printing with Speed Screens, just pull the ink down the mesh once to take your print.

Peel the Screen up off the fabric or paper to reveal your print.

You can stick the screen back down on another piece of fabric to take a further print. When you’re finished, peel away the tape and rinse the Speed Screen in cold water. Blot it with paper towel again. Leave it to dry: you can use the white peel away sheet to lay it down. When it is completely dry you can print again.

For this project you will need:

Exposing a Screen using Speedball’s UV Light

Speedball’s new UV Light makes it so simple to expose screens at home. It has a fold-out bracket that can be mounted or hand held. Its small size makes it ideal for a home studio setting.

For our project, we hung the might from a tripod, but you could hang it from the back of a chair, off a table or simply hold it during the exposure time.

To expose an A4 screen, we suspended the light 16 inches away from the screen for 8 minutes. This was perfect for our setup, but will vary slightly depending on your method and materials used, so you are likely to need to experiment with a few times and distances when you begin.

We used an A4 43T screen coated with a single layer of Speedball Photo Emulsion and Sensitiser. Our artwork was Inkjet Screen Film drawn with Zig Opaque Pens and Jacquard Film Markers.

Place your coated, dried screen on a flat surface, frame side down. For more help on coating your screen, see this blog post. The mesh should be raised above the table. Place the artwork on top of the mesh. The drawn (or inkjet printed) side of the artwork should be down against the mesh. Once it’s placed, the design should me a mirror image when you look at it from above. Place a sheet of glass or perspex on top, to hold the film in place.

We chose to do this process in subdued lighting which gives us a little more time to set up. If the screen is exposed to too much light before you’re ready, your image may not expose properly. Remember to dry your photo emulsion in complete darkness and only bring the coated screen out when you’re ready to expose.

When you’re all set up, turn on the Speedball UV Light and set a timer for your chosen exposure time.

Whilst the screen is exposing, set up your washout station. Ideally, this should be near where you are exposing the screen so you don’t have to carry the screen far before washing it out. If it is far, pop the exposed screen in a black bag for the journey.

We like to use a jet wash to wash out our exposed screens. If you don’t have access to one, a garden or shower hose should be fine – it may just take a little longer.

Immediately after your exposure time has elapsed, turn off the UV light and take your screen to your washout station. Get the screen wet straight away, with cold water. Your design should show on the screen at this point, like in the image below.

Use the hose to rinse the screen until the design is completely transparent. Hold it up to the light to check. You may have to wash out in a few attempts, leaving the emulsion to soak for 30 seconds or so between washing. If you’re using a jet wash, be careful not too go too close to the mesh as it can damage the emulsion.

If the design isn’t washing out or the emulsion is coming off in the wrong places, your screen is likely to be over or under exposed. See this blog post for more help on troubleshooting.

Let the screen dry and then you’re ready to print!

For this project you will need:

Meet the Maker: Maud of Fungus and Mold

Describe your printmaking process.

I design and print fabric, mainly linens and hemp fabrics. I use wooden blocks which I carve using a CNC router. I love the heaviness of old Indian wooden blocks which you can load a thick layer of ink onto, I wanted to create my own versions of these.

I first design my prints by looking at many influences, from antique textiles and illustrations to paintings and patterns in nature. I start by using Japanese watercolours to paint my design, I then digitalise and create a repeat tile artwork for the router to carve. I mix my own colours using pigments and a screen printing medium so that I have more control over the colours I use.

I really enjoy creating patterns that repeat in a way that tricks your eye and makes you search for the pattern. At the moment I am focusing on single-colour designs, but I would like to experiment with more colourful designs soon. I like combining the digital and handprinted elements to create my designs, much like screen printing but what I love about wooden block printing is that you can be less accurate and do it more by eye, creating a less regimented overall pattern.

How and where did you learn to print?

I studied printed textiles at Brighton University where we learned about colour mixing, dyes and screen printing. I went on to work in textiles for clothing and interiors where I was on a computer designing repeats for screen printing and digital printing. I then studied for a year at West Dean College where they had amazing experimental printmaking tutors and a print room to use whenever we wanted. I loved experimenting with mono-printing on silk through the press and aluminium etching.

Why printmaking?

Printmaking has excited me for as long as I can remember, especially antique printed textiles and intricate Japanese woodcuts. For me I love how printmaking can simplify an image, breaking it down into parts. I really admire printmakers who can create texture and complicated layers of colour through their practice. I love the flat texture of a printed paper surface. Fabric does its own thing when printed because the weave works with the ink to create other tones.

Where do you work?

I am lucky enough to live 30 mins from the Handprinted studio and have been using it to print my fabrics for years. At home, I have a print room in my house which is in total chaos at the moment as we have just moved.

Describe a typical day in your studio.

It depends on what I am printing. If I am making orders for cushions or lampshades I will first cut the fabric to size so that I don’t print any more than I need. When I have a stash of printed panels I combine coloured linens and piping that compliment the print and sew my fabrics into cushions and bags. Some time is spent online, updating my website and different sales channels and sometimes I will just be looking for inspiration in books and doing some initial watercolour designs.

How long have you been printmaking?

I remember potato printing stars in my bathroom when I was really young and my mum taught me how to cut stencils that I would decorate furniture with. My mum passed her love of textiles and art onto me and taught me so much.

What inspires you?

Colour is the first thing that inspires me, I love odd combinations of earthy and bright colours. Small details in things inspire me like simple shapes in other patterns or shapes in nature. I really love kitsch design too but I am not sure if my work is kitsch, it does have a retro feel though.

What is your favourite printmaking product?

Permaset Aqua Print Paste.

What have you made that you are most proud of?

I would say I am most proud of making the wooden printing blocks, it has taken a long time to learn how to carve anything useable and I still have a lot to learn. 

Where can we see your work? Where do you sell?

On a lovely website called The Chuffed Store which sells UK-made kits and treasures. Also, on my own website and an app Calle Narchie which is like Depop but for homewares.

I also take part in markets but mainly around Christmas.

What will we be seeing from you next?

Hopefully more work on paper and larger more experimental fabric pieces.

Do you have any advice for other printmakers and creatives?

Keep making things that you love and not what you think others might want to see.

To see more from Maud follow her on Instagram.