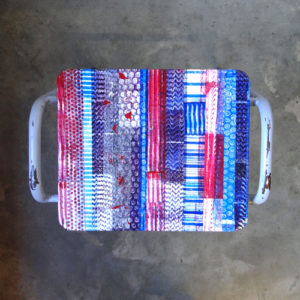
This month we are meeting the fabulous duo behind hello DODO! We love their work and are so thrilled to be able to chat to them about it:

Hello! We are Ali & Jam AKA hello DODO, playful printmakers and designers from sunny Brighton. We met at university over 10 years ago (eeek) where Jam studied Graphic Design with Typography and Ali studied Design Photography.
How and where did you learn to screen print?
Jam had done a tiny bit of screen printing at uni whereas as I had done zero, but the process fascinated and made sense to me as an analogue photographer. We decided to teach ourselves to screen print from home, which was very VERY challenging. We probably made every mistake in the book! Our first silkscreen supplier sold us some really shoddy kit too, which didn’t help! In hindsight we should have done a screen printing crash course but now we can say that we’re self taught and can be proud of that!!
Why screen printing?
Screen printing just made sense for us, we wanted to create bold and colourful graphics that could span paper and textile and we wanted to use a traditional, hands on method.

Where do you work?
All of our printing is done from home on our homemade press which is called Preston. We have literally (!) only just upgraded to having a room which is a joint office and printing studio, until now it’s been kitchen worktop all the way!
Describe a typical day in your studio.
A typical day (when not working for clients) would be coffee and toast whilst replying to emails at about 9am, then on to packing orders and getting those to the post office (luckily just round the corner!) Then it’s usually screen printing, either for orders to go out the next day or creating stock for upcoming markets. Quick lunch whilst back on the emails, online shop maintenance and updating social media. Then back to the squeegee, probably accompanied with a cuppa tea! Evenings are usually a mix of social media and listing new products online.

How long have you been printmaking? How long has hello DODO been going?
hello DODO has just turned 4! It’s strange because it’s hard to remember a time when our lives didn’t revolve around it. We started printmaking about a year before that.
What inspires you?
With every hello DODO design we try to create something that’ll make people smile, so fun is our main inspiration! Animals, bright colours and amazing/terrible puns also feature heavily in our work as well as the seaside, all things which make us happy.

What is your favourite printmaking product?
We’re VERY attached to our squeegee and can’t imagine ever replacing it!! Other than that we’re big fans of Speedball inks, the colours are fantastic.
What have you made that you are most proud of?
It’s a bit of an oldie now but our ‘I Love a Nice Lion on a Sunday’ screen print is still as popular today as when we first launched it and at markets gets everyone chuckling, young and old! From a scribble in a sketchbook when we were on holiday to our most well known and loved design, we’re pretty proud of it! It’s also a relief that so many people share our ridiculous sense of humour! Other than that, we make a pretty awesome vegetable curry.
Where can we see your work? Where do you sell?
You can find our work online in our Etsy shops and in a bunch of independent shops around the country. At Christmas you’ll find us at lots of fairs in Brighton and London, the Brighton Etsy Market, Renegade, BUST, Crafty Fox to name just a few!
What will we be seeing from hello DODO next?
Ok, as you asked you’ve got the exclusive, awesome and adorable babywear is about to drop!
Do you have any advice for other printmakers and creatives?
It’s obvious advice that everyone repeats, but if you’re struggling to get something right try, try, try again. Then maybe have a cup of tea and try again. When you eventually nail it nothing beats that feeling! Also never waste ink and always wash your screens out thoroughly!

Now that you love hello DODO as much as we do we know you’ll want to take a look at their website!


