Meet the Maker: Katie Cheng

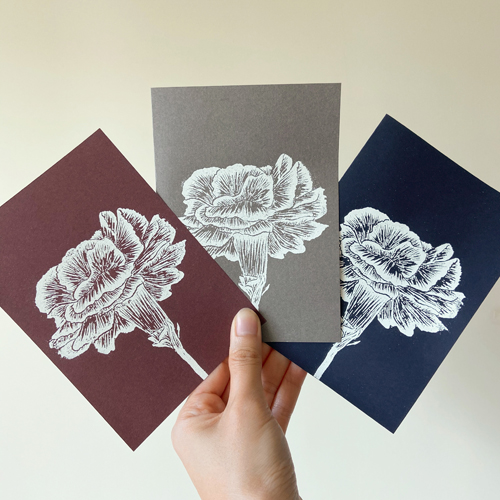
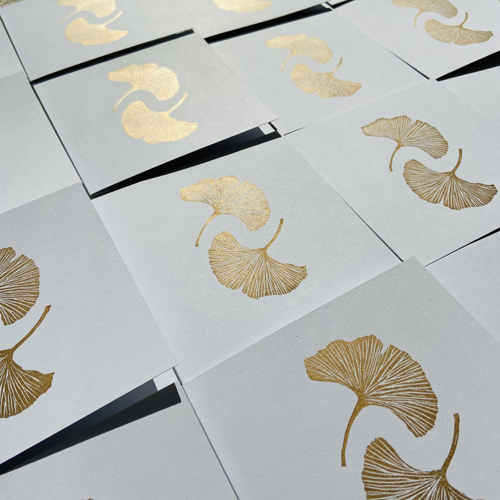
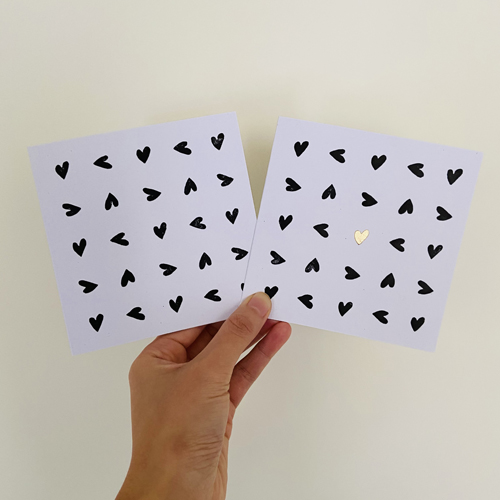
Hi, I’m Katie, also known as Sotibab. I’m an Architect and printmaker currently based in Bristol, UK. My husband and I moved back to the UK 7 months ago after living in Hong Kong for 9 years. My background in Architecture has allowed me to explore other creative mediums, which happens to be printmaking! I’ve been creating botanical and typographic inspired linocut cards and prints of a minimalist nature.

Describe your printmaking process.

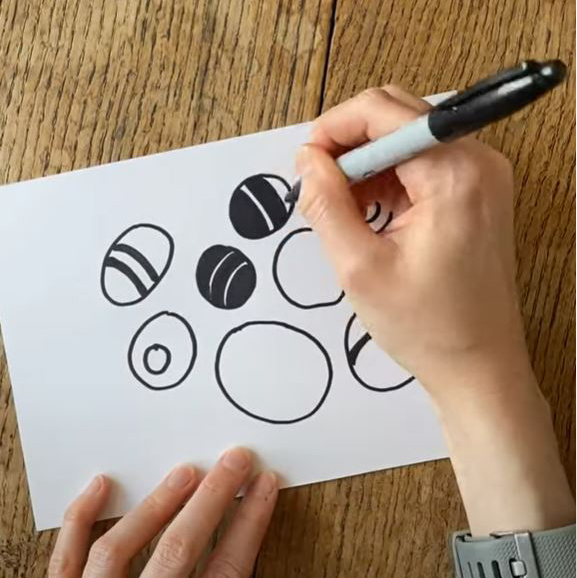
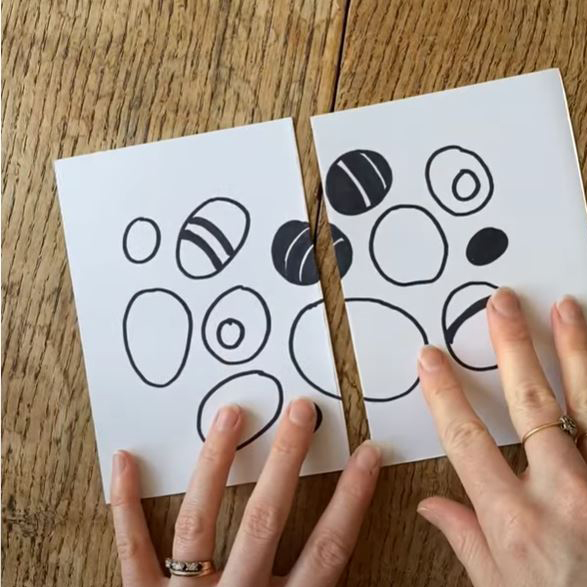
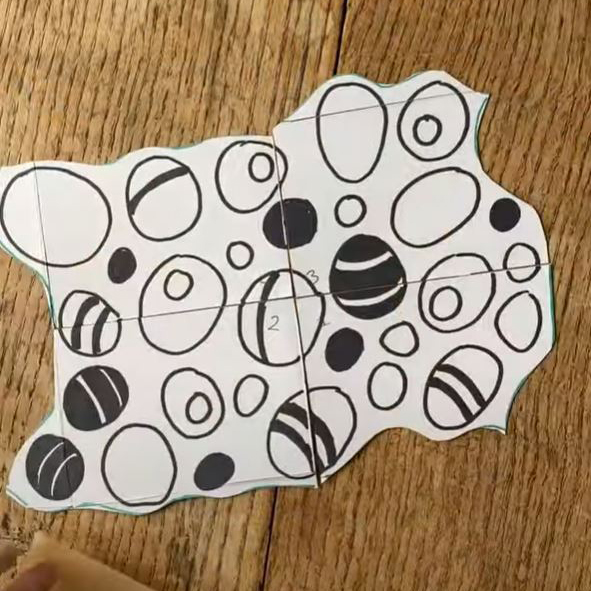
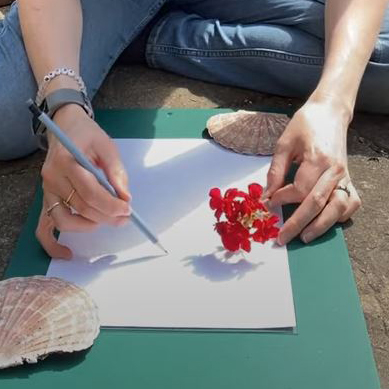
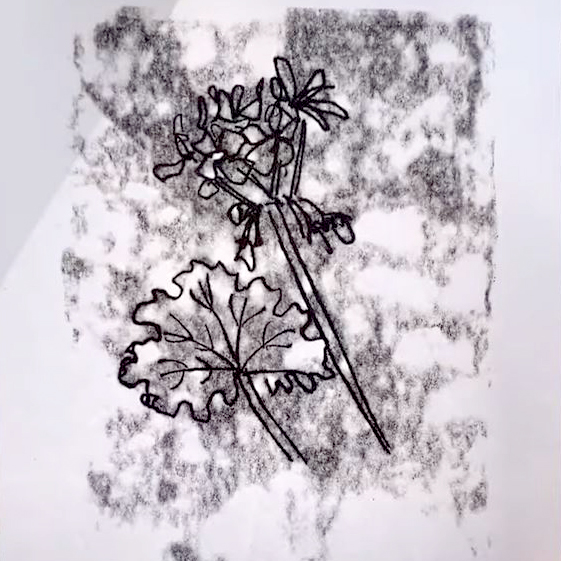
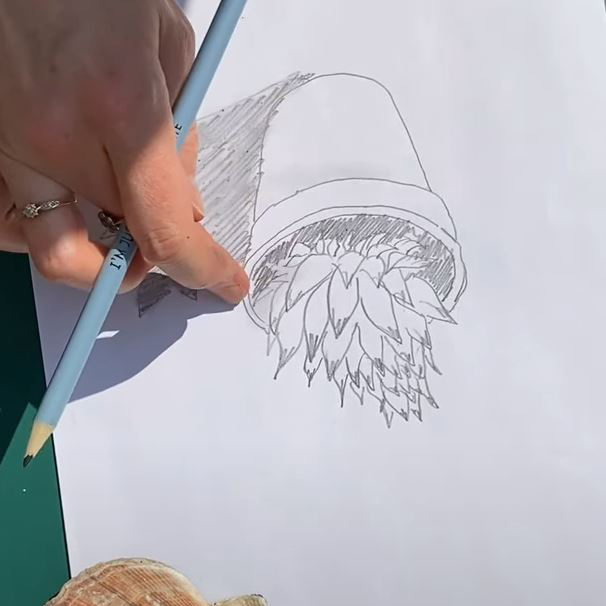
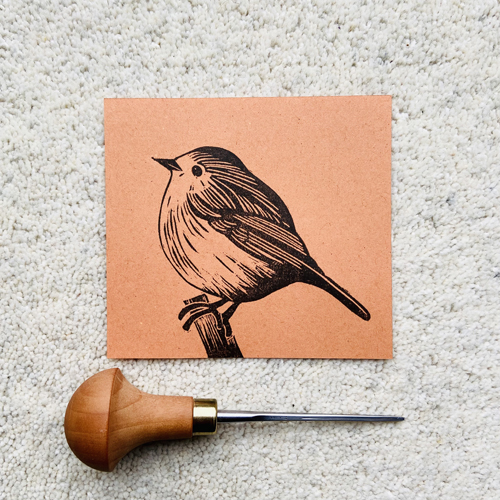
I start by sketching an idea roughly into my sketchbook. I’ll let the idea sit for a while before drawing it properly with most of the fine details intact in Procreate on my iPad. I will then print and transfer the image using Japanese Red Carbon Paper onto my choice of carving material which is usually Lino, Japanese Vinyl or Blue Easy Carve. The choice of carving material depends on the design. If I want nice crisp lines, I would choose Lino or Japanese Vinyl. If the design is more flexible, then I would use Blue Easy Carve.

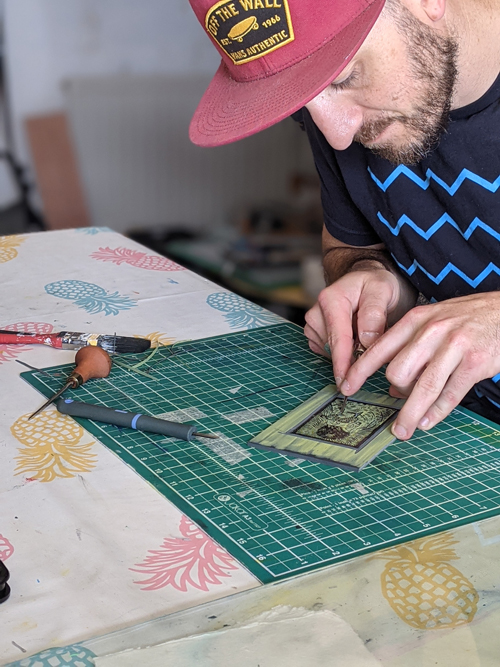
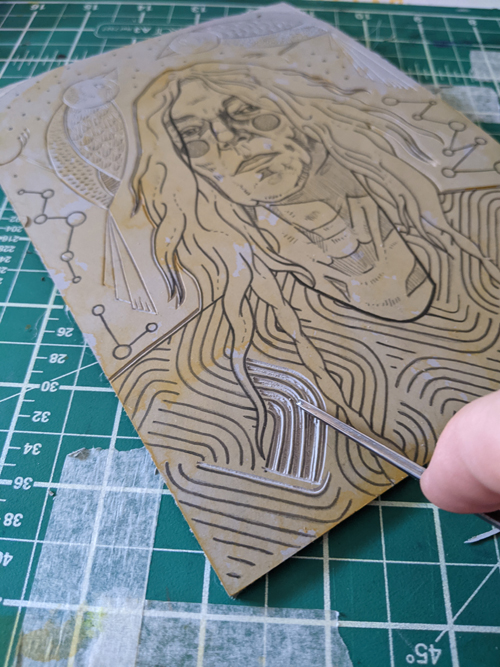
Then the fun part begins – carving! I’ve learnt to work slowly here. I used to be a bit impatient and rushed carving which led to chipping unwanted parts off.

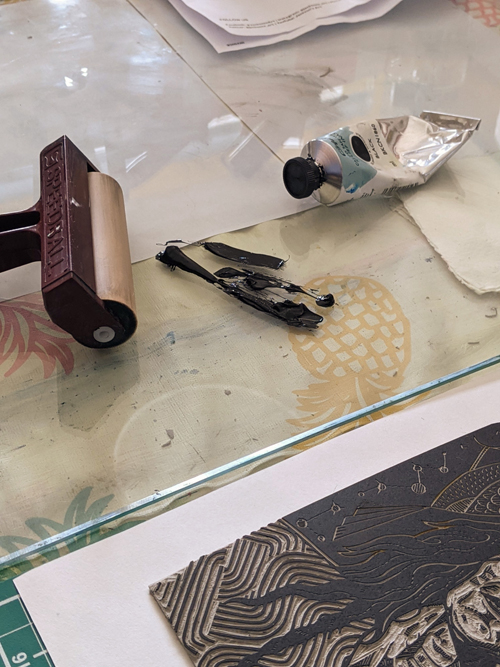
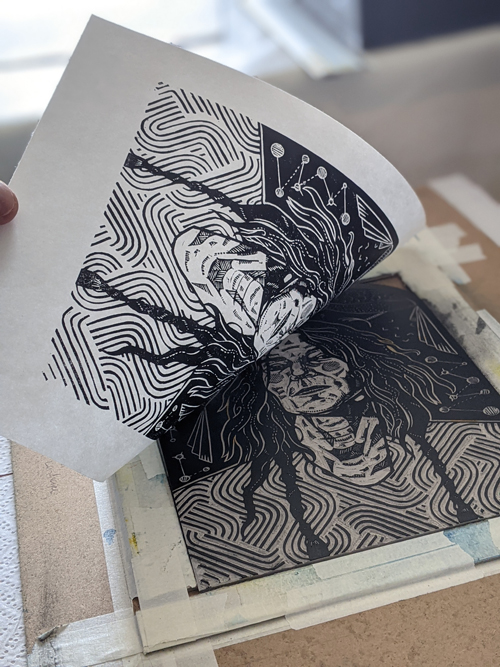
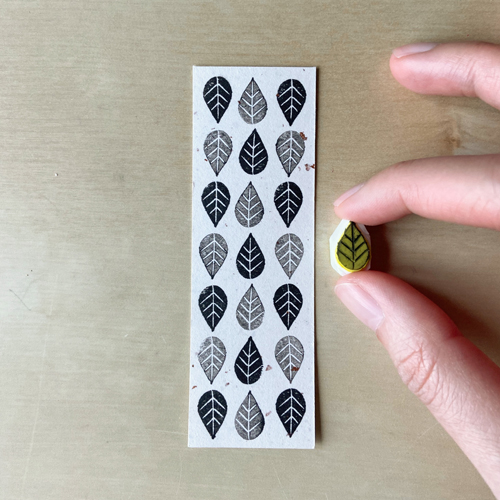
Once carved, I’ll test print with Versafine ink pads, take a step back then make some amendments. There’s a lot of putting the design down and reviewing it in my process. I find that you can see things more clearly after taking a break from it. I’ve rarely designed, carved and inked in one go.

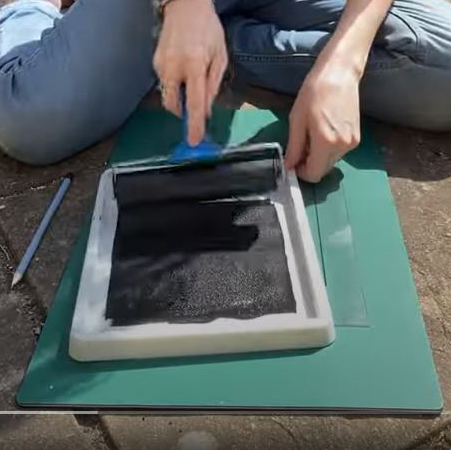
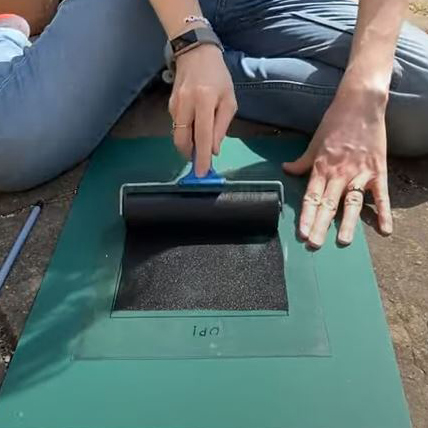
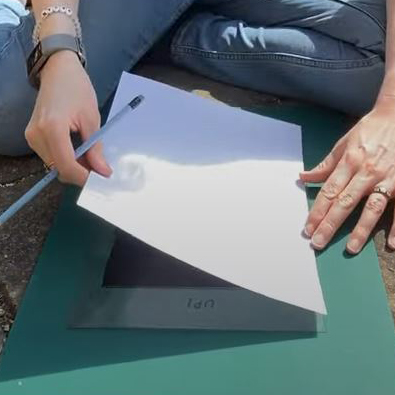
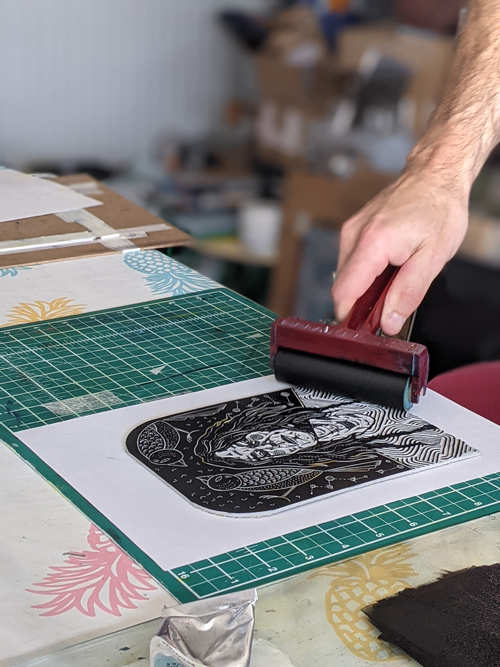
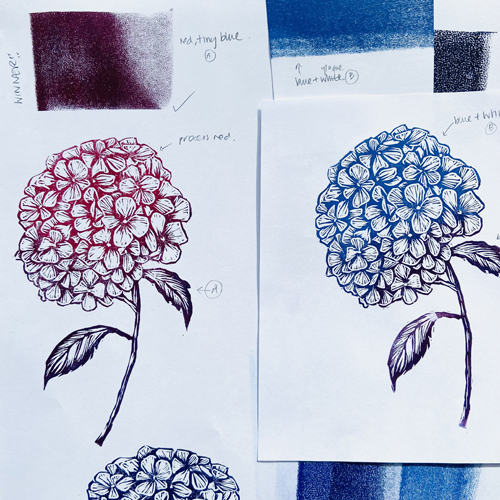
When I’m happy with the design, I’ll start my inking. If I’m using colour, I’ll play around with different colour combinations and keep those swatches in my sketchbook for reference later. I’ll ink with Cranfield’s Caligo Safe Wash inks and depending on the size, I will print using a baren or my press.

How and where did you learn to print?

I am self-taught. A year ago, a friend lent me her Speedball carving tools where I carved my first stamp. Eventually, I bought my first Flexcut carving set and the carving frenzy began!

Books, online resources and lots of experimenting have helped me along the way. The printmaking community on Instagram has been a great resource. A lot of printmakers are very generous in sharing their tips and tricks which has been extremely helpful. I started off making small stamps with ink pads and experimented with heat embossing powders.

Moving over to the UK meant printmaking suppliers were more easily available. I started trying different carving materials, different papers and playing with different relief printing inks.

Why printmaking?

I have always enjoyed having a creative outlet and I would go through different phases with watercolour and calligraphy but printmaking was the one that really stuck.

After carving and inking my first stamp, I was hooked. Carving is a very addictive and meditative process in itself. The first test print is always extremely exciting and satisfying as you really don’t know what to expect.

As an Architect, it takes many years for a project to come to fruition. With printmaking, you’re able to see the results a lot sooner. I try to explore subjects other than architecture in printmaking. In a sense, printmaking is my way of escaping the day job!

Where do you work?

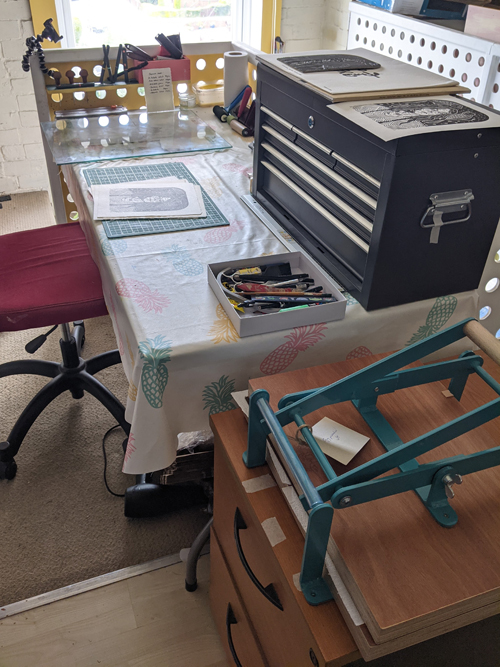
We have a small temporary set up in our bedroom where I do most of my carving, inking and printing. We will be moving to Edinburgh shortly so we shall see what the set-up is there!

Describe a typical day in your studio.

Due to my full-time job, I try to fit printmaking in after work hours during the week. I’ll try to do as much sketching and carving as possible during the evenings and work on multiple carvings and designs. During the weekends, I’ll clear my desk and do most of my inking and printing.

How long have you been printmaking?

I have been printmaking for around a year.

What inspires you?

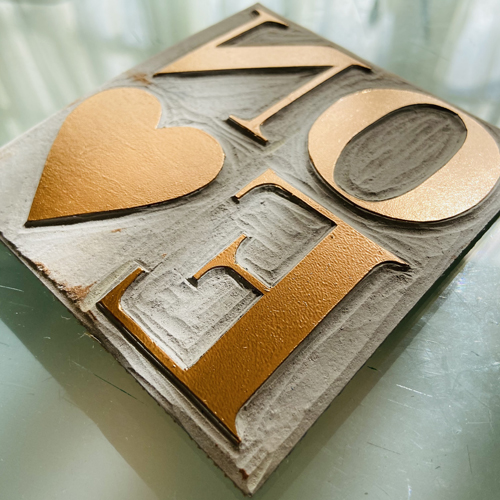
My biggest inspiration comes from nature, landscapes, strong geometry, patterns, colours and typography.

What is your favourite printmaking product?

My favourite printmaking tool is my Pfeil 11/0.5mm cutting tool. This little tool allows me to carve the finest details accurately; it stays sharp for a long time and cuts through lino easily.

What have you made that you are most proud of?

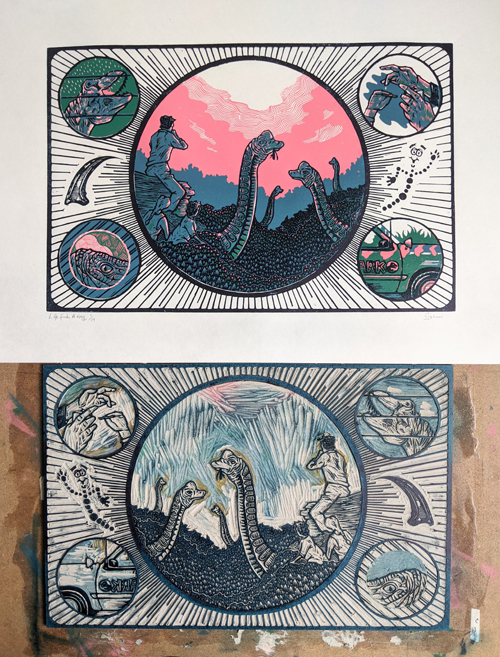
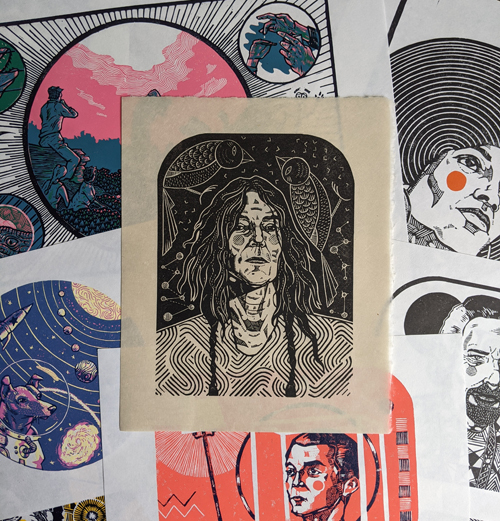
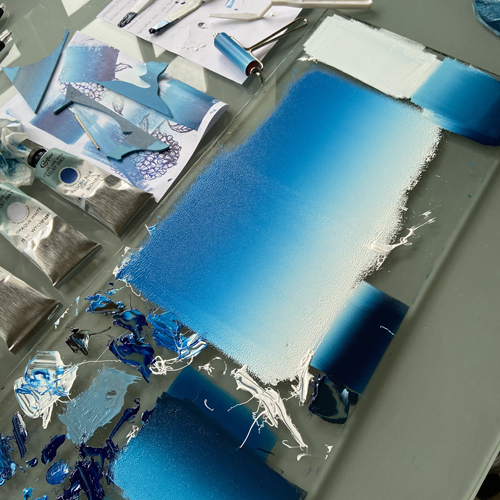
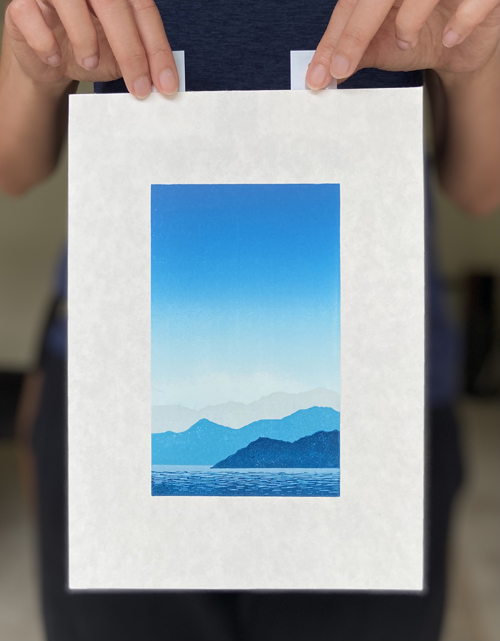
I’m still relatively new to printmaking, but a print that I am most pleased with is my latest blue landscape piece. Although it looks like a simple print, this print was made of many firsts for me – using a registration system, creating a reduction print, applying a large gradient ink roll and mixing complementary colour schemes.

Where can we see your work? Where do you sell?

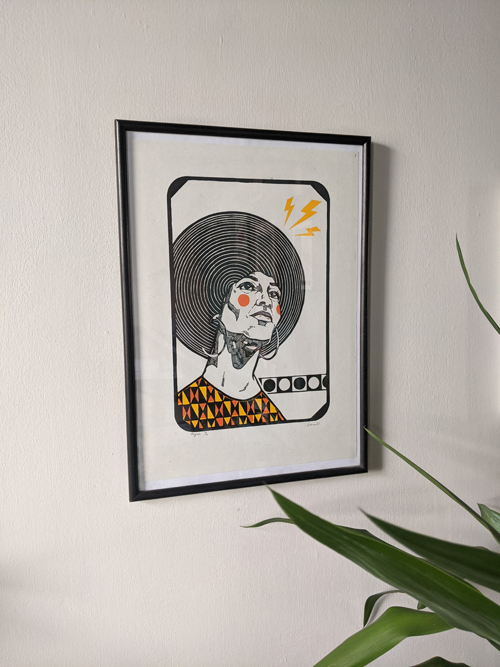
You can find me on Instagram for my progress and latest prints. My cards and prints are also available here.

What will we be seeing from you next?

There’s a lot that I’m keen to explore! I hope to create more reduction print pieces such as landscape scenes – reduction printing has opened up a lot of different possibilities. I would also like to create some geometric and typographic prints.

Do you have any advice for other printmakers and creatives?

Allow yourself to experiment and play with different subjects, colours and techniques that interest you without being pressurised on focusing on the end result.

To see more from Katie follow her on Instagram

Designing a Repeat Pattern by Hand

This method is quick and simple. No digital equipment or software is required: all you will need is paper, a pen/pencil, tape and scissors. With this technique, a repeat pattern can build seamlessly with no awkward joins or obvious lines. It’s perfect for a scatter design and can be used for screen printing or block printing.

Read on for instructions or scroll down to watch a video.

This technique will create a straight repeat pattern: you build up the pattern by printing directly alongside and below your previous print.

Begin with a piece of paper a little smaller than the piece of lino you will be using, or a size that will easily fit in the printable area of your screen.

Start to draw your design in the centre of the paper. Fill in the middle of the paper with design but don’t work at the edges yet. Scatter designs are perfect for this technique: this means that the design is created from separate motifs with spaces between them.

Fold the design in half and cut along the fold line.

Mark your corners 1, 2, 3 and 4. You can also do this before you fold and cut (but we may have forgotten…)

Swap the two pieces round so that the cut lines become the outside edges. Stick them together at the back with small pieces of tape.

You should now have a new blank space in the centre of the paper, created where the two edges have now met. Draw more design over this new middle. Again, don’t draw all the way to the edges yet.

Next, fold the paper in half in the other direction. Cut along the fold line.

Swap the two pieces so that the top becomes the bottom and the bottom becomes the top. Follow the pictures (or watch the video at the bottom of the page) to avoid confusion!

Stick them together with small pieces of tape at the back.

Draw over the new join to fill in any blank spaces. You can draw more closely to the left and right edges but do not touch them with the design.

Unstick the pieces and rearrange them in their original places: 1, 2, 3 and 4.

Stick them at the back, with long pieces of tape this time to make sure they stay in place.

We now know for sure that the edges will match up because of the way they were drawn. If we were to expose this design on a screen or carve it onto a block, we would have half-shapes trying to match up. This is absolutely fine for some designs, but to avoid this, we can take it a step further:

Take a different colour pen or pencil and draw a line down the middle of the design in one direction. This time though, we will wiggle the line between the elements in the design, sticking in the gaps between the motifs.

Cut along this line.

Swap the two pieces around again.

Match up the design and tape it at the back.

Repeat down the middle in the other direction by drawing a wiggly line between the designs, cut, swap and tape.

You should now have a design that fits together like a jigsaw piece but with no half shapes! This design is ready to be transferred to a lino block or screen for printing your repeat pattern.

Monoprinting with the Drawn Line

This method is fantastically quick and easy. If you’re looing for a way to loosen up your drawing skills and mix up your printmaking, this is one to try! Scroll to the bottom to watch a video or read on for instructions.

Begin with a sheet of plastic (drypoint plastic works well for this). You could also use an Inking Plate or piece of toughened glass. It needs to be solid, flat and smooth. This is for us to roll ink onto.

An oil-based ink is better for this project as it has a longer drying time on the plate. Water-based inks could dry before you have finished making the print, causing the paper to stick to the plastic. We like to use Caligo Safe Wash Relief Inks for this technique but Cranfield Traditional Relief Inks or Hawthorn Inks would work well too.

Roll a little ink onto an Inking Tray or separate Inking Plate. Using the roller, transfer some ink to the plastic. You need an even layer that is not too thick but not sparse. Fill most of the plastic sheet but don’t go all the way to the edge – ideally, your inked area should be slightly smaller than the size of your paper.

To begin a print, gently rest a piece of paper on top of the rolled out ink. Use a couple of small objects to hold the paper down at the very edges if necessary.

Use a pencil to draw on the back of the paper. Stay within your inked up area (which should be most of the paper minus the edges). Try not to touch the paper as fingerprints will pick up ink on the other side and potentially spoil your print. Press quite firmly with the pencil to make sure the lines pick up ink.

If you’re struggling with drawing freehand, you can lay a magazine page or similar on top of the printing paper and draw over the top. The printing paper will still pick up the drawing.

When you have finished drawing, peel up the paper to reveal the print! There is likely to be background texture from the background ink but the drawing should be bold. Different papers will produce varied results so experiment to see what gives your preferred result.

To take another print, replenish the ink, lay another sheet of paper down and draw again.

To experiment further, try different mark making tools, use your finger to press lightly on the paper to add shading and tone.

You will need:
– Sheet of plastic such as Drypoint Plastic or an Inking Plate
– Oil-based Ink such as Caligo Safe Wash Relief Inks, Cranfield Traditional Relief Inks or Hawthorn Inks
Inking Tray or another Inking Plate
Roller
– Pencil
Paper on which to print
– Magazine pages or similar (optional)

Meet the Maker – Gareth Barnes

Heya, I’m Gareth, an amateur printmaker currently living in Leeds with a 6-year-old Whippet called Lola.  The majority of my time is spent working at a high school supporting blind students, but outside of that I’m busily working on, or thinking about the next print project. I studied design and illustration at university in my home country New Zealand yonks ago, and after that threw myself into different creative adventures – having a bash at film character design, oil portraits, and general illustration. After a handful of years not doing very much creative work, I felt the yearning to get back to it and after borrowing some lino cutting tools, I had a go and loved it.

I’m definitely still a learner in some ways and have plenty of skills to sharpen. I’m really enjoying flicking between creative portraiture and larger scale reduction prints that throw in a bit of colour. 

Describe your printmaking process.

After a few thumbnail sketches of potential ideas and a lot of staring off into space visualising it, I draw out a full-size design, leaving out a bit of detail to add later. I then transfer it to the lino using carbon or graphite paper and draw in a few more details.

If it’s a straightforward monoprint, I’ll draw it up with an ink pen and get carving, but if it’s a reduction I’ll coat the pen linework in a layer of coloured ink to seal it. This helps protect the drawing from getting rubbed off every time I clean the lino after a layer has been printed. It’s the best solution I’ve used so far. Then, when it’s all carved and I’ve high-fived the whippet, I do a test print to check if there are any carved areas to tidy up. Then, I cross my fingers and get printing using my Ternes Burton pins, baren and printing press!

How and where did you learn to print?

I’ve learned what I’ve learned so far mainly through the experience of doing it a lot in a short-ish space of time and learning from mistakes. I have picked up a few useful tips from Youtube and printmaker’s blogs. The Handprinted website has also been super useful for learning about materials and how to get the best out of them. I haven’t really been doing it for very long and there’s still loads to figure out. 

Why printmaking?

One aspect I really like about it is the process. I really enjoy the different stages involved – the drawing, the carving, the inking and working with paper.  It’s been a really helpful creative outlet to focus my mind on (especially during the Covid crazy times). It also enables me to produce work that is a satisfying mixture of graphic, bold, and finer detailed bits. It brings together the different styles I’ve used with illustration and painting from the past, and is very hands-on which is ace.

Where do you work?

I mainly work at my desk in the converted loft of my house. It’s a bit of a chaotic room, where I share the printing space with DIY tools, tents, squirrels, and a load of other things that get stored in lofts, so it’s not quite as photogenic as a lot of studios you see! It’s nice and light and has a futon for my Whippet to snooze on though, which is the main thing really.

How long have you been printmaking?

Since January this year, so a bit of a newbie.

What inspires you?

Other printmakers and other artists of course. Always great to see their jazzy work and what processes they use.  With my portraits, definitely the subjects themselves. The main reason I’m making a print of them is that they’re inspirational and awesome in different ways.

What is your favourite printmaking product?

I think my Woodzilla A3 press is my favourite printmaking product I’ve used. Looks like a dream, saves time and achy muscles. Closely followed by my Pfeil 12/1 carving tool, which I use all the time and has become an extension of my hand…in an Edward Scissorhands kind of way.

What have you made that you are most proud of?

I guess I’m most proud of my Jurassic park print which I rolled out recently. It quickly turned into a much more complicated piece than I’d originally planned, with four layers in total and two separate lino pieces. It was a little stressful at times, but I was really chuffed with the final print in the end.

Where can we see your work? Where do you sell?

At the moment you can see my work on Instagram, and my prints are available to buy on Etsy. You can also message me directly to buy or for a commission.

What will we be seeing from you next?

I’m working on some ideas for a two-colour reduction print which I’m excited about and aiming to have some t-shirts, patches and cards in the mix.

Do you have any advice for other printmakers and creatives?

My advice would be to try not to compare your work to others, and devote your time to what you enjoy, what makes you the happiest. Don’t get bogged down by the number of Instagram followers you have.  Immerse yourself in the creative community and talk to other creatives as it’s a warm and welcoming place. Also, get a whippet.

To see more from Gareth follow him on Instagram