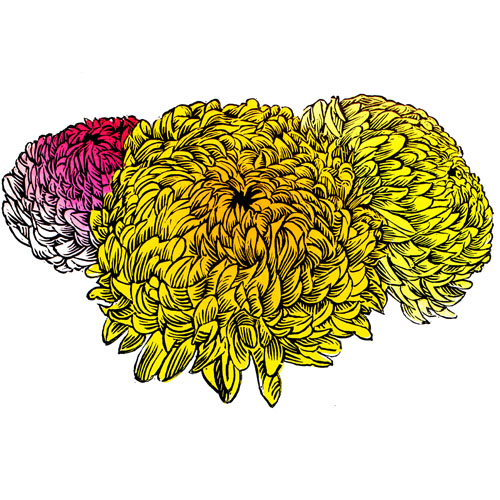
Meet the Maker: Masha Tiplady

Hallo, I’m Masha Tiplady, Edinburgh-based printmaker, working primarily in linocut. I grew up in Moscow and moved to Scotland nearly 20 years ago to complete my Master’s degree and now call it home. I like creating colourful linocuts, using both reduction and multiple-plate techniques. I absolutely love carving, it’s such a meditative process and I often end up carving more tiny details than initially planned. 

Describe your printmaking process.

My linocuts usually begin as a fairly vague image in my head – I hardly ever sketch at that stage and just let the image/colours develop in my imagination. Once the image in my head is clear enough I tend to draw straight on lino and start carving, often changing things as I go along. I don’t have a proper printing press and hand-burnish most of my linocuts with a wooden spoon and a glass barren. After I finish a new linocut, I usually put together a short video of the process and upload it on Instagram, Facebook and my website www.mashaandtheprints.com.

How and where did you learn to print?

I’m a self-taught printmaker. I discovered linocut by pure chance after attending a local workshop – I was suffering from a pretty bad postnatal anxiety at the time and just wanted to do something different to take my mind off things. I fell in love with linocut straight away and it quickly became my ‘happy place’/passion (and now – a full-time occupation). I started by reading a few books and watching many hours of YouTube videos and absorbing as much information as I could find on a subject. Then I just started carving and attempted my first reduction linocut (“A girl with a necklace”) only a few weeks later – it was a huge learning curve but I loved everything about it. I also joined an on-line linocut community – there is a large Facebook group called “Linocut Friends” which is a great source of practical advice and a friendly community of linocut-obsessed people. Last year I joined Edinburgh Printmakers and started learning intaglio techniques there – frankly, I’m fascinated by all printmaking techniques and will hopefully get a chance to try most of them.

Why printmaking?

To me, linocut is a perfect medium, which combines a thorough planning and methodical process with an element of a complete surprise. There is something so magical in watching the image to appear layer by layer and you are never sure what it’s gonna be like until you’ve finished the last layer. As many printmakers will agree – it’s such a thrill!

I also like the fact that linocut allows for pretty much endless possibilities of experimenting with colours.

Where do you work?

I’ve set up a small studio space at home and keep expanding (basically, taking over the living room inch by inch). One day I hope to have a separate studio but at the moment such set up works for us – it means I can juggle working with looking after our young daughter.

Describe a typical day in your studio.

At the moment, I have to plan my work around our daughter’s routine and available childcare – most days I will work in short bursts during the day and again for a good few hours in the evening.

What inspires you?

I find inspiration in things that interest me: my favourite books, music, history. Many of my linocuts have a retro feel to them: beginning of the 20th century and 50s-70s are my two favourite eras.

What is your favourite printmaking product?

I love my Pfeil gauges, I’ve built a nice collection that suits my mark-making needs. I’m also very fond of Flexcut tools – micro palm set in particular. As for ink, my favourite is Caligo Safe Washrange and traditional gold ink by Cranfield.

What have you made that you are most proud of?

It’s got to be my latest 10-colour reduction linocut “Murmuration’ – a commission which was great fun to make. It was my first go at a landscape and I’m very happy with the design I came up with and how it turned out.

Where can we see your work? Where do you sell?

You can see my work in Art & Craft Collective gallery in Edinburgh and Scottish Design Exchange in Buchanan galleries, Glasgow. You can also buy my linocuts from my website www.mashaandtheprints.com and on Etsy https://www.etsy.com/shop/mashaandtheprints/

What will we be seeing from you next?

I’m working on a new mid-century-themed reduction linocut and I have a couple of botanical designs on my mind (can’t get enough of flowers at the moment!). I’m also hoping to do more etchings this summer and try woodcut when I get a chance.

Do you have any advice for other printmakers and creatives?

Main advice would be just to go for it! In my experience, the best way to learn is to try something new, even if it scares you and feels overly-ambitious. You’ll make mistakes but that’s the best way to learn.

Links:

Website: www.mashaandtheprints.com

Etsy: https://www.etsy.com/shop/mashaandtheprints/

Facebook: https://www.facebook.com/mashatiplady/

Instagram: https://www.instagram.com/mashatiplady/ 

Repurposing Objects for your Printmaking Kit

There are many objects that can be gathered from around the house to add to your printmaking kit! Here are some of our favourite alternative uses for easily found objects that we use in the studio every day! 

Use clips on your hinged screen for an easy squeegee rest:

Securing two large clips to your frame creates a rest on which your squeegee can rest between pulls. This can keep messy ink within the frame and lowers the risk of getting ink all over the place! We have written a blog post on how to make a hinged screen printing board here

Use grip matting under your board:

This stops the board from sliding about and makes it easier to put pressure on your squeegee.

This grip matting is also really useful when cutting lino. It stops the lino from slipping about, making it both easier and safer to cut. 

Save empty tape rolls to prop your screen:

When your screen is attached to a hinged board you may need to raise your screen to flood your ink. Use an empty tape roll to hold your screen away from the paper.

Empty tape rolls are also an easy place to rest your squeegee without dirtying your table with ink:  

Use old store cards to scrape excess ink from screens:

These are a perfect flat surface to remove as much ink as possible but are not sharp so are unlikely to damage your mesh.

Use baking spatulas to mix ink:

It’s much easier to mix screen printing inks with a flexible spatula intended for cooking rather than a metal inking spatula that you may use to mix relief inks on an inking plate. A flexible spatula will ensure you don’t have any unmixed ink in your pot, giving you a smooth, even colour. 

Use old magazine pages to block off unwanted areas of your screen:

We often like to expose more than one image onto a screen but only want to print one at a time. Instead of taping over the whole unwanted area, we can use a magazine page with just one piece of tape to secure it to the screen. This produces less plastic waste and also protects the screen from the tape which can occasionally damage the emulsion or leave a sticky residue behind. The shiny surface of the magazine page can be wiped clean if necessary. Rob Luckins was using this technique last weekend when his workshop group were printing four layers with just one screen. 

Wash out squeezy bottles to hold thickened dyes:

Screen printing with thickened dyes is great fun, especially when breakdown printing. Because these dyes are runnier than screen printing inks it can be easier to apply them to the mesh with an old washing up liquid bottle than with a pot and spoon! Bottles with wider openings could be used for thicker inks. 

Meet the Maker: Wayne Longhurst

I am a Worthing based linocut printmaker. Born in Brighton, moving to Worthing in 2012, I’ve always been surrounded by the Downs and the sea, for which I am very lucky, if a little complacent of at times!

I love to get out and about to find inspiration for my prints, which lately has been trees! I’ve been taking a few walks up on the downs with my camera and or sketchbook. This time of year, the leafless trees are amazing structures and provide great inspiration for new carvings.

Recently I had a huge opportunity to spend much more time concentrating on printmaking, so I shall be embracing this with gusto! Fingers crossed…!

Describe your printmaking process.

One phrase that I keep on hearing when people see my work is that I ‘must have the patience of a saint!’. I don’t know about that (you should be in my studio when things don’t go to plan…!!!), but I do like to print intricate designs and I love to see the end result.

I always like to challenge myself with each new print, so I like to try and think of ways of getting more detail into the print, either by using different colours (I do love a good blend!), or adding more layers (which may be via multiple plates of lino, or using the reduction technique).

I do like to get out and about each day, walking around town, on the seafront or up on the downs, with either my camera or sketch looking for inspiration for the next print.

How and where did you learn to print? Why Printmaking?

About 5 or 6 years ago I was on holiday in South Wales, and I ended up walking in and out people’s houses… They had opened them for the local artist open house event. I met and got chatting to local artist Lee Wright, who, I discovered, made linocut prints. At the time I had never heard of the medium (I guess it skipped my generation at school…?).

He gave me such inspiration to give it a go myself. So, I bought myself a little starter kit from Amazon, and began to teach myself. Over the years I have picked up tips from other artists through social media and by attending local events or art fairs (not least the one held by Handprinted showcasing the work of Linocut boy a couple of years back).

It has been great learning the different techniques and processes, if a little scary at times, wondering or second-guessing how things will turn out. I’ll admit, things don’t always work, but that is just a part of the process. Brush my self down, and get on with the next challenge!

Where do you work?

I am so lucky to have the space at home to have my own little studio. It’s a modest space, but certainly does the trick!

It certainly has evolved over the years, from the starter kit, to now having my own etching press and working space. It’s wonderful, and never underappreciated.

Describe a typical day in your studio.

I have a mantra….you must turn on the laptop, and you must leave the house.

So, first thing in the morning (around 8am) I will have had my breakfast, and turned on the laptop. This makes me check my emails and keep up to date with anything that I need to do.

Once that’s done I shall get on with the main interest of the day, which will generally be either; working on my latest print, updating my social media, my online shop, my website, or getting ready for an upcoming event (sometimes a little of all of the above).

There shall certainly be a lot of tea involved in the day (my fuel!), and of course the compulsory walk, to get some fresh air and, if I’m lucky, some inspiration!

How long have you been printmaking?

Around 7 years now. The first 3 or 4 of those I was just dabbling, and teaching myself different techniques, but over the last couple of years I began to take it more seriously, trying to get my work out there ‘into the wild’.

What inspires you?

I do like to make sure that I get out and about daily (hopefully daily, but I don’t always manage to…bad Wayne!).

Just going out for a walk, either down to the seafront, or up on the Downs will get the creative juices flowing. Either by what I see on my travels, or just having some down time to let my mind think of new ideas.

What is your favourite printmaking product?

My Pfiel tools (they’re AWESOME!)

Oh, and Caligo safe wash inks are amazing!

What have you made that you are most proud of?

Is it corny if I were to say ‘my latest print’…? It is corny, I know, but I am always proud of the latest print that comes together, just because of the effort that goes into it and to finally see it in its final form is great!

But, if I had to choose one of my prints, I would probably go for my ‘Worthing Best’ print. This was a commission from The Brooksteed Alehouse (a local micropub on South Farm in Worthing. If you haven’t been there, go, it’s great! This isn’t an ad by the way!).

The owners wanted a print that represented Worthing but also suitable for their pub. I came up with the idea of a pump clip for a fictional beer ‘Worthing Best’. They loved the idea…I just had to print it…

It ended up being my largest print (still is) at 60 x 42cm, and a 6 layer, single plate, reduction. I am glad to say that the owners loved it, and it is currently hanging up in their pub for all to see!

Where can we see your work? Where do you sell?

I currently have my work in an Artist Collective gallery in Tunbridge Wells (which is coming to an end on the 23rd March…boooo!). Other than that, I sell my prints via my etsy site.

What will we be seeing from you next?

Apart from new prints, I shall be at the Paper Daisy Easter Boutique at the Shoreham Centre on the 13th April and then the Fairy Tale Fair at the Charmandean Centre in Worthing, on the 14th of April. Come say hi!

I shall also be taking part in the INK event at Colonnade House in Worthing, which is an exhibition showcasing local printmaking artists. Very lucky to be a part of this! That runs from the 2nd to the 13th April.

For the first time this year, I am opening my house, taking part in the Worthing Artist Open house event (I have taken part before, but this is the first time at my own house). Over three weekends in summer; 15/16th June, 22nd/23rd June and 29th/30th June.

Do you have any advice for other printmakers and creatives?

I am currently attending an evening drawing class at Northbrook College. The tutor (Steve Carroll) has his own mantra which is ‘just leave it!’. What he means is that if you make a mistake, then don’t worry about it, just move on, live with it, and adapt to it. Make it work into your piece. Don’t be so precious over every tiny little detail. That has really stayed with me, as it not only applies to drawing, but to printmaking too. If you happen to carve something away but you weren’t meant to, just leave it! You cant undo it, so go with it. Sometimes it’s really hard, but you have to.

So, whether it be drawing, or carving, if you do happen to make a tiny mistake, it’s okay, just leave it. It’ll be fine. The world won’t end! It has taken a while for me to learn that, and I’m not 100% certain that I have completely yet, but I’m getting there!

My website; https://longhurstlino.com/

etsy; https://www.etsy.com/uk/shop/LonghurstLino

Instagram; https://www.instagram.com/longhurstlino/

Facebook; https://www.facebook.com/LonghurstLino/

Making a Hinged Board for Screen Printing onto Paper

Using a hinged board to screen print onto paper is a game changer. It allows you to register layered prints and print in identical editions. Here’s how
we made our latest batch of A2 hinged boards in the studio:

You will need a board at least the same width and slightly longer than your screen. It needs to be a smooth, rigid, wipeable surface. Laminated (melamine
faced) MDF works perfectly. MDF that has been varnished can work too. This board is around 20mm in depth. 

This board is for an A2 screen.

You may want to use your board for different sized screens so make sure your hinge clamps are close enough to accommodate all the sizes you would
like to use. For small screens such as A4 and A3 you may want to recess your hinge clamps into the board a little to reduce the snap on the screen.
The hinge clamps hold the screen a little above the board – this gives a great snap off for perfect prints but can make it difficult to print close
to the frame of a small screen. 

Use a pencil to mark through the holes on the hinge clamps.

Drill pilot holes where you have marked the board.

Screw the hinge clamps down to the board. The hinge clamps come with screws but you may want to use alternative screws depending on the depth of the board. 

Secure the screen into the hinge clamps by turning the wingnuts. You should now be able to lift your screen up and down.

For easy registration, tape a large piece of acetate to the side of the board. You can then print your design onto the acetate, slide your paper underneath
and mark the correct position. The acetate can then be folded like a book page out of the way. Small pieces of mount board are useful for placing the
paper in the correct place each time.