At Home Screen Exposure with Bridget

Like many others over the past year, I have been working on a lot of my printmaking projects at home. However, being limited on space doesn’t stop me from trying new things. In this blog post, I will be sharing how I exposed a screen at home in my tiny bedroom! You can adapt this method to expose your own screens at home too.

For this project, I used an A4 43T screen. It is important to de-grease your screen before you start. I used washing up liquid and a brush to do this. Alternatively, you could use Speedball Speed Clean or Screen Cleaner.

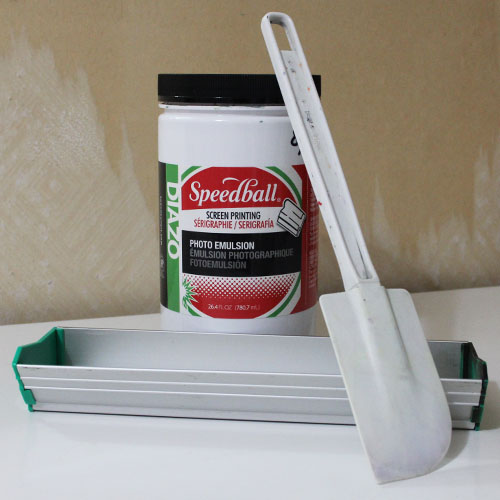
To coat my screen, I used a 225mm Coating Trough and Speedball Diazo Photo Emulsion. A coating trough helps to ensure the emulsion is applied evenly. Uneven emulsion can cause exposure problems. To mix the Photo Emulsion I filled the sensitiser half full with cold water and mixed well, using the handle of a spoon to ensure that I reached all the sensitiser from the corners. Once I had dissolved all the sensitiser, I poured the contents into the Photo Emulsion and stirred well. It’s best to do this a little while before you use the emulsion, to help any air bubbles to disappear.

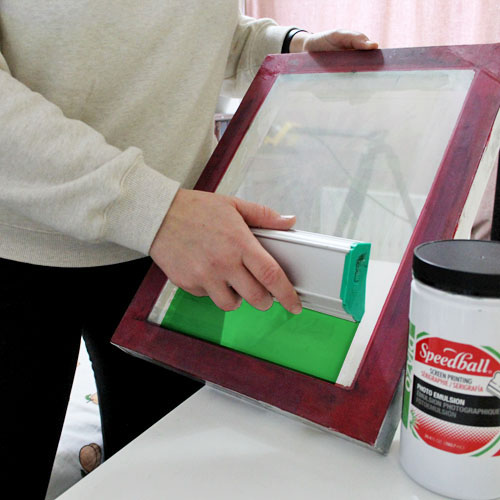
I then poured some photo emulsion into the scoop coater and allowed it to settle. Pressing the edge of the scoop coater firmly against the upright screen, I tilted it until the flat edge of the scoop coater was touching the screen. I then dragged the scoop coater smoothly up the screen to ensure an even coating. When I reached the top, I tilted the scoop coater back, so the emulsion fell back into the scoop coater. I used the flat edge of the scoop coater to remove any excess. The leftover emulsion can be put back in the pot. Store the emulsion in the fridge for up to 6 months.

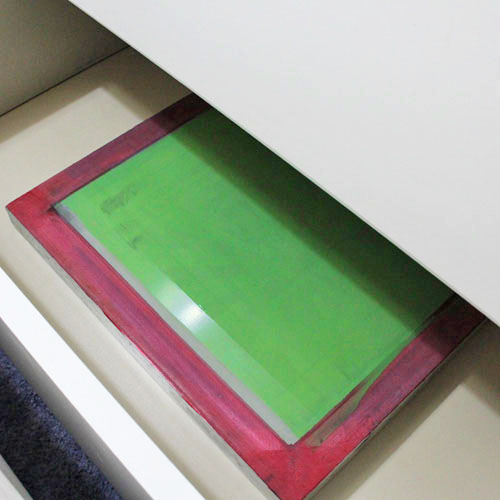
Once my screen was coated, I placed it in an empty drawer to dry. The screen needs to dry in complete darkness, so a drawer or sealed box works well. I laid the screen horizontally, resting the frame on some coins to allow the air to circulate. I used a small heater to keep the room warm to decrease drying time.

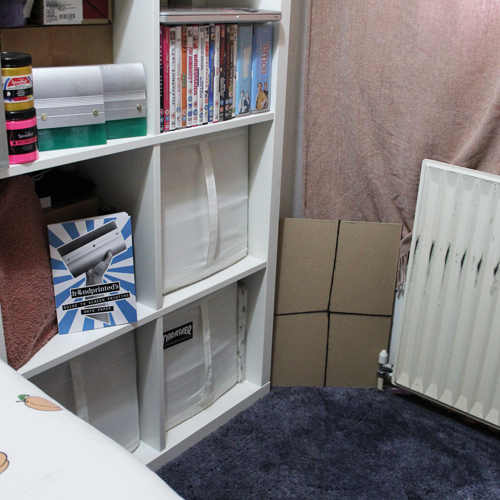
Once the emulsion was dry, I was ready to expose it. Before removing the screen from the drying drawer, I set up my ‘exposure unit’.

I used a tripod to hold my lamp directly over the table. The tripods adjustable legs made it easier to alter the height. This meant I was able to easily get my desired distance between the lamp and where my screen would sit.

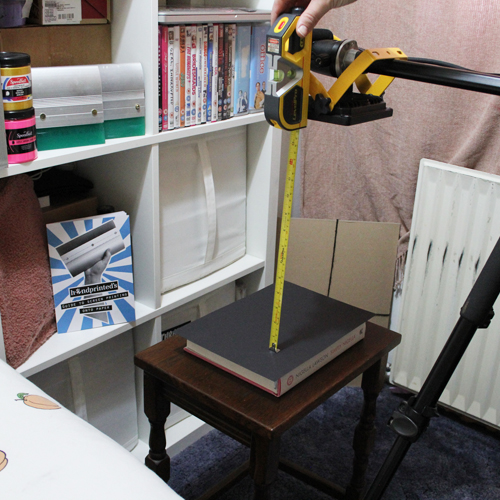
The distance between the lamp and the surface of the glass, once fully assembled, was 14 inches. The distance will vary depending on the lamp that you use. Here I am using a 20W (1500 Lumens) work lamp.

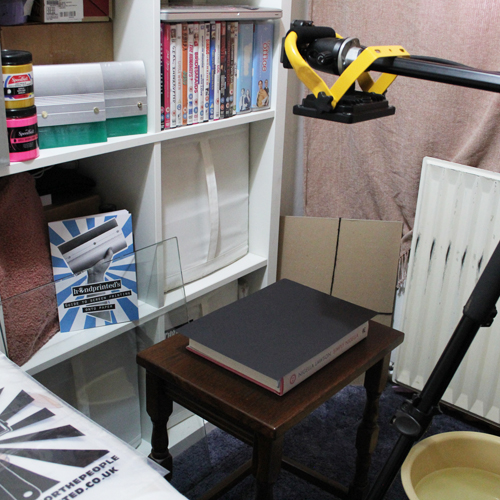
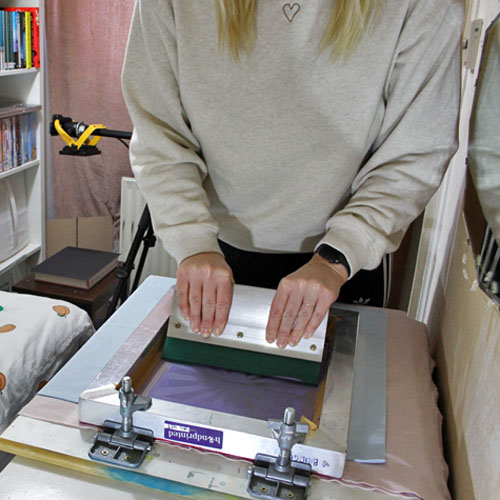
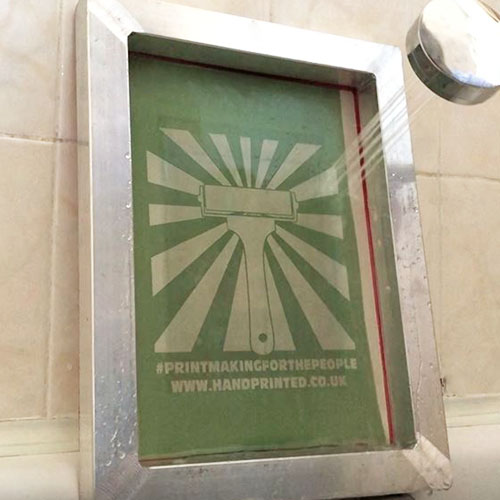
I placed a cookbook in the centre of a small table and then covered it with a sheet of black paper. The cookbook was slightly deeper than the frame allowing the black paper to sit flat against the inside mesh. The frame was slightly raised away from the tabletop. I had my sheet of glass to the side and my film positive ready to go. The key is to work quickly once you have taken your screen out of the darkness. Make sure you have a bucket of cold water and a soft sponge to hand as well.

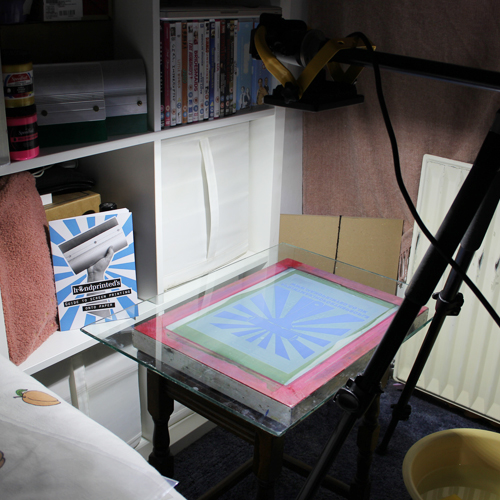
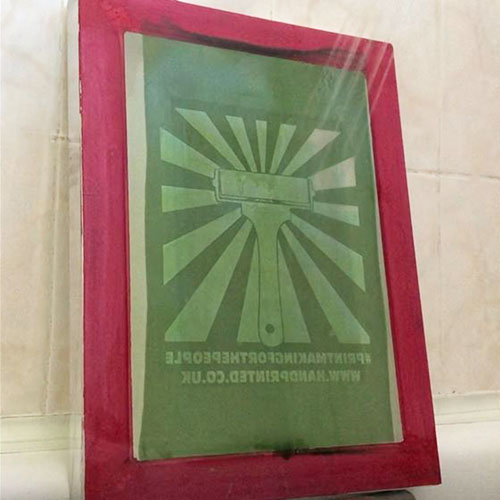
When I was ready, I removed my screen from the drawer and placed it down onto the black paper. I positioned my positive (reversed) on top of the screen and then placed my sheet of glass.

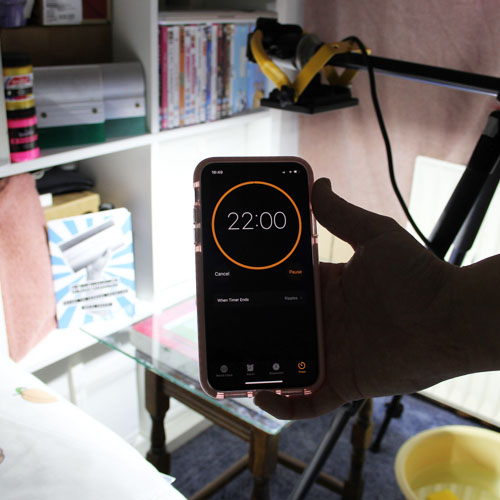
I turned the lamp on and exposed it for 22 minutes. The timings may vary depending on the lamp that you are using. I found that 22 minutes was the perfect time with my 20W lamp at a 14-inch distance.

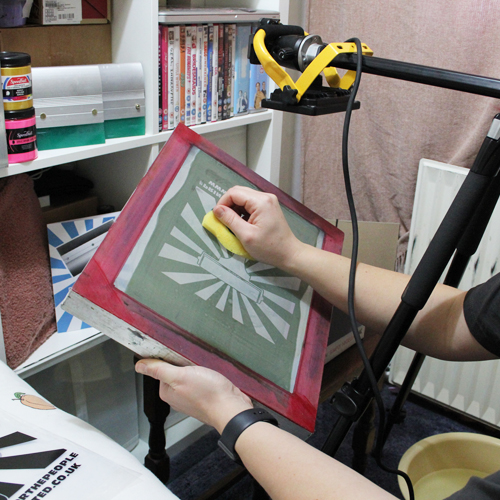
When the time was up, I turned off the lamp and removed the sheet of glass and film positive. As I was working away from running water, I had my bucket of water and a soft sponge to hand so that I was able to wet my screen when the exposure time was finished. Wetting the screen pauses the exposure process giving you time to get to the shower or a garden hose.

I then used the shower hose to rinse the screen properly, revealing my design. By lifting the screen to the light, I could see that all the unexposed emulsion had been removed. I then left the screen to air dry.

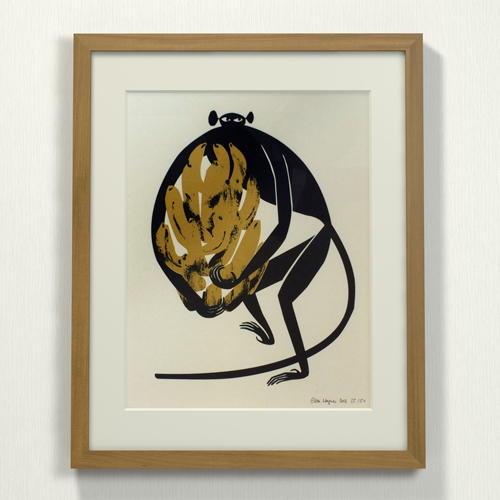
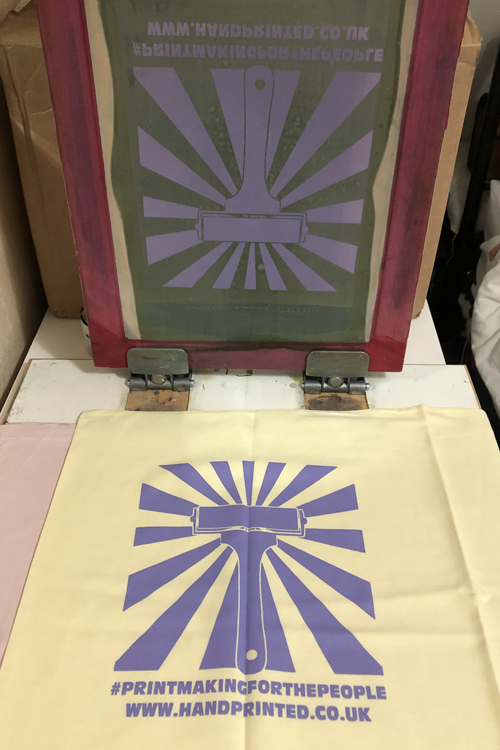
Once my screen was completely dry, I tested it, and this was the result!

To expose your own screen at home you will need:

  • Aluminium Screen
  • Washing up liquid, Speed Clean or Screen Cleaner
  • Coating Trough
  • Photo Emulsion and Sensitiser
  • Dark space in which screen can dry (drawer, cupboard or box)
  • Light (we used a 20W (1500 Lumens) work lamp)
  • Tripod (or some way of suspending the light above the screen)
  • Raised surface to put under the screen (such as a cookbook)
  • Sheet of black paper
  • Piece of glass or perspex
  • Screen film with artwork drawn or printed onto it, or paper stencil to expose
  • Bucket of cold water and a sponge
  • Garden or shower hose

Using a Mylar Mask to Reduce Chatter in a Linocut

One of the problems to overcome when printing a linocut is ink being picked up by the carved away areas of the block. These lines print onto the paper causing ‘chatter’ or ‘noise’. Sometimes chatter on a print can add character or interest to a piece but other times it can just get in the way. This method uses Ternes Burton Pins and Tabs and a piece of Mylar to mask the areas causing chatter. Read on for instructions or scroll to the bottom of the page for a video.

Set up a registration board with Ternes Burton Pins at the top and an area for your block underneath. Use pieces of mount board to create a space into which the block can slot.

Prep your printmaking paper with the Ternes Burton Tabs.

Place your block into its space on the board. Lay a sheet of Mylar over the lino. Clip a pair of Ternes Burton Tabs onto the fixed Pins and tape them to the Mylar. This way, the Mylar will go down in the same place over the lino each time.

Take notice of any areas on the block that are picking up ink to create chatter. Use a permanent pen to draw around the main uncarved design onto the Mylar. Use the permanent pen sparingly as we don’t want it to be left behind and transferred to the print. 

Unpin the Mylar from the pins, place on a cutting board and use a scalpel to cut away the areas where you want the print to come through. Make sure the Mylar stays together and attached to the tabs. Trim away any pen lines. 

You can now ink up the lino, place it on the board, lay the Mylar over the top using the tabs and then your print paper. The Mylar mask will stop unwanted ink from reaching the paper.

For this project you will need:

– a board (the back of a picture frame works well)
– masking tape
– parcel tape
– Ternes Burton Pins and Tabs
– Mylar
– Scalpel
– Cutting Mat
– Permanent Pen
– Carved lino block

Using Mirror Card to make an Expressive Drypoint

Mirror Card is a great option for intaglio plate making. It’s shiny and wipeable, making it brilliant for expressive inking and sketchy designs. Peel away the surface to create dark, inky areas too. Scroll to the bottom to watch a video of the whole process or read on for instructions.

Mirror card is a thin card with a shiny surface on one side. It works similarly to tetra pak printing but is available in flat A4 sheets, unlike tetra paks which are irregularly shaped with creases and folds.

This is an intaglio process which means that lines are drawn into the plate, inked up, wiped and then printed onto dampened paper. Ideally, an etching press is used to print (but we have a method for printing without a press here).

Cut a piece of mirror card to your chosen size. Use an etching needle to draw into the plate. Press quite firmly so that lines are scored into the plate.

Use hatching and cross hatching to create areas of tone.

To create solid areas that will hold on to lots of ink, use a scalpel to score the edges of a section (being careful to not cut all the way through the card) and then use the point of the scalpel to lift the shiny surface of the card and peel it away. This reveals the fluffy surface of the card inside: a texture that ink will cling to.

Before beginning to ink up the plate, soak your paper in a tray of water. We are using 300gsm Snowdon paper. A thick paper like this soaks well and prints intaglio work beautifully. 

We are using Akua Intaglio Ink, a soy based ink that is easy to clean up with soap and water. 

Working on an inking plate, use a wad of rag to to dab ink all over the surface of the plate.

Next, use a piece of scrim to wipe the plate, using a twisting motion to work the ink into the lines whilst removing excess from the surface. At this point, you should see the drawing emerge.

Use a clean rag to remove further ink from the plate. Wrap it around the end of your finger to shine up the plate more precisely. Alternatively, use a cotton bud. Shine up any areas that you would like to appear white in the final print. You can add more ink with scrim in areas that you would like more texture. 

Lay the plate face up on the bed of an etching press (or see here for a press-less method). Blot the soaked paper. It should feel damp but not be dripping wet. Lay the paper on the plate and cover with a blanket. Roll it through the press, set with a tight pressure. 

You can then ink up and plate again for another print. When finished, clean any excess ink from the plate with a cloth.

For this project you will need:

Meet the Maker: Print now-Riot later

Hi, we’re Ellen Wagner and Axel Roessler, we live in Frankfurt/Germany and share a passion for screen printing. Our screen printing studio “Print now – Riot later” was founded in 2014 in Tucson/Arizona, where we have lived and worked from 2014 – 2019. Having left the dusty desert behind us, we have been pursuing our passion for screen printing in the freshly furnished workshop rooms in Maintal since summer 2019. Here we dedicate ourselves to textile screen printing and explore the creative possibilities of fabric pattern printing.

Describe your printmaking process.

Before the actual printing, we concentrate on the idea, compile images for a mood board and start sketching, either with pen or ink. In some but not all cases we use the usual Adobe software tools to modify the first drafts, Axel sometimes uses Cinema 4D to generate templates. As we’re screen printers there’s always the extended chain of preparation: cleaning and coating the screen, transferring the artwork on transparency and exposing the screen, retouching, and exposing another time.

Of course, the printing process is where the fun begins. When printing yardage, we always do it together because our screens are really huge – so we stand vis-à-vis and hand over the squeegee in the middle of the screen while printing. It took a while to get to know all the tricks with the amount of pressure, the consistency of the ink, the number of strokes and so on. We have learned that especially when it comes to textile printing there isn’t the right way to print that will always give you top results. It’s all trial and error, learning from your past mistakes and not giving in too fast. Printing on textiles – and we’re not talking of T-shirts here – is quite a challenge.

How and where did you learn to print?

We started round about 2010. Ellen took a screen printing class while at the University of Art and Design in Offenbach (close to Frankfurt) and immediately knew that this might be THE thing for her, and it didn’t take too long to convince Axel that this medium would be a nice tool of choice for expressing creative ideas – and she was right.

Why printmaking?

In printing, we both can bring together our aesthetic preferences and graphic ideas although we have totally different backgrounds: Ellen is a graduate illustrator and graphic designer; Axel has been working in the field of 3D and motion design for many years. We’re not big fans of pushing pixels all day, it’s more the idea of keeping on with a traditional handcraft that seems fulfilling to us. Of course, we know that working with graphic software is a lot of fun, but the authentic work with ink, the work with “real” tools (without the choice to go back a few steps in a couple of clicks) and the charming imperfections seem to be more rewarding for us in the end.

Where do you work?

We’re happy to have our own printing studio in the industrial area of Maintal, a small village close to Frankfurt. We go by bike every day as we don’t own a car, and it takes us maybe 40 minutes to get there – it’s our daily exercise (besides printing). In the same building, our landlord runs his own screen printing studio, and we’ve learned a lot from him – he’s extremely helpful, funny, a problem solver and has been in the printing business a long time. He teaches screen printing at the University of Art and Design, so we’re more than happy to have him around.

Describe a typical day in your studio.

There’s no typical day, not at all, but every day starts with making coffee first. The next step depends on what we’re on: probably adding the next colours to a poster that we started a day ago, maybe signing and storing some finished prints, shipping some orders, and coating the screens for the next day. At the end of the day, we always clean up so that it feels good to open the doors again the next day. What we do not do in the studio is work on designs – we both like to do this in our homes as it’s much easier to concentrate and focus on the ideas in our own four walls.

What inspires you?

At the moment the design concepts of the whole mid-century modern era have the strongest impact on our own output: geometric shapes in play, folk art transcribed into new forms. It still seems like an era full of new and fresh ideas. We feel that the 70s get more and more influential for us too, but one may not recognize this in our work (yet).

What is your favourite printmaking product?

We could talk a lot about our favourite ink systems here but decided to go in a more exotic direction: for us, it’s maybe the sidekick that keeps the screens in the elevated position when we print on paper. After losing too much hair and/or getting ink on the head while trying to hold the screen in the lifted position, the purchase of this made things so much easier.

What have you made that you are most proud of?

For us, it’s our three wall hangings that we really like most. Ellen designed the squirrel gang, Axel went into the abstract direction with the ‘Sanskrit’ motif and then there’s our favourite collaboration yet: The ‘Knobbly tree’, designed by Adam Higton. All three were fun to print and we love them!

Where can we see your work? Where do you sell?

Well, these are special times, and because of the pandemic, the possibilities to show our products in a direct way to people like in a market were, well, more than limited over the last few months. We have our own website with an online store and we’re selling our goodies at Selekkt/, a well-curated online store for all things handmade. Oh, and there’s Instagram – at the beginning, we were kind of suspicious about social media, but now we love it and have made a lot of connections that we don’t want to miss.

What will we be seeing from you next?

Good question. We can’t name a specific product, but in general, we feel that we want to focus more on the art-related output – that may result in a poster series, a wall hanging or an object we haven’t done yet. We always feel that our best work is still ahead of us!

Do you have any advice for other printmakers and creatives?

Don’t be afraid of mistakes, don’t compare yourself to others all the time, listen to your heart and stay focused. It’s okay if an idea takes days or weeks to unfold as it’s always the result that counts.

To see more from Ellen and Axel check out their Instagram.

Meet the Maker: Rachael Hibb

I’m Rachael, owner and founder of RLH Prints. I am a linocut artist and illustrator specialising in botanically inspired artwork. My process involves hand carving and printing my lino blocks on a traditional style etching press.

How and where did you learn to print?

I studied fine art at university however it wasn’t until after I left that I began to explore printmaking. I got a job as an art technician in a private school and they had a beautiful old press that I was able to experiment with.

Why printmaking?

Because even after years of doing it you never know what you will end up with when you pull that first test print. I love the range of textures you can get from the medium of lino print, and the carving side is purely meditative for me.

Where do you work?

Currently, my front room in my 1 bed flat has doubled as my art studio/ packing room/ office. I am also lucky enough to be able to use the amazing print facilities at my work where I work as a printmaking facilitator.

Describe a typical day in your studio.

If I’m working from home I generally make myself a coffee and do a bit of boring admin or faff about on Instagram. Then I might package some orders and do a post office run before lunch. Later in the day is when I get to print/carve. I have to get the other stuff out the way before I can actually relax and find some inspiration after having a short walk in the park.

How long have you been printmaking?

I would say I have been printmaking professionally for officially 3 years. Before that I dabbled on and off with other mediums but when I started lino cutting there was no going back.

What inspires you?

Mostly the natural world, science and specimens. I absolutely adore the Natural History Museum and Kew Gardens and regularly visit to get inspiration for a new print. I also think macabre Victorian curiosity illustrations have really influenced my work as of late.

What is your favourite printmaking product?

I have so many but if I had to narrow it down it would have to be Cranfield’s metallic inks range. They are just the most beautiful consistency and a joy to print with. It really does feel like your pulling a print made of pure liquid gold magic.

What have you made that you are most proud of?

Currently, it would have to be my new two-layer block print of a South African Protea flower. I don’t often use colour in my work, and mostly revert to black ink. I wanted to experiment with creating some earthy organics tones and introduce a pop of colour in the background while keeping the bold graphic detail in the foreground.

Where can we see your work? Where do you sell?

I mostly sell online through my website. I have a couple of instore shops that will be stocking my prints but they are to be announced! Any updates are always released on my Instagram page first.

What will we be seeing from you next?

I am hoping to try out some repeat pattern designs for wallpaper or fabric because I also have such a passion for interior design and décor.

Do you have any advice for other printmakers and creatives?

My advice would be to immerse yourself in what inspires you. Make art for you and no one else. Also if there are beginners looking to get into linocut you should know that you don’t need expensive professional equipment or tools to create a brilliant print! Just keep practising and utilise what you have!

To see more from Rachael check out her Instagram.