Blind Embossing with Lino

Blind embossing is a beautiful way in which to add light and shadow to your prints. Embossing adds subtle texture and interest. Emboss prints ‘blind’ (without ink) or combine with inked lino for a complex final print.

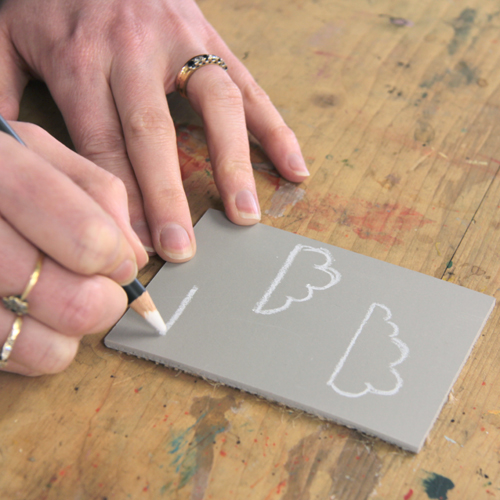
Prepare the design. These white pencils are brilliant for drawing designs onto traditional lino. The marks show up beautifully and there’s no danger of transference onto white paper.

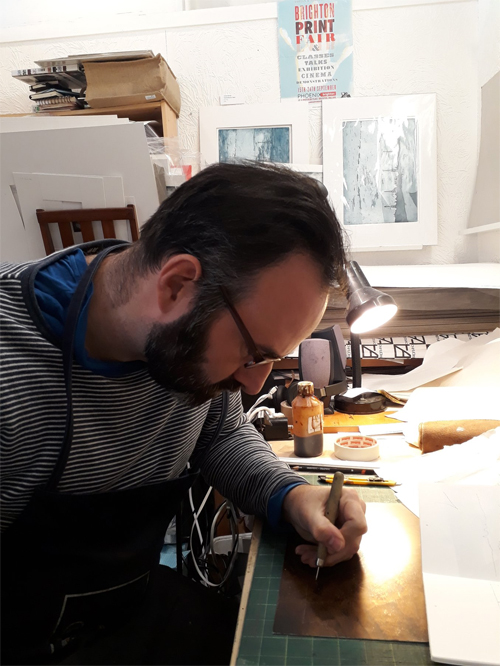
Carve the design. Remember that anything we carve away will be raised in the final print. We want these clouds to puff out of the paper so we are carving them into the lino. A small U tool is perfect for carving the edges of the clouds.

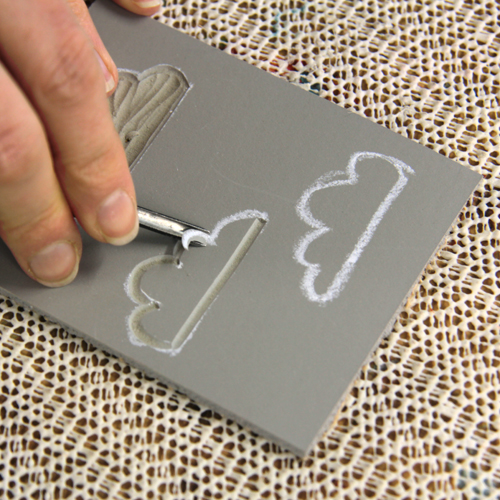
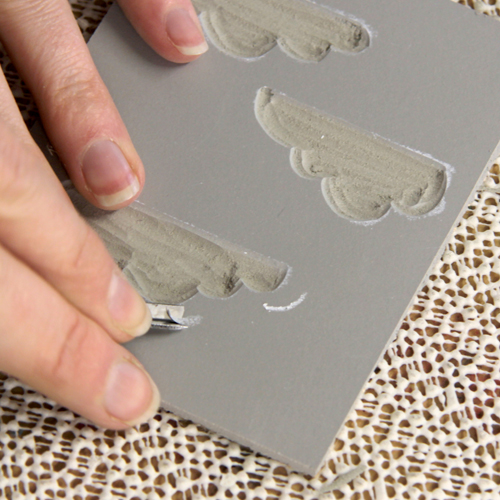
A large U tool works well to clear the larger areas. The texture of these carved areas is likely to show up in the final print. Use a large U or chisel to flatten and smooth out carved areas with too much texture.

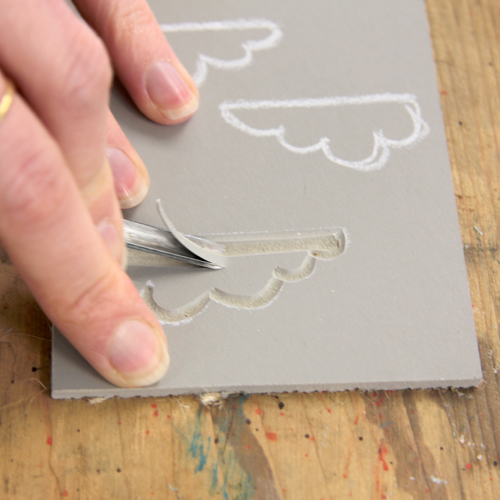
We are using a V tool to carve a few extra lines around the clouds to add detail.

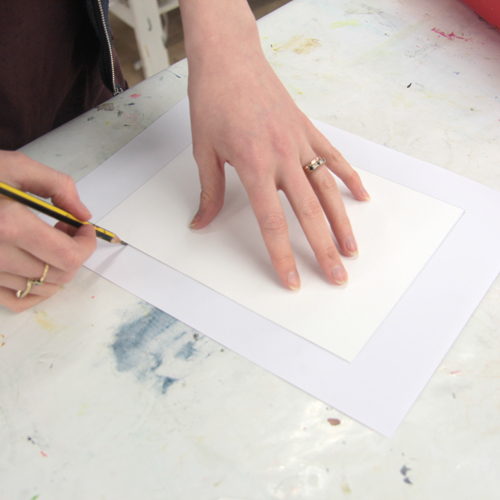
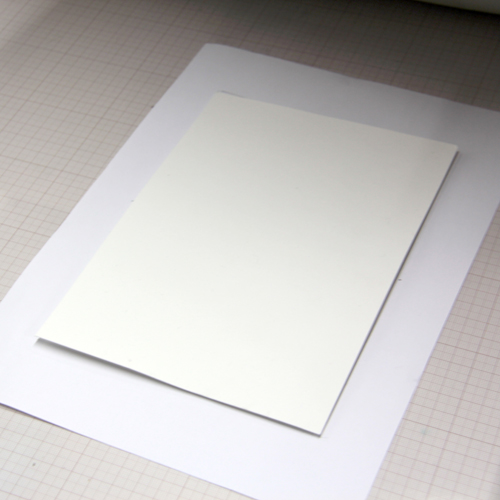
Before printing, make a registration sheet. Lay a sheet of your printing paper onto a plain sheet of copy paper. Draw around it.

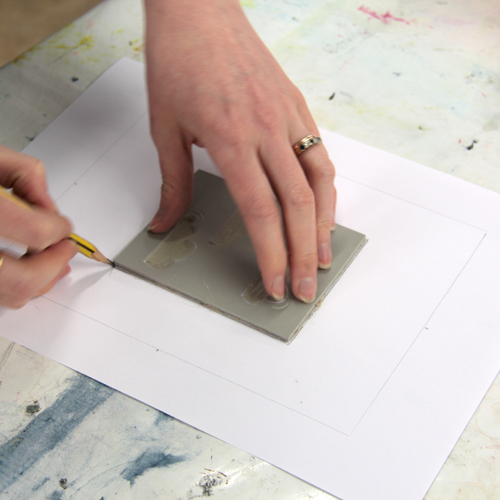
Place the block in the centre of the registration sheet. Draw around it. This will help us to ensure the block and paper are straight and square when put on the press bed.

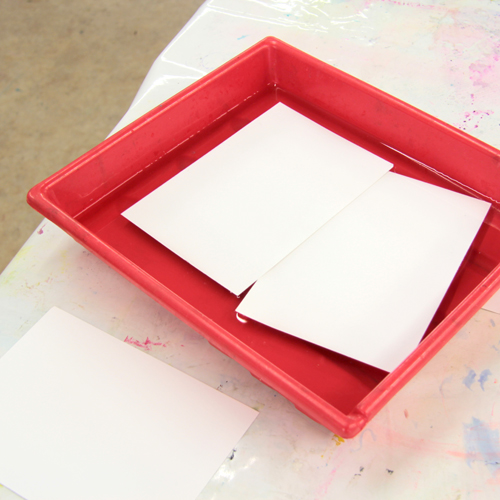
Soak the printer paper in a tray of water. We are using Snowdon 300gsm cartridge paper. A thick paper is best for soaking as it is more sturdy, less likely to curl and should receive lovely plate marks – perfect for embossing. Leave the paper to soak for at least 3 minutes. Experiment with different soaking times for varied embossing results.

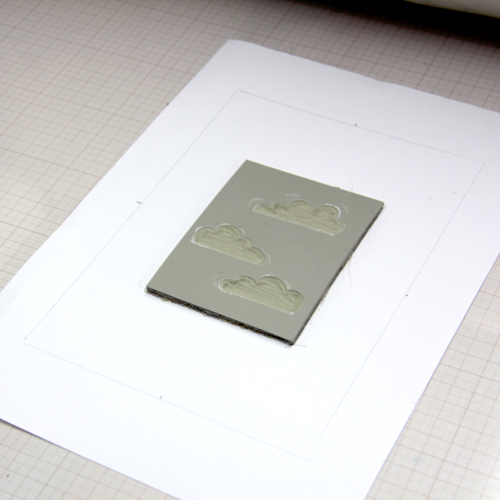
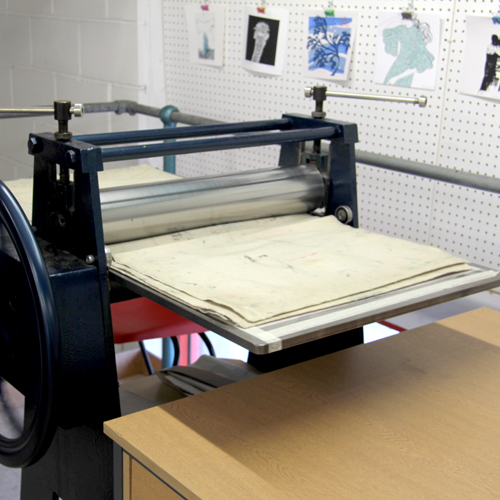
Place the registration sheet on the etching press bed. Lay the lino block in the centre, face up.

Remove a sheet of paper from the water bath and blot it. it should feel damp but not be dripping wet. Lay it on top of the block using the registration sheet to guide its position.

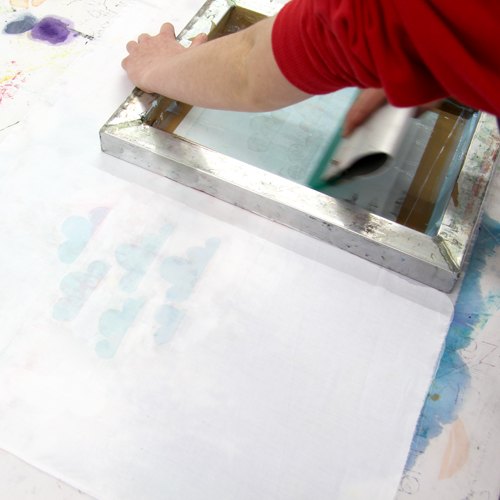
Cover with blankets and roll through the press. The pressure should be a little tighter than normally used with lino.

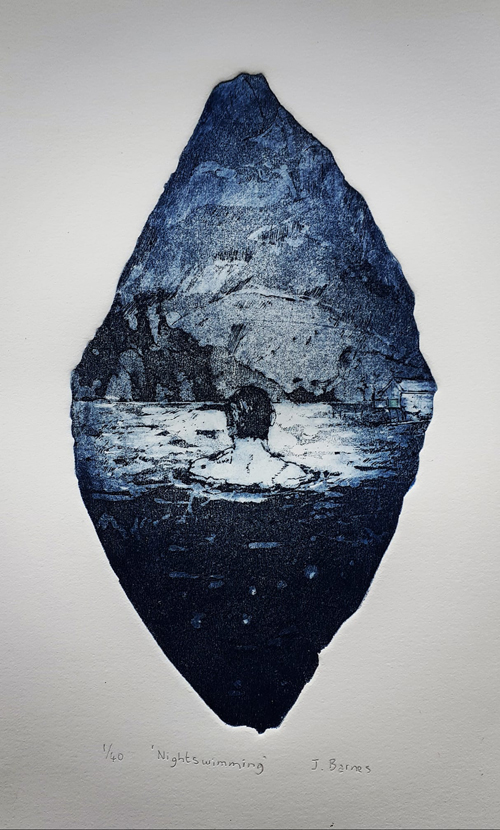
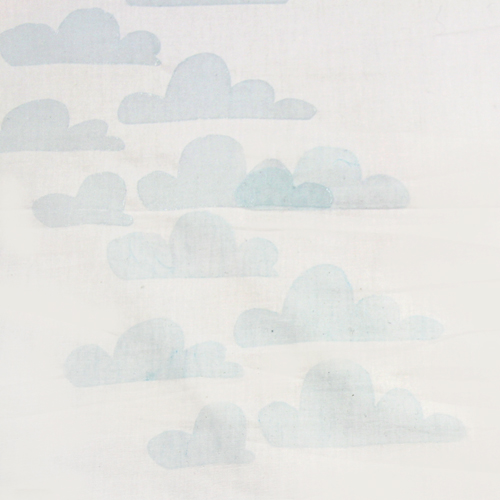
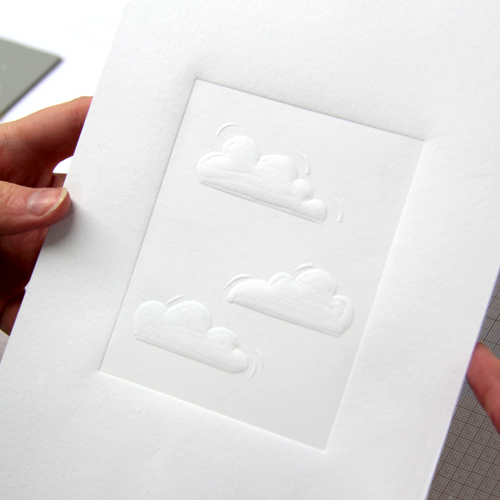
Peel the block from the paper to reveal the print! The carved areas should be raised.

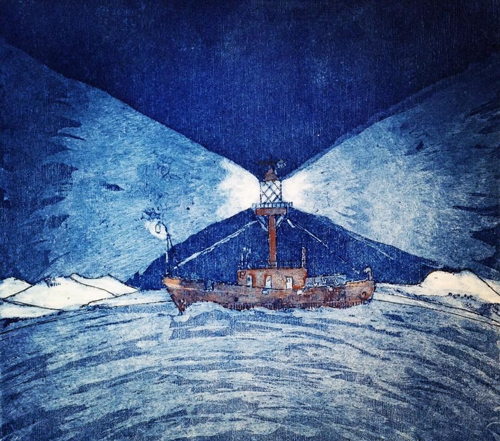
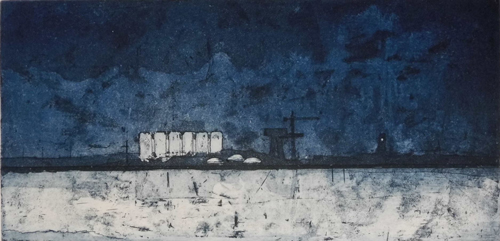
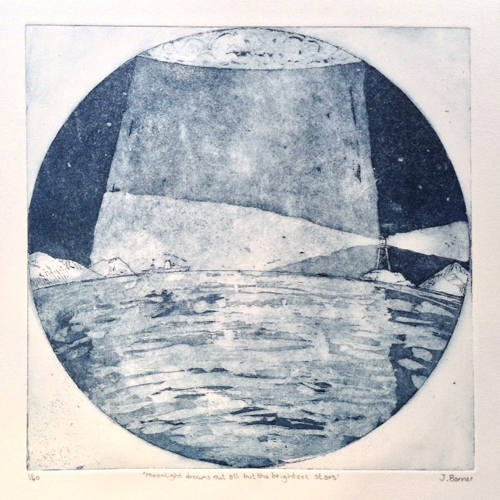
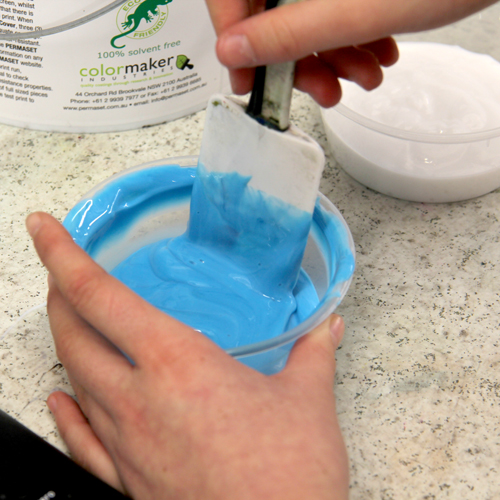
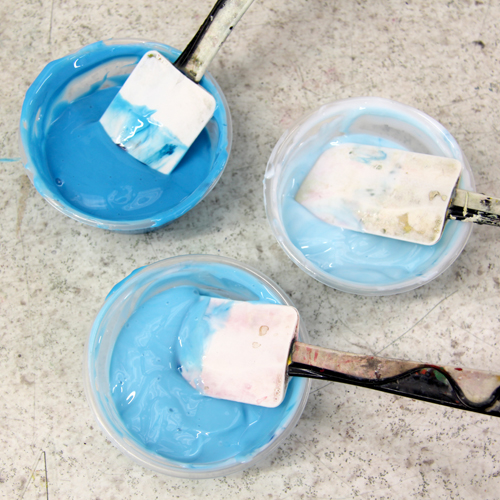
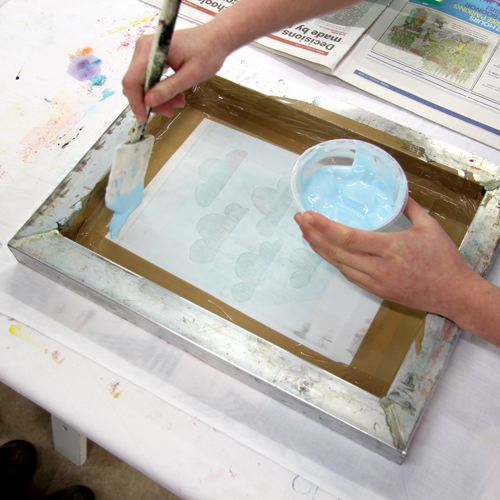
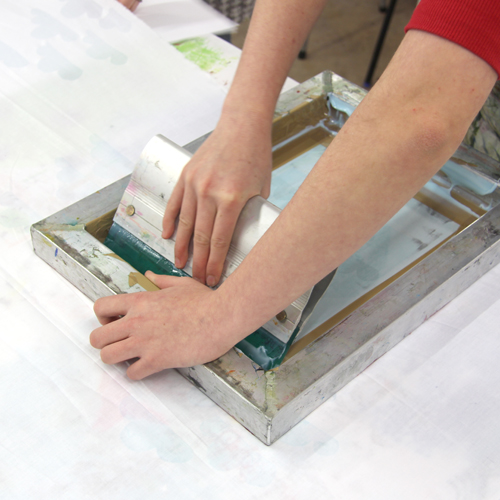
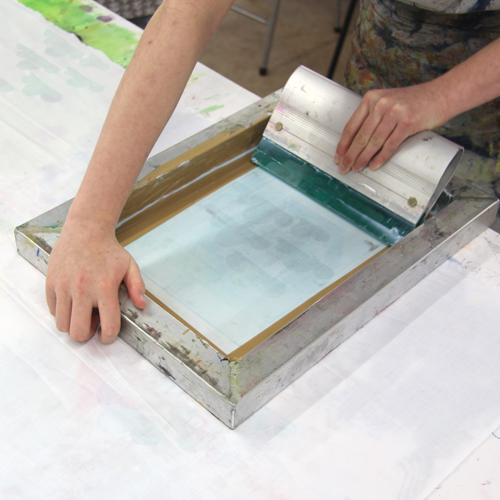
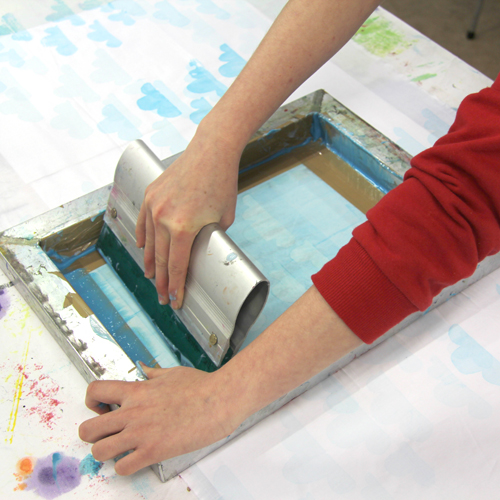
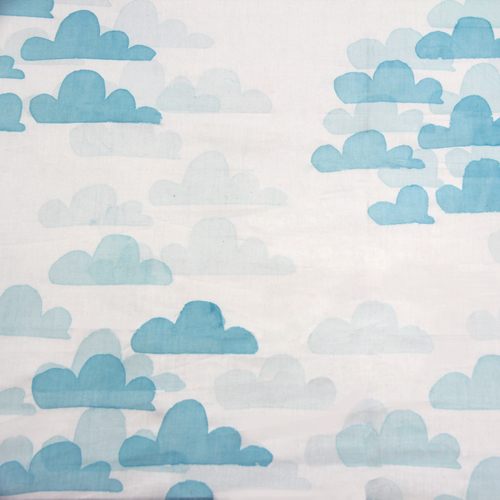
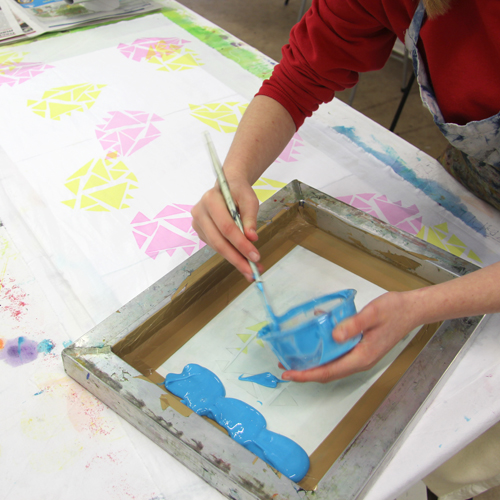
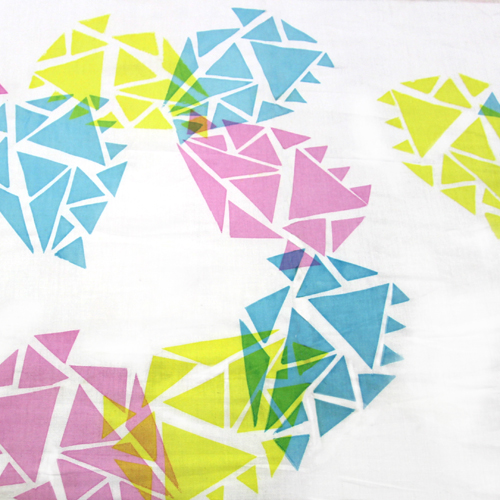
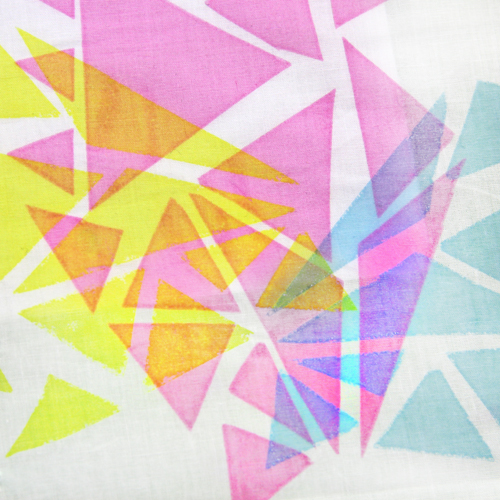
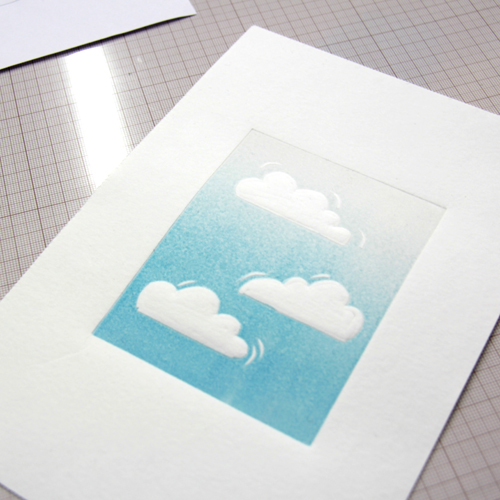
Experiment with combining inked and uninked blocks. The print below was made using the same method but the block was inked with a rainbow roll of Caligo Process Blue mixed with Extender through to pure Extender to create a faded sky.

To emboss your own prints you will need:

Meet the Maker: Jamie Barnes

We are very lucky to have Jamie Barnes in the studio teaching Aquatint Etching in April 2020! Join us for the weekend or weekday workshop and read on for more information about Jamie and his beautiful work.

Describe your printmaking process.

I make etchings about structures in the landscape and on the coast, so everything begins with a real or imagined place. I then develop that into a drawing on tracing paper then reverse the drawing to use as reference to make an etching. I etch the lines into the zinc plate using copper sulphate solution. Next I add all the tones to the plate, this is called the aquatint. I then add ink to the plate and take a print using an etching press.

How and where did you learn to print?

While I was working as a museum curator about 10 years ago I took a printmaking night class in the local art college. As soon as I learnt the etching technique I was hooked and my fascination with it has never waned. 

Why printmaking?

Two reasons 1. I absolutely love drawing and etching is an excellent way of processing line drawing, and 2. I’m colour blind, and a limited palette suits etching really well

Where do you work?

I work in my studio right in the middle of my hometown, which I share with two other printmakers, a painter, a photographer and a sculptor.

Describe a typical day in your studio.

I live in Kendal in a terraced cottage in an area of town called Fellside, where the houses are stacked up like an Italian hill village – but with a lots more rain! My studio is a 3-minute walk down this hill into the market place. I usually start with a bit of editioning of etchings while listening to lots of art podcasts or music. After lunch I’ll either make my etched jewellery or do a bit of framing or drawing. If I’ve been on my own in the studio, I may go to the local coffee shop mid afternoon and have a natter with the staff and other customers, and perhaps do some research for future projects.

How long have you been printmaking?

10 years now

What inspires you?

The tracks and traces left by humans in the landscape; be it buildings, power lines, infrastructure or just curious structures. 

What is your favourite printmaking product?

Probably the intriguingly-titled ‘straw hat varnish’ which I use to ‘stop out’ areas when making my etching plates.

What have you made that you are most proud of?

I think the etching ‘Stone Semi-Circle and Shap Cathedral’ (below) from my recent group show ‘Shap Shape’ ticked all the boxes for what I was trying to achieve.

Where can we see your work? Where do you sell?

If you visit my website www.jamiebarnes.co.uk you can see and buy my work, as well as see a listing of the many art selling events I attend throughout the year. 

What will we be seeing from you next?

I will be attending Printfest Ulverston the first weekend in May; the best printmaking festival in the UK, and luckily for me just on my doorstep! I am also trying to develop some new work about space architecture.

Do you have any advice for other printmakers and creatives?

Don’t try and do too many different things. Concentrate your efforts on a couple of strong ideas or techniques follow them right through. This helps give your work consistency which is often what galleries and buyers want to see.  

Join Jamie Barnes in the studio for his Aquatint Etching Workshop in April 2020! Join us for the weekend or weekday workshop.

See more from Jamie:
Instagram: PrintmakerJim
Facebook

Screen Printing onto Fabric with Translucent Colours

This week’s blog post has been created with Sophie, our fantastic work experience student!

Over this past week, I have been doing work experience. It has been an amazing opportunity and I have learnt some great new skills.

Yesterday I tried screen printing, I drew out my own designs which I used in three different colours to overlap in translucent coloured ink – pink, yellow and blue. I also did a different design where I layered up the same stencil in the same colour, going from lighter to darker shades. I really enjoyed the screen printing, especially seeing my first design go through the stages to get printed onto fabric.

I used Pinterest to help me design my screen print – for more inspiration, you can see my Pinterest board here. My final templates were a series of triangles arranged at different angles which when printed in different colours overlapped to create different shades. My other print was clouds overlapped with shades of blue. Here is how I did it:

Start by taping around the edges of a 43T A4 screen. Tape the front and the back of the mesh, leaving an aperture just a little smaller than the stencil.

To mix up the inks, we started by measuring out 100g of Permaset Print Paste.

For the darkest shade of blue, we added 1 drop of Turquoise Pigment.

For the palest shade, we used a chopstick to add a small dab of pigment to 100g of print paste. We added two dabs of pigment to the middle shade.

Using a padded surface, pin out some prima cotton. Place the stencil in the top right of the fabric. Place the screen on top, making sure there are no gaps left between the stencil and the tape. Place a bead of the palest shade of ink along the top of the screen.

Holding the screen with one hand and the squeegee with the other, drag the squeegee at a 45′ angle down the mesh. Begin by pressing gently to flood the mesh and then finish by pressing hard. You should hear a zip sound.

Lift up the screen to reveal the print. The stencil should stick onto the mesh. Place the screen down on another area of fabric, making sure the screen doesn’t go down on a wet print. Print the design again.

Continue to print the first layer, overprinting when the first layer is dry. The two layers of transparent blue overlay to create a darker shade.

Scrape any remaining ink from the screen using a spatula. The stencil can stay attached to the screen because we are continuing to use blue ink. Add a bead of the next shade of blue and print all over the fabric. Repeat this with the third shade.

When you’ve finished, peel the stencil from the screen, remove any excess ink and clean the screen down with a damp sponge and cold water.

Sophie’s second printing project used Magenta, Turquoise and Yellow inks. These translucent primary colours overlap to create secondary colours. Each pot of ink was created using 100g of print paste mixed with one drop of pigment.

Sophie started with the yellow ink. The inks being used here are very translucent and so the colours underneath will show through each layer. If we were printing with slightly more opaque ink, we may want to print with the blue or magenta ink first as they will be stronger colours than the yellow.

When changing the ink colour for a new layer, clean the screen down and replace the stencil. Sophie cut three of the same stencil for this fabric.

The translucent inks overlay to create new shades of green, purple and orange.

To do this project at home you will need:

Meet the Maker: Chris Pig

I’m Chris Pig, an artist printmaker living in Frome with my family. I am director of a small teaching/professional studio Black Pig Printmaking Studio. I designed it myself and managed the project and am very proud of what it has become.

Recently I’ve been collaborating a lot with academics, historians who study prints and drawings mostly. They have come to learn the processes in making the prints that they study. Dr Alixe Bovey, director of studies at the Courtauld Institute, Dr Bethan Stevens who heads the Dalziel project at Sussex University and Dr Esther Chadwick, also of the Courtauld have all recently been involved.

Most of my work at the moment is to do with childhood. My partner works away for four days a week and I’m the primary carer. One day, as the kids filed out to bury a goldfish, Frank crossed his arms in front of him and said, “I’d just like to say a few words.” It was a damascene moment for me as I realised I had a rich seam of pathos right under my nose. Adults tend to patronise and belittle childhood emotions when they are the richest and most intense. Why should a child’s grief for a lost pet carry any less gravitas than an adult’s bereavement?

In the studio, learners work alongside professionals and all their work is together in the ball racks. This suggests to learners that their work is of value no matter what skill level they are. I have been making prints for a very long time and no other profession has really interested me. I am not passionate about printmaking, that suggests something more intense and short-lived, like an affair. I’m married to printmaking, a much more complicated and nuanced relationship.

Describe your printmaking process

I have two printmaking processes, wood engraving and linocut. They inform each other, I cut boxwood like a linocutter and lino like a wood engraver. Often I’ll do two versions of the same composition, one in box and then scale it up for lino. 

How and where did you learn to print?

I was a sickly child with a reduced curriculum. I managed to exagerate my sicknes to the extent that I spent my whole time in the library and the art room. Mike Kitchener the art teacher, formed me and taught me enough drawing skills to last me the rest of my life. He taught me how to etch by about 14. We had acid baths open on the benches with no extraction. Because of my open sores from eczema, he used to immerse the plates for me. No gloves or protection at all, no extractor fans. The sixth formers used to flaunt the brown burnt ends of their fingers from the nitric acid which looked like heavy nicotine stains. We only had money for steel couldn’t afford copper ’til I went to art college. 

Why Printmaking?

I came across printmaking by circumstance but it is very addictive and I decided it was the one for me. Plus it’s egalitarian. It’s possible to own and appreciate an exquisite, hand made work of art for an affordable price.

Where do you work?

In my studio, black pig. It’s easiest to cut alone and print with company. I have that luxury and am very aware of how lucky I am.

Describe a typical day.

On a good day I get to the drawing board by nine, work ’til twelve, lunch ’til one, teaching from one to three then it’s all over when I pick up the kids.

How long have you been printmaking?

Forty years this year, man and boy.

What inspires you?

Everyday life inspires me, I get my best work ideas when I’m open to possibilities in story-telling and a good image from that which surrounds me. There are lots of artists of course, Masereel and Valloton I’ve had since I was a kid. I’ve worked a lot with victorian engravers, particularly Doré and the Dalziel brothers and during a recent spell in hospital Hans Holbein the younger and Sandow Birk.

What is your favourite printmaking product?

EVERYTHING involved in the process of relief printmaking is intensely satisfying, sensuous and beautiful. My tools are Pfeils for lino, J.Buck for engraving, victorian originals, and EC Lyons of course. I print only with VanSon rubber based inks and lots of different papers, Sunome Senaka being my favourite for large work.

What are you most proud of?

I like my big linos the most.

Where do you sell?

Different Trains Gallery, Decatur, Georgia USA Wharepuke Gallery, New Zealand. Why Gallery UK,  Society of Wood Engravers, UK

What will we be seeing from you next?

Large work, either to do with the homeless or kids living in food poverty, depending on my mental health. I find depressing subjects take a toll on me, partly because with relief work you are so up close and personal with your subject. Something has to be done though to counterbalance these cartoon bigots, these fascist pigs who have been allowed to take over our political system. Dark work for dark times.

Do you have any advice for other printmakers or creatives?

Yes. Don’t lose focus on your work and don’t anticipate it making you any money.

More more from Chris Pig, visit his website.