Meet the Maker: Sally Hirst

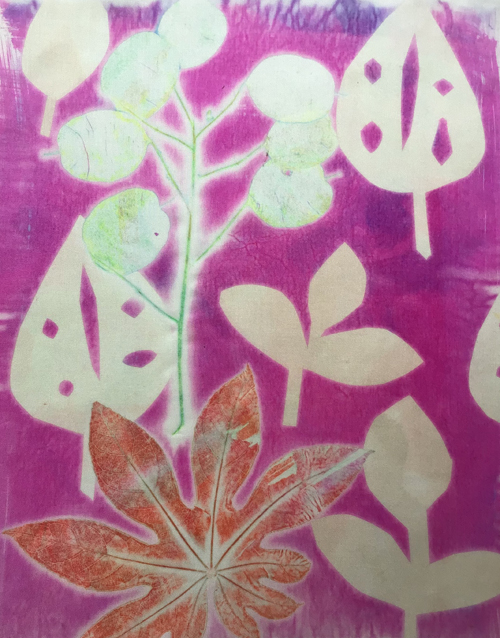
I am a painter and printmaker living in Norwich. My work is about journeys; those that I take and the journey that the artwork has been on
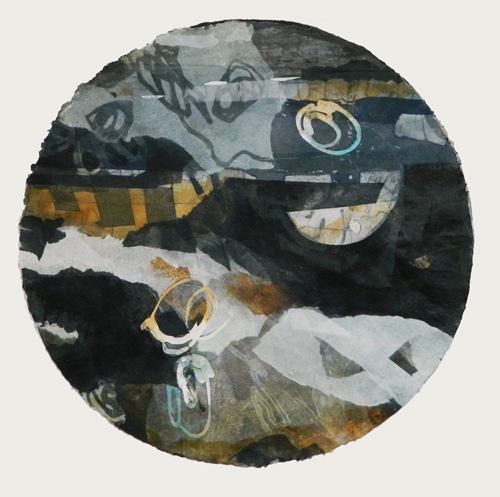
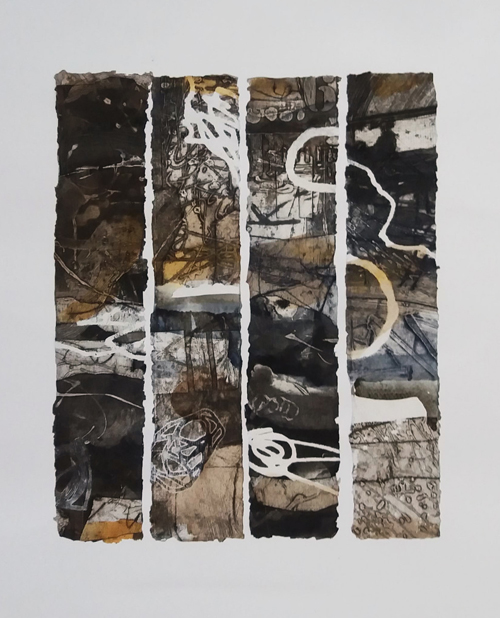
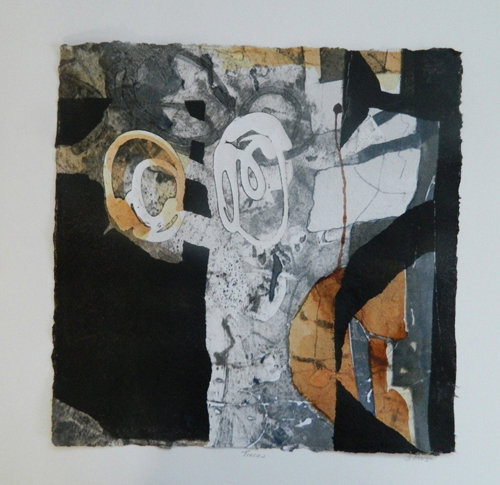
in my studio. The textures, colours and structures of each environment dictate the development of my artwork which whilst predominately abstract are based on fleeting images, imagination and experiences. Whilst I harness a range of printmaking techniques for my works in paper I do not make editions or reproduction. Each piece is created individually as a result of incorporating elements of risk and experimentation, my creative process produces unique pieces, more akin to painting than printmaking.
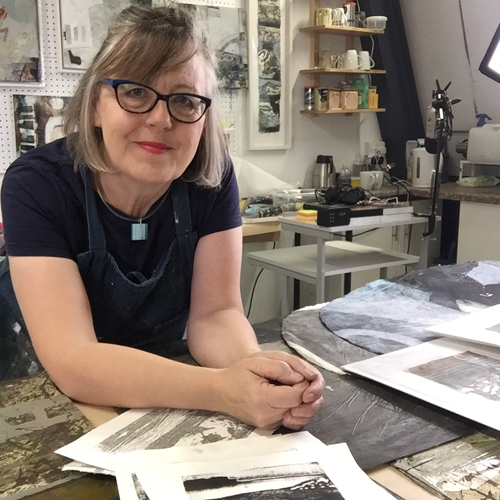
Describe your printmaking process.

 I work across three printmaking processes, collagraphy which is building a plate with textures to hold the ink, drypoint which is creating lines in perspex that hold the ink and monotype, simply inking a plate, manipulating t and taking a print. I often combine all three on one piece.
How and where did you learn to print?

At Cambridge University as part of my PGCE and once I started teaching I would treat myself every summer to a week long course at Gainsborough House in Suffolk. Over the years I was taught by many great printmakers including Dale Deveraux Barker and Michael Caro. I have never stopped learning, or teaching printmaking.
Why printmaking?

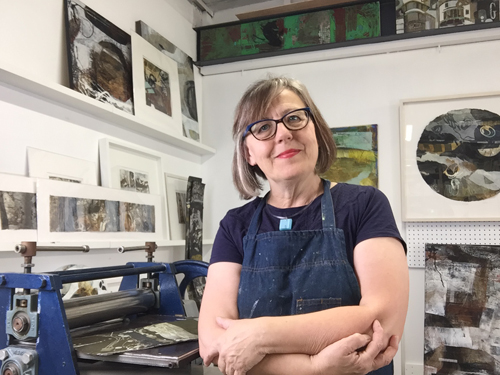
I don’t like to know what is going to happen. At the point I can predict the results I get bored! So, for me the moment of lifting the paper from the plate is always an exciting one. For that reason I don’t make editions, each print is a one-off. A single piece of paper may have three process on it, and I often hand colour the prints or add collage elements so it would be impossible to repeat! In many ways my prints can be seen as paintings, built in layers each layer responding to what has gone before. I love how something will happen in a print that influences my paintings and vice versa, it’s like a conversation that goes back and forth.
Where do you work?

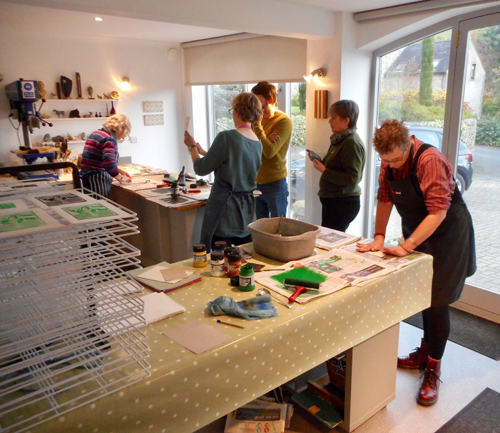
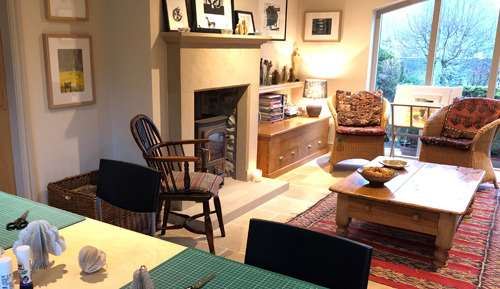
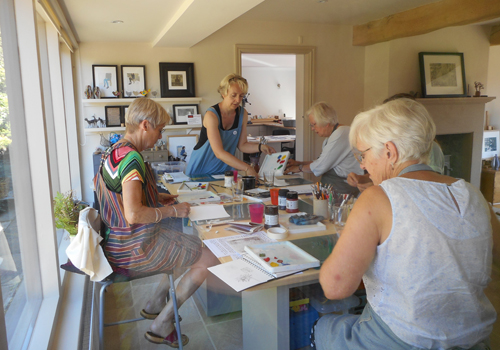
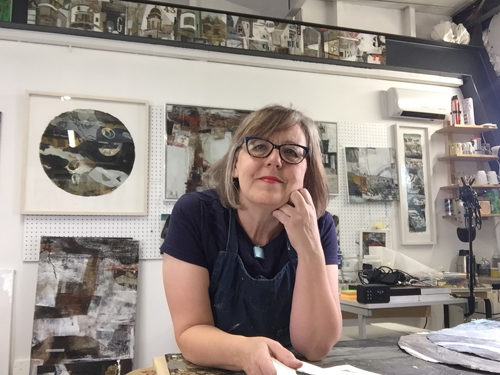
I have a studio near my apartment in Norwich, a short walk along the river. I have worked from home but I like to keep the mess contained. My studio is large enough for me to be able to run workshops and is a light and airy space. I have travelled and moved house a lot of times but the priority has always been a space to be able to work in, often more important than where I’m sleeping!
Describe a typical day in your studio.

I aim to get there by 9am. I then spend the morning working, stopping for a cup of tea about 11am. I paint as well as print so there is always something to do, and with both media I work in a series. I go back to my apartment for lunch around 2pm. The afternoon is either spent catching up with emails and paperwork, or looking at photos I have taken of the mornings results and considering my next moves, like chess! I go back to the studio about 5pm to spend an hour or two tidying up and set out work for the next day. My aim it to make it so when I return the next day I am straight in, without having to think or plan or get distracted.

How long have you been printmaking?

I first discovered printmaking when I did my postgraduate teaching certificate at Cambridge University so 30 years. Before that I was mostly painting.
What inspires you?

Anything with interesting textures and strong shapes. I’m currently studying for my MA and have been exploring themes around abandonment so I’m looking at textures of old buildings and things I find on my travels, drawing around objects, taking rubbings of parts of buildings, gathering ideas.

What is your favourite printmaking product?

Not really a printmaking product but I love ceramic tile adhesive. I use it to create textured plates for printing on an etching press or craft die cutter (Xcut Xpress). I can mould it, score into it, sand it and varnish it…and it survives the inking and printing process. Suzie Mackenzie included a section about my work in her new book.

In terms of ink my favourite is Akua Intaglio as it never dries on the plate, or skins in the pot. This means I can spend a day inking lots of plates, then go back the next day with clean hands to print them. Its just the right consistency for both collagraphy and drypoint.
What have you made that you are most proud of?

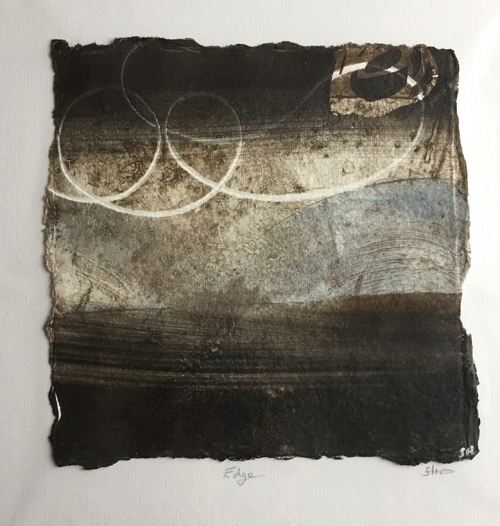
I am most proud of the series of prints I created as a response to the Cornish coastline. I was at a point which we all have of being in between projects, feeling unsure of my direction. I went to Cornwall for a residency at Brisons Voer. Having packed the car with a mountain of equipment and driven down there I was faced with a calm blue sea and idyllic landscape…and panicked! I almost turned around and drove home. I’m a city girl at heart and whilst I love being in a rural environment it doesn’t feed into my work and I was very unsure of what I would do. But I calmed down, took a walk and turned around to find the most amazing colours, shapes and textures of the Cornish geology. That was it, I was in! The prints I made as a response to that environment have been some of the best I have made. They are confident, loose, free and painterly.

Where can we see your work? Where do you sell?

I find selling prints in galleries not cost effective. The prints are made on deckled edge paper and hang on a signed mount, this means frames I use have to leave space for the paper and are specially made. Paying commission to a gallery on a framed print leaves me with just enough to cover the cost of making it! As a result I now only sell my prints either online through my website or at specialist print fairs such as Norwich Print Fair, or through Open Studios. If I am having a solo show of paintings I include prints as they relate to each other, People quite like that my prints are only available from me and over the years I have built a group of collectors who understand my work.
What will we be seeing from you next?

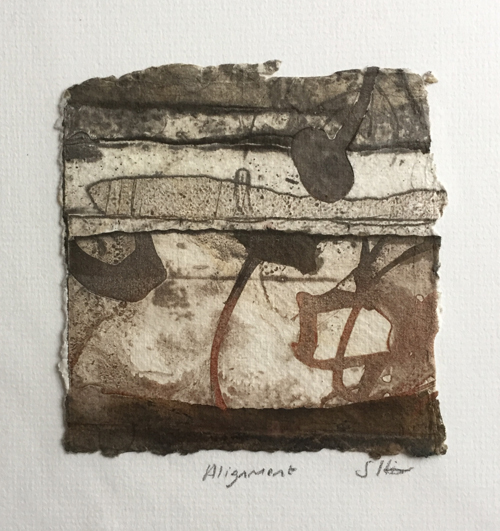
I’m currently working on a series of paintings and prints based on the knots and ropes, textures and colours of old fishing boats. I have been teaching workshops in Collagraphy, Monotype and Drypoint for many years. I recently started teaching online and have nearly 2k subscribers to my YouTube channel already! As a result I will be launching some more online workshops. I love teaching, and people seem to like my depth of knowledge and experience, its also nice to be able to reach people all over the globe!

Do you have any advice for other printmakers and creatives?

Work on something everyday, even if it’s just gathering a few supplies, that way you will be in contact with your creative self, to be kind to yourself when things don’t go well, and finally to avoid making things that other people like, but you are bored with! I have met so many printmakers who say “I love your approach but this is what I’m known for so have to stick with it”.

For more from Sally Hirst:

www.sallyhirst.co.uk
Youtube
Artwork Archive
Facebook
Instagram

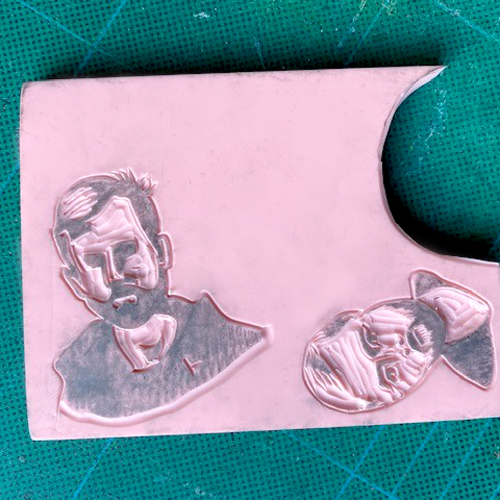
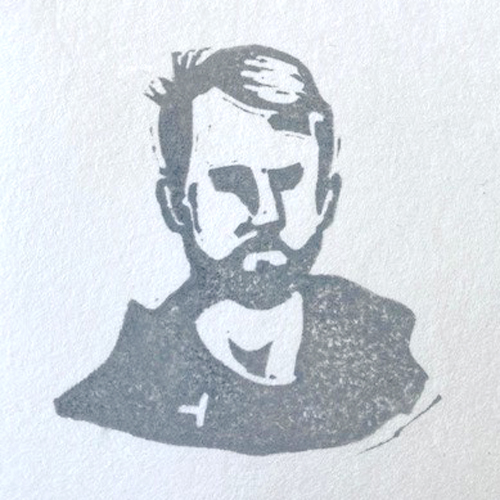
Creating a Portrait Stamp

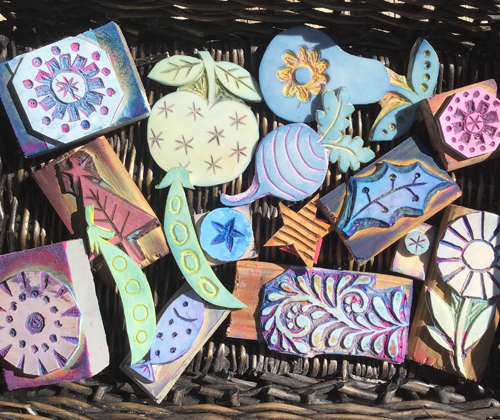
Making your own stamps is so satisfying. You can build up your own collection of personalised stamps for all of your projects and what’s more personalised that a portrait! These adorable portrait stamps are perfect for your arts business, signing cards and letters, scrapbooks or just for fun! Create a collection of stamps of your friends and family or a self portrait stamp.

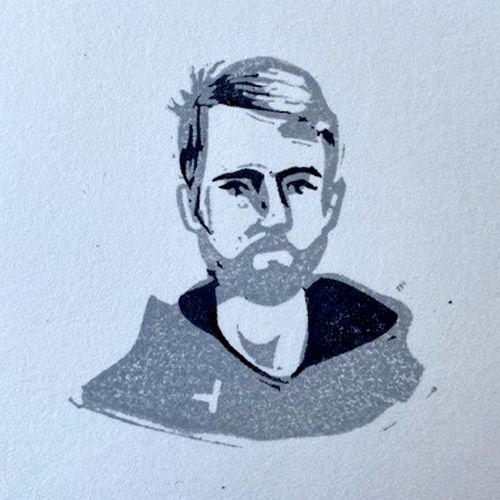
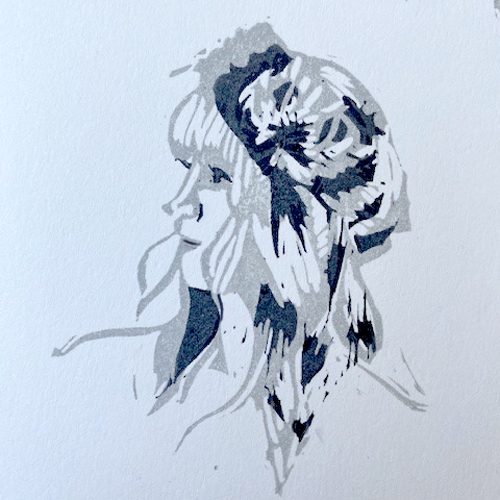
In this project we create pairs of portrait stamps to be layered over one another: one for mid tones and one for dark tones and details. If you’d like to make simpler single stamps you can stop after the first one – they’re lovely on their own.
Choose your stamping block – we are using Speedy Carve and Japanese Stamping Block which can both take very fine detail without crumbling and are dreamy to cut.

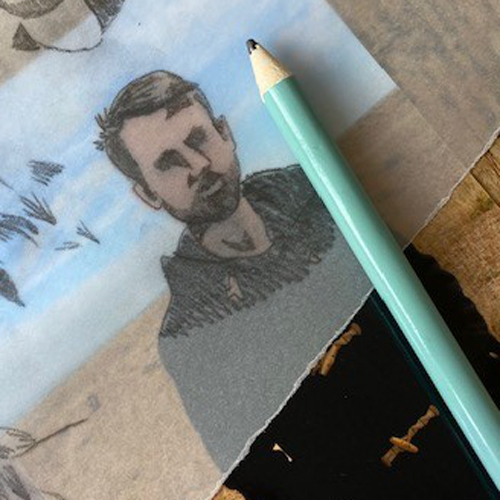
Begin by taking tracings from a photograph. For the first tracing, don’t worry about the detail, just shade in the mid tone and dark tone areas, leaving the highlights out, like in the image below.

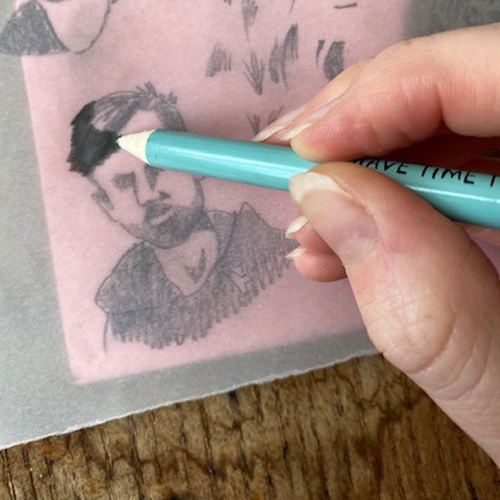
Transfer the tracing to the block by flipping it over and scribbling on the back.

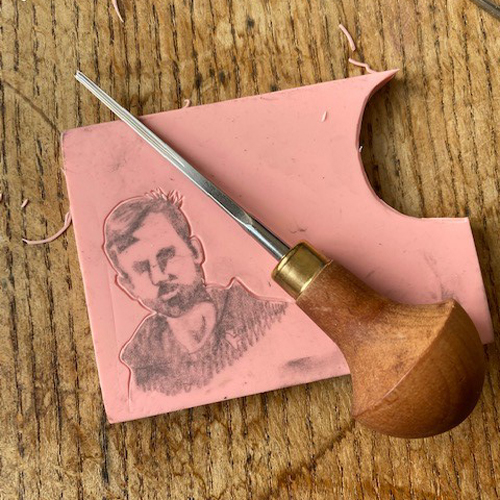
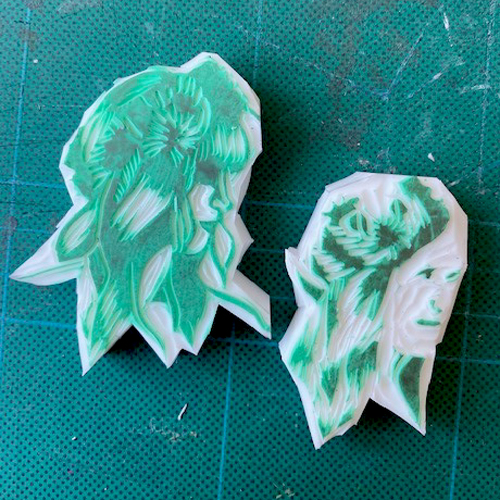
Begin carving by outlining the main shape with a fine tool. Pfeil tools are perfect for these stamps as their blades are precise and sharp. A 12/1 has been used here.

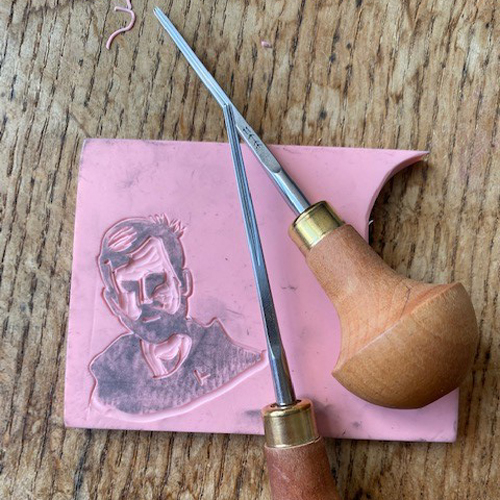
After outlining, carve away the detail. remove any areas that are not shaded.

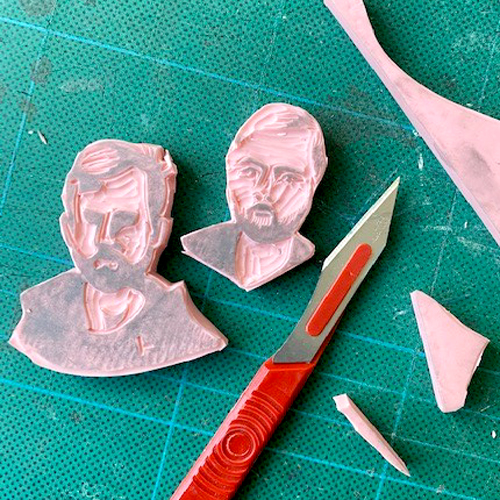
If creating a multi-layered stamp set, repeat these steps. The tracing this time needs to only be the darkest areas and a few detail lines: the eyes for example. If you are unsure of the final look of the design, err on the side of caution by adding a little more to the second stamp – you can always carve away more later but you cannot add it!
When all the stamps are carved, cut them out with a craft knife. The block should cut through like butter but be careful and use two or three swipes to get through the thickness of the block.

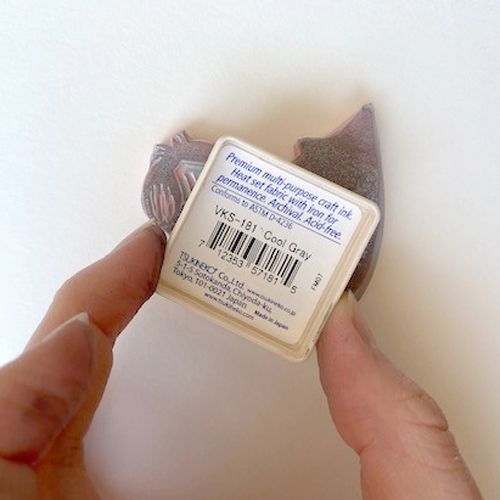
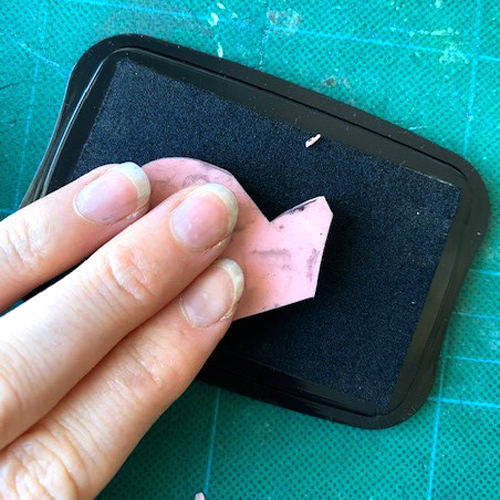
Ink up the stamps with an ink pad. Versacraft pads can be used on paper or fabric, Versafine pads are specifically designed for printing onto paper. Both will work really well. If printing a two layered design, choose a mid toned colour for this layer – cool grey is perfect.

Use a dark colour for the second layer. We’re using a large Versafine Ink Pad in Black which is brilliant.

Japanese stamp pads have a coloured surface and a white centre so it’s easier to see where you’ve carved.

For this project you will need:

Meet the Maker: Claudia Jones

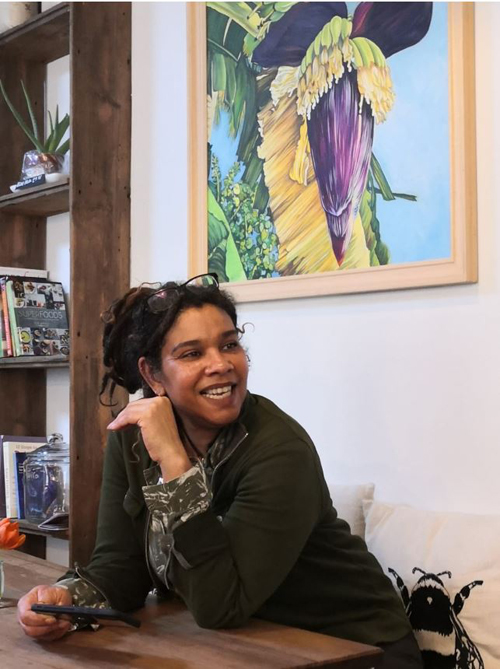
My name is Claudia Jones and I’m an artist from Kingston, Jamaica and I have been living and working in Petworth, West Sussex for the past thirteen years.

How and where did you learn to print?

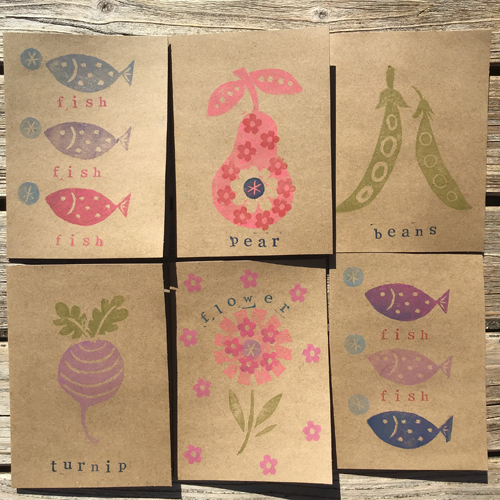
I learnt print making about five years ago after attending courses with Will Dyke and Hugh Dunford Wood. Although I’m a painter I have always loved block printed images and the immediacy of printmaking.

I enjoy all aspects of printmaking, especially carving the lino.

Where do you work?

Recently I converted my daughters bedroom into my printmaking studio as she has moved back to Jamaica and she no longer needs it.

My other studio, known by the rest of my family as the living room, is where I carve my blocks and paint. 

Describe a typical day in your studio.

     The first thing I start with is mixing the colours. Rarely do I use colour straight from the tube. I like to think I’m creating a new colour, my aim is to make the colours as vibrant as possible. I print as much as I can in the daytime and use the evenings to design and carve the lino.

What inspires you?

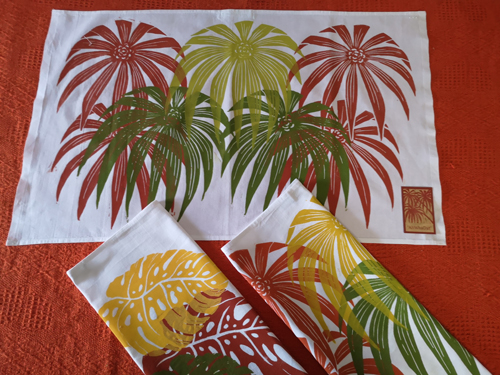
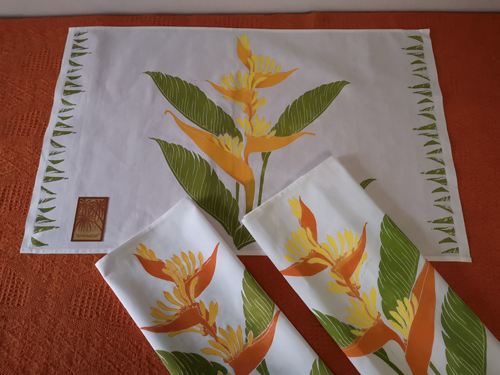
     I am inspired by the plants and colours of home. I have many photographs that I’m constantly looking at reminding me of what I love. The light is different in the tropics, also the shape and colours of the plants are more dramatic.

What is your favourite printmaking product?

    I love all my cutting tools but my favourite is the Pfeil cutting tool. I’d love to have the whole set. Good tools make the work much more enjoyable.

What have you made that you are most proud of?

I’m most proud of my recent prints as I have managed to create lino blocks that remind me of my paintings of tropical plants, flowers and birds with their vivid colours.

Where can we see your work? Where do you sell?

My work is available on my Instagram @ahwhadat as well as several gift shops and galleries in Jamaica.

Do you have any advice for other printmakers and creatives?

     When designing a lino block I start with drawing circles and that gets me on my way. Similarly when printing, squirting out the first colour gets things rolling. My advice would be, don’t overthink it …just have a go.

Making a Triangular Stamped Repeat Pattern

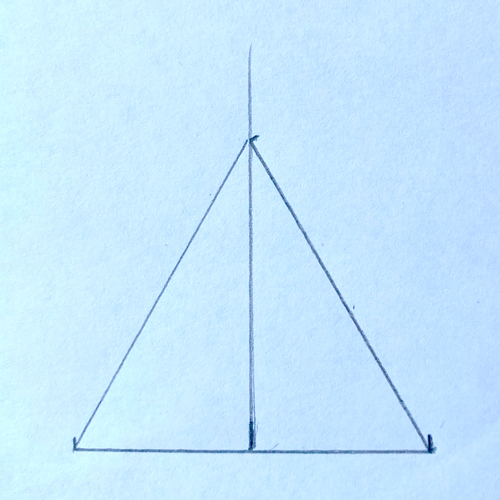
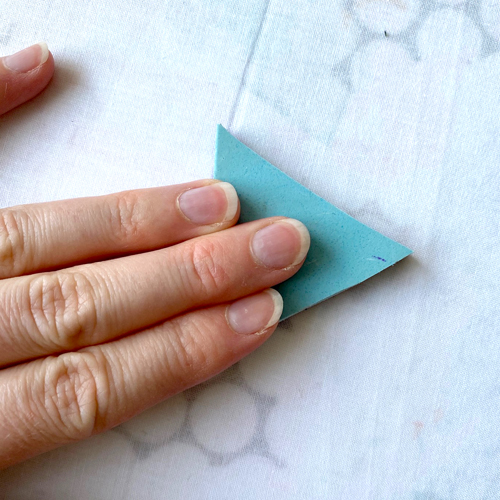
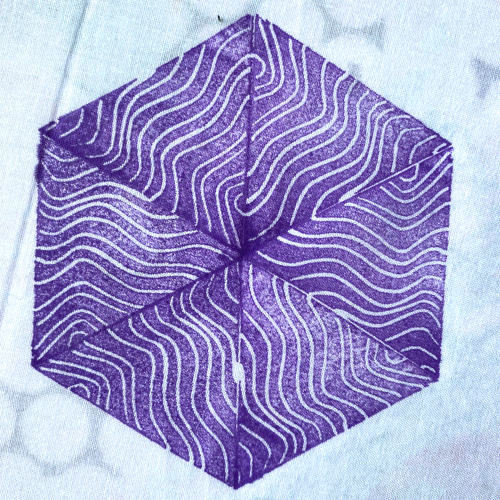
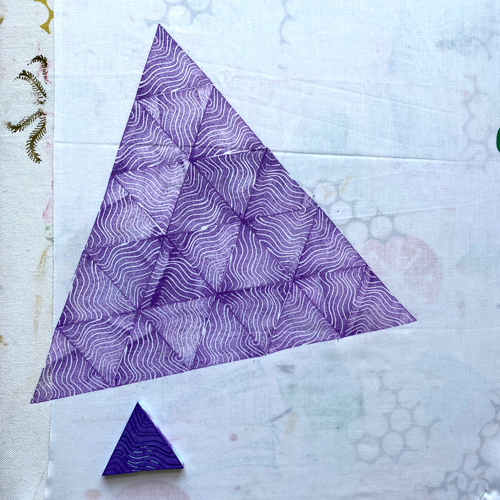
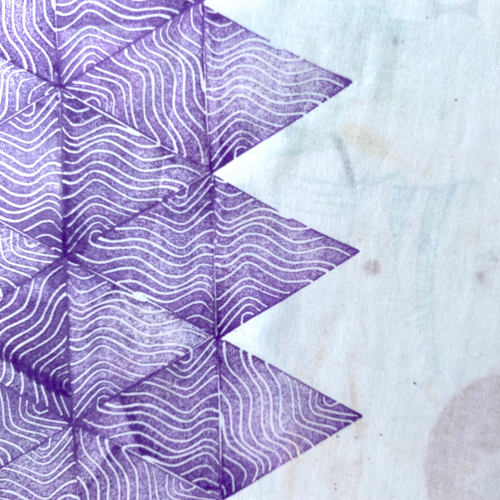
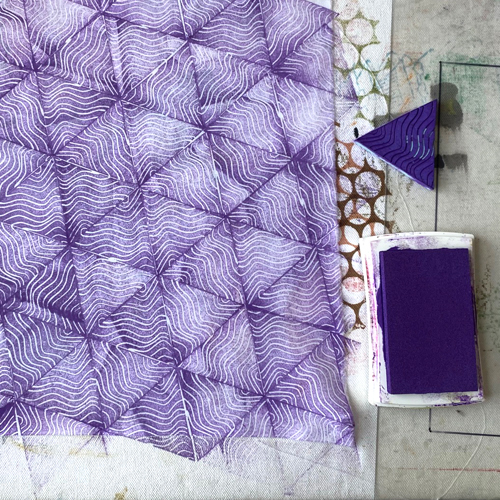
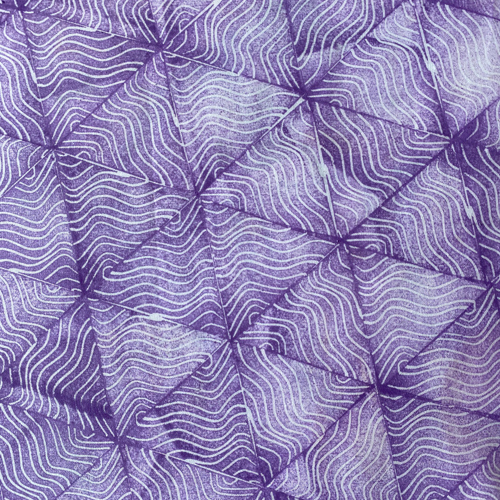
Using an equilateral triangle stamp creates an easily repeatable pattern that builds quickly whilst breaking up the typical grid structure often found in repeat patterns. This project is quick, easy and versatile. It’s important to use an equilateral triangle so that the edges will match up perfectly each time – if the sides are not equal in length the design will not build seamlessly.

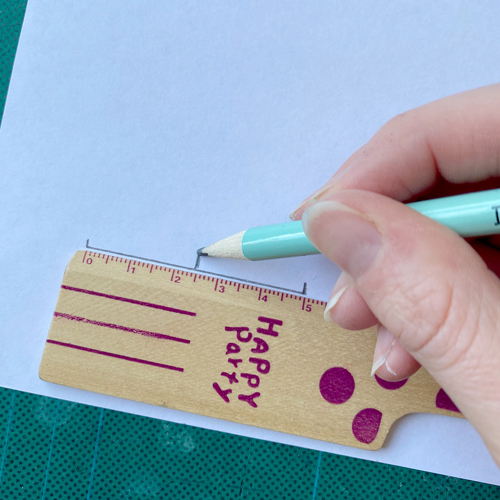
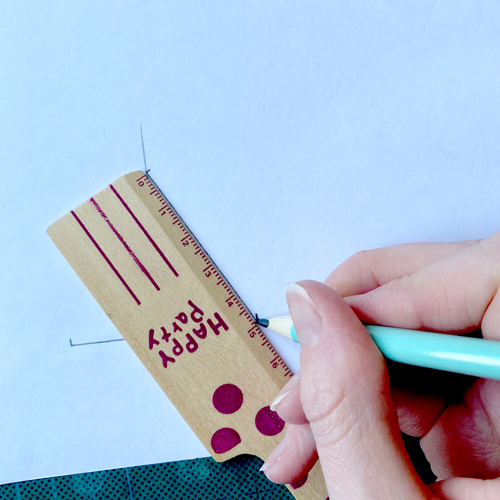
Begin by drawing one side of your triangle. Take note of the length of the line. Find the centre point.

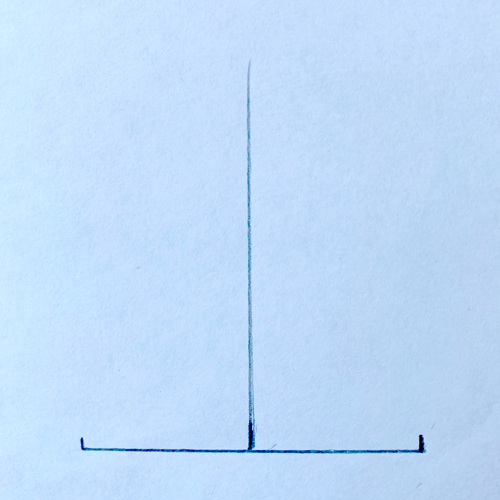
Draw a line straight up from the centre point. Make sure that it is at right angles to the first line (using the corner of another piece of paper can help check this).

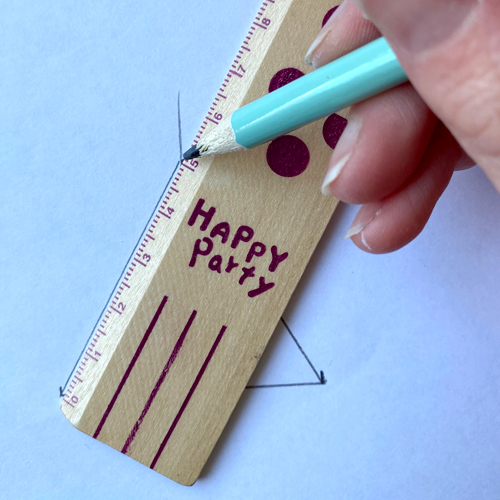
Use the ruler to draw from the end of the first line up to the second line, making sure it is the same length as the original line.

Repeat on the other side.

You should now have an equilateral triangle.

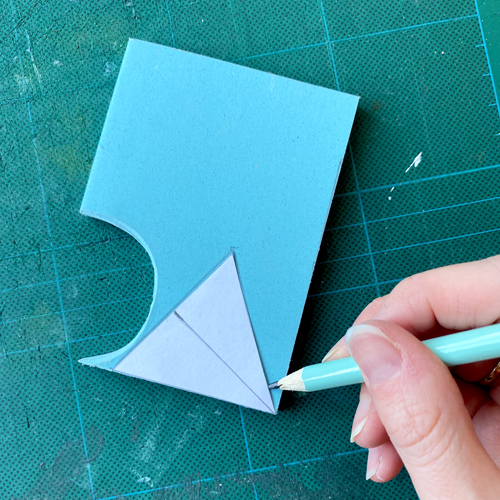
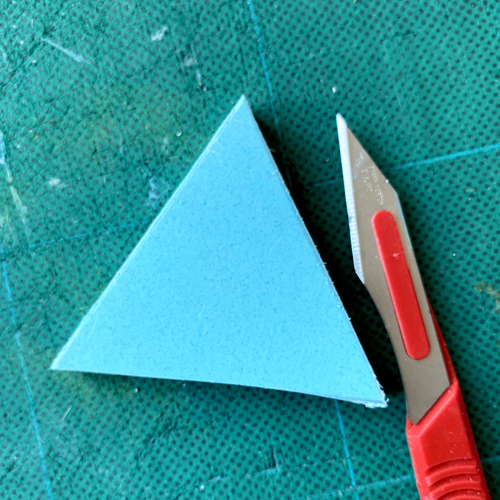
Cut the triangle out and draw around it onto a piece of stamp block. We are using Speedy Cut Easy.

Carefully cut it out with a scalpel.

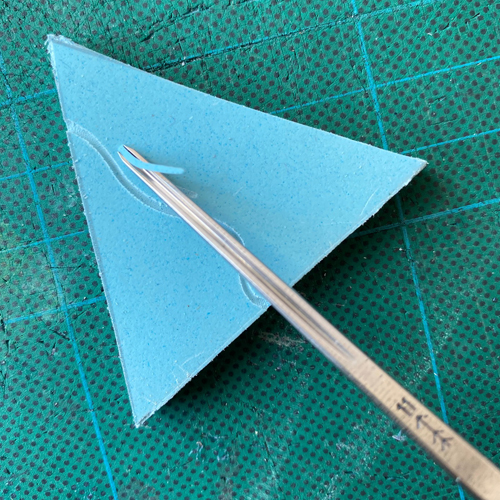
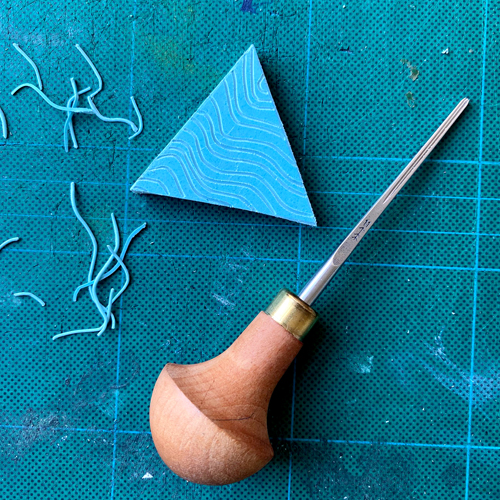
Carve a design into the block. We are using an 11/1 Pfeil Tool.

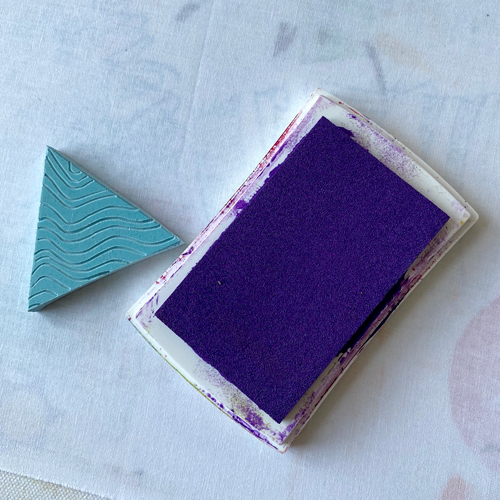
To print onto fabric, pin the fabric out onto a padded surface. Ink up the block by pressing it gently into a Versacraft Stamp Pad.

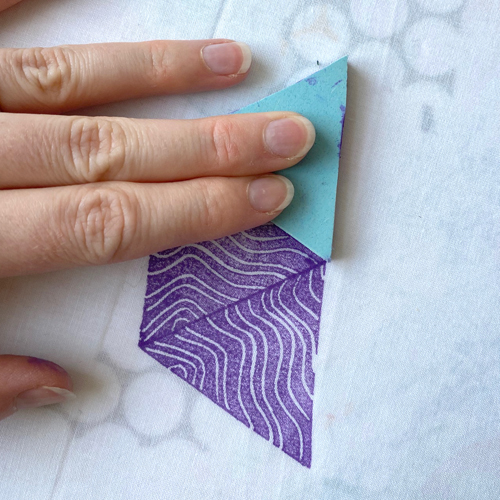
Press the stamp face down onto fabric to print.

Repeat the stamping process to build up the design. All the sides will match up to build a solid design!

For this project you will need:

Meet the Maker: Alison Butler

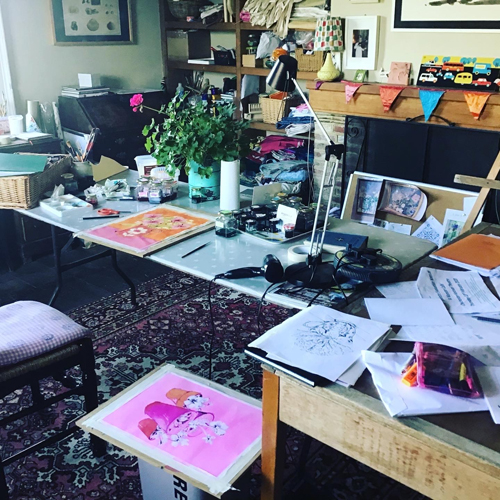
I am primarily a textile designer, artist, illustrator and maker.

In my early career, in partnership with a friend I set up and ran Blooming Designs, which was then a successful textile design business selling prints to leading high street fashion chains both in the UK and internationally.

Under the Blooming Designs name, I now produce a range of print items as well as organise and run workshops in batik, block printing, gel printing and still life on the family farm at Meon Springs, including Art in the Barn, a twice yearly Creative Arts Week which I run with fellow artist and maker Liz Wellby. 

Describe your printmaking process.

My work is quite diverse.  I like to experiment with techniques that give instant results. I particularly enjoy block printing onto fabric and cards but I also love transfer printing as you never know what you are going to get. Gelli plate is also a favourite of mine again the results are so instant and effective, you can achieve much in a short space of time!

How and where did you learn to print?

Having dabbled with screen printing on my foundation I chose to study textiles at Loughborough College of Art and Design. I specialised in print design as I found weave and embroidery too labour intensive and I loved the instant results of print so experimented on my course printing my designs for both fashion and furnishings.

Why printmaking?

As a textile designer I have always enjoyed the printing process. I sold my print designs for many years to the fashion market on paper so often you did not get to see them make it onto fabric but  I always liked the idea of producing my designs myself on fabric which is why block printing has been an obvious starting point.

Where do you work?

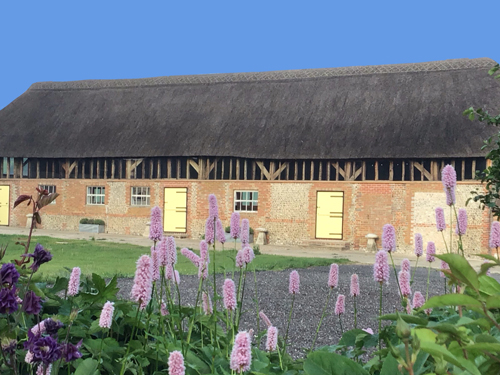
I work in my home studio which has wonderful views of the farm and my garden. If I am running a small workshop I will do this from my studio but if I am running a larger workshop I will do this from a large thatched barn next to my house which we also use for corporate events.

Describe a typical day in your studio.

I am not sure there is such a thing particularly at the moment with lockdown. With the girls at home, I quite often have company as I have a spare desk which is nice! At the moment our yurts and huts are closed so I am finding that I have more time to spend in my studio. I have been doing quite a lot of drawing as this is important for developing ideas My garden is a huge inspiration to me for my design work and this is my favourite time of year as everything is coming into flower. I have also been doing lots of block printing producing fabrics and gifts for friends and relatives.

How long have you been printmaking?

I have been printmaking for about a year now, I love trying new processes and have done several of your courses which I have enjoyed enormously as I have learnt lots of new techniques to experiment with.

What inspires you?

My main inspiration has always been colour and pattern. As a textile designer I have always been hugely influenced by nature, particularly flowers as these obviously feature heavily in textile design. I have always taken inspiration from vintage textiles, silk designs and Indian block prints as well as designs from the 50’s, 60’s and 70’s. Everything is so instant now, we used to have to trawl through designs books and magazines to find ideas but now you just press a button and you have so much at your disposal instantly! Exhibitions are also a huge source of inspiration and we are lucky that we live so close to many lovely galleries, I have also been enjoying the online exhibitions that are available at the moment.

What is your favourite printmaking product?

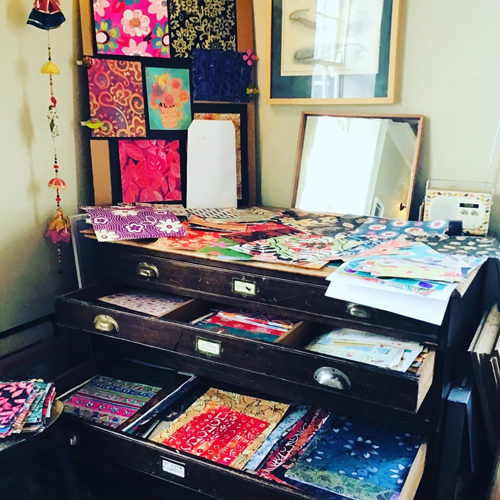
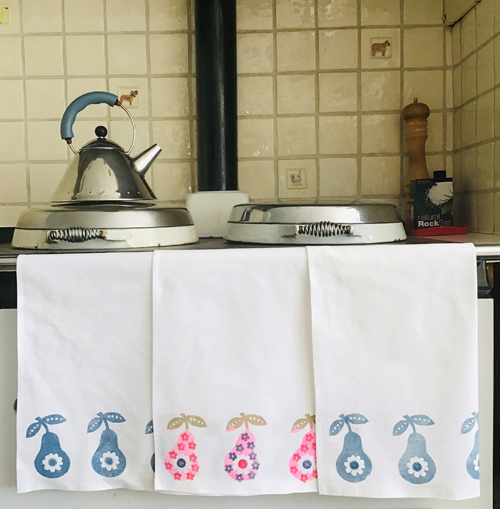
At the moment my Indian wood blocks are my favourite printmaking product, I bought them in Cochin a few years ago and have used them for inspiration for my own block prints. I have also just made myself a fabric printing pad which has made printing so much easier.

What have you made that you are most proud of?

 That is a tricky one, I think you are always looking to improve on your last piece as this keeps you moving forward to the next stage, everything is work in progress. The great thing about the printing process is you can repeat what you have done again and again. I think is healthy to not be too precious about what you produce, there is always lots more waiting to be created!

Where can we see your work?

 My work is on social media, Instagram and Facebook 

Where do you sell? 

 I  have a website www.bloomingdesigns.com where I sell the art courses, at the moment I work to commission as my work is generally one-off pieces though I am looking to produce larger quantities.

What will we be seeing from you next?

I was really disappointed to postpone our Spring Art in the Barn series of workshops due to the Coronavirus, but hope to have the green light soon so that I can make our Autumn series of workshops running from the 8th – 13th October even more special.

I also hope to develop my block printing as well as experimenting some more with transfer printing and kitchen table lithography.

Do you have any advice for other printmakers and creatives?

Don’t be afraid to try something new, there are some great workshops out there that can teach you exciting new skills.  Instagram and Pinterest are great sources of inspiration as are exhibitions, it’s really fun to see what other people are up to particularly if you are not working in an environment with other artists.

See more from Alison at bloomingdesigns.com or on Instagram.

Upcycle a T-Shirt into a Reusable Tote Bag using Fabric Paints

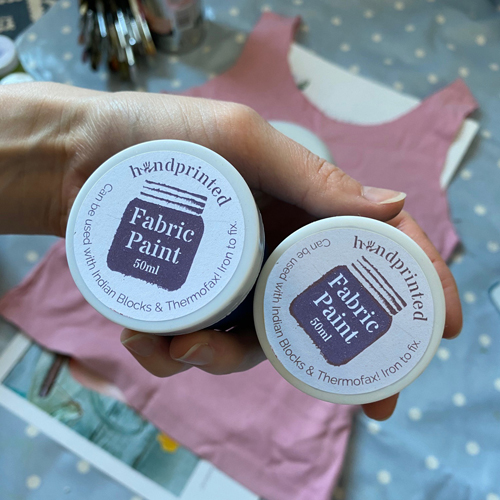
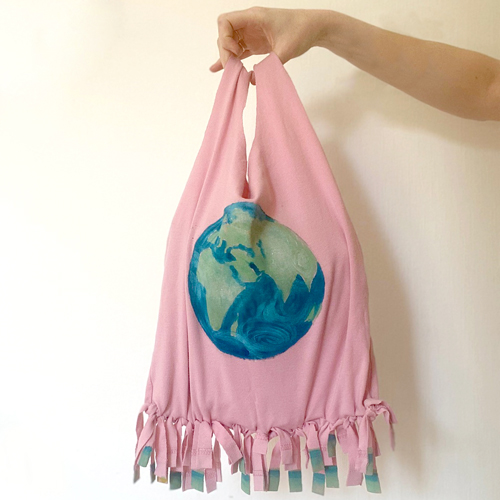
This is a quick, no-sew method for turning an old t-shirt into a reusable tote bag. Use Handprinted Fabric Paints to create your own design. Take your bags shopping to carry loose fruits and veggies or to the beach with your suncream and towel!

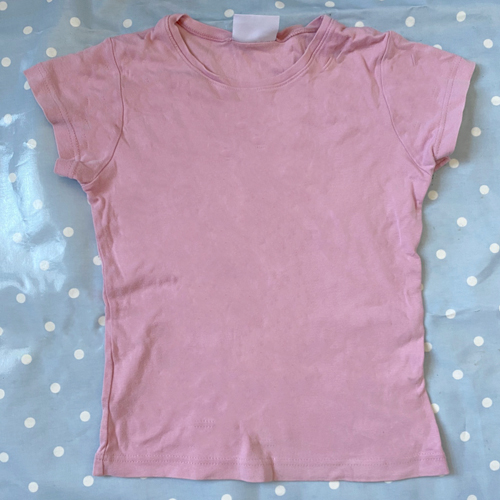
Start with a t-shirt – any will do. The fabric paints we will be using are translucent so work best on pale-coloured fabrics.

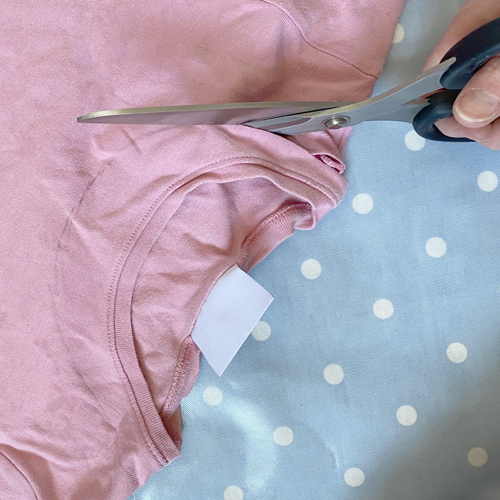
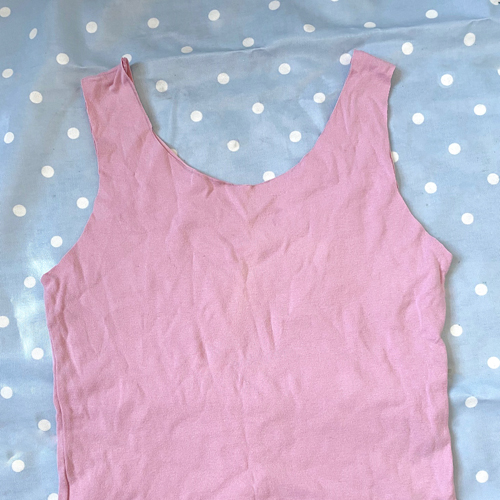
Draw a deeper U shape around the neck and cut it out with fabric scissors.

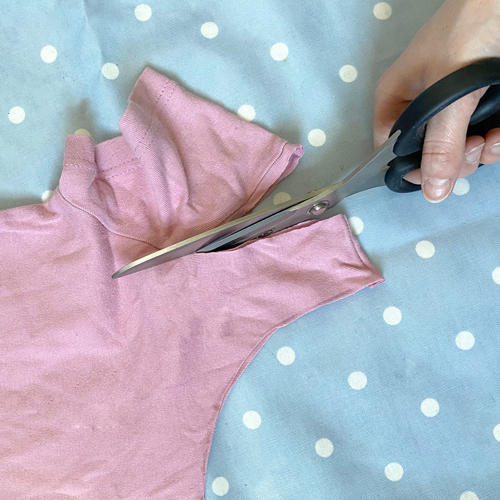
Cut off the sleeves.

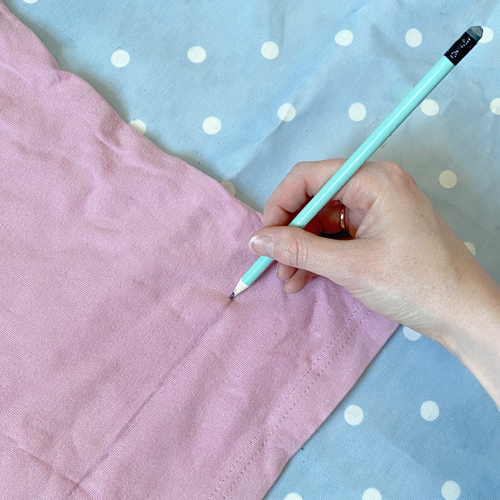
We will be using the bottom section to cut tassels to secure the bag. Mark off 2 or 3 inches along the bottom so you can keep the main design off this area.

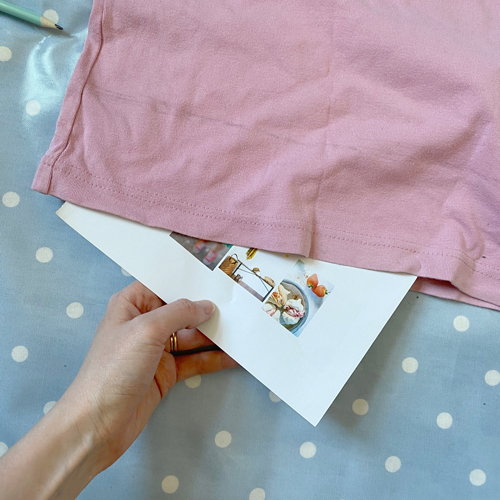
Place a few sheets of magazine paper inside the t-shirt to stop any paint from going through the fabric onto the back.

Use Handprinted Fabric Paints to create the design. Remember that the paints are translucent so the t-shirt colour will show through. Choose colours that will work well on the t-shirt you’re using. Stronger colours will go over this pink best. Test the paints on the offcuts of fabric to check.

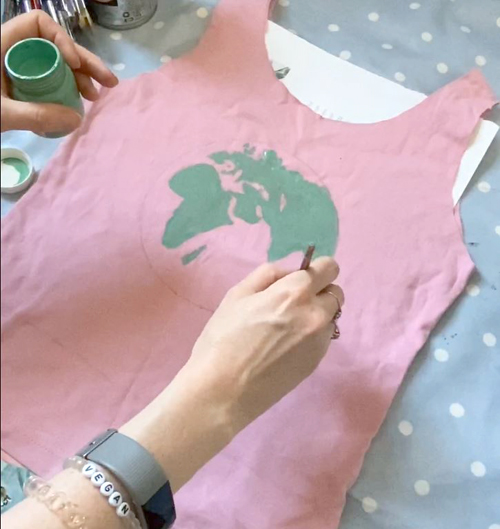
We are using Sea Green and Dark Turquoise.

Draw the design faintly with pencil and then paint onto the fabric.

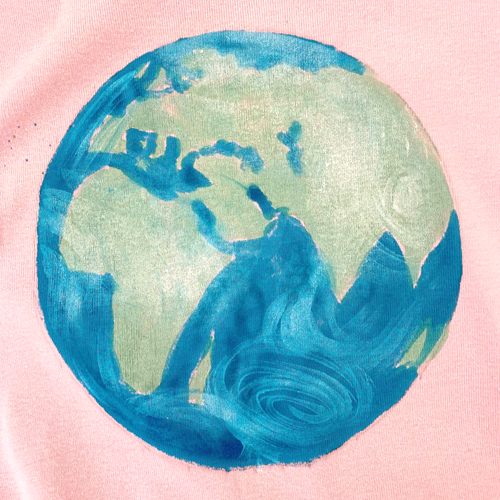
After painting the Sea Green and Dark Turquoise, we added Mixing White to create swirls over the Earth. Mixing White is translucent and so mixes with the other colours beautifully. Opaque White could be used instead if you want a brighter white in your design.

We also painted a row along the bottom of the t-shirt. This will add a pop of colour to some of the tassels when the bag is done.

When the paint is dry, you could paint the back too!

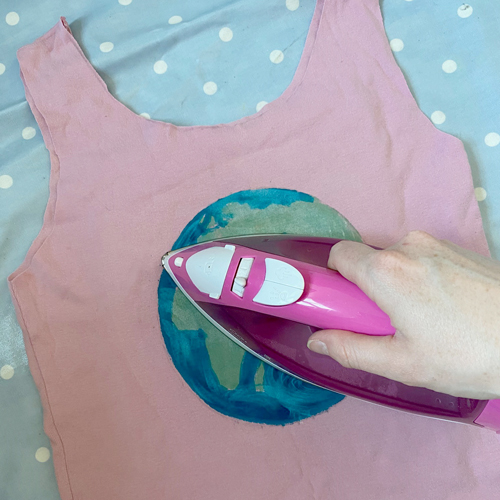
When both sides are dry, iron all over the design to heat-set the paint. Use a dry iron on a hot setting suitable for the fabric until the design feels hot to the touch.

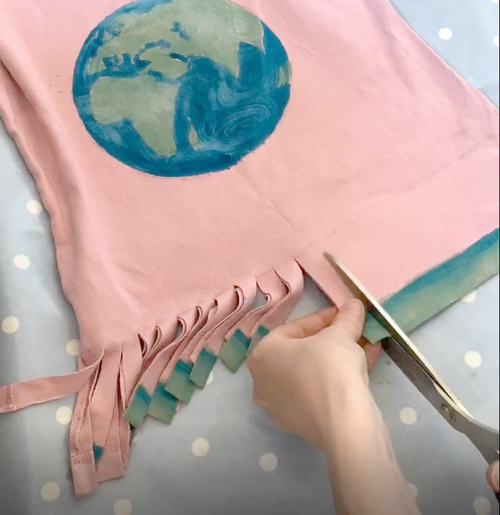
Use fabric scissors to slip the bottom of the t-shirt into strips up to the line we drew earlier. Tie each pair of strips in a knot to seal the bottom of the bag.

For this project you will need:

Meet the Maker: Liz Wellby

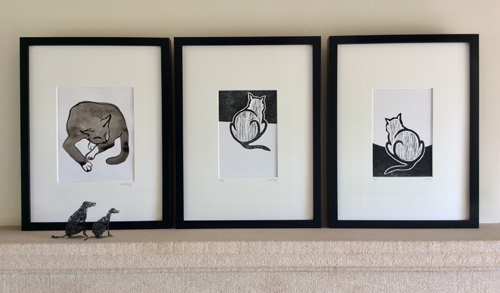
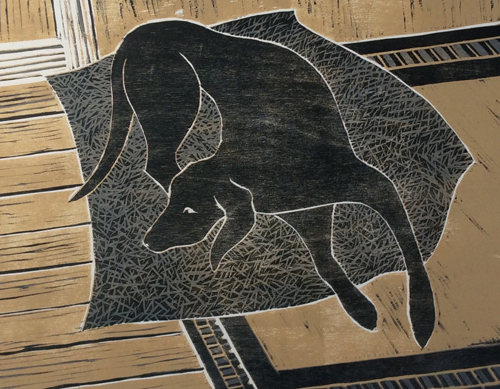
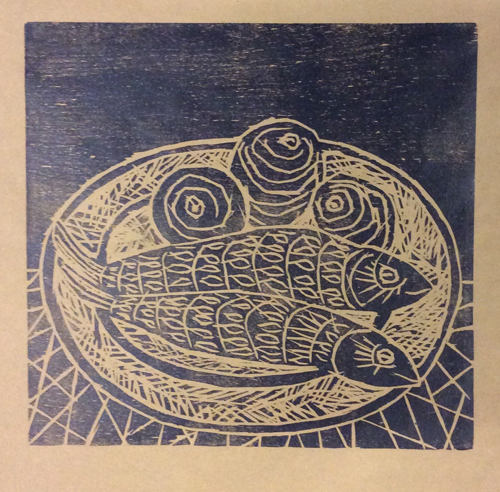
Liz Wellby is as an artist, teacher and maker. She creates a range of outcomes, which includes wire sculptures, lino prints,
woodcuts and monoprints. Liz also runs a range of creative workshops for Arts groups, galleries and museums.

Describe your printmaking processes.

I enjoy variety in my work, so I explore a range of printmaking processes including lino and woodcuts and a range of mono printing techniques. I enjoy the challenge of reduction techniques and the physical nature of the processes, plus I like the different qualities that each print allows you to create; linocuts have a sharpness, whilst the wood grain creates a more subtle printed surface. I also like to explore a range of mono printing techniques, as I can explore more drawn and painterly qualities. Lino and woodcuts require planning and precision, whilst monoprinting can be more intuitive and experimental and are less physically demanding on my elbow and fingers. Developing ideas for new workshops encourages me to try more techniques; I am really enjoying exploring mono printing with a Gelli Plate, using flowers as a masking technique and cutting stencils.

How and where did you learn to print?

I vaguely remember lino printing at secondary school, but I was fortunate to have some great print lecturers at Chesterfield College where I completed a Foundation course in the late 80s. It was a close-run thing, but I chose to study Sculpture at what was then Loughborough College of Art and Design, rather than printmaking. I don’t regret this, as I have come back to print, so I got to enjoy two creative disciplines.

Why printmaking?

I taught a range of Art and Design subjects at secondary level for a
number of years and printmaking was the natural choice when I felt the need to create Art for myself, rather than as part of my day job. I
needed processes that I could stop and start and complete at my kitchen table, so lino cutting and mono printing were natural choices. I see strong connections between the carving elements of sculpture and lino cutting, so it doesn’t surprise me that I chose printmaking. One of the things that I particularly like about printmaking, is that there are lots of processes to try.

Where do you work?

I work from my home studio in a small village on the edge of the Peak District. The studio and workshop next door allow for a very short daily commute in my slippers. It’s a beautiful space with views into the garden and down into the village and I feel very fortunate to have it. I also offer 1 to 1 tuition and workshops for a maximum of 5 people from The Slipper Studio.

Describe a typical day in your studio.

No two days are alike. I started running workshops from my studio a couple of years ago, so a lot of my time is been spent developing a range of creative workshops, which I promote through social media, on my website and CraftCourses.com. I usually advertise and run 3 workshops a month from February to June and September to November, plus another 3 or 4 for Art groups in different venues, so I have a lot of preparation to complete. However, I am trying to regain a balance between running workshops and creating a body of new work. The current situation with this extended period of lockdown and being at home, is allowing me time to think about what I want to make and the themes that most interest me.

What inspires you?

Living and working in Derbyshire is important to me, providing a significant visual resource for my work. The themes of home, countryside and the domestic environment inspire me, which I record and respond to.

What is your favourite printmaking product?

For years I was happy working with the red-handled student lino tools, but I treated myself to a box of Power Grip cutting tools and they are such a pleasure to work with. When my studio was up and running I bought a Gunning Etching Press, which I am really pleased with.

What have you made that you are most proud of?

I always hope it’s my next piece, as it inspires me to continue
making, trying out something new and keep developing as a maker.
That doesn’t mean to say that I don’t have my favourites and
fortunately, with printmaking, I can keep copies of one or two images.

Where can we see your work? Where do you sell?

The best way to see what I am working on is by checking out my
Instagram, Facebook, Twitter and Pinterest accounts and on my
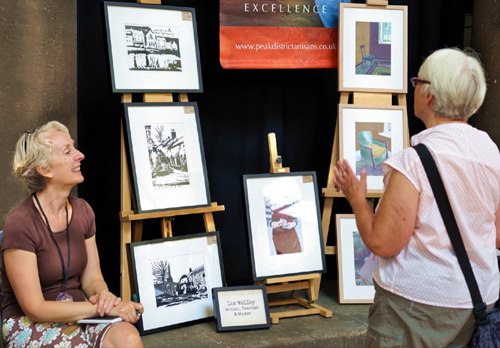
website. I am a member of the creative group, Peak District Artisans
and we come together a number of times a year to exhibit and sell
our work at venues across the Derbyshire Dales and the Peak
District, including an annual winter exhibition at Chatsworth House.

What will we be seeing from you next?

I am trying some small scale blind embossing with lino, which I am really enjoying. I am likely to explore adding detail with pen and ink,
along with adding ink in the traditional printing manner. I also feel that my range of woodcuts need adding to, with more images based on my cat Bert and a return to still life imagery; nothing if not varied.

Do you have any advice for other printmakers and creatives?

Keep trying out new ideas or images and explore them with different processes; an image completed as a linocut may not be wholly successful, but as a drawn mono print it may be completely different. Make notes about what you have done, i.e. how you created a particular colour, so that you can make it again without wasting copious amounts of ink. A print might not be a complete success, but cut out the sections you do like and keep in a sketch pad/ notebook; these may act as inspiration for new pieces. Attend workshops; it’s a really good way of developing your skills quickly,
with lots of opportunities to ask questions. And the best piece of advice I have ever been given – when mixing colours, only add additional amounts of colour the size of a grain of rice; it still amazes me how a little goes a long way.

Follow Liz on Instagram, Facebook, Twitter and Pinterest or head
over to her website.

Meet the Maker: Emma Fisher

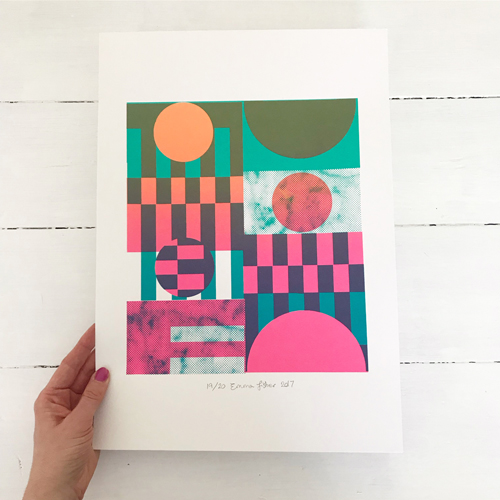
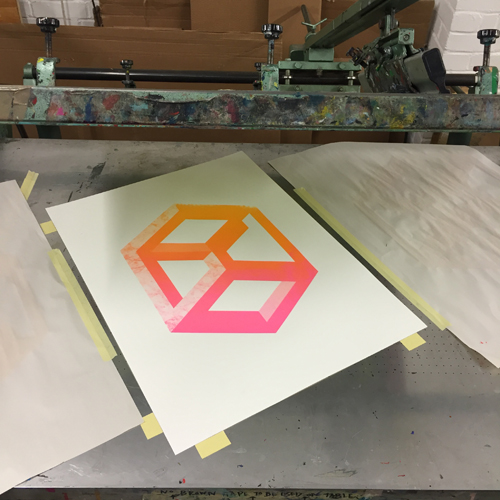
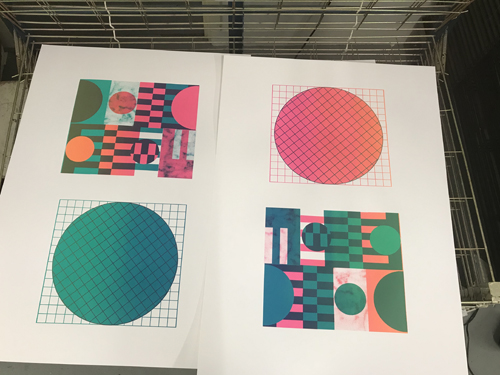
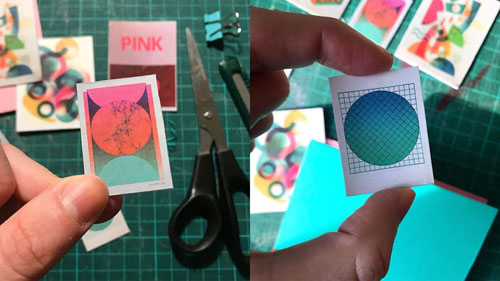
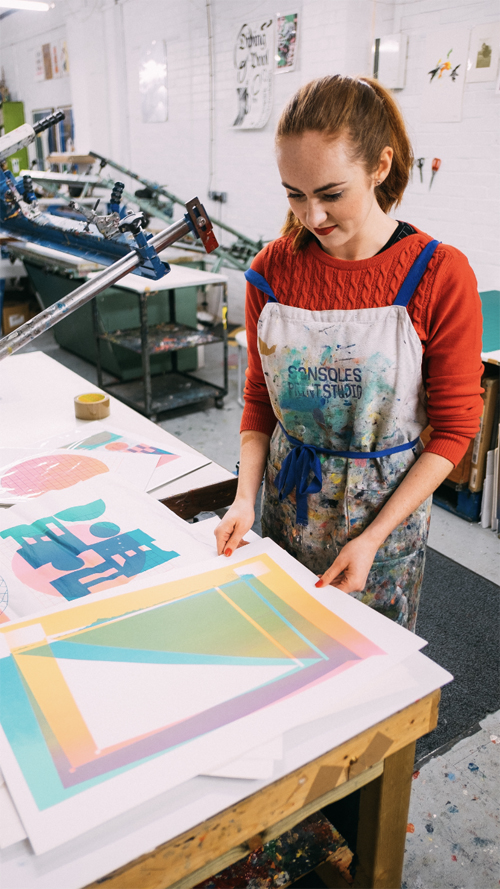
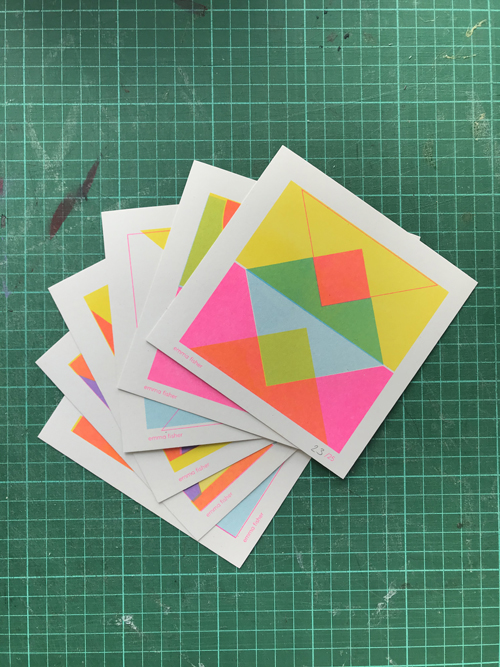
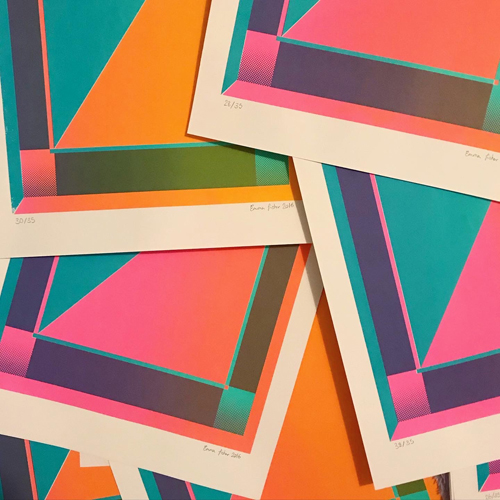
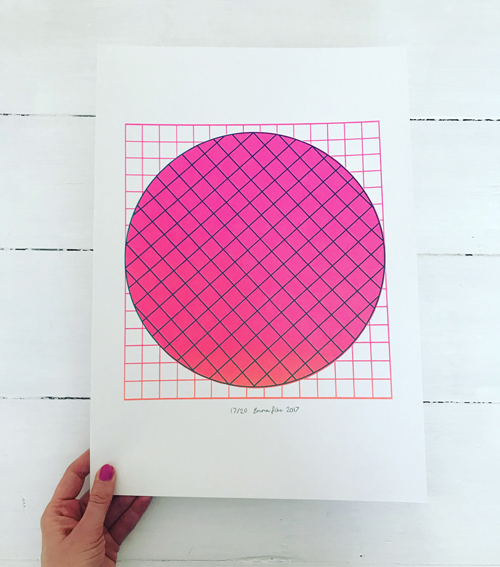
I’m a Graphic Designer and Printmaker living in South East London. My style is inspired by Japanese art and geometry in design and nature and includes a signature colour palette recognisable with accents of neon tones.

I have worked on commissions with brands including Barbour, GLUG, ibis Hotels and also collaborations with creatives including US Studio, Special Edition Co. I sell my print work at markets and stockists across the UK, and I am always keen to take on new challenges, new projects or collaborations.

Describe your printmaking process.

My printmaking process starts with an initial idea usually in the form of a rough pencil sketch. I find it much better to put pen to paper and build a collection of drawings. I can then work from these ideas with a good picture of what I want to create before getting lost in the options once you begin to start working digitally.

How and where did you learn to print?

I studied Graphic and Media Design at The London College of Communication (LCC). But regretfully only took full advantage of the print studio in my third year of studying!

Why printmaking?

I first experienced screen printing on my foundation course, but due to a lack of confidence and understanding of how the print process could help me and my then traditional way of drawing and painting, I didn’t venture back into the print studio until a few years later.

When I finally got back into the print studio at LCC with a wonderfully encouraging tutor, Tony, everything started to click. For me, it was the ability to mix and make colours unachievable through digital printing techniques. I also became obsessed with making gradients, experimenting with halftones and the unpredictable results from overprinting with transparencies. It made me more free and experimental with my work and now I always keep all my test prints as they often inform new work and colour palettes too.

Where do you work?

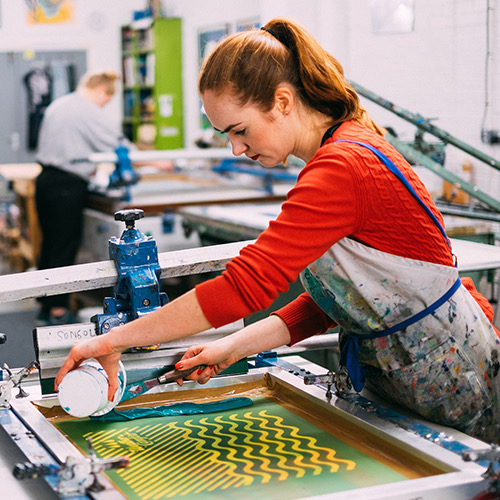
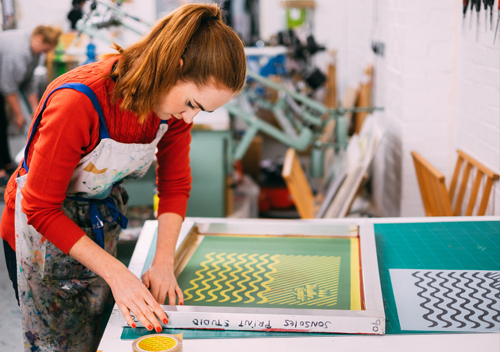
I am a member at Sonsoles Print Studio in Peckham, so try and get there as much as possible. I also currently work full time as a Graphic Designer at innocent drinks, so fit my printmaking in around the evening and weekends when I can.

How long have you been printmaking?

I’ve been printmaking for 6 years now. After starting a career as a Graphic Designer, I was determined to keep up my printmaking practice as much as possible. I feel it pushes me to be more experimental in my graphic design work, and the print studio offers a space to be purely self-indulgent in my own practice.

What inspires you?

I get inspiration from all over the place. I’ve always wanted to go to Japan and finally made a trip there in 2018. I took hundreds of photos from tiled grids in the architecture to the coloured traffic cones in the street. The colour palette was so different there, it still inspires me today. I also love David Hockney and Matisse as masters in colour, and continually think of their fearlessness in pushing colour boundaries and bold colour choices.

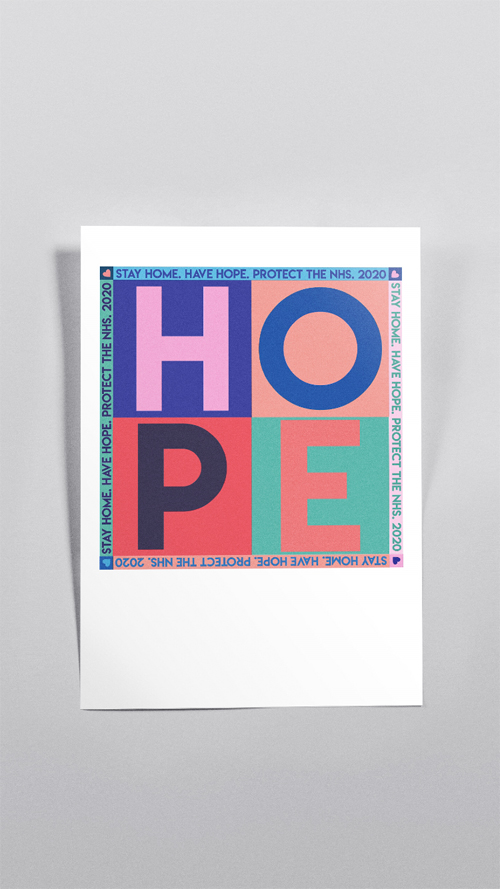
Recently, like many other designers I’ve been massively inspired by the abundance of creativity across the country with rainbow illustrations, messages of hope and support for key workers pasted in windows forming street art galleries like we have never seen before.

What is your favourite printmaking product?

My favourite printmaking product is probably neon ink or neon acrylic paint! It’s essential in my palette and adds that glow unique to my printmaking.

What have you made that you are most proud of?

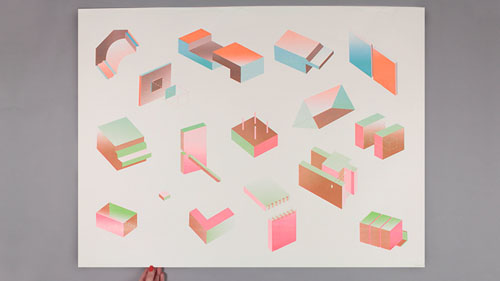
I’m probably most proud of a series of isometric prints I did for my degree show, as this was the first time I felt like I had conquered my challenges with the print room and come out with a new direction to my work that has continued to define and inform my personal practice today. 

Where can we see your work? Where do you sell?

I use Instagram as the most current portfolio for my work and love to show work in progress and inspiration too. I take direct orders from Instagram and have an online store emmafishershop.com

What will we be seeing from you next?

Inspired by the rainbow window artwork I have created a new print series. This is one of my first experiments into more typographic work and I’d love to take these designs into the print studio post lockdown.

Do you have any advice for other printmakers and creatives?

Definitely become a member of a local studio, either taking up a short course or join to keep up personal projects. It’s not only a great place to create tactile work and get messy but also be inspired by other printmakers and designers too.

For more from Emma:
Instagram @emmafisher_design
Facebook
Shop
Website

Designing and Printing an Envelope Stamp

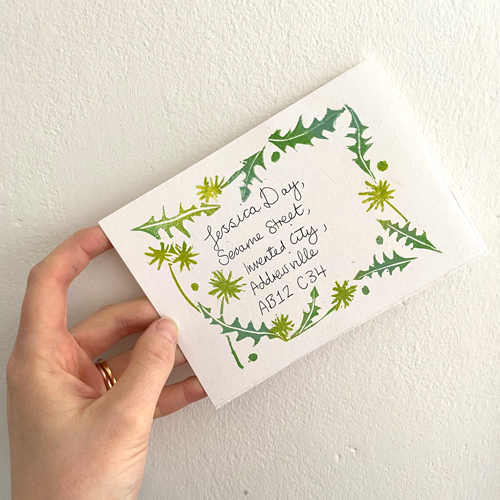
The ways in which we communicate with one another have changed recently and a lot of us are thinking about alternative ways to connect with friends and family. In this project, we show you how to design and print a stamp for the front of your envelopes to add something special to your snail mail to someone important to you. Use your stamp to frame the address on your envelope or parcel or around a little friendly note. You could even print and write a note, take a picture and send to a friend in a cute picture message!

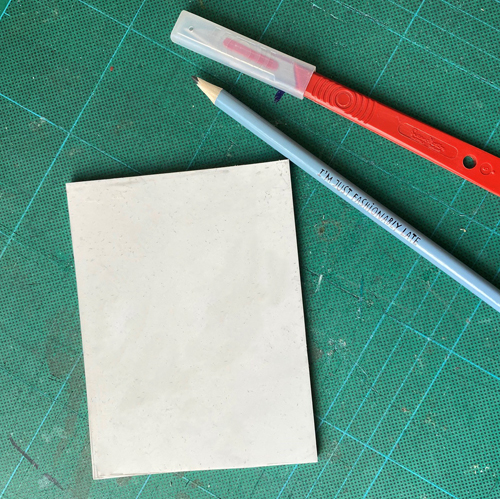
Start with a rectangular piece of Mastercut, Lino, Vinyl, Softcut and other stamping blocks will also work. Carefully use a scalpel to cut a rectangle slightly smaller than your envelope.

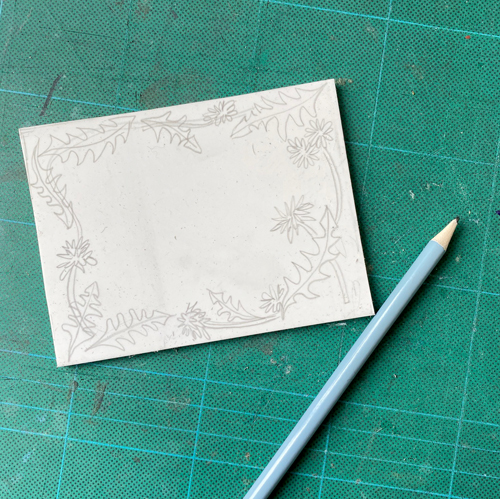
Draw a design onto the Mastercut with a pencil. Draw the design around the edges, leaving a blank space in the centre for the address or message.

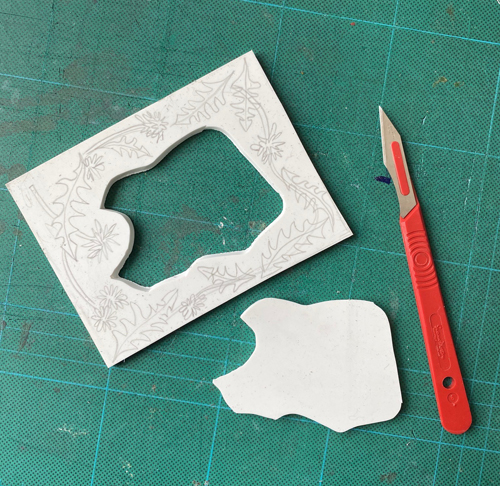
Use a scalpel to remove the blank centre of the stamp. This can be used for more stamps later.

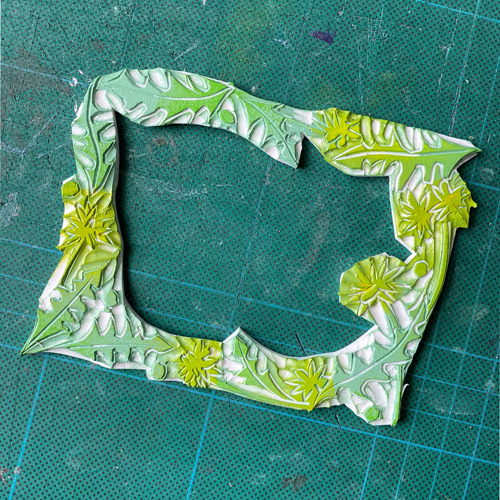
Carve your design. Use a V tool or small U to carve the detail and remove the larger areas with a large U tool. Trim off any excess with a scalpel. We used a set of Japanese Cutting Tools and a 12/1 Pfeil Tool for the tiny detail.

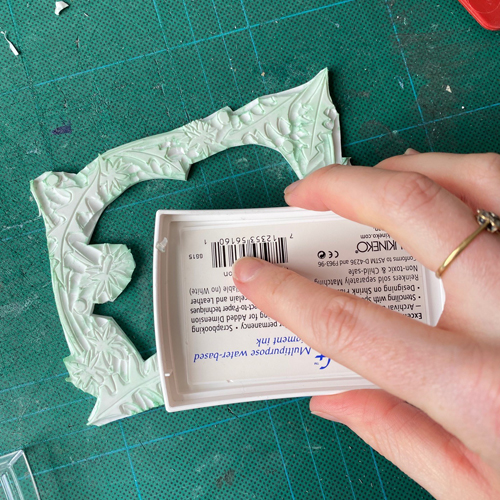
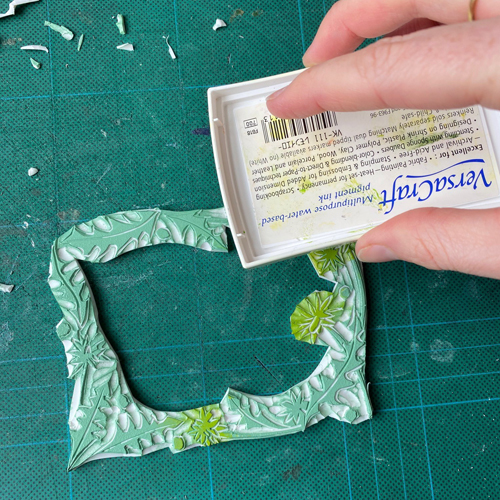
Ink up the stamp using Versacraft Ink Pads. Lay the stamp face up on a flat surface and dab the ink pad all over it.

Use different coloured ink pads to blend colours and add pops of colour to specific areas.

Place the inked up stamp face down onto your paper, envelope or note card and press firmly down all over to print.

For this project you will need:
Mastercut or other stamp carving material
– Cutting Tools (such as Japanese Tools or Pfeil)
– Cutting board
– Pencil
– Scalpel
Versacraft Ink Pads (or small pads)
– Envelope or paper on which to print

Meet the Maker: Hannah Carvell

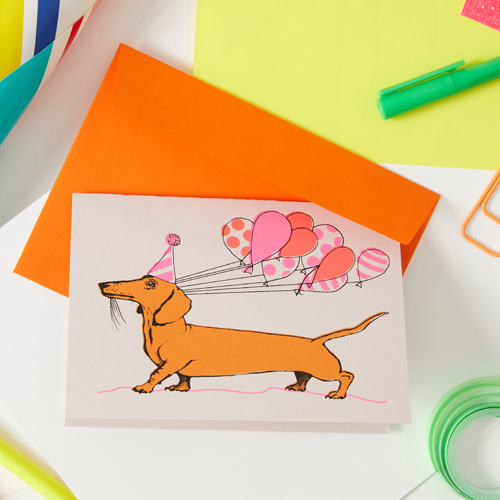
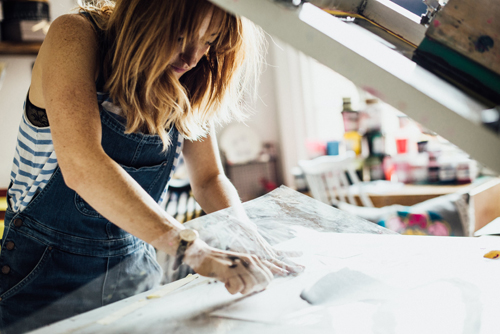
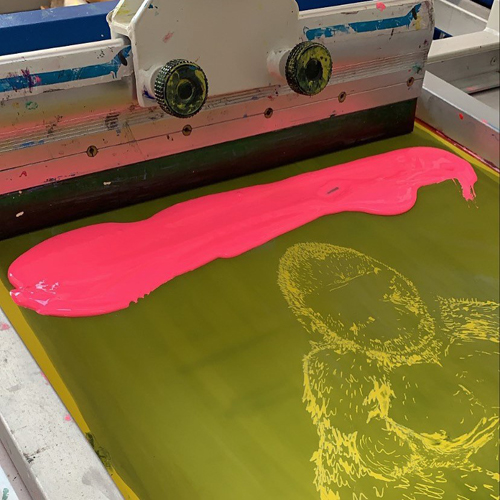
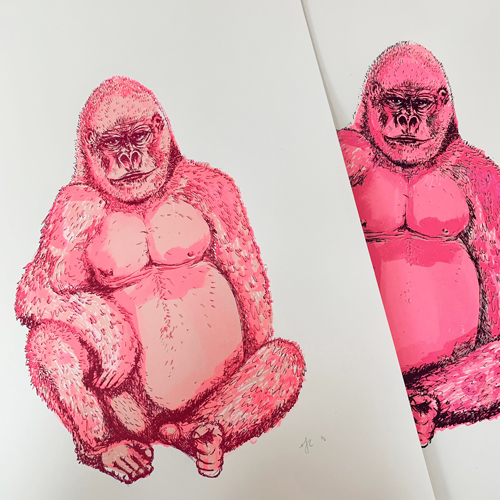
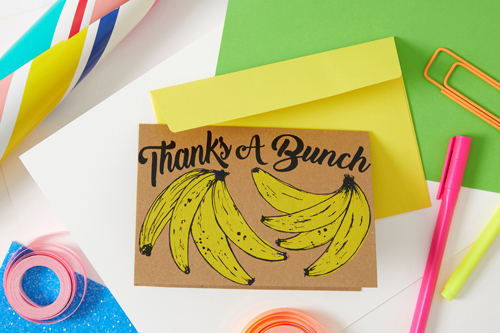
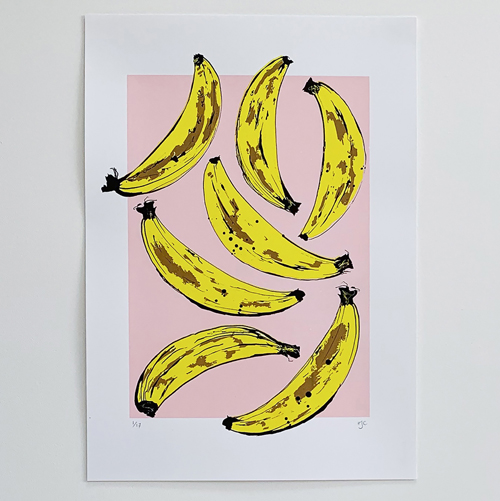
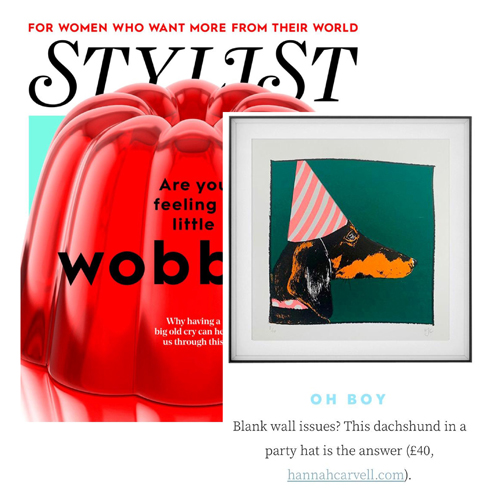
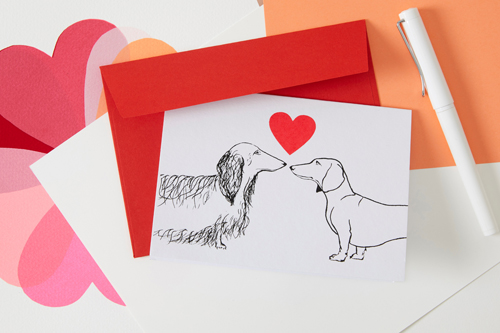
I am a screen printer, working out of my Studio in Bedford where I am also mum to two children and various pets. I screen print Art Prints and Greetings Cards, I love bright colours and my prints more often than not feature animals, I am partial to a Dachshund and most recent piece is a large Pink Gorilla.

Describe your printmaking process.

I screen print so the process is a long one. Normally I start with pencil and pen illustrated sketchers, which get scanned into photoshop to be made into layers which are printed onto acetate, these get developed using UV lights onto my screens and each colour printed onto paper is a separate screen, it’s quite a process.

How and where did you learn to print?

I did a Fine Art Painting degree, mainly using oils (still painting Drag Queens and Dachshunds even then) but I touched on Screen Printing and loved it. fast forward 15 years, a career in London & 2 children and wanting to get back to a creative job that I could do whilst being able to pick my kids up from school and I just knew Screen Printing was the route I wanted to take.

Why printmaking?

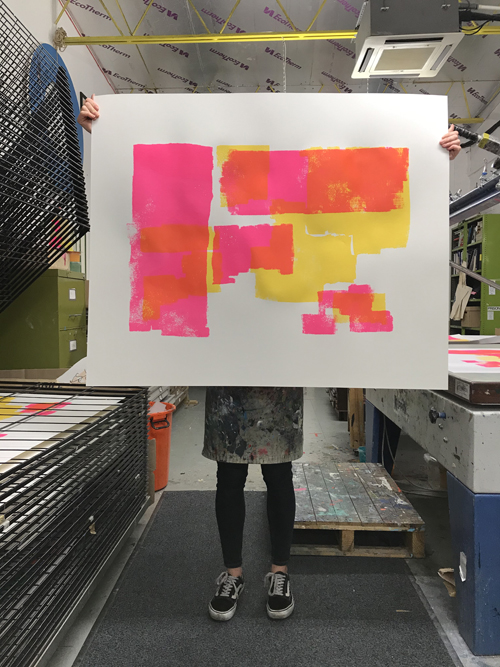
I love the bold blocks of colour and building the image up in layers to produce an image.

Where do you work?

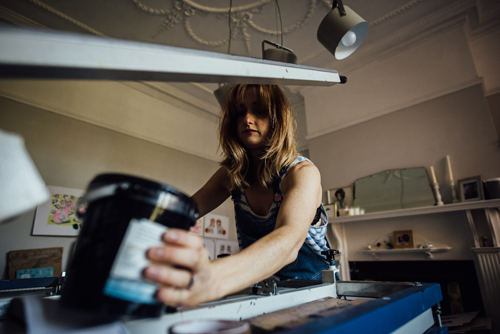
I am very lucky, I have a studio at my home in Bedford, we converted a patch of our garden, it’s my happy place.

Describe a typical day in your studio.

Well prior to lockdown, I would get my kids to school, walk the dogs and then spend the day either Printing at my Flat bed printer or Sketching and Developing new ideas for prints before School pick up at 3:30pm. Then I might get back in the studio at 8pm to work on admin like website and packing orders. Life has changed a lot since then, now with 2 children to home school I’m not finding I am getting as much time as I would like to print, we are muddling through the best we can.

How long have you been printmaking?

About 3 years

What inspires you?

Colour, I love bright colours and Clashing patterns, also animals, in particular, my Dapple Dachshund Minnie Moomin.

What is your favourite printmaking product?

NEON PINK INK every time!

What have you made that you are most proud of?

My recent print of a Pink Gorilla I am proud of, it took a lot of drafts and changes to get it exactly as I wanted it. I made a few by printing a base layer of Adhesive and using Pink Metal Leaf sheets as my base layer and then printing on top, it was my first time using metal leaf and I had a lot of goes before I was happy, but I rather love the camp pink beast I ended up with.

Where can we see your work? Where do you sell?

I mainly sell via my Instagram page @hannah_carvell this is where I post all my new work and progress shots I also have my own website www.hannahcarvell.com and a few Retail stockists dotted around the country.

What will we be seeing from you next?

I always have a few ideas on the go, I have a lot of requests for more large Abstract hearts, which I do really enjoy printing. I would also like to do more monkeys and a series of Staffordshire China Dogs, I sketched loads of these so long ago I would love to turn them into prints.

Do you have any advice for other printmakers and creatives?

If I still lived in London I would have joined one of the open studios to print, the facilities are all there as well as other people on hand to help you out in those early stages. I have been to Print Club London and Consoles Print Studio, both offer workshops to get you started. If that’s not a possibility then I managed to source most of my equipment 2nd hand on eBay and Gumtree, I got my Flat Bed printer from a School that was selling off old equipment on eBay.

For more from Hannah, follow her on Instagram!