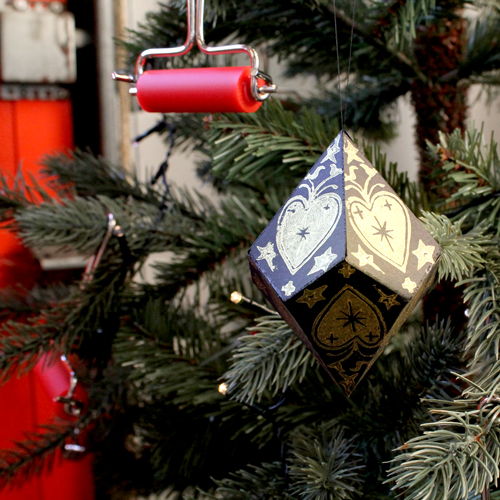
This gorgeous DIY bauble will look amazing hanging from any tree! Use ink and paper to match your favourite Christmassy colours. Jez has opted for gold ink on black paper. Here’s how to make it:
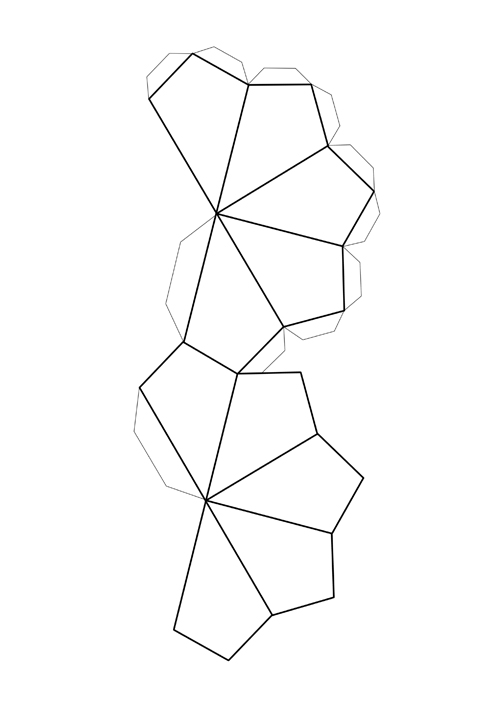
Print out our bauble template onto A4 paper – it can be downloaded here. We use using black paper for a striking bauble. Trace one quadrilateral shape of the design and trace it to a piece of lino. We are using traditional lino which is made of completely natural materials.
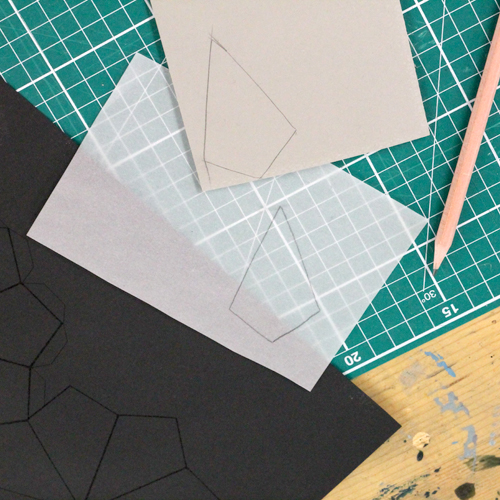
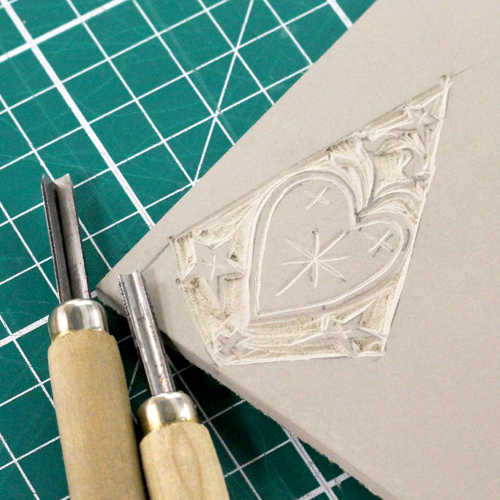
Draw a design into the quadrilateral.

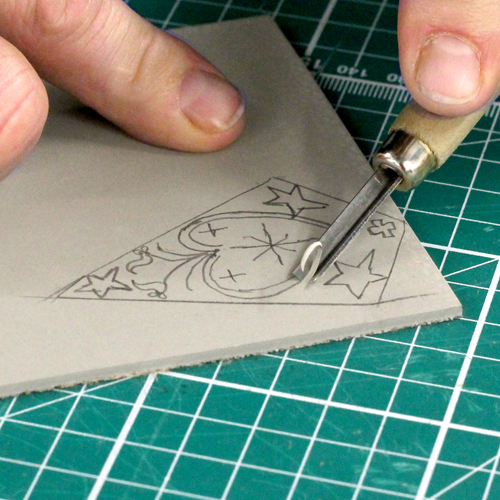
Carefully carve the design into the lino. A small U tool will carve fine, even channels in the lino. A V tool will give clean, sharp edges with fine detail. A large U tool is perfect for clearing large areas. We are using a set of Japanese cutting tools. Remember that the area left uncarved is the part that will print.
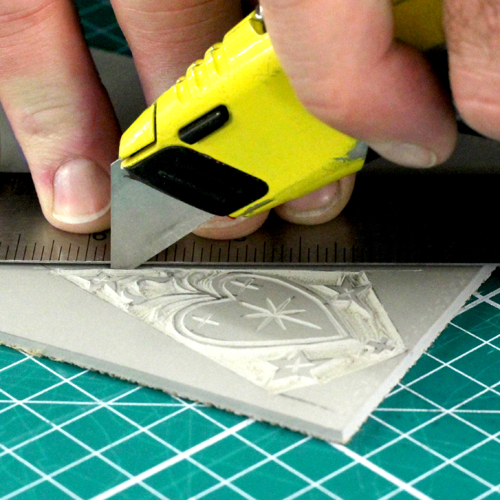
When the design is carved, carefully cut the quadrilateral out of the lino block using a craft knife and a metal ruler.
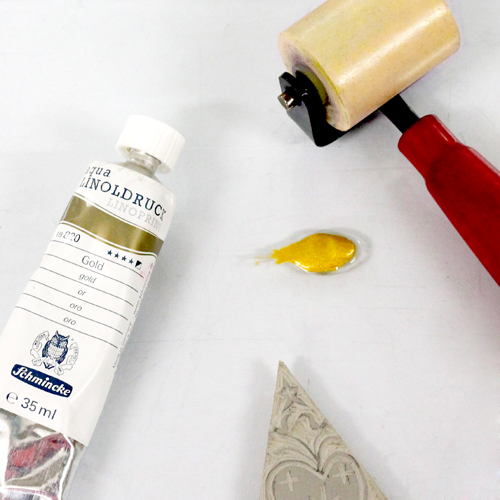
Use a small roller (such as this Speedball Deluxe 1.5″ Roller) to roll out a small square of ink. It should not be squelchy or leave long track marks when rolled. We want the ink to have a suede texture and make a zzz sound when rolled. This Schmincke ink is a beautiful bright gold. It’s water-based so will dry quickly on the paper – perfect for speedy bauble making!
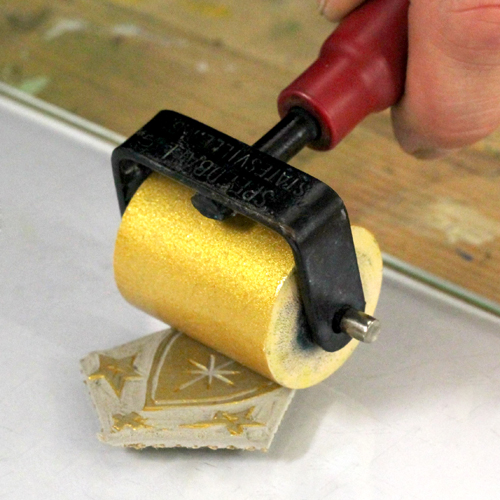
Roll the ink onto the block.
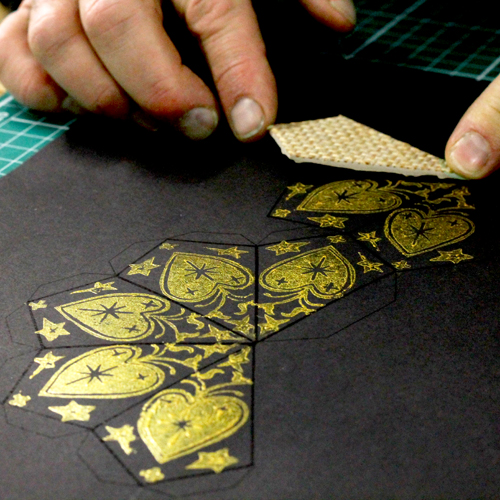
Carefully place the block onto one of the quadrilateral shapes on the template. Press on the back with your hand or use a hard roller to roll onto the back of the block. Re-ink and print in each of the quadrilateral shapes on the template.
Wait for the ink to dry.
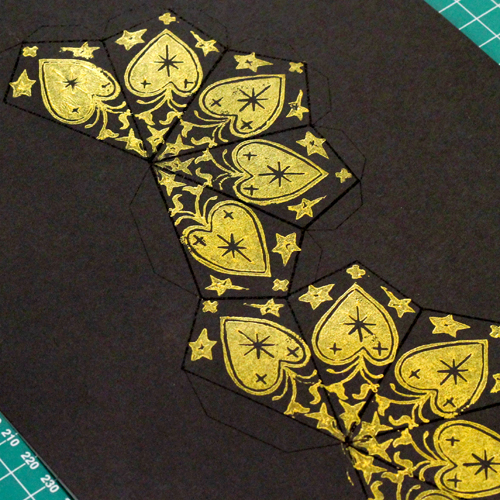
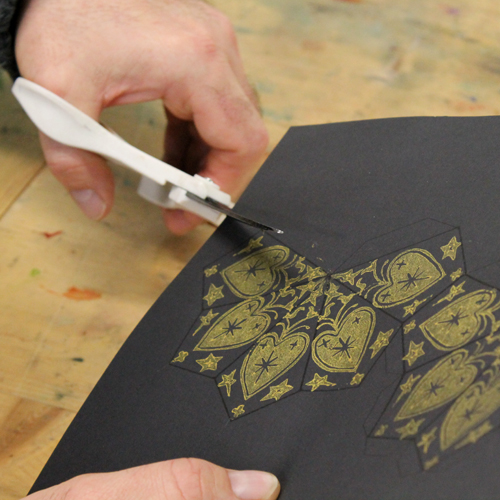
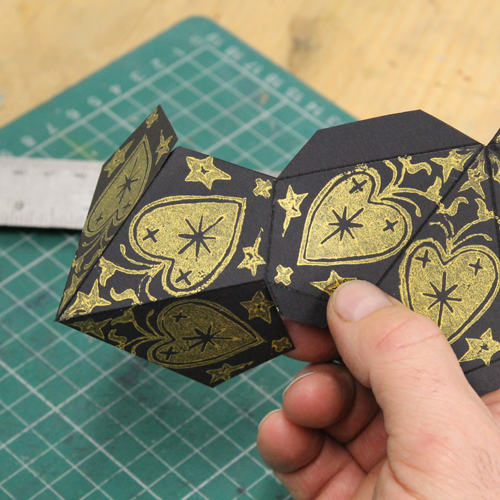
Cut around the net of the bauble, being careful to not cut off the tabs.
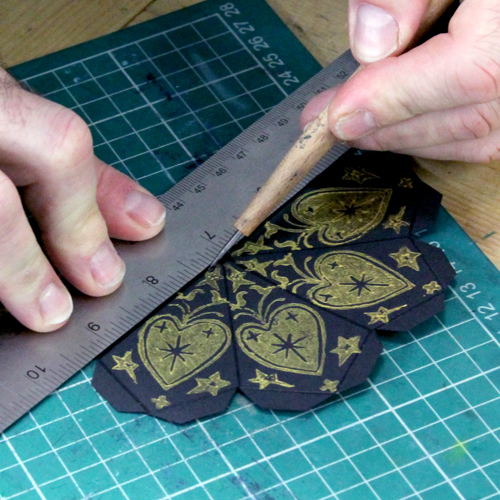
Score along the fold lines – we are using an etching needle and a metal ruler.
Fold all of the scored lines into mountain folds so that the net will form a bauble shape. Carefully glue the tab and stick it to the underside of the card to form half the bauble.
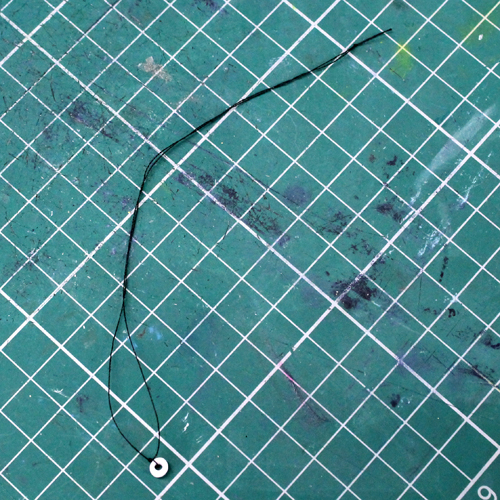
Tie a bead to a piece of thread from which the bauble will hang. The bead will prevent the thread from slipping through the hole.
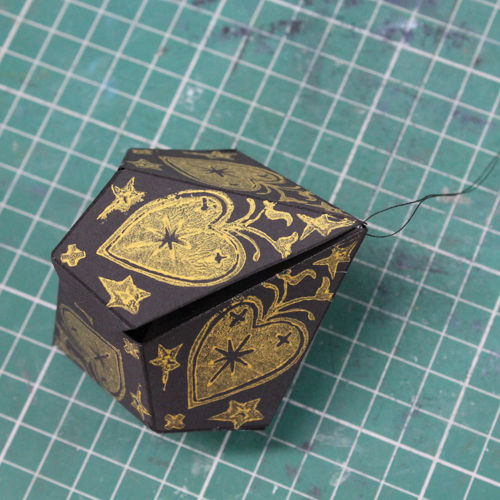
Continue to stick the tabs to the underside of the card one at a time to complete the bauble. Before sticking the last two tabs, side the bead under the point of the bauble. The bead should hold it in place. Glue the final two tabs.
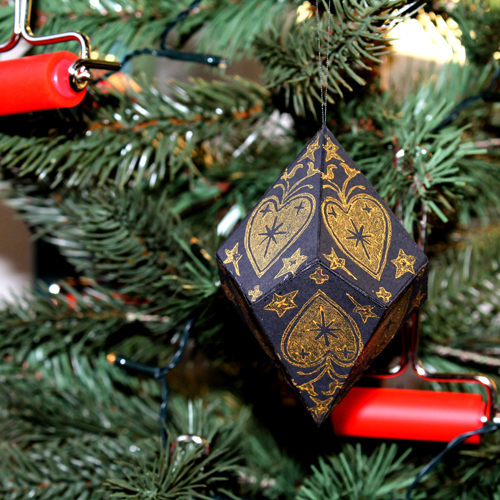
The bauble is now ready to hang!
To create Jez’s Christmas bauble project you will need:
- Bauble template
- A4 printer
- Card (we used this Black Paper Pad)
- Tracing paper
- Pencil
- Sheet of traditional lino
- Cutting tools
- Schmincke Ink in gold
- Roller
- Hard roller for pressing on the back of the lino
- Inking plate or tray
- Scissors
- Craft knife
- Metal ruler
- Etching needle or another object to score fold lines
- Glue (Pritt stick works well)
- Thread
- Bead
Made this project? Tag us on Instagram @handprinteduk and add the hashtag #printmakingforthepeople