Colour mixing can become a very complicated topic. When printing, it is tempting to use colours straight from the tube as mixing the perfect shade can be a little daunting and result in a large quantity of unwanted murky brown ink. We wanted to create a few colour mixing guides to help printmakers build up their colour mixing skills.
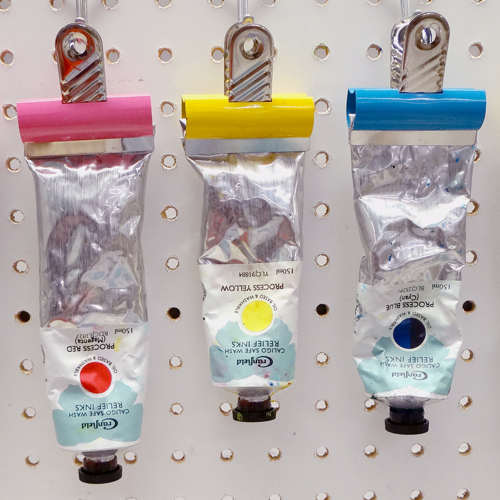
For our first guide, we are going to be using Caligo Safe Wash Relief Printing Inks in the process colours: Process Red (Magenta), Process Yellow and Process Blue (Cyan). Process colours work like printmakers’ primaries. They are designed to be mixable to create a wide range of shades. You can also print these inks on top of one another when layering prints. We will focus on mixing secondary colours (orange, purple and green) using just two of these inks at a time.
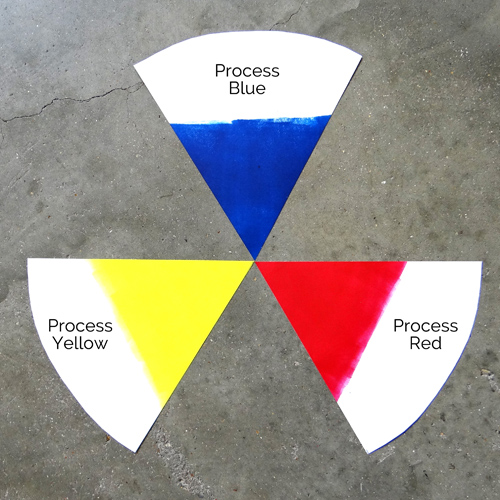
Below, we can see the process colours unmixed, as they appear straight out of the tube (no extender has been added). The ink has been rolled directly onto the paper (not transferred from a piece of lino) and is therefore quite thick.
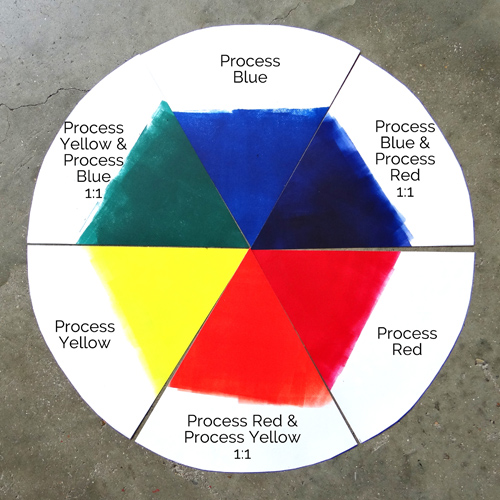
To make the colour wheel below we have mixed the three secondary colours using a 1:1 ratio of our process colours, measured by weight. When the process colours are mixed in equal parts we can clearly see that they are not of equal strength. When the red and yellow are mixed in equal parts by weight, the strength of the red dominates the yellow. The bottom wedge of the circle below shows a scarlet rather than a bright orange.
The yellow ink is also knocked back by the blue. When Process Blue and Process Yellow are mixed in equal parts by weight, the blue dominates the green shade as seen below.
The Process Blue ink is stronger than the Process Magenta in the 1:1 mix, resulting in a shade of blue that just hints slightly towards a purple.
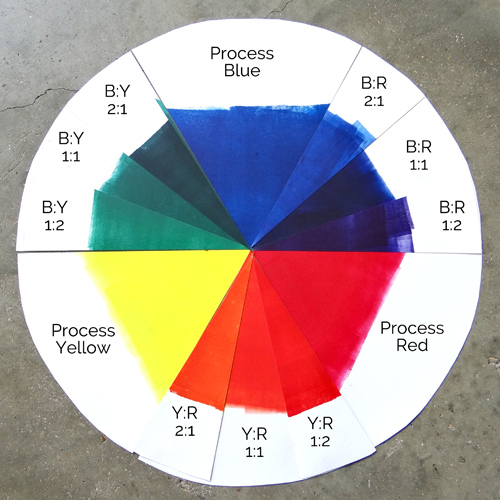
In order to create a colour wheel with more subtle shades, and to explore the strengths of the process colours further, we added segments of colour with different ratios.
The below colour wheel includes 2:1 mixes by weight of each of the secondary colour mixes. We can see that the Process Red is still very strong when mixed with Process Yellow, even in a 2:1 yellow to red ratio.
The Process Blue is also still very strong when mixed with both the Process Red and Process Yellow.
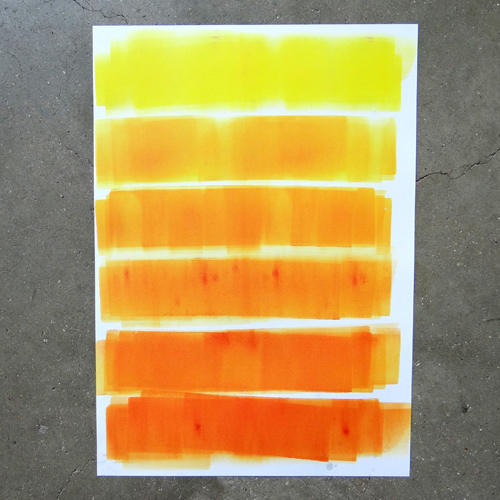
In order to create more subtle shades of orange, purple and green, we can tint our inks. We can tint our yellow with tiny hints or red until we reach the desired shade. Below we have added increasing amounts of Process Red to Process Yellow, starting with 100% yellow and adding very small hints of red.
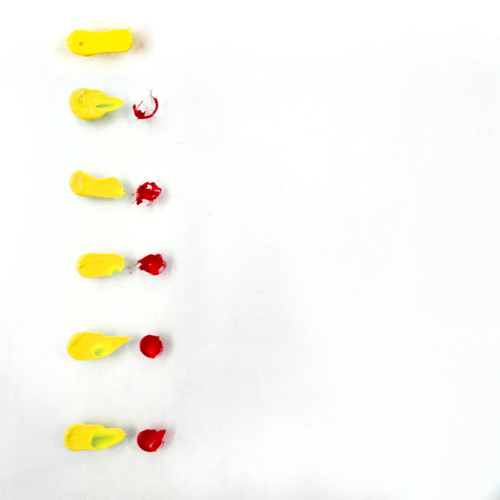
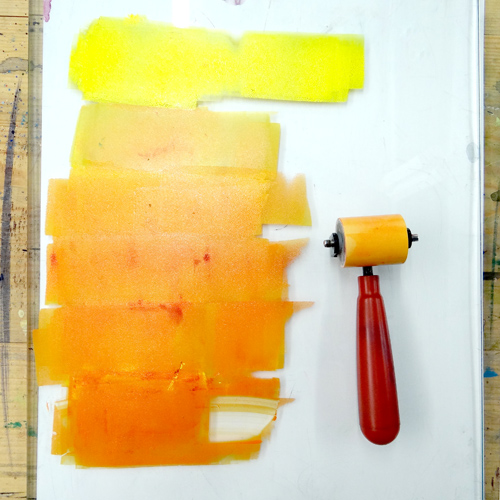
This is what our shades of yellow to orange look like when rolled directly onto paper.
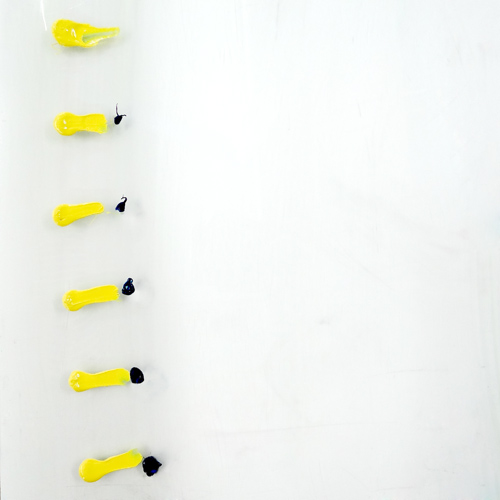
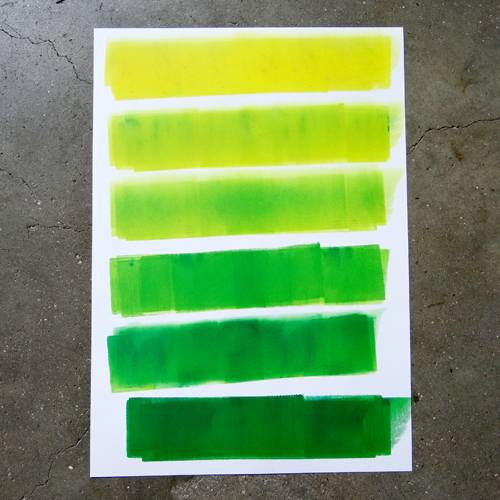
We carried out the same experiment with Process Yellow and Process Blue. The blue is very strong so we need only add very tiny dots of the blue to alter the shade dramatically.
More natural shades of green can be created by adding the tiniest dab of Process Red.
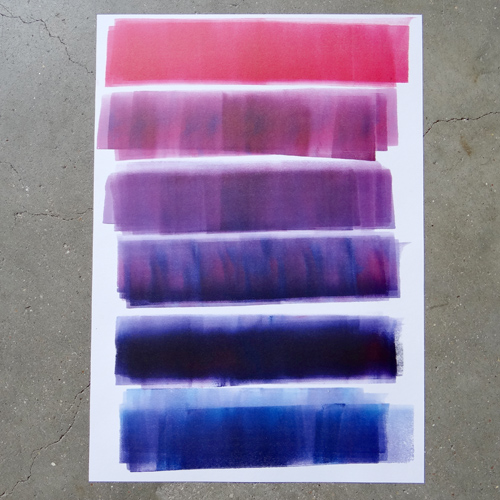
To mix shades of purple, we added small touches of Process Blue to Process Red. It is useful to know which ink is stronger so we can begin with the weaker colour and add touches of the stronger ink until the desired shade is achieved. If we were to start with Process Blue here, we would need to add a lot of Process Red before the colour was altered, resulting in a large quantity of ink, much of which might be wasted.
Here we can see that the Process Red appears quite pink when rolled thinly onto white paper. This pink hue enables us to mix rich purples rather than dirty burgundies.
A huge range of colours can be mixed just using the Caligo Safewash Process Colours. In these experiments, we have only created secondary colours by mixing two inks at a time in varying proportions. However, more shades can be achieved by using all three Process Colours. Adding Black ink to this range opens up more possibilities, as does the addition of Opaque White and Extender. Please note that these colours are just a guide and how they appear on your screen may not be an accurate representation. More on this in further experiments!