Drying Prints when Using Oil-Based Inks

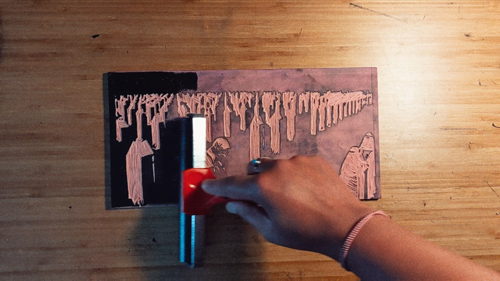
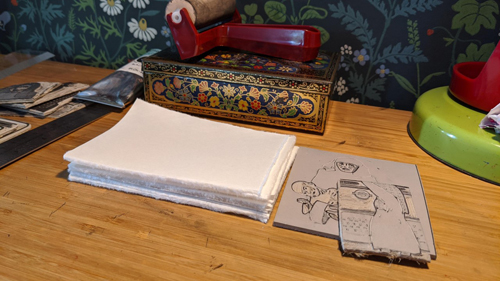
The ever-helpful Michael from Cranfield has some top tips for drying prints when working with oil-based inks. We’ve summarised some of his advice to help us with our own printmaking:

When working with oil-based inks, the air in the room is very important in order for your prints to dry. The atmosphere should be warm and have a low relative humidity to increase the drying speed. Moving air is even better – an open window or a fan will help (but remember that some heaters can create water vapour and made the environment more humid.)

Damp studios at night are not ideal. The cold, damp atmosphere is not a good environment for drying prints. It can undo the lovely drying work that has happened during the day!

Adding driers
– Liquid driers like Cobalt Driers can be added up to around 5% – any more than 6% and the solvent in the driers can do more harm than good to the drying of your prints.
Wax driers have the texture more similar to ink so they can be easier to add. Around 7% should be the top end of the amount you would want to add to your ink but 3% should be plenty.

In conclusion, a warm, dry environment with well-circulated air should ensure your prints dry quickly. Add a little driers to speed up the process if you like.

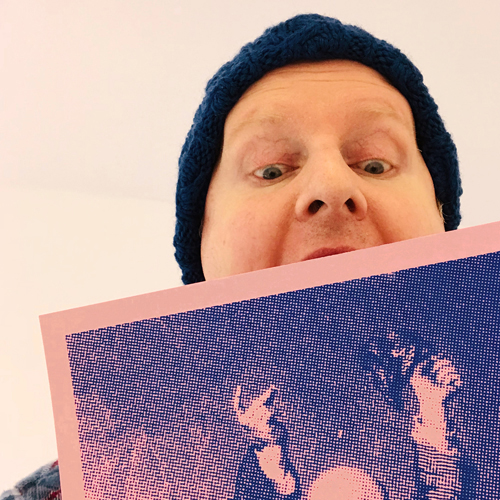
Meet the Maker: James Bristow

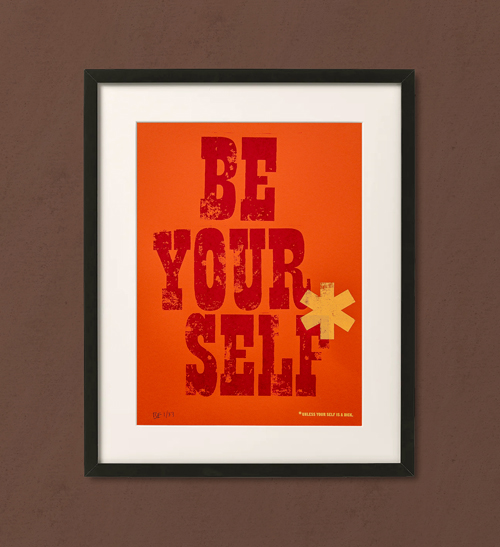
I’m James Bristow, a graphic designer and, following a career that included marketing fish to restaurants (yes, really!), I set up Beanwave, a small studio working on brand identity, printed literature and online communications, based in Silverstone, Northamptonshire.

I love quirky typography, wordplay, colour and imagery. Working with commercial clients – including the National Trust, Jaguar, The Royal Signals, The Open University – often comes with constraints (and rightly so), so having an outlet to experiment and play creates a healthy balance between design and art. That outlet is Beanwave Editions – quirky, colourful, hand-pulled screenprints.

Describe your printmaking process.

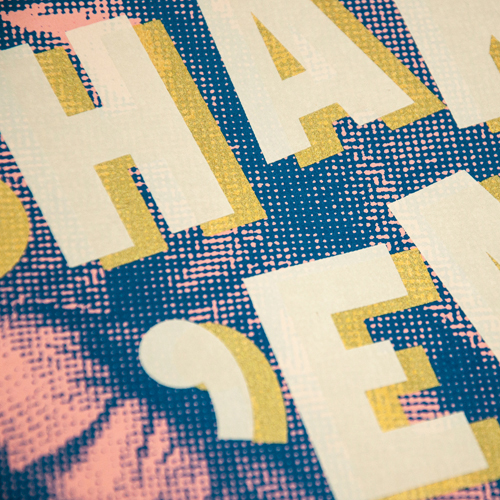
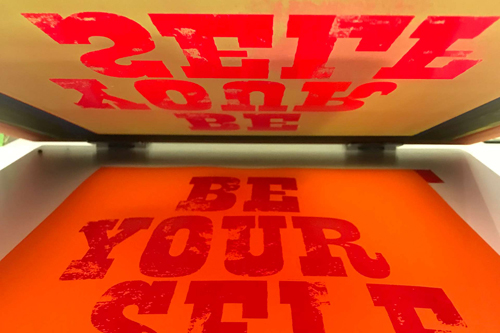
I pick up phrases, bits of lyrics, random images, and twist them on-screen into something that amuses or delights me while thinking about how to utilise type, layers of overprinted colours and paper. I try to imagine each print in a frame on a wall in someone’s home. I then expose the screens and get inky. What I end up with rarely looks like what I had in my head, but that’s all part of the joy/frustration.

How and where did you learn to print?

I dipped a small toe in the world of screen printing back at art college some 25 years ago, but only in the last year did I get around to dipping in the rest of the foot, learning by doing. Also, a couple of books were helpful – Print Liberation and Screenprinting by Jane Sampson – as well as online blogs and videos.

Why printmaking?

Most graphic designers get excited about print (well, certainly the ones with a few grey hairs) and I’m no exception. It’s great to take a design and make it ‘real’, experiment and have control over the whole process.

Where do you work?

I’ve set up a print workshop in a small room behind the design studio. I can do the whole process in there, from the coating and exposing screens to printing. Very basic, but it does the job.

Describe a typical day in your studio.

Screen printing fits in between and around the day job of commercial graphic design work. So there’s no regular routine. I think this works for me, it keeps printing as more of a treat and not just another job to do.

How long have you been printmaking?

Only 1 year. So still got a lot to learn (and accidentally stumble into).

What inspires you?

Corita Kent, bold colour, Beastie Boys, psychedelia, Anthony Burrill, the punk do-it-yourself ethic, retro typography, patterns from the 60s & 70s, 3D/Robert Del Naja, wordplay, vintage ephemera.

What is your favourite printmaking product?

Speedball white ink. Having had millions of pages of commercial work printed over the years using CMYK litho, it’s liberating to be able to print in white and other opaque colours onto coloured papers.

What have you made that you are most proud of?

The next piece is always the most exciting. Oh, and the DIY vacuum table that I built this summer.

Where can we see your work? Where do you sell?

I share work in progress images on Instagram, and final editions go in my shop. I’ve also recently had a couple of approaches from homeware shops and a gallery, which I’m exploring.

What will we be seeing from you next?

I’ve just launched three quirky Christmas card designs. After that, I’ll delve into my notebook of ideas and find something to get stuck into.

Do you have any advice for other printmakers and creatives?

Learn by doing. Find your own path. Think of it as play, not work.

To see more from James check out his website and Instagram.


Meet the Maker: Fiona Wilson

I’m Fiona, I am a screen printer and maker. I create happy colourful artwork and home accessories to make people smile and add some colour to their homes.

Describe your printmaking process.

I spent a year creating a print or collage a day a few years ago and this has given me a huge body of work to develop my character, patterns and ideas from. I love working with painted and printed papers, nothing much goes to waste in the studio as I tend to recycle it to start new designs. I work mainly with paper and wood, creating art prints and more 3D playful pieces, such as my wooden vases and flowers or my Mix and Match people.

How and where did you learn to print?

I retrained in my 30s and went back to university. I studied Surface Pattern and Textiles at Bradford College. We had a vast print room with the longest print tables I have ever seen and some fantastic tutors. I had a very happy 3 years there.

Why printmaking?

Well, I love colour, and mixing and matching inks is a lot of fun. Plus when you pick up that screen and see the results. I think it’s like opening up a present every time. I love teaching other people and had a great time teaching 6 years olds a few years ago who went “ooooo” every time they lifted the screen up.

Where do you work?

I have a studio based in Leek in Staffordshire. The building used to be a small Ginger Beer Factory. It’s my favourite place to spend my time, in fact, it’s hard to get me out of there sometimes.

Describe a typical day in your studio.

I’m usually up quite early and tend to be in the studio by 8am. I start with some screen printing if I have orders to do so that I can leave things to dry while I get on with other things. I might be updating my website, or adding something to social media. If there are wooden pieces that need cutting I’ll head to the woodwork area and spend some time on the band saw and sander. If I’m really busy then my other half will help out too, getting some wood cut whilst I get on with printing and packing up orders. I try to do something playful creatively once a week, which might be experimenting with layering up screen prints or creating collage pages in my sketchbook.

How long have you been printmaking? 

I started university in 2006 – so nearly 14 years now.

What inspires you?

That’s really tough, as there is so much, but I do love vintage wooden toys and illustrations from kids books. I love the colour and pattern of Marimekko. I look at all sorts of things and I do love a good library and have my own stash of books that I’ve collected over the years.

What is your favourite printmaking product?

I love the screen printing inks, whether it’s Speedball, System 3 or fabric-based ones, as they give you the flexibility as a screen printer to play with colour, opacity and layering.

What have you made that you are most proud of?

I love my wooden products. They are a bit different, playful and I have a lot of fun making them and developing new ideas.

Where can we see your work? Where do you sell?

You can find my work on Instagram and my website. I normally sell at markets but sadly lots not happening this year, but I have got some online events coming up, which you can find out about on my Instagram or you can sign up to my Print Peeps Newsletter.

What will we be seeing from you next? 

I am busy working on an online course at the moment which I am really excited about. It’s going to be about simple and accessible painterly printmaking techniques and lots of colour and pattern.

Do you have any advice for other printmakers and creatives?

Practice and keep creating as its the only way to get better at it and find the stuff you love doing. Enjoy it! Sometimes it’s frustrating when things don’t work the first time but equally some of my best ideas have come from mistakes and happy accidents, so keep an open mind. And don’t give up, I’ve screen printed on dining room tables and washed screens out in the bath when I’ve had to.

To see more from Fiona follow her on Instagram and check out her website.

Delicata Metallic Ink Pads

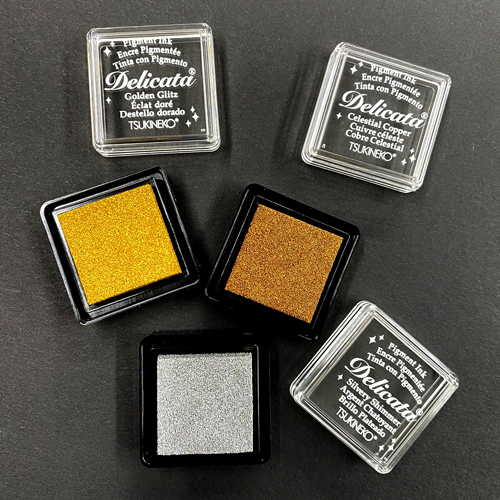
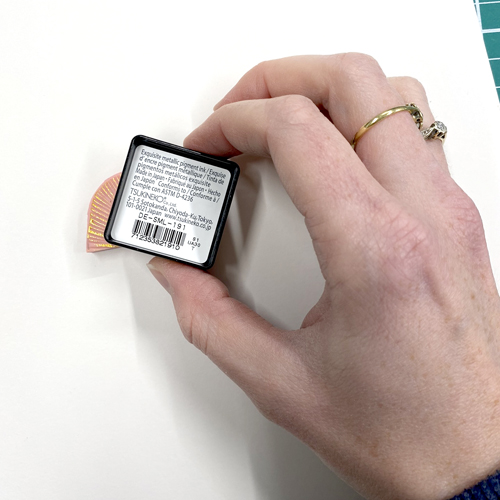
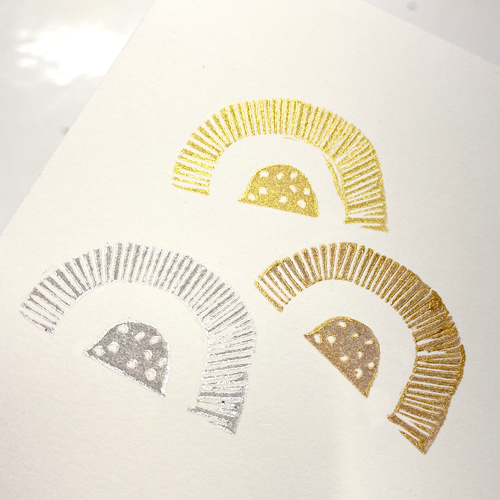
Stamping is one of the easiest ways to print at home. Use ready-made stamps or carve your own to create beautiful designs. We love these Delicata Metallic Ink Pads for printing onto paper. They come in Golden Glitz, Celestial Copper and Silvery Shimmer. All three print brilliantly onto both light and dark papers.

Ink up your stamp by dabbing it lightly all over the surface. This way, your ink pad doesn’t need to be larger than your block and can be used to ink up any size stamp.

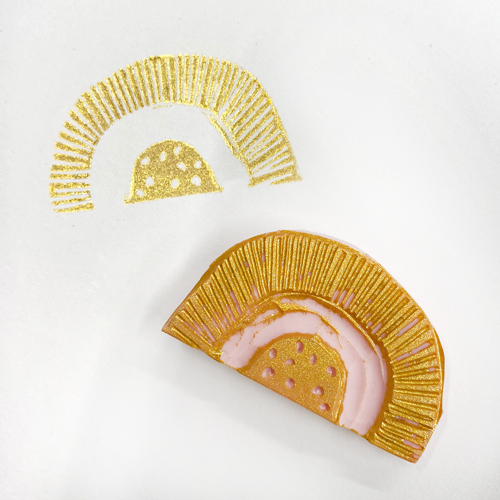
Press the stamp firmly onto the paper.

This Golden Glitz Ink Pad has a gorgeous shine!

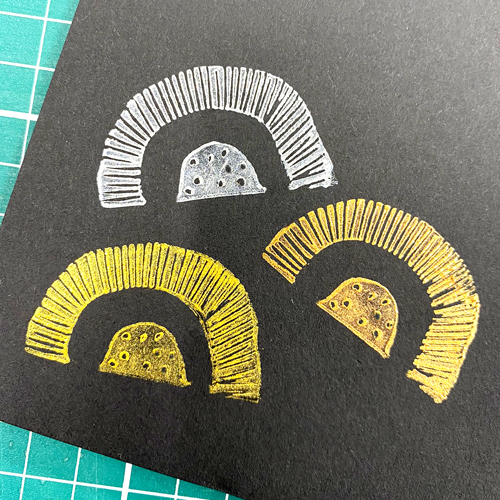
What’s even better? They print beautifully onto dark papers too! Look how great they look on black paper.

For project you will need:

Screen Printing Metallics: Ink, Powder or Foil?

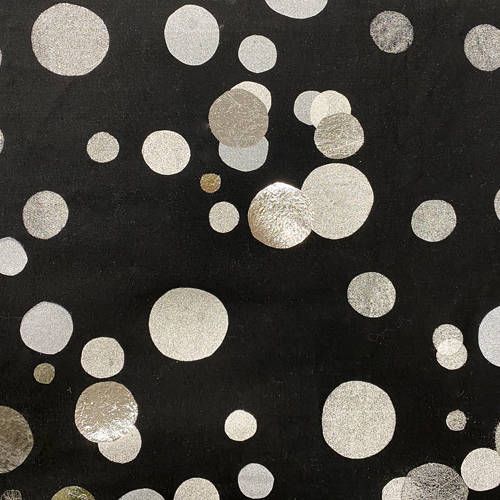
Printmaking with metallics can add a real pop to your designs. There are a few different options to choose from when screen printing with metallics: pre-mixed metallic ink, metallic powder and textile foils. We’ve made this project using all three methods to show you the advantages of each one.

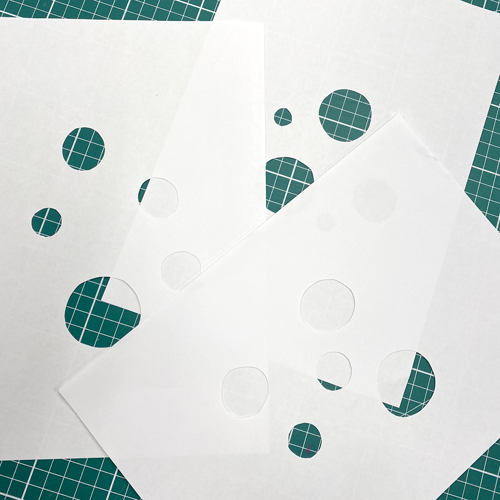
We cut three paper stencils: one for each type of ink in this project. This way, the stencil could be peeled off and the screen cleaned between each ink type.

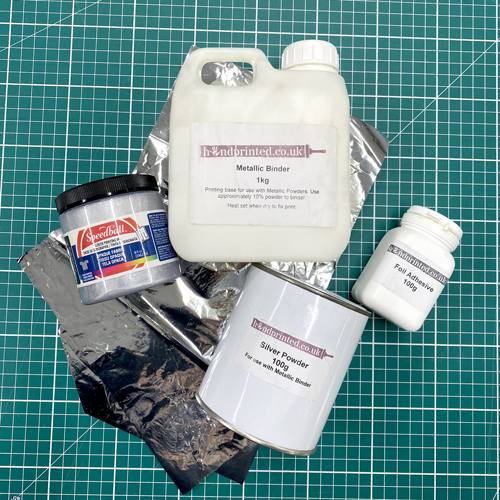
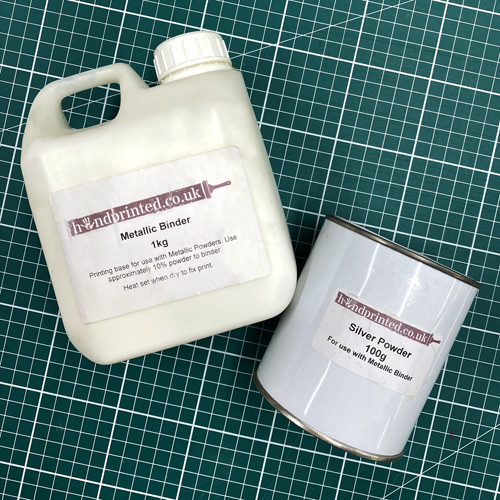
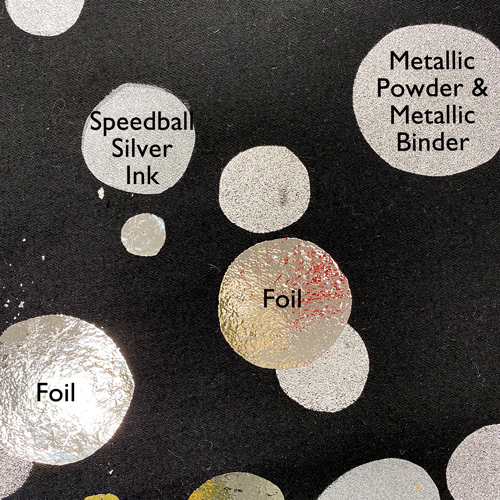
We are using three types of metallic screen printing: Speedball Metallic Screen Printing Ink in Silver (also available in gold), Metallic Binder mixed with Silver Metallic Powder (also available in gold) and Textile Foil (available in lots of colours).

A 43T mesh screen is perfect for printing onto fabric.

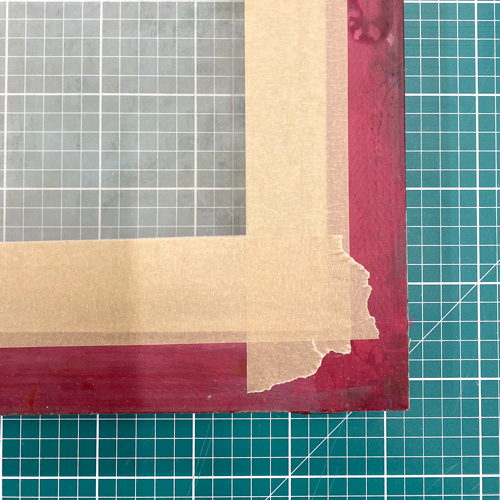
Begin by taping the screen around the edges with parcel tape on both sides of the mesh. We used paper parcel tape. If using a paper stencil, make sure the aperture is slightly smaller than the paper.

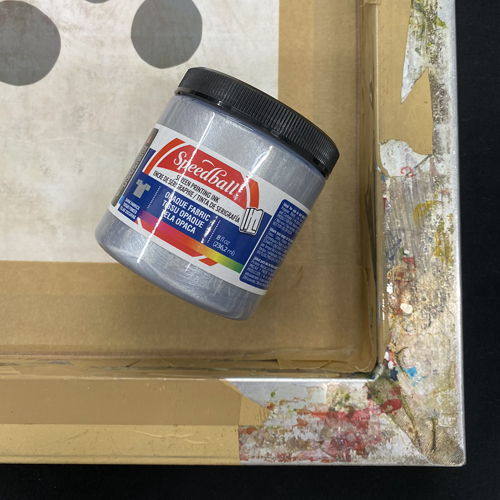
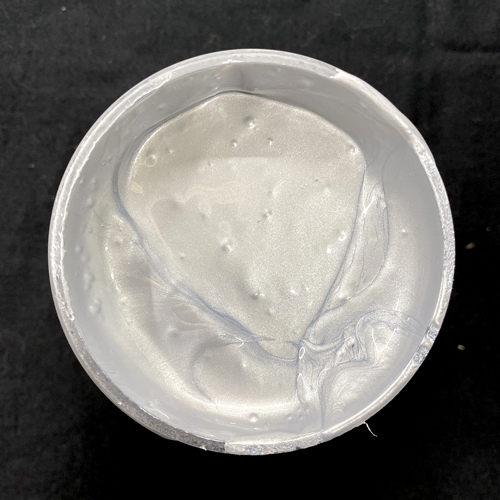
Speedball Opaque Fabric Screen Printing Ink in Silver is a pre-mixed ink that can be used straight out of the pot. It’s opaque so can be used to print onto both dark and light fabrics. We are printing onto black cotton.

Permaset also have metallic screen printing ink that will work beautifully too!

It has a beautiful metallic sheen.

Lay the fabric down onto a padded surface and pin it down in the corners. Lay the paper stencil on the fabric and the screen on top.

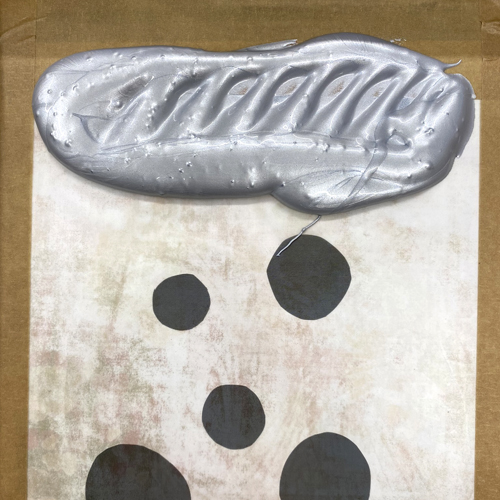
Place a line of ink at the top of the screen, above the design.

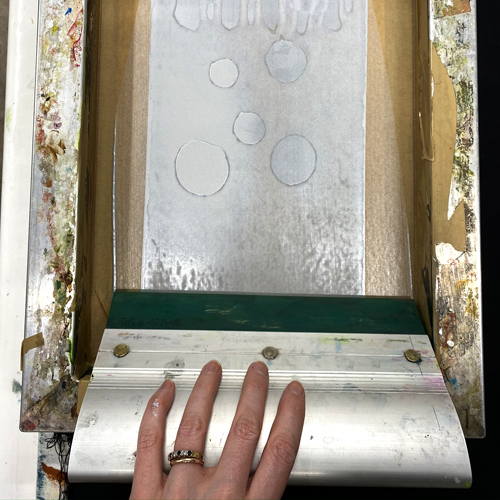
Use a squeegee at a 45′ angle to lightly drag the ink down the screen. This will flood the mesh with ink. Leave excess ink at the bottom of the screen. Place the squeegee back at the top of the screen and drag the squeegee down again at a 45′ angle, pressing hard this time. Use your other hand to hold the screen still.

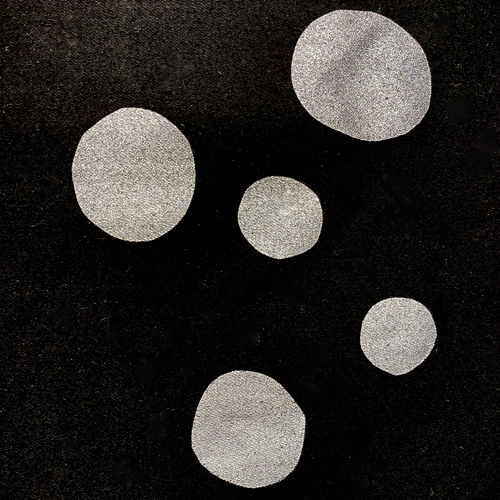
This ink shows up very well on black cotton. The finish has a soft metallic sheen. It washes well but will need heat setting before washing – heat set by ironing on a high heat until the print feels hot to the touch.

Our second metallic ink choice is Metallic Binder and Metallic Powder in Silver. These two are mixed together to create a metallic ink by themselves or with Pigment Colours to create coloured inks with a metallic shine.

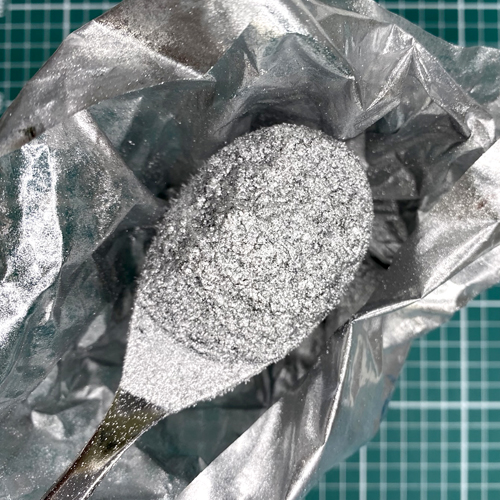
The powder is very fine so it will not block the mesh. It’s made of aluminium and will not tarnish. It is advised to wear a mask when handling fine powders like this.

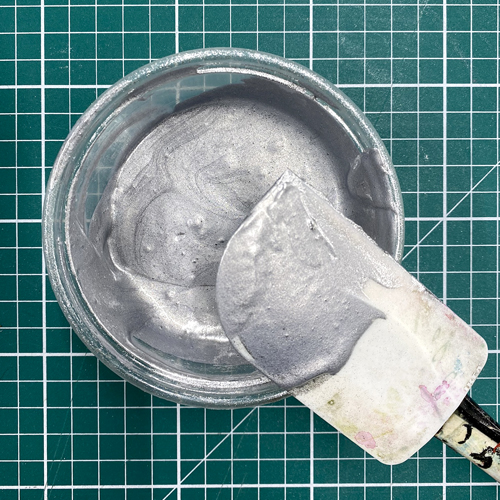
The powder and binder should be mixed together in a ratio of 1:10 powder to metallic binder. Less powder can be used for a less metallic finish. Pigment Colours could also be added to this mix to create various coloured inks with a metallic sheen.

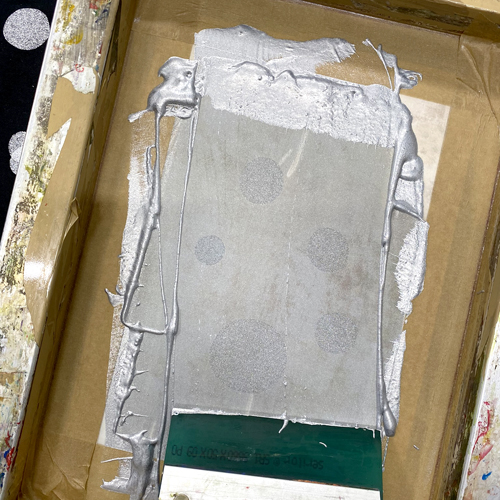
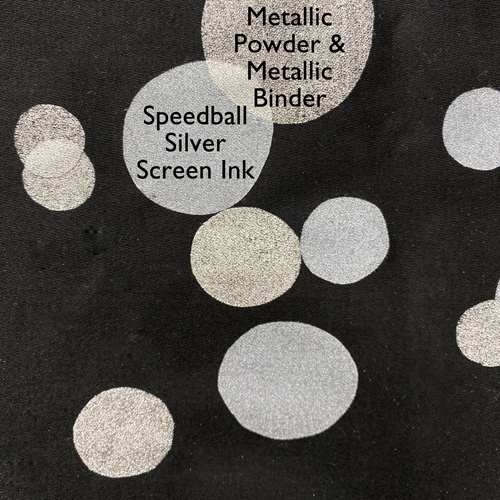
The finish of this ink is a slightly warmer grey than the Speedball ink. It also has a more glittery look because of the way the particles are suspended in the binder. It shows up very well on black fabric. Like the Speedball ink, it will need heat setting before washing.

Inks mixed with Metallic Powder and Binder are a bit less wash-friendly than pre-mixed inks. They’re more well suited to projects that won’t need washing as often, like decorations accessories or home furnishings.

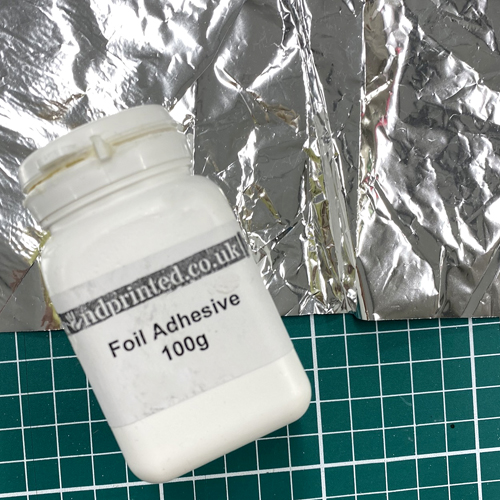
Our third and final metallic option is Textile Foil. For this technique, we need to apply Foil Adhesive to the fabric before using an iron to apply the foil.

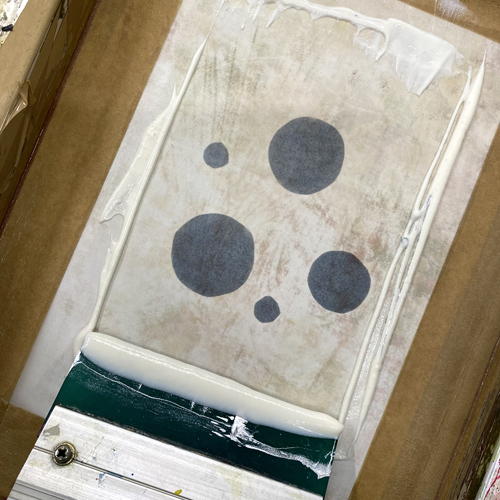
Foil adhesive can be screen printed onto the fabric just like an ink.

The glue will look pale and matte on the surface of the fabric. When you have finished printing with the glue, wash the screen before applying foil.

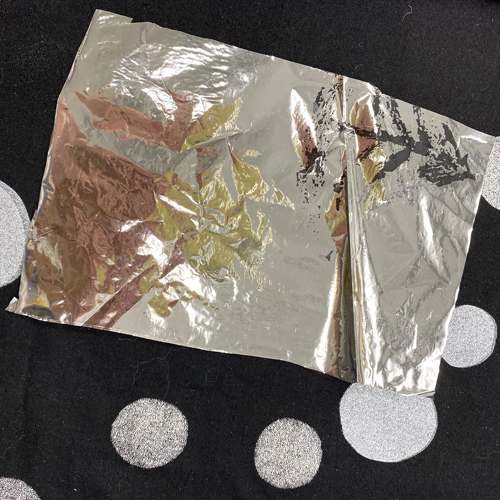
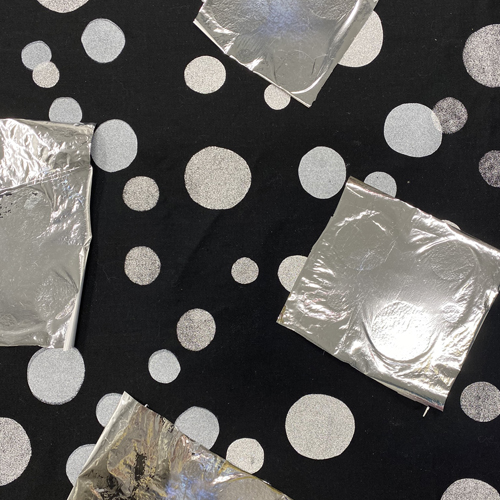
When the adhesive has partially dried (tacky – not wet, not dry), it’s ready to have foil applied. This usually takes between 10 and 15 minutes. Lay the foil shiny side up on the adhesive.

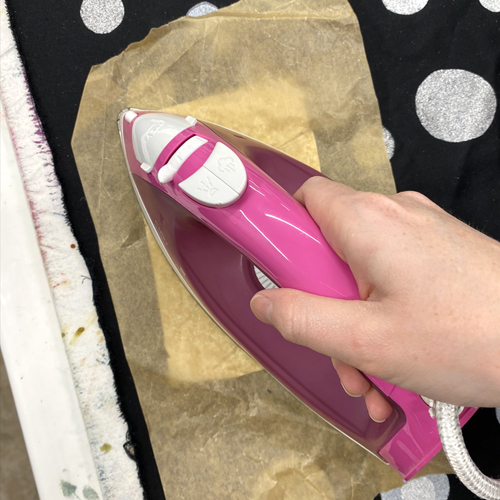
Cover with a piece of greaseproof paper and iron for about 30 seconds.

Leave the foil to cool on the fabric. This is important – warm foil won’t peel cleanly away from the fabric.

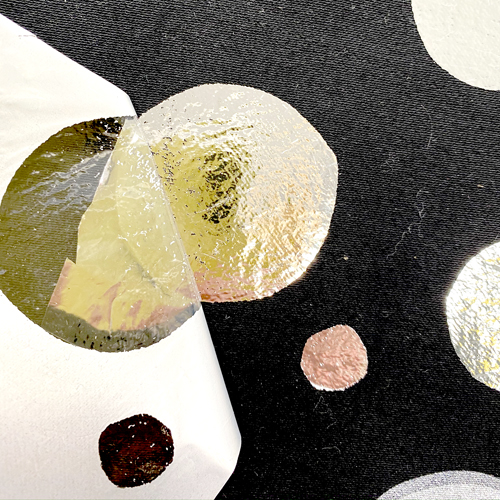
When the foil has completely cooled, peel away the excess.

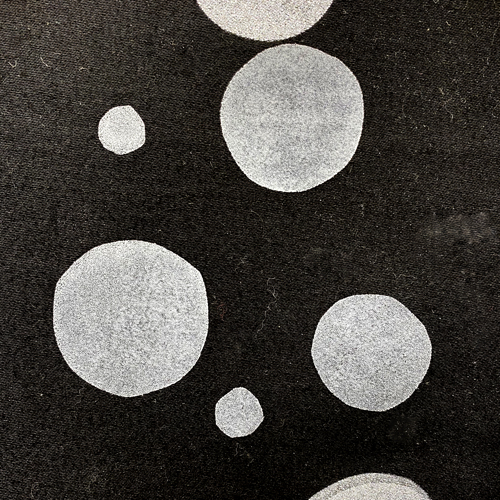
Textile Foil is by far the most metallic option as a layer of foil sits on the surface of the fabric. It is slightly less hard-wearing than ink though so needs treating with care.

All three techniques create a beautiful metallic print on this black cotton. Textile Foil is the most metallic, then the Metallic Powder, with Speedball Silver Ink the least shiny but the most hard-wearing and washable.

With all these techniques, please make sure no ink or adhesive dries in the mesh by working quickly and washing it as soon as printing has finished. Once ink or adhesive has dried in the screen it’s very hard to remove it! Metallic inks and opaque inks tend to dry a little more quickly than standard inks.

For this project you will need:

PLUS EITHER

OR

OR

Meet the Maker: Amanda Roseveare

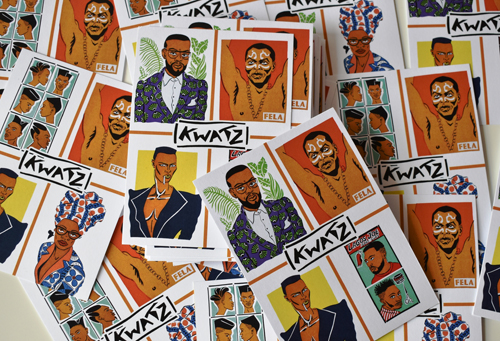
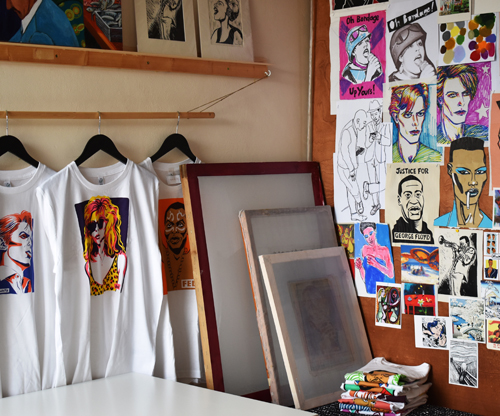
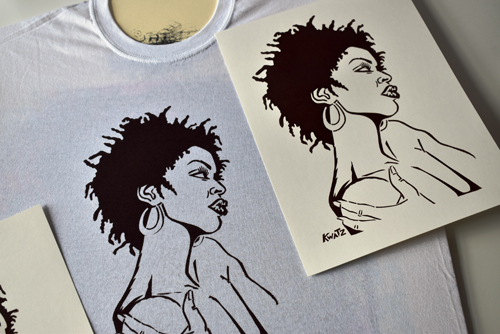
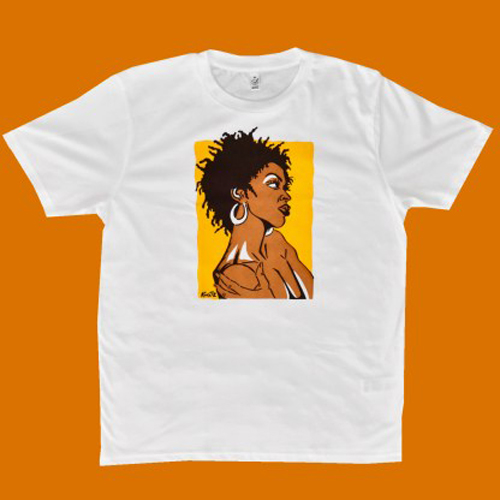
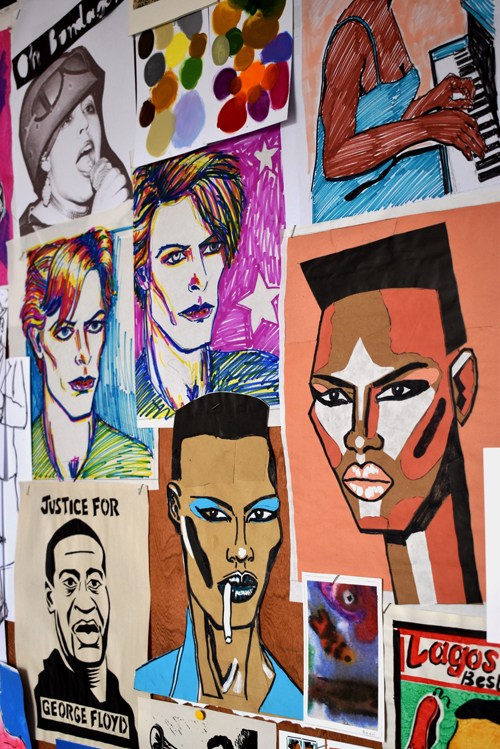
I am a painter and printmaker living in East Yorkshire. In the early 1980s as a young frustrated artist, I started to screenprint my art onto T-shirts which developed into a small business, Kwatz T-shirts. After a few years and a move abroad, the business was ‘mothballed’. Forward 30 years, in 2018 I decided to re-visit and re-started Kwatz with a small collection of African inspired designs which has grown to include some pop and jazz icons.

Describe your printmaking process.

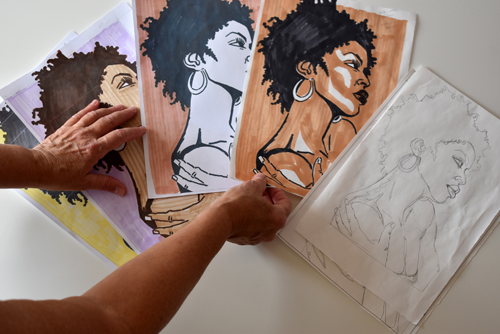
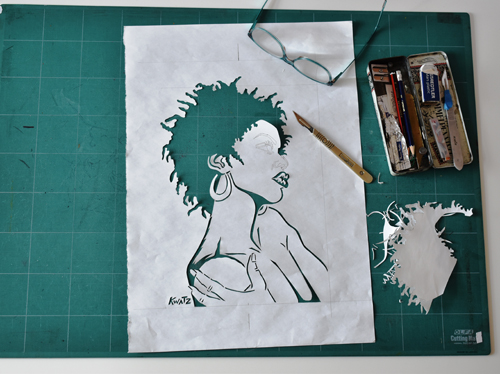
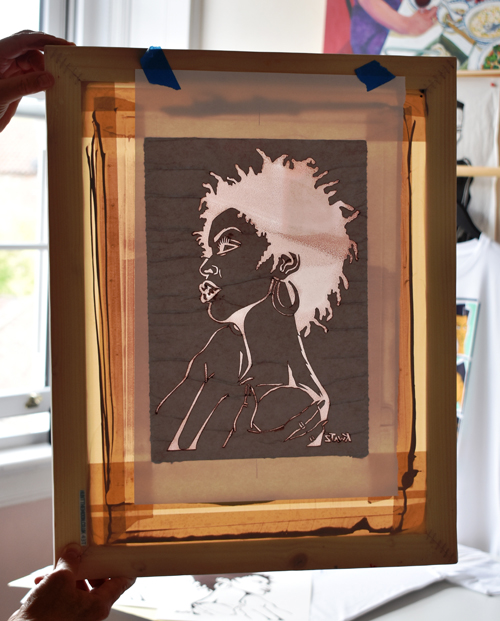
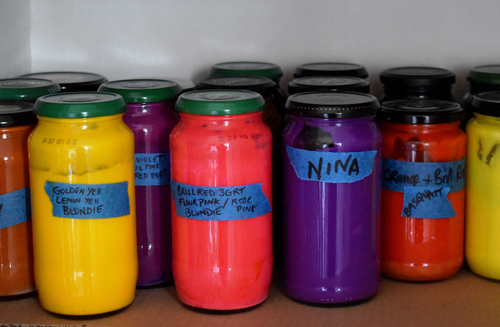
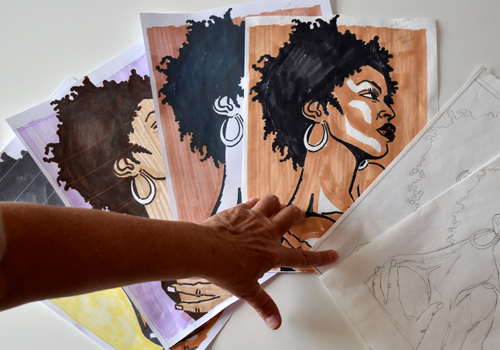
I do my thinking on paper making thumbnail sketches, using the printer to reduce or enlarge designs. I use layout paper, felt pens and a lightbox to trace and try different layouts and colourways before I commit to a final design. I trace the outline and cut the first paper stencil using a sharp scalpel. The stencils are very delicate and this limits the number of prints I can do from each one. I like to break screen printing rules and print the darkest colour/outline first, which acts as the registration guide for successive colours. The screen is handheld, and registration is done by eye. It’s a very lo-tech, portable and a simple but effective process. I use a water-based binder and colour system for printing on fabric. The inks are transparent and make lovely new colours when overprinted.

How and where did you learn to print?

I studied graphic design at what was Newcastle Polytechnic. I didn’t fit the typical graphic designer mould but felt at home in the print rooms and fell in love with screen printing. To this day I am my own harshest critic and try to print the best that I can.

Why Printmaking?

I like the physicality of printmaking. I enjoy the tactile act of cutting lino, inking up the block and the reveal, the smell of ink and the feel of paper. I love the immediacy and flatness of a screen print, the fact that you can produce multiples – it’s a very democratic form of art. Once set up, what can start out as a humble idea can be transformed into something quite powerful, prints give off certain energy and aesthetic that appeal to me and suits my own graphic style.

Where do you work?

I work in a large spare bedroom converted into a studio upstairs in my home. The light is great, and I can wash out my screens in the shower.

Describe a typical day in the studio.

There isn’t a typical day, I could be finishing a piece of work, or having a big tidy and clean up before starting a new project. There might be admin jobs, packing and posting orders or ordering supplies. I spend a lot of time thinking, researching and planning future work. I like to be solitary.

What inspires you?

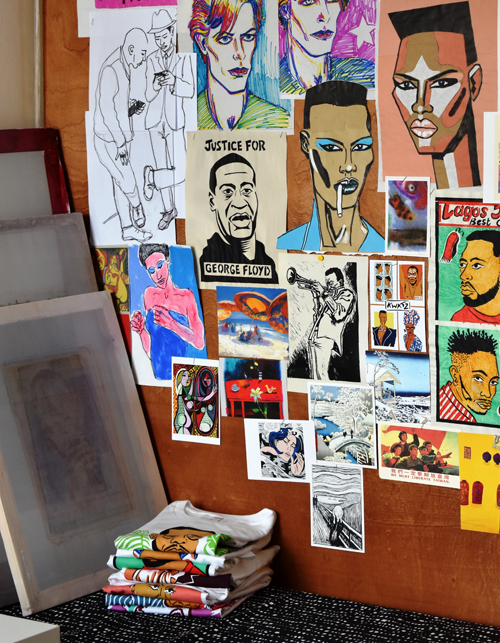
Travel, people watching, street art, films, fashion, music, Japanese and Chinese prints, African art and textiles. I have a big collection of art and textile books which I couldn’t live without. I try to create special, desirable work that people want to wear, based around the images and cultural references that influence and inspire me – from art, music and pop culture to politics. A great T-shirt graphic can give an instant insight into the wearer, the more unique the better.

Artists that inspire me; Matisse, Picasso, Barbara Rae, Margaret Kilgallen, Paul Peter Piech, Sister Corita Kent, the art of the Black Panther movement, Russian Revolutionary art.

What is your favourite printmaking product?

Water-based inks for screen printing. I use Selectasine pigments and binder for fabrics, a little goes a long way. I have favourite screens and squeegees that I have had for decades. When lino printing I use Caligo safe wash relief printing inks, Pfeil cutting tools and soft paper, like Japanese HoSho.

What have you made that you are most proud of?

The T-shirt designs I produced for the Anti-Apartheid Movement during the 1980s and early ’90s, some of which were adapted for use as backdrops at the Nelson Mandela 70th Birthday Tribute Concert at Wembley Stadium.

Where can we see your work?

On my website, Instagram and a great indie gift shop based in Leeds. York River Art Market, local Maker’s Markets, Pocklington Area Open Studios, unfortunately, all cancelled this spring/summer.

What will we be seeing from you next?

I am constantly developing new designs to join the T-shirt collection. I’m often asked if I sell screenprints on paper but the inks I use are not suitable. I recently bought some Daler Rowney System 3 screen ink to try out with different weights of paper to see what results I get. I’m going to add a small edition of my ‘Grace Jones’ lino print to the Kwatz shop soon.

Do you have any advice for other printmakers and creatives?

Follow your own impulses. Printmaking rules can be broken. You don’t need loads of equipment to be able to produce something beautiful.

To see more from Amanda follow her on Instagram!

Setting up a Hinged Board for Screen Printing and Printing Using a Mylar Film Stencil

Mylar film is an extremely useful addition to your printmaking kit. It can be used to mask off areas when relief printing, as registration plastic for screen printing or even used to make stencils. In this project, we use mylar film to make a registration device and a mask for screen printing.

Mylar film can be wiped clean and used again and again. Unlike paper stencils, mylar stencils can be cleaned and used another day or with another colour. Using Mylar film for registration means the same piece can be used over and over. The mylar film comes rolled so it may need flattening out before use, especially for large stencils.

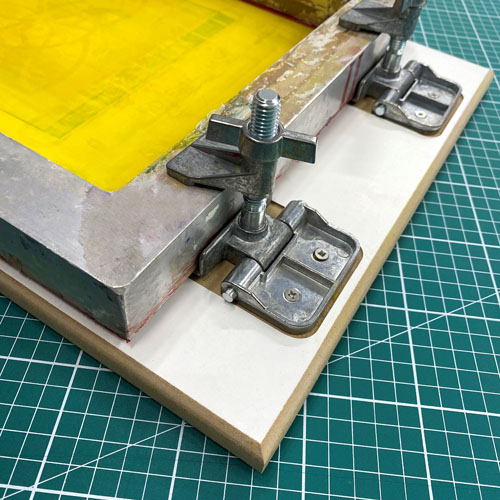
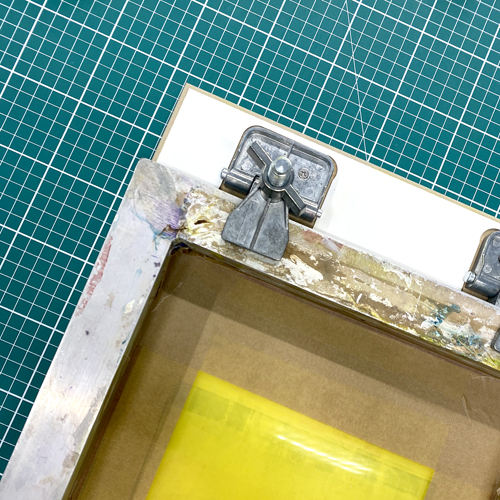
We are printing onto paper using a hinged board: a melamine coated MDF board with hinge clamps attached at the top. The hinges have been lowered a little by routing out the surface of the board so that the screen lies closer to the surface. We’re using an A4 90T screen.

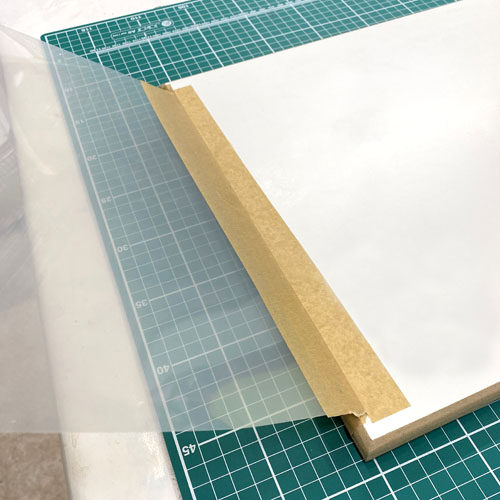
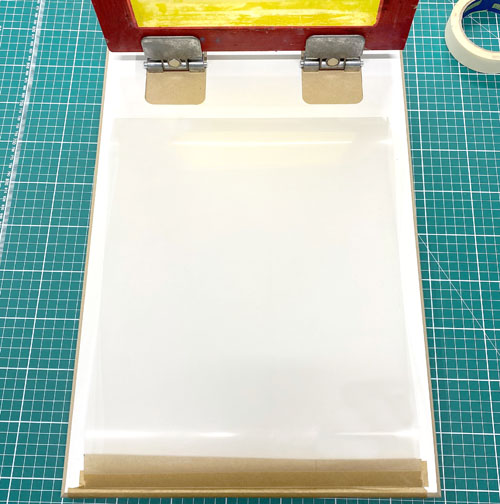
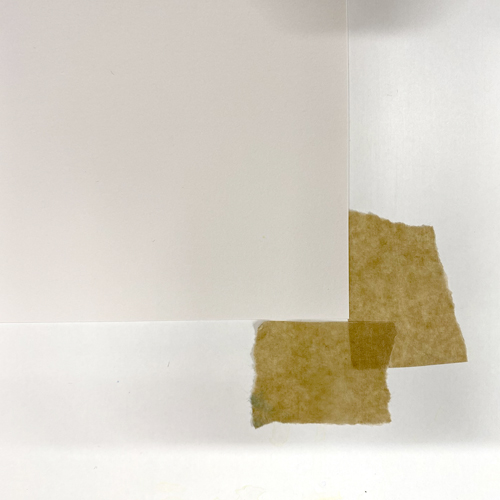
The registration device can be created by taping a piece of mylar film to the bottom of the board. Use tape on both sides to create a hinge. It needs to be big enough to cover the whole board but not interfere with the hinges.

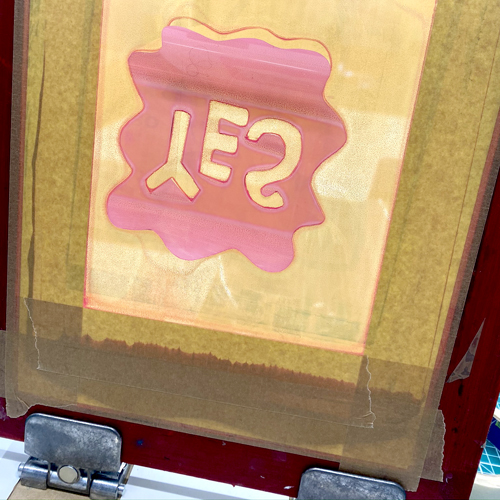
Use parcel tape to tape the edges of the screen, leaving an aperture in the centre for the ink to go through. If you’re making a stencil, make the aperture slightly smaller than the stencil. If you’re using a mask, tape a neat aperture that will fit nicely onto your paper.

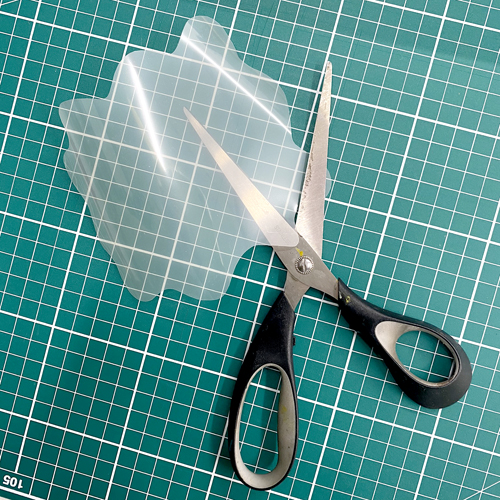
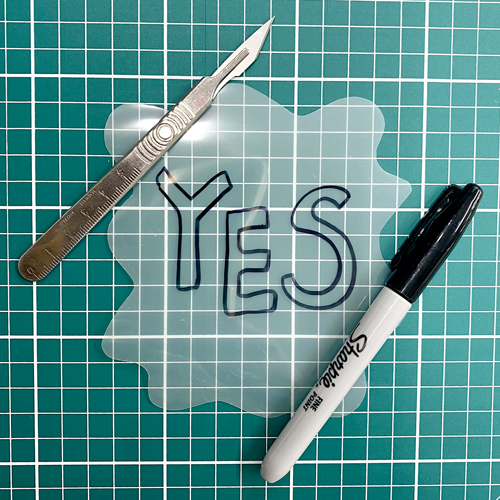
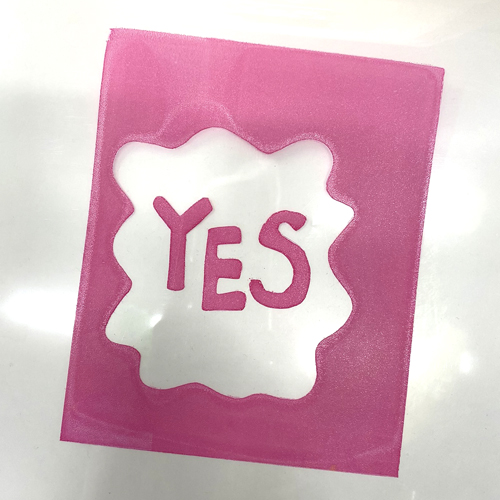
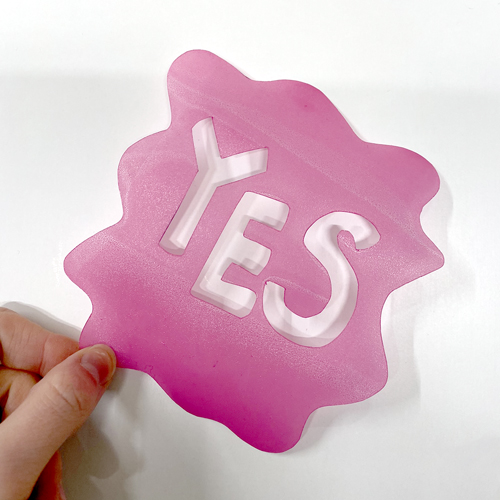
Use scissors or a scalpel to cut the mylar film into your desired stencil shape. We are creating a mask: a positive shape that will block the ink from the paper.

The film can be drawn on with a permanent pen to help with the design.

With the screen attached to the board using the hinges,
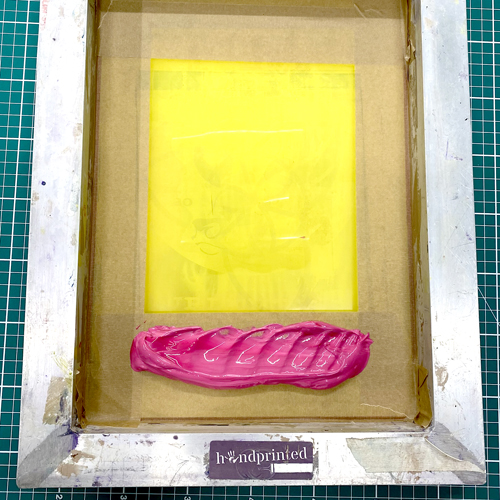
place the stencil or mask underneath the screen, making sure the whole stencil fits in the untaped area of the mesh. Load a line of Acrylic Screen Printing Ink along the bottom of the screen.

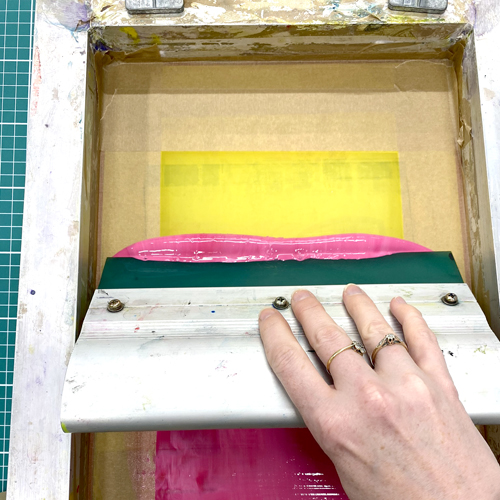
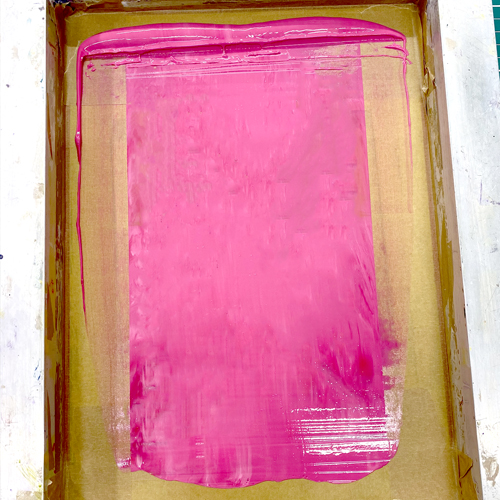
Prop the bottom edge of the screen up on a block using something like a roll of tape. This should hold the screen away from the board at one end. Use the squeegee at a 45′ angle to push the ink up the screen. This floods the mesh with ink. You don’t need to press, just glide the ink along the mesh.

Remove the block that’s propping up your screen and place it down on the board. Make sure the mylar registration plastic is covering the board underneath the screen.

Use the squeegee at a 45′ angle to drag down the screen, pressing firmly this time. The squeegee movement should sound a bit like a zip. Lift up the screen and reveal the print on the plastic.

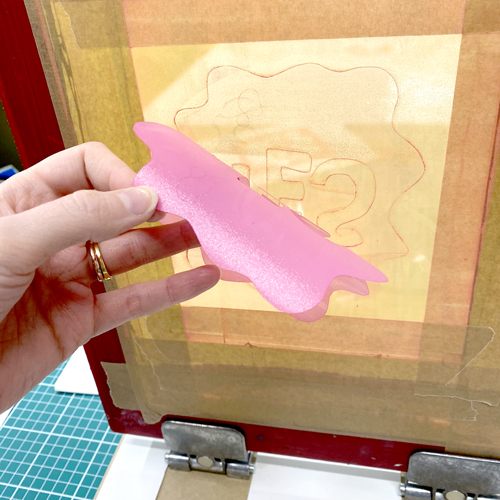
The stencil should stick to the mesh.

Leaving the registration plastic in place, slide a piece of paper underneath, positioning it where you would like the print to be placed. The print on the plastic should show you where the print will go.

Use small pieces of tape or mount board to mark where the paper should be placed each time. You can also spray a little low-tack spray mount onto the board to help hold the paper still.

Remove the registration plastic by folding it down in front of the board out of the way.

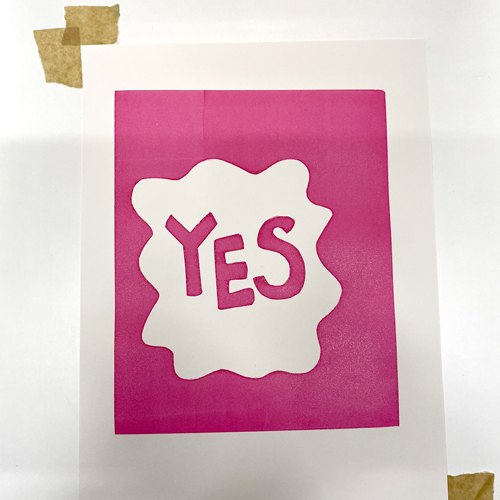
Repeat the printing process by flooding the screen and then printing firmly with your squeegee, this time with paper underneath. Lift the screen to reveal the print!

Repeat this process until you have your entire edition, placing the paper down using your tape markings each time.

When you are finished with the stencil, it can be peeled off and washed to be used again another day or with another colour.

If you are printing a multi-layered print, the registration plastic is even more useful! When printing your second layer, slide the first layer of the printed paper underneath to check they will line up. Use new pieces of tape or mount board to mark where the prints should be placed.

For this project you will need:

Lino Printing onto Fabric – Which Inks and Rollers to Use

We love printing with lino onto fabric – it can take your designs into loads of fun new places like t-shirts, homewares and bags!

Back in 2016 we wrote a blog post about how to block print onto fabric and it’s still one of our most popular posts ever! Since then, we’re continued to refine our methods and materials and are now bringing you an updated look at lino printing onto fabric.

Below we look at our four choices of ink for lino printing onto fabric.

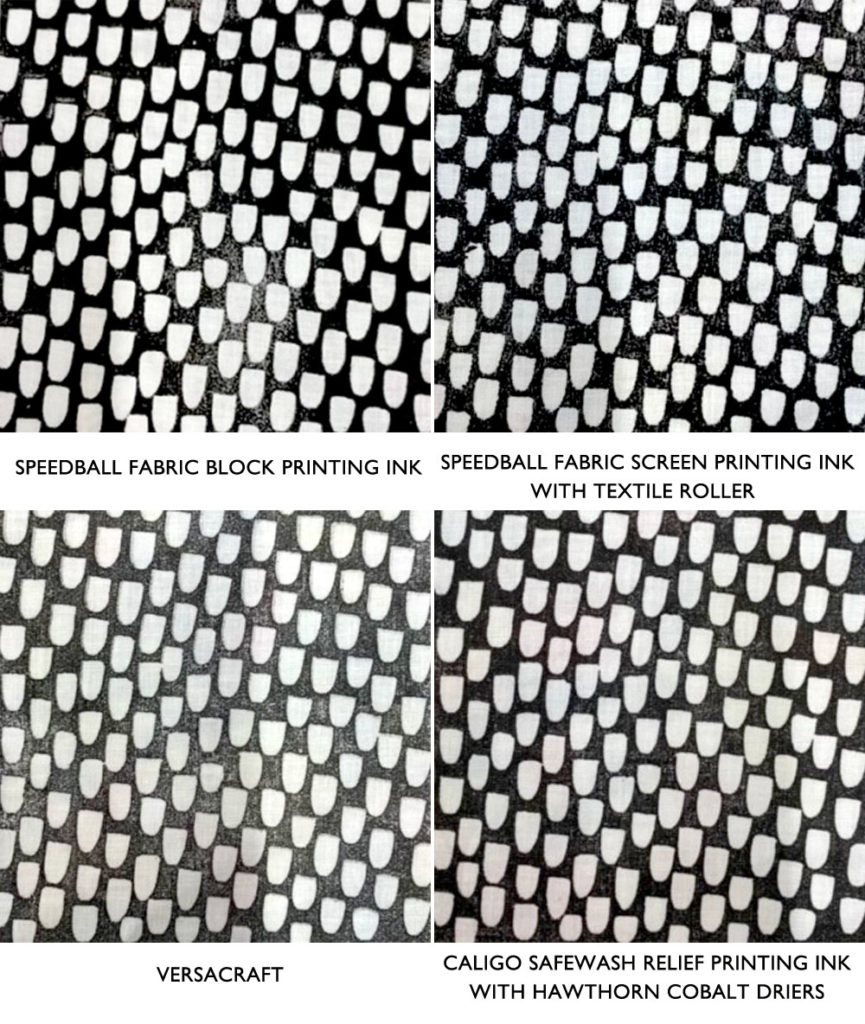
Each print was taken from the same traditional lino block, printed onto cotton which was pinned down onto a padded surface. Printing onto a padded surface is a great way of ensuring your fabric prints are even.

Each print was washed in a 30′ wash one week after printing. Each type of ink showed good washability with very little fading. When printing onto fabric with any ink, test prints and test washes are recommended before embarking upon a large project.

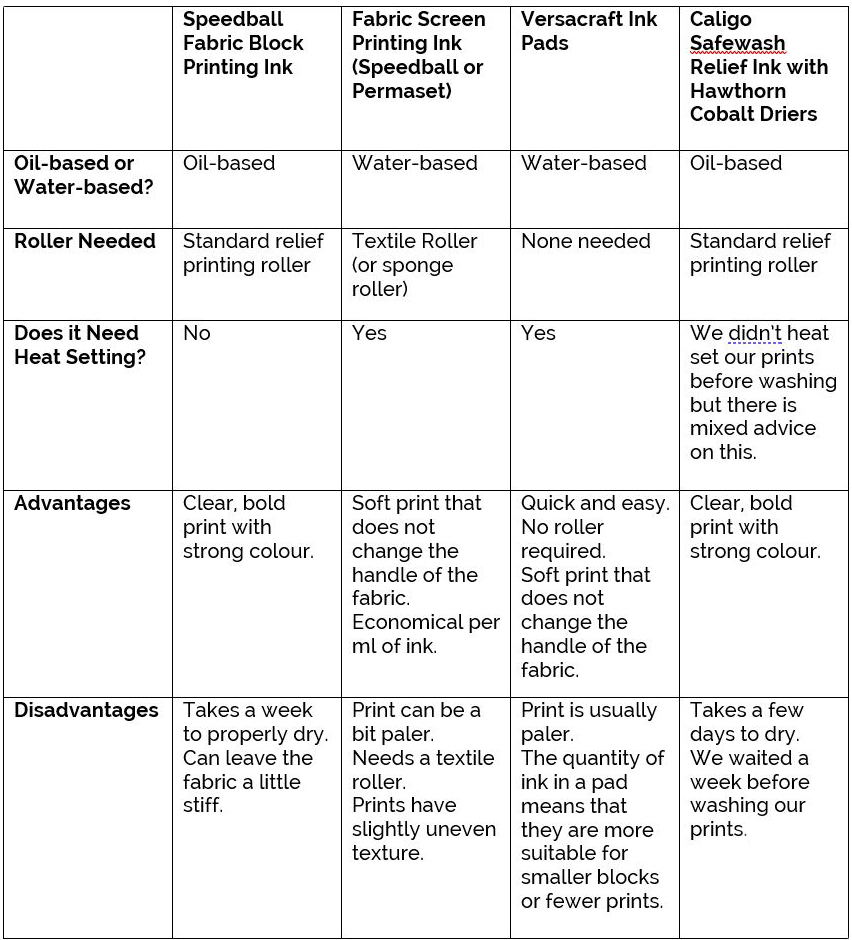
See the chart below for a summary of our findings or read on for more details:


Speedball Fabric Block Printing Ink

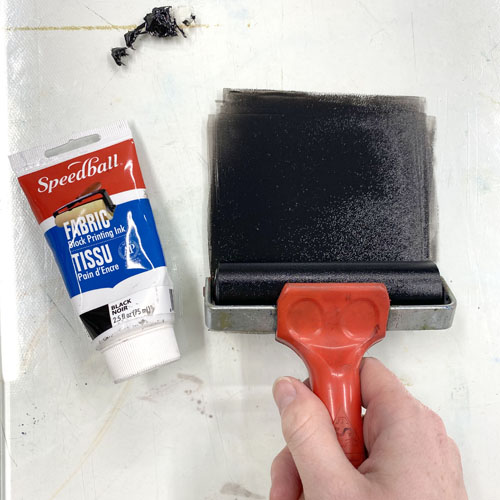
Speedball Fabric Block Printing Ink is an oil-based ink. It’s water-washable so can be cleaned up with soap and water. It comes in two sizes with a wide range of colours to choose from.

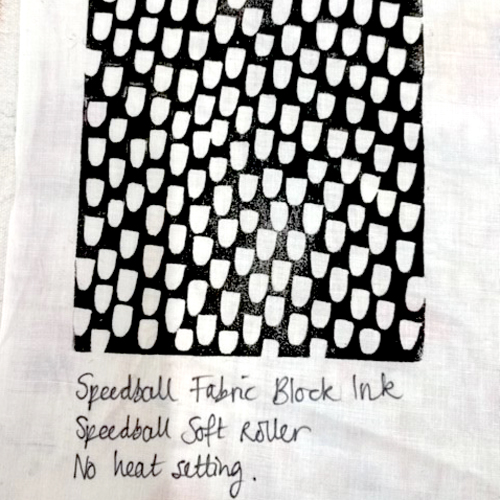
The prints are bold and strong with crisp edges. The prints leave the fabric feeling very slightly stiff.

This ink should be used with a standard inking roller. We found that a slightly softer rubber roller (such as this Speedball Roller) produced better results than a very hard one.

The ink takes about a week to air-dry – no heat setting. After a week, the prints can be washed in cool water with a mild detergent.


Fabric Screen Printing Ink

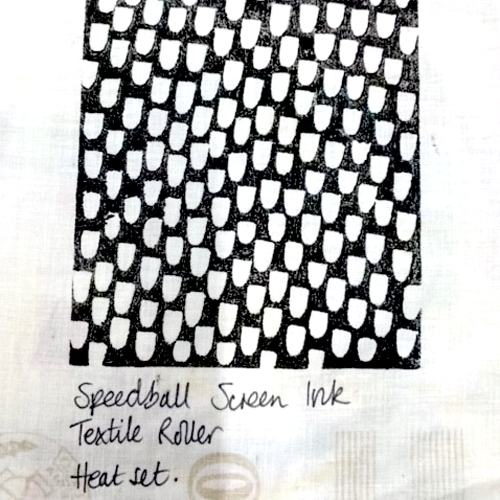
Using Fabric Screen Printing Inks for lino printing onto fabric is one of our favourite methods. The ink leaves the fabric feeling really soft.

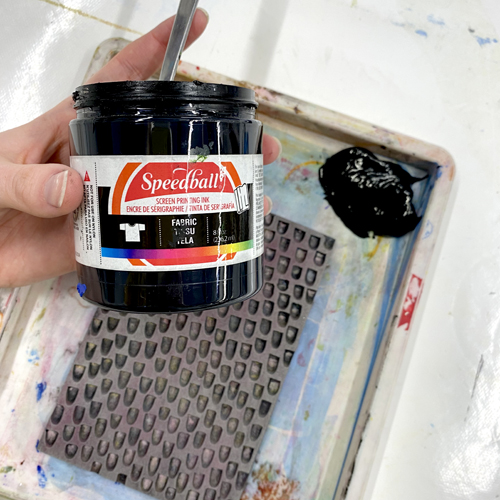
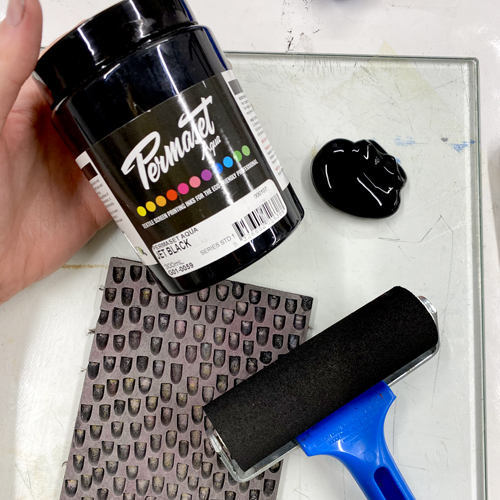
We like to use both Speedball Fabric Screen Printing Ink and Permaset Aqua Textile Ink. The consistency of the different colours tends to vary so some may prints stronger than others. We wouldn’t recommend using inks mixed yourself from pigment and binder as the colours tend to come out weaker and the consistency is trickier to use for block printing.

Standard relief rollers won’t work well with screen printing inks and they’re too slippery. A Textile Roller is perfect as it has a little grip for rolling the ink evenly but it’s not absorbent so won’t waste a lot of ink of cause blobs.

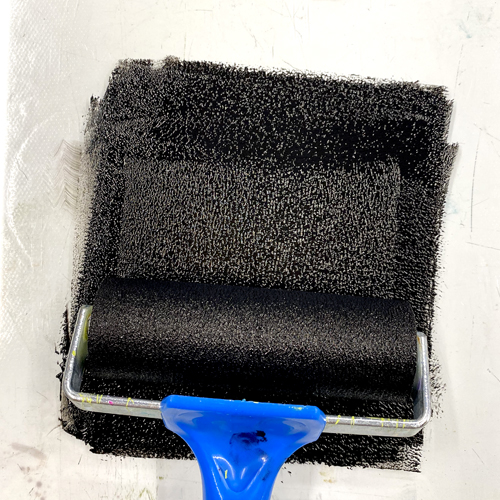
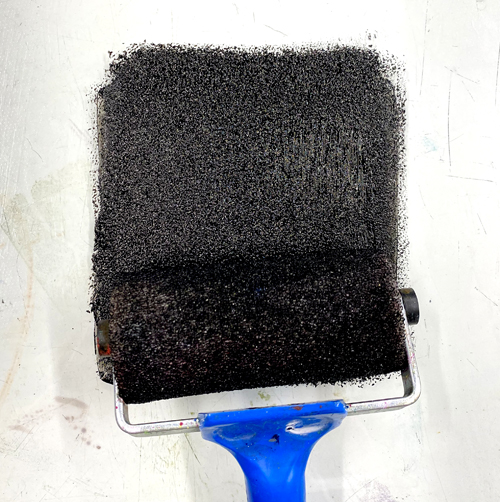
A Sponge Roller can also be used (see below) but the texture is more bubbly and it’s more likely to pick up noise from the carved areas of your block.

Prints made using screen printing inks tend to be a little more textured than those made with block printing ink. However, screen printing ink is more economical (once you’ve bought a separate roller!) per ml of ink compared to block printing ink.


Versacraft Ink Pads

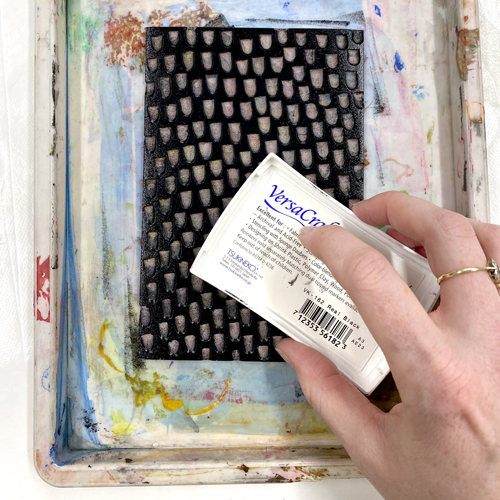
Using Versacraft Ink Pads eliminates the need for any rollers at all. The blocks can be loaded up by dabbing them all over the surface – you can even use the small ones.

Versacraft prints on fabric are very soft and can be heat set to be washable.

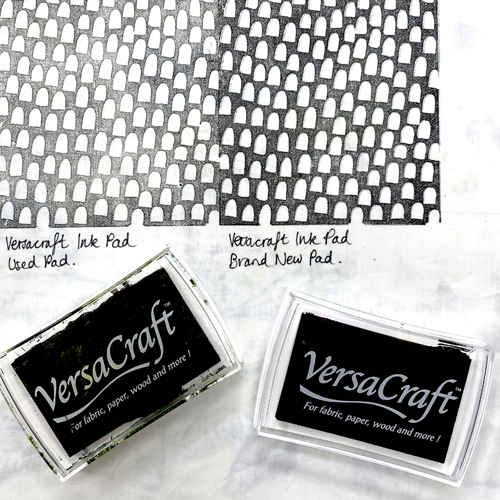
Prints made from ink pads tended to be paler than the other methods we tested. The prints have a slightly more faded look. The ink pads also print paler and paler the longer you use them as the ink runs out. Below, you can see where an older ink pad has been used on the left and a new pad on the right.


Caligo Safewash Relief Printing Ink

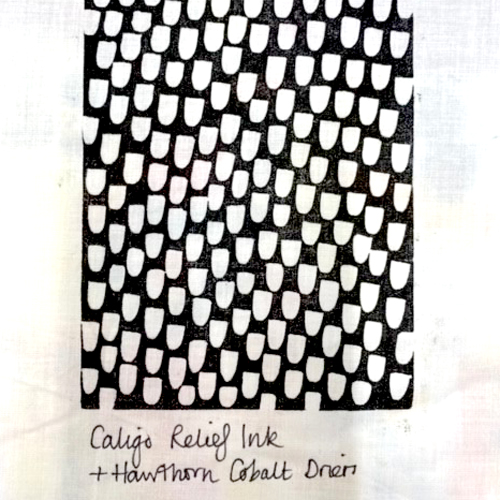
Caligo Safewash Relief Ink is an oil-based block printing ink that can be cleaned up with soap and water. It is designed for printing onto paper but has had success on fabric too! Cobalt Driers needs to be added (just a tiny drop) to help with drying ability.

It is used with a standard roller and the prints are crisp and bold. However, it can take several days for the ink to dry fully.

Meet the Maker: Maarit Hänninen

My name is Maarit Hänninen. I’m a Finnish printmaker and artist living in the Netherlands. I love traditional/folk art, nature, plants and animals, and all these elements are all strongly present in my work.

Describe your printmaking process.

I work mainly with linocuts. After sketching a design (either with pen and paper, or a digital tablet) I hand-carve, print and dry all my prints with minimal equipment in my tiny 10m² studio. I actively document and share my process with the online community through social media and YouTube.

How and where did you learn to print?

My first introduction to linocuts was in grade school when I was 10 or so (I made a yin yang symbol for my Mom). But much later, while studying at Liminka School of Arts in Finland, part of the curriculum consisted of intaglio printmaking and woodcut. I had enrolled in the school to improve my drawing and painting skills, and at first, I didn’t know what to make of printmaking. It took me a while before I learned to appreciate the art form.

Why printmaking?

Before becoming a printmaker, I drew. But before I started drawing, I loved making just about anything with my hands. Whether it was textiles, sculpting, baking, building or gardening, if it meant creating something new, I loved it. Through printmaking, I can combine various craft elements with drawing, thereby satisfying not only the artist in me, but the maker as well.

Where do you work?

I work at my Amsterdam-based home studio. This is an ideal place for me to work because, not only am I an introvert, but this way I don’t need to brave the rainy and cold Dutch weather.

Describe a typical day in your studio.

No two days are alike, but I always try to start working by 9 am and be done by 6 pm (though I often find myself working later). Before I begin working, I usually start my days by sitting down at my desk to eat my breakfast and stare out of the window, just to relax for a moment. I run an online store where I sell my prints, so much of my time is spent on the business side of things: packaging orders, administration, content creation, etc. The days I’m fortunate enough to dedicate just for the creative work, I usually have a schedule in place. One day might be for sketching, the next day carving, and some days are all about printing.

How long have you been printmaking?

Outside of the one year at art school, I’ve been printmaking for nearly three years.

What inspires you?

My biggest inspiration is nature. I love plants and animals, and so it feels natural to use them in my work. I love the strong design and illustrative qualities often used in folk art and old school tattoos, and I seek to create my own, contemporary interpretation of them.

What is your favourite printmaking product?

There are so many great ones that it’s hard to choose just one, but probably the biggest game changer for me has been my press. It’s an A3 tabletop etching press, and I don’t think I could keep producing the volume and quality of work that I’m currently making without it. It’s just the right size for my studio, mobile enough to be stowed away when not in use, works great for my A3 size (and smaller) linocuts, and is just an overall solid and affordable piece of equipment.

Second place would go to Cranfield Colours gold (and recently also their copper) ink.

What have you made that you are most proud of?

My recent linocut “Lady in Black” is my largest and most intricate project so far. Not only did it take the longest to design and carve, but I filmed the entire process of carving it, keeping the block still the entire time – something that is quite challenging for someone who’s used to turning the block every few seconds. I compiled the footage into a one-minute time-lapse video that you can watch on my Instagram page.

Where can we see your work? Where do you sell?

I’m most active on Instagram, but you can also watch videos of my printmaking process on my YouTube channel. My prints are available for purchase on my website.
What will we be seeing from you next?

I will be focusing on more floral linocuts in my signature style. I’m also planning on producing more content for my YouTube channel, and I’m hoping to expand my catalogue to other products as well in the future.

Do you have any advice for other printmakers and creatives?

Be patient, love your work, and don’t be afraid of making mistakes.

To see more from Maarit check out her website, Instagram, Facebook and YouTube.

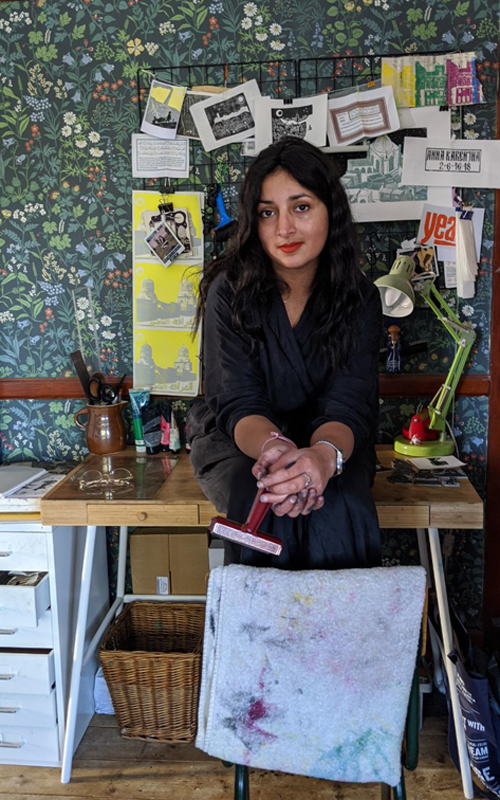
Meet the Maker: Sunbul Akhtar

My name is Sunbul Akhtar and I run Night Press from my bedroom studio. I work in publishing during the week, ordinarily cooped in an office on the 41st floor of a building in London, and I love my job. I sometimes wish I was born half a century earlier to experience what publishing was like in its post mid-century revival – cigarette smoke and typewriters.

Describe your printmaking process.

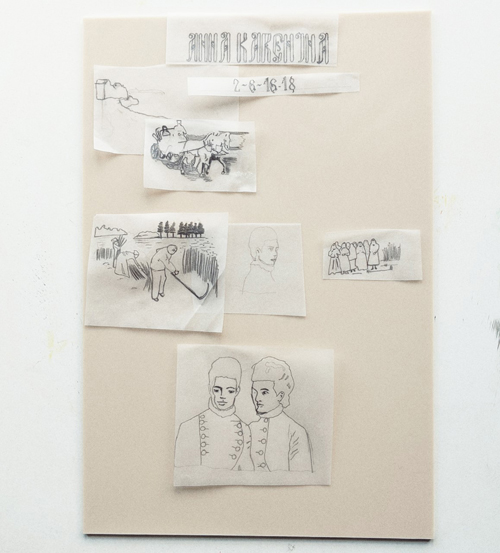
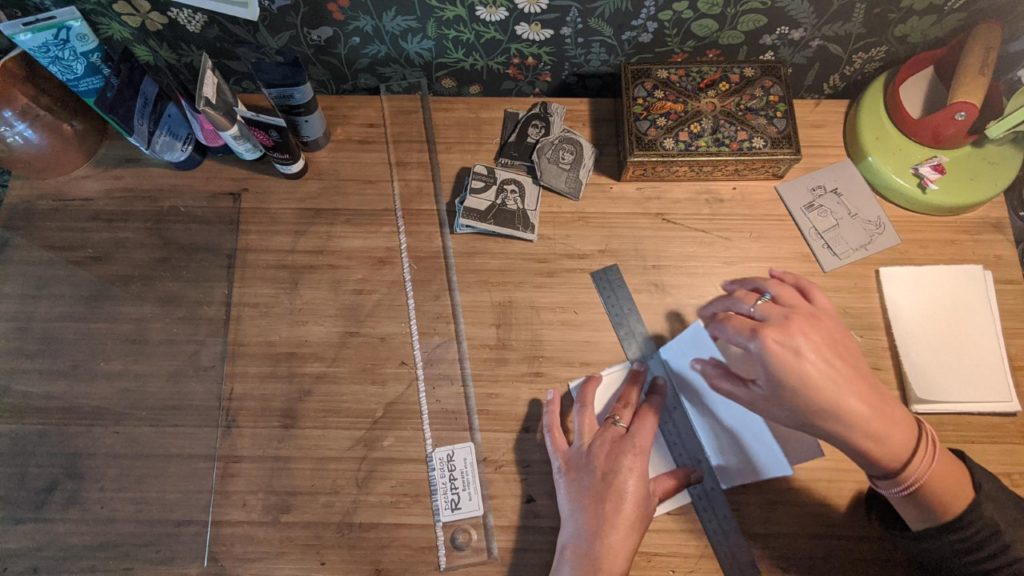
I don’t have a static style of printing so each print I produce has a unique process of production. My blocks are always transferred from tracing paper. For larger composition prints, I use small pieces of tracing paper which gives me the opportunity to move the images around on the block before committing to transferring it.

My favourite part of the printmaking process is the carving. It is therapeutic and calming (even when I’m holding my breath getting into the intricate details of the print). A helpful tip, if you’re working on a print with faces, start with the faces first, there are so many small nooks and details that if you mess it up on your first try, you haven’t wasted hours of carving. Test printing is also another favourite, it’s so exciting not knowing what your final image will be. Once I’m happy with the print, I just go like a machine – a hand burnishing machine.

How and where did you learn to print?

I started printing in school, we had an amazing art department and my art teacher was someone I really looked up to. My very first print was of Dali’s ‘The Burning Giraffe’. I just really liked Dali and wanted to reproduce one of his pieces in a different medium. After I separated from my partner in 2012, I felt like I needed to rediscover the world as a different person. I jumped into lino printing again and my first block after the hiatus was a reproduction of Picasso’s ‘The Guernica’.

Why printmaking?

Because I find every process of production thoroughly enjoyable. I run block printing workshops in schools in London. I love teaching the process to children and rediscovering the delight of producing a print vicariously through them. I really hope I have inspired some printmakers for the future.

 Where do you work?

Having a studio is a pipe dream for me, I live in a small apartment in London with my daughter and have just enough space in a corner of my room for my printmaking activities, which is entirely confined to this space. I call it my bedroom studio.

Describe a typical day in your studio.

A typical day in my studio starts at night. I try to be present for my daughter during the day, although, as she gets older, we each move towards independent activities. When she’s asleep I own the time for my printing. I’ll sacrifice sleep and work until late on whatever process of the printmaking I’m up to. Sometimes it’s carving or test printing. Sometimes that time is spent packing orders, it takes about half an hour to pack one item, I like the recipient to feel as though they’re opening a gift. Each purchase comes with a gift and a handwritten note.

How long have you been printmaking?

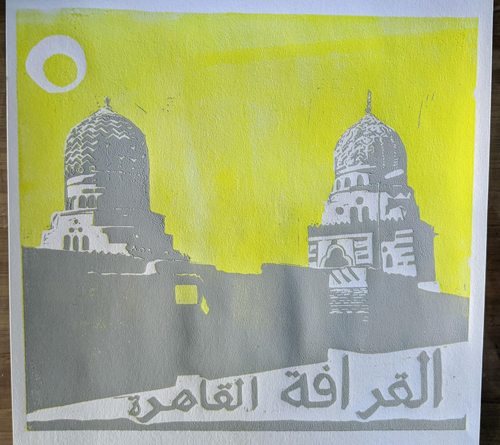
I’d say I rediscovered printmaking after 2012. I started Night Press in order to sell my prints. I carved ‘al-Qarifa al-Cahira’, a reduction print of the city of the dead in Cairo and it gave me the confidence in the subject matter of my prints to start selling. It hasn’t been a year yet, but it’s been amazing! I’ve received commissions and I’ve made such amazing friends in the industry.

What inspires you?

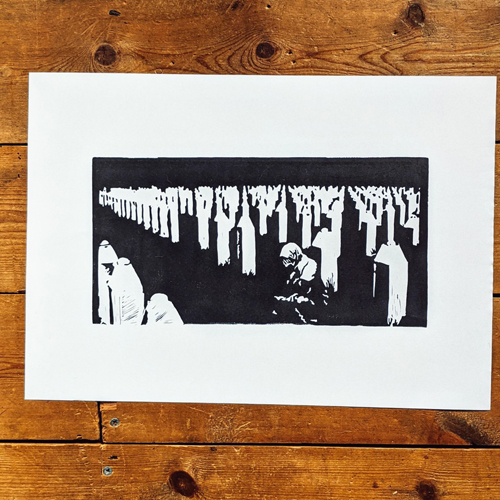
I’m mostly inspired by world events. I use my prints to highlight events, like the Srebrenica genocide, arms trade, the Syrian conflict and the war in Iraq. I studied politics at university and remain interested in it all these years later. I also use printmaking to reconnect with my heritage. I am a British Pakistani woman, growing up during the tail end of the National Front and the beginning of the BNP, being Pakistani alone was enough cause for derision. I’m trying to rekindle the heritage that was so derided in my youth with my printmaking. I have been having a debate with myself, as you do, on the line between inspiration and imitation and I am trying to look at my work objectively enough to see whether that comes into play. I am definitely inspired by other printmakers, in particular, Imen Roulala, a French printmaker and Persileaud for the sheer volume of her output.

What is your favourite printmaking product?

By far it is my Pfeil tools, I only have a small collection. I started with the 12/1, and then added the 11/0.5. Whenever I reach a personal milestone I treat myself to a new tool. I have four now.

What have you made that you are most proud of?

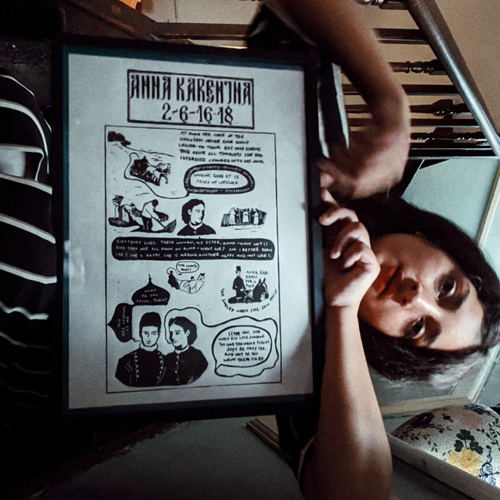
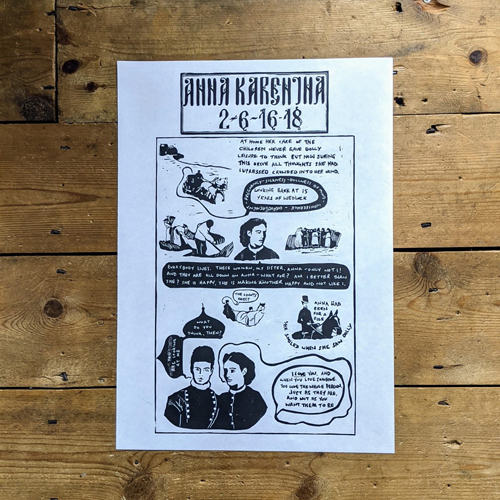
I am most proud of my last completed print – the Anna Karenina print. I took a few chapters from the book for my print. Anna Karenina is my favourite book and the chapters I chose contain my favourite quote from Tolstoy ever. It is a quote on unconditional love and it is said between two female characters of the book. The book revolves around the male-female relationships of the characters and this quote really speaks to me, showing the bond of sisterhood that transcends societal limitations and prejudice. I’ve written about it at length on my website and I have a whole page dedicated to the print and the process of creating it. The illustration and composition of the print took the most work, the carving I managed to do over a few nights.

 Where can we see your work? Where do you sell?

I am on Instagram and I recently started my own website to write more about my work. I sell my prints on Etsy including the Anna Karenina print.

What will we be seeing from you next?

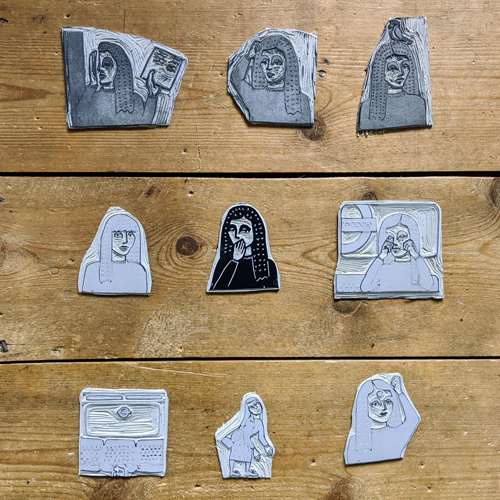
I always have a few projects on the go at the same time. At this very moment, I am carving a series of prints for the ‘About Me’ page on my website. They’re illustrations mostly of embarrassing moments I have experienced. “Waterloo”, for example, is a print on the time I was walking into Waterloo Station and a pigeon landed on my head. I have a very ‘do not make a scene’ attitude in public, and so I acted like it didn’t happen and carried on my journey.
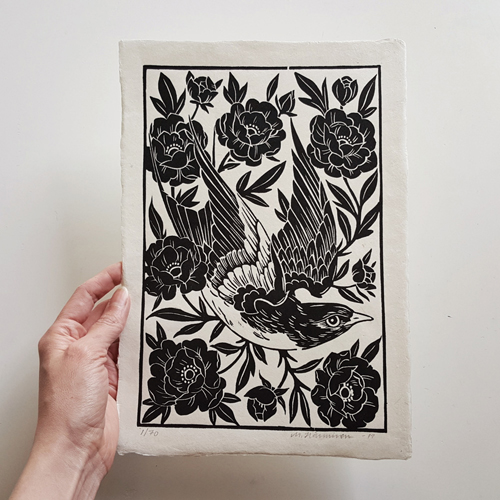
I’m also working on a Marxist critique of Adam Smith and the Wealth of Nations in print form. It makes sense in my head and hopefully it will make sense when it is printed.

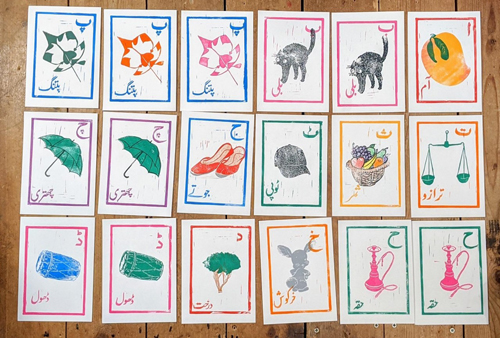
I had my first showing at the Museum of London planned for April 2020, I was supposed to showcase my Urdu alphabet flashcards but it was postponed. I’m looking forward to it, whenever it can happen.

Do you have any advice for other printmakers and creatives?

If you’re interested in taking up lino printing, my advice is to start with the Essdee cutting tool set. Build your set slowly, taking your time to get to know what tools work best for you.

To see more from Sunbul follow her on Instagram and visit her website.