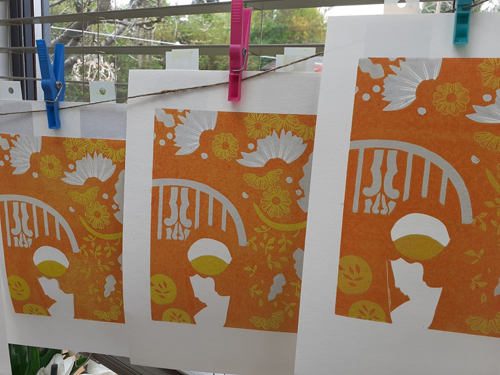
Meet the Maker: Tom Frost

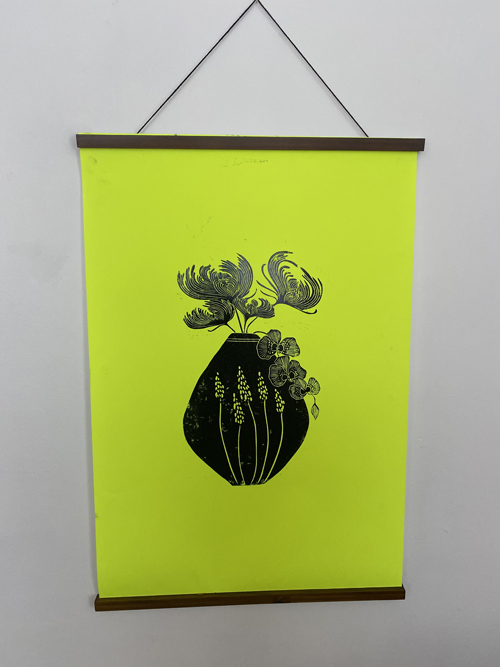
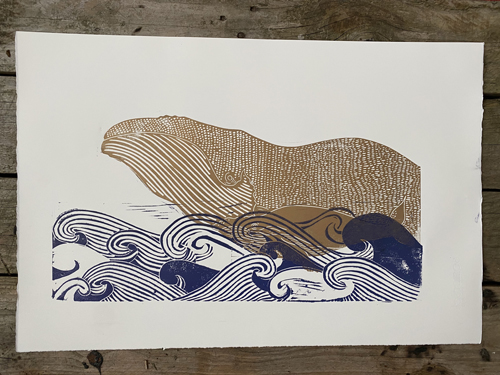
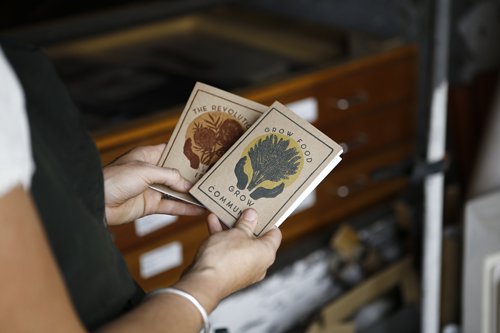
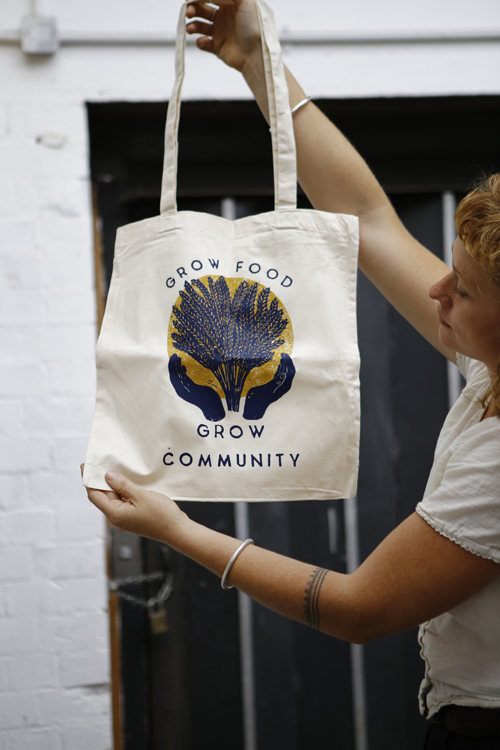
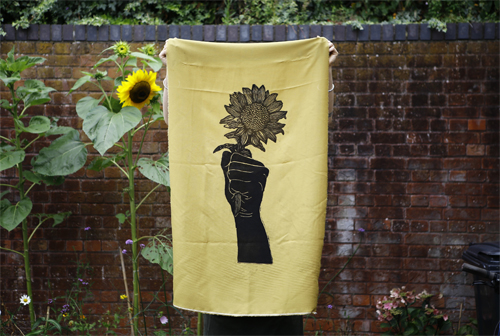
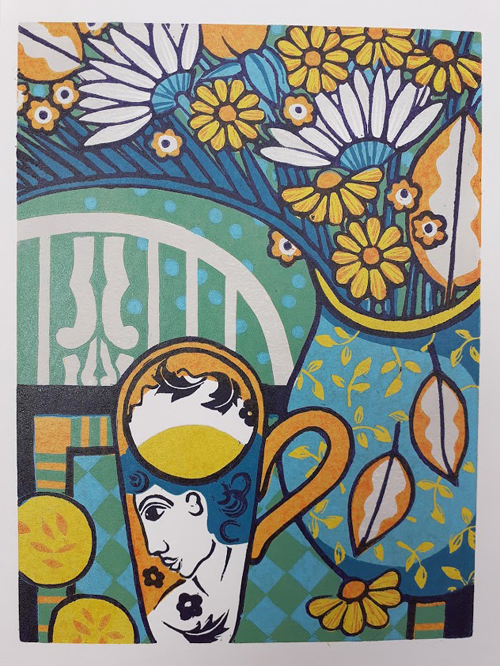
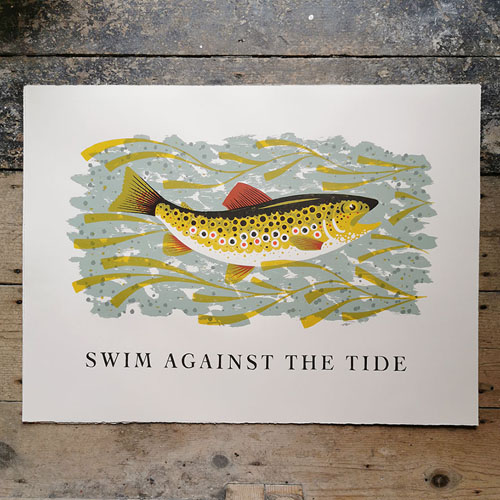
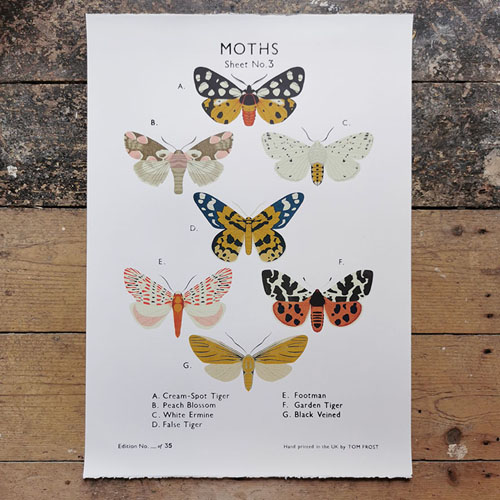
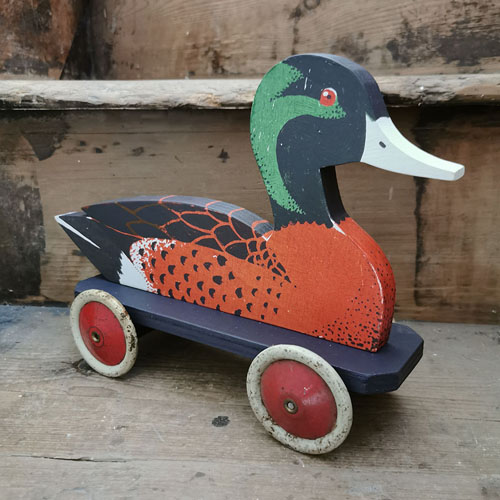
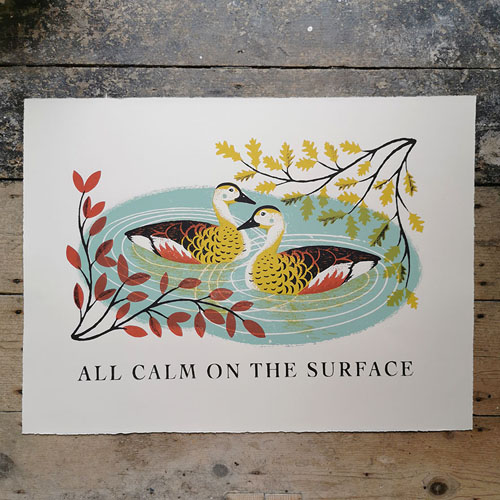
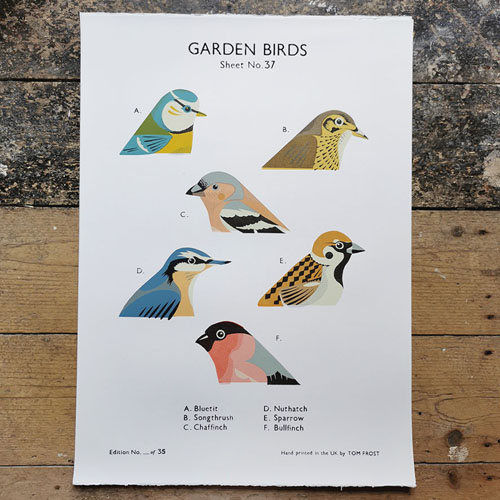
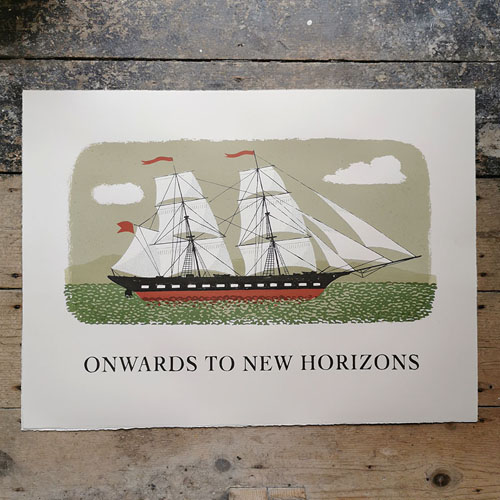
Print maker and illustrator Tom Frost graduated from Falmouth College of Arts in 2001 returning to his hometown of Bristol to work as an illustrator for a number of years. He now divides his time between print making, restoring his tired Georgian house in rural Wales and raising a young family. In recent years he has worked with clients including the V&A, Perry’s Cider, Walker Books, Freight Household Goods, Selvedge Magazine, Penguin, Barti Ddu Rum, The Archivist and Yorkshire Sculpture Park. His work highlights a fascination for old matchboxes, stamps, folk art, tin toys and children’s books. Tom strives to produce items that people will cherish for many years to come. 
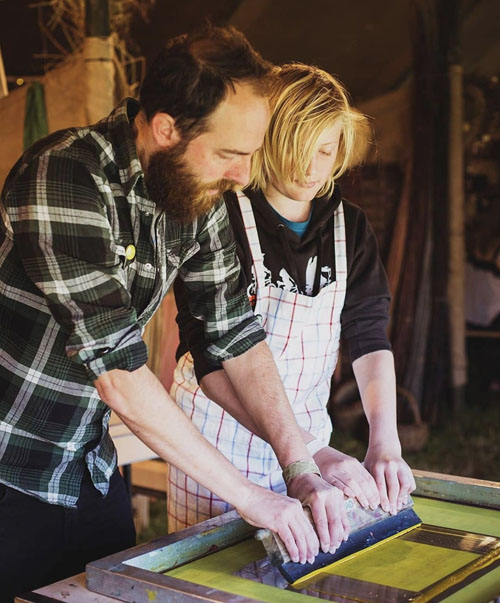
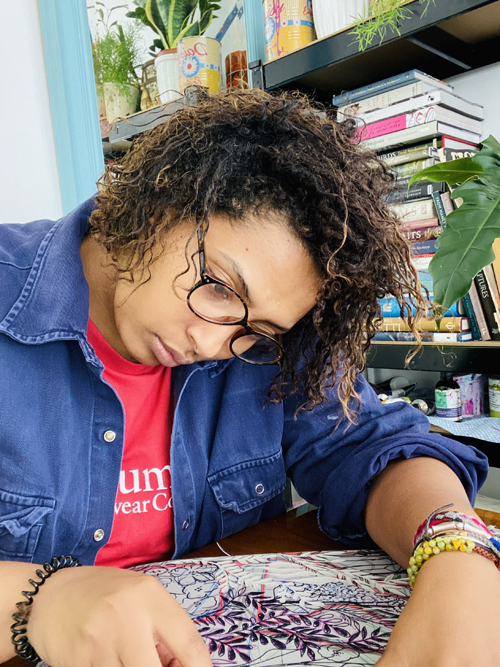
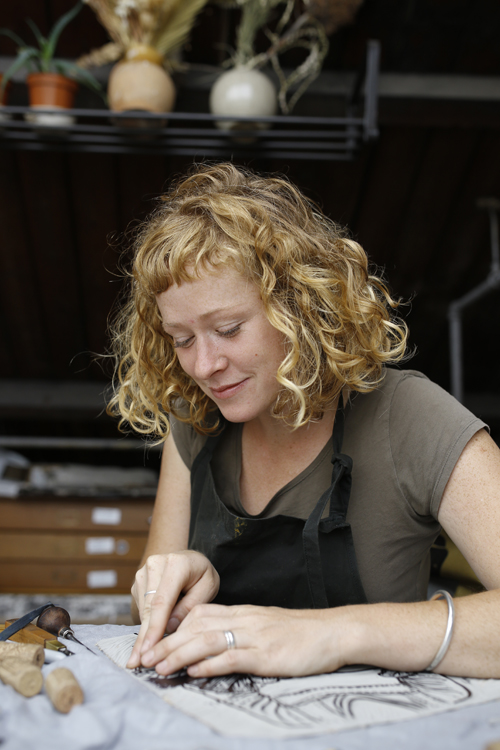
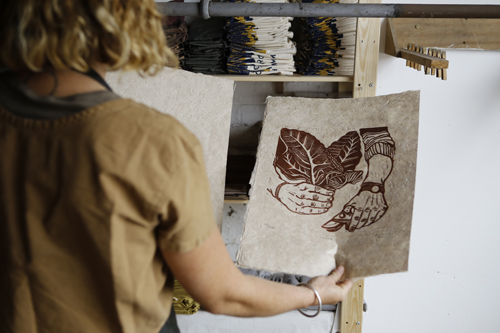
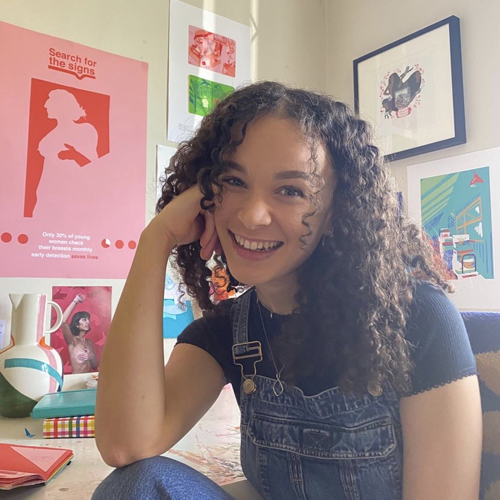
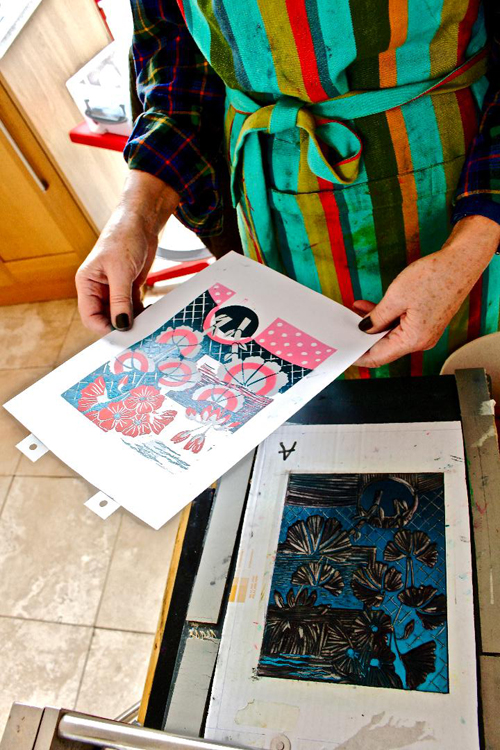
Image by Heather Bernie

Describe your printmaking process.

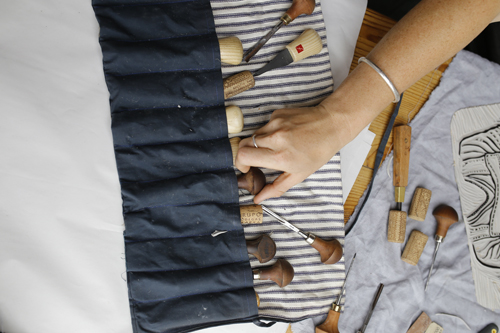
As a screen printer I create my positives in a number of ways. If I am doing something detailed or text heavy, then it is generally designed in Photoshop and printed onto a transparent stock. For my most recent limited edition prints I tend to work directly onto Mark Resist or True Grain with either acrylic paint, Chinagraph pencils, inks and paper cuts. My exposure unit at the moment is simply a UV floodlight beneath a sheet of glass. Very Heath Robinson! Once the screens are exposed, I use acrylic inks (safer in a house with children) and more than likely some lovely Somerset, Colourplan or Fabriano papers to print onto. No flashy exposure units, no vacuum beds, no back lit washout units, just good honest homemade printmaking which I find gives a much more pleasing result.
How and where did you learn to print?

I learnt to print in my hometown of Bristol at a small print workshop, gallery and studios called Snap around ten years ago. I was sitting in a pub chatting with one of the studio members who said I should give screen printing a go. A week later I had done the one-day introductory course and had instantly fallen in love with the process. A month later I was part of their mini print show and another month or so later I became one of the eight members of the studio and had 24-hour access to screen printing. My future (fate) was sealed.
Why printmaking?

It was a chance to try and step away from the digital. I had been working as a commercial illustrator for a number of years and felt I was treading water. Printmaking gave me the inspiration I needed to move my work forward, to get my hands dirty and inspire me to be a creative artist again.
Where do you work?

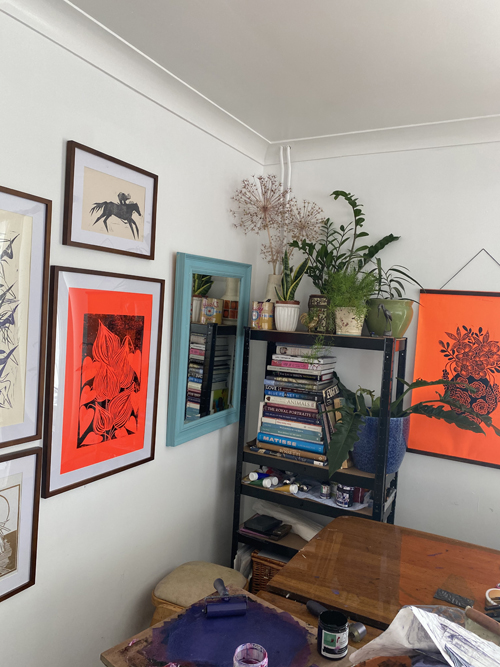
At the moment you will find me working out of a slightly chaotic, overly small space in our crumbling Georgian house in rural West Wales. Over the past few months, we have been moving ever closer to finishing the renovation of our barns that will become the first proper studio space we’ve had in the seven year since moving. Upstairs in the barn will be the main studio space and downstairs will be the workshop. It will be bliss!
Describe a typical day in your studio.

There tends to never be a typical day in the studio, and I like it that way. Some days it might be printing, others spent in the workshop making something out of wood, another day doing illustrations for a book and another might see me visiting clients up and down Wales for a branding job. With a liberal sprinkling of kids, cooking, emails, Instagram, a run here and a walk there, no day is the same.
What inspires you?

Nature, architecture, music, film, children’s books, folk art, old toys, old books, match boxes, our house, our kids, food, other printmakers, antiques. Everything! 
What is your favourite printmaking product?

Not a product as such but I have a little old wooden Dryad squeegee I found at a car boot sale for 50p. It was well used when I bought it and has been well used since with many happy years of printmaking left in it.
What have you made that you are most proud of?

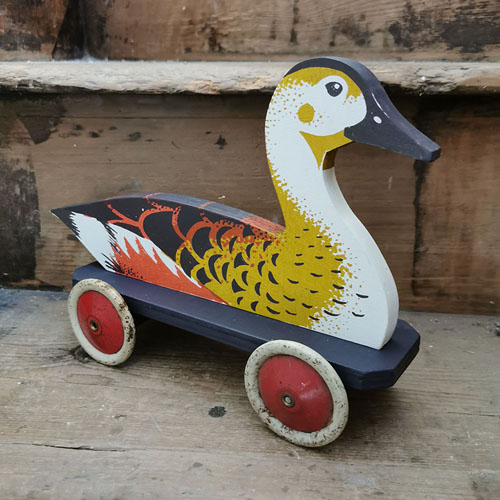
It would have to be the body of work I created a number of years back for Yorkshire Sculpture Park as part of my first large solo show. I’d not long been a printmaker and for a gallery to invest their trust in me to produce a show for them meant a great deal. After eight months of hard work I’d managed to produce about forty new pieces of work ranging from limited edition prints, wooden toys and even a bit of marquetry. 
Where can we see your work? Where do you sell?

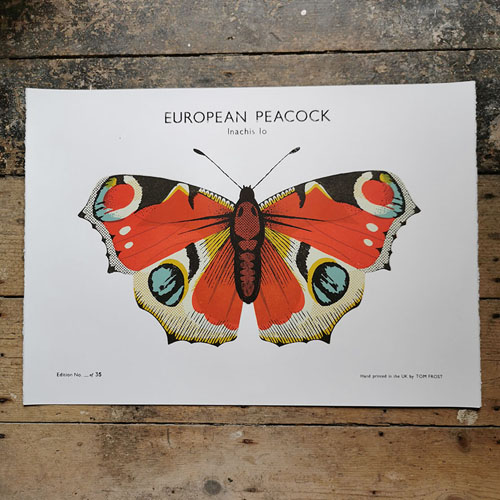
The best place to find my work at the moment is in my online shop. Over the past number of years my work has pointed me more in the direction of book illustration and design work. This has meant my print drawers have become rather empty and the number of galleries I supply has fallen away somewhat. I’m hoping that this will soon change with many new prints in the pipeline.
What will we be seeing from you next?

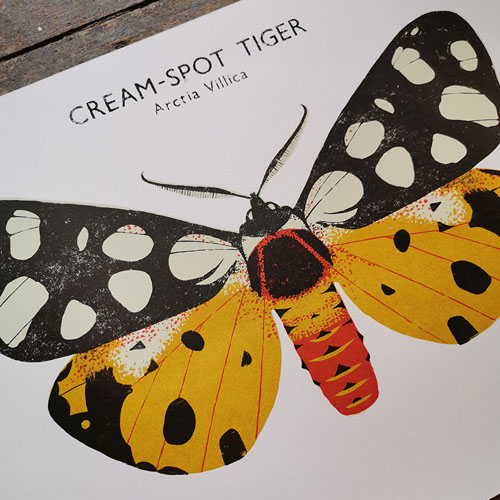
I was lucky enough to work on a recent book with Ladybird just as lockdown started which will be out next year. I was also due to have two solo shows this year which Covid-19 has obviously had other ideas about. The hope is these will happen early next year so I’m planning lots of new prints and handmade goods over the coming months.

Do you have any advice for other printmakers and creatives?

Have fun, make mistakes and do what you love.

To see more of Tom’s work check out his Instagram.

We are very excited to have Tom teaching two courses for us at our Bognor Regis studio on Saturday 26th/Sunday 27th September and Monday 28th/Tuesday 29th September.

Drypoint with Enviromount

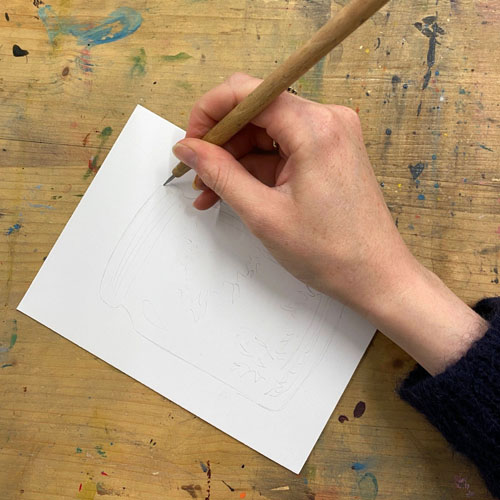
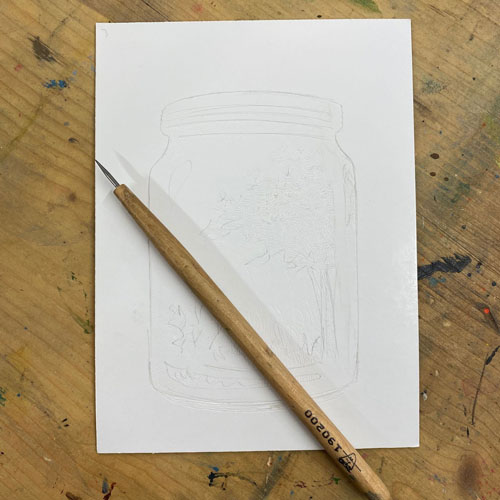
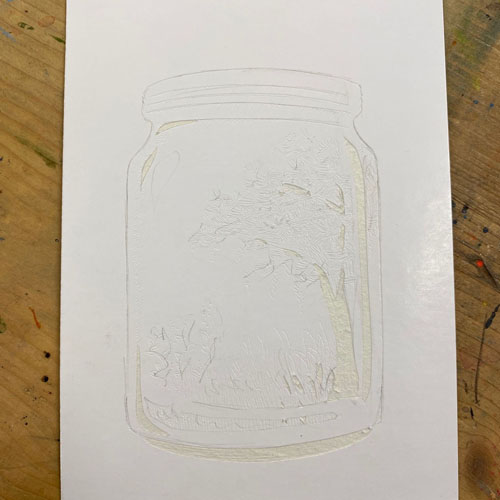
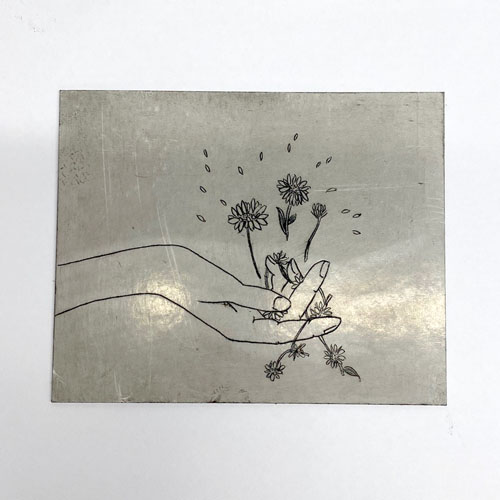
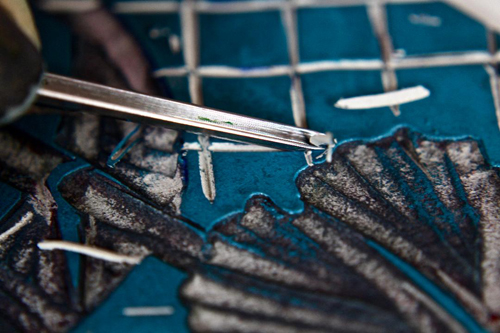
Enviromount is a brilliant paper-based drypoint surface. It can be scored with a sharp tool such as a drypoint needle, and the top surface can be peeled away. We were keen to try it out in the studio.

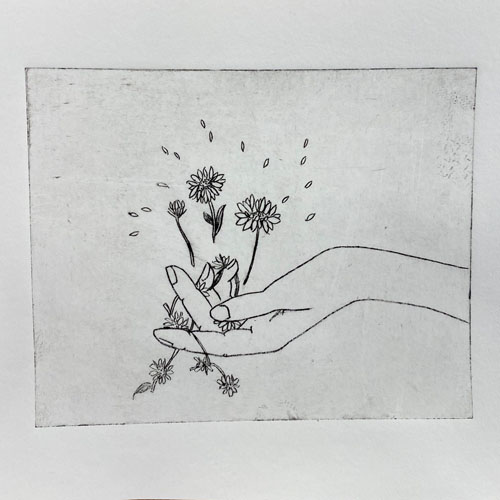
A drypoint print is an intaglio technique in which lines are scratched into a plate, creating a burred edge that holds ink. Ink is applied to the plate and excess is wiped from the surface. The plate is printed, usually using an etching press but not always, and the positive marks appear on the paper.
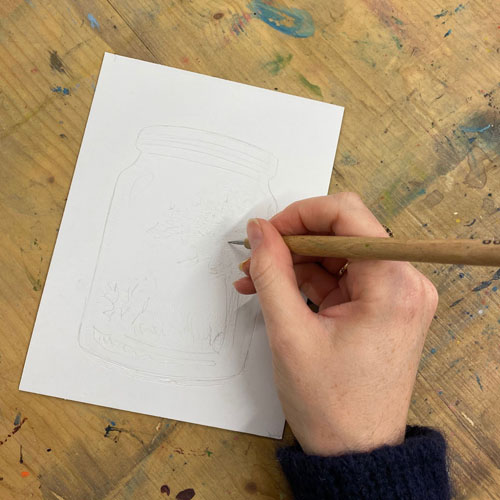
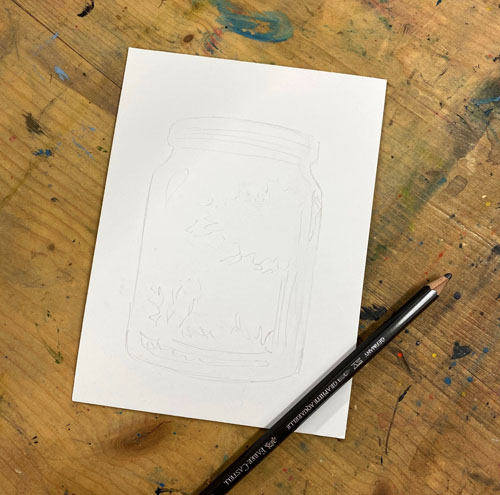
Use soft pencil to lightly draw out the design, being careful not to press too hard and dent the surface. Use drypoint needle to score the design into the surface (we used a 2mm needle).

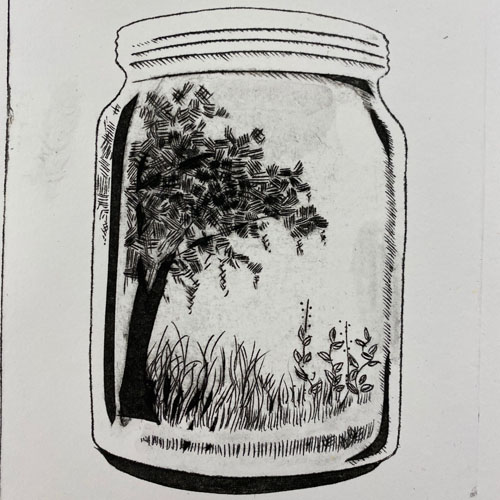
We used hatching and cross-hatching to build tone in the line work.

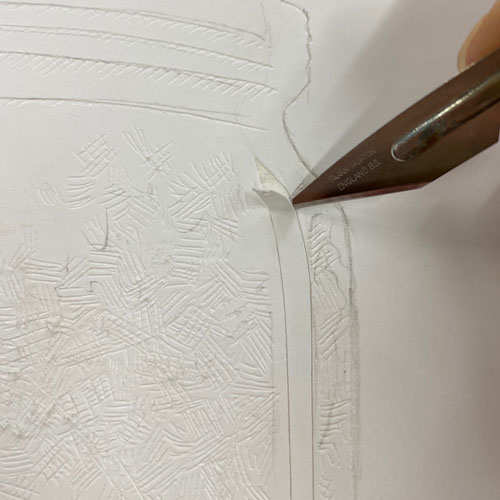
Enviromount has a top surface that can be peeled away to reveal fluffy insides that will hold onto ink and print densely dark. Score the edges with a scalpel and then use the point to lift the edge of the section you with to peel away.

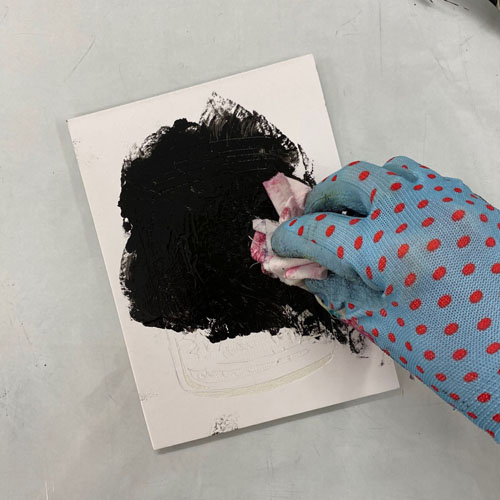
Before inking up, soak your printing paper in a tray of water. We are using Snowdon. Ink up the plate by dabbing it on with a wad of cloth. Akua Intaglio Inks work especially well with Enviromount, and are easy to clean up.
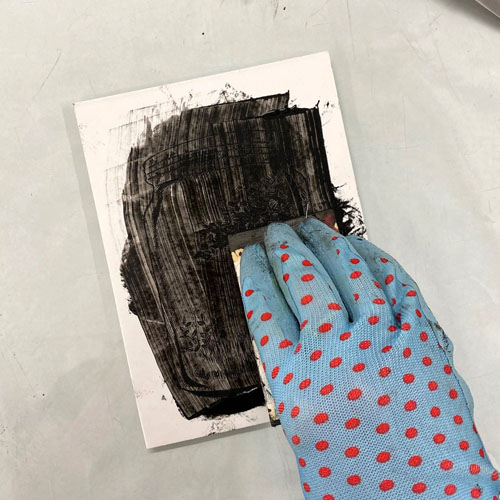
Scrape excess ink from the plate whilst working it into the lines with a small piece of mount board.

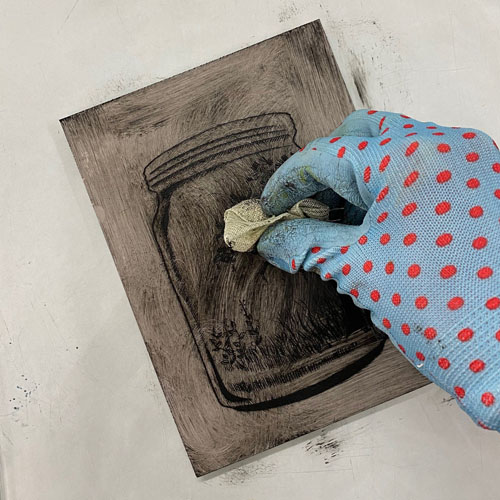
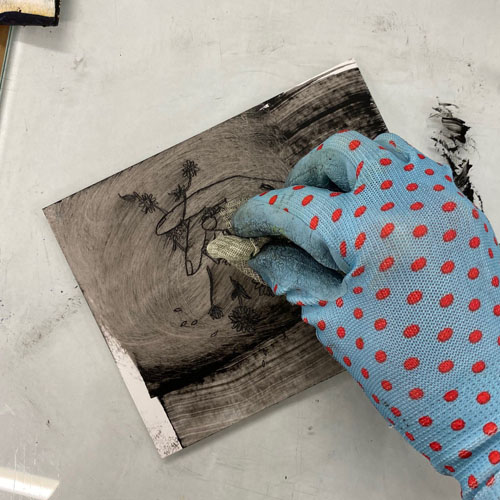
Use a twisting motion with scrim to work the ink into the lines and away from the surface.

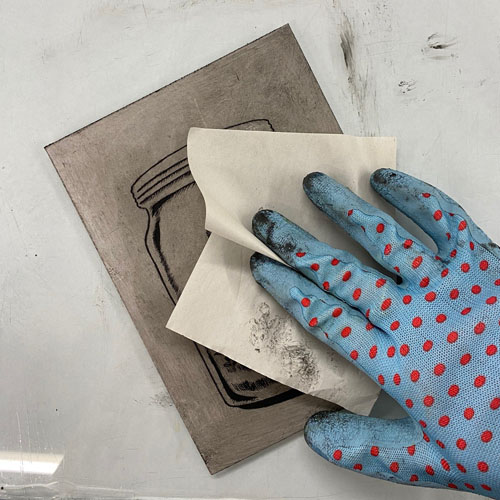
Polish the top surface with a piece of tissue held flat between the fingers.

Place the plate on the surface of the intaglio press. Blot the soaked paper until it feels damp to the touch but not wet. Lay the paper on top and roll through the press with a fairly tight pressure. Alternatively, read our blog post about intaglio printing without a press.

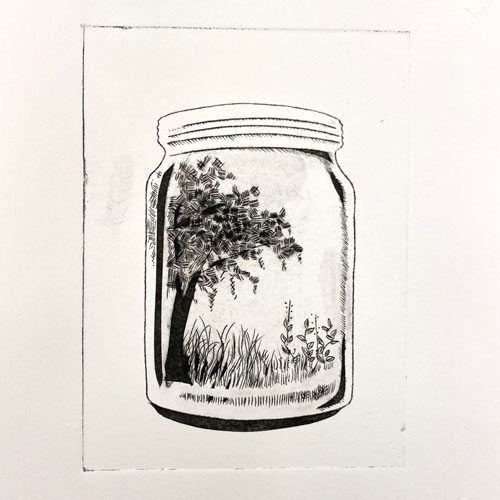
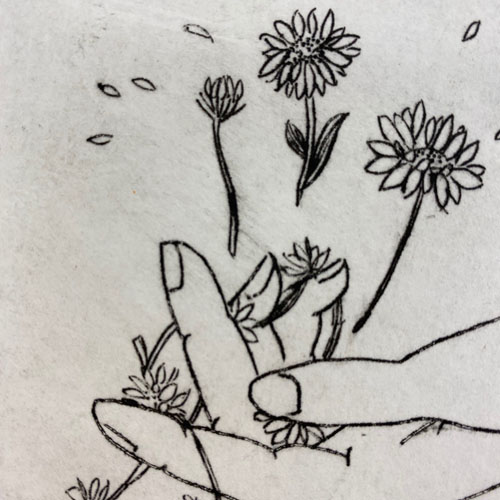
We found that, although the surface of the plate looks very grey with ink, this did not transfer to the print, which shows very little plate tone. This makes it a lot easier to get clean prints!

The quality of line in these prints has the lovely fuzziness that is typical of drypoint prints.

For this project you will need:

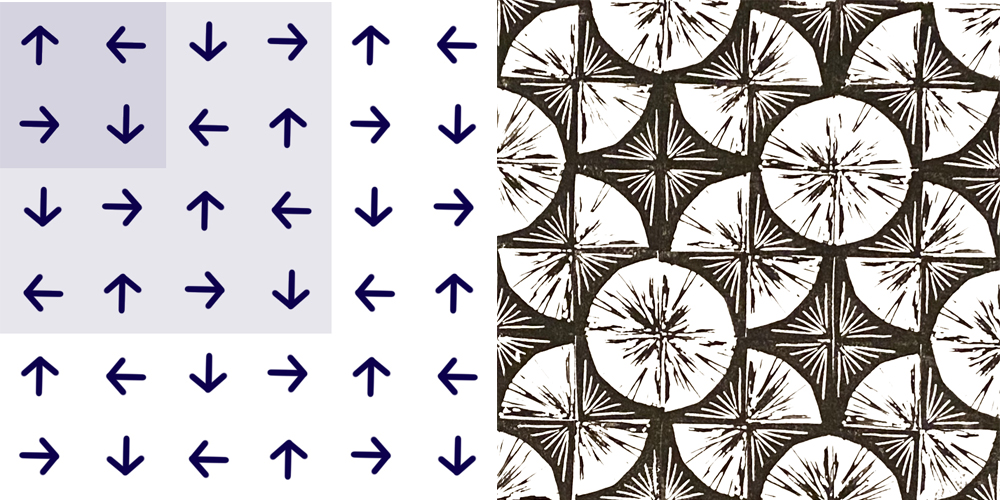
The Endless Possiblities of a Square Block Repeat

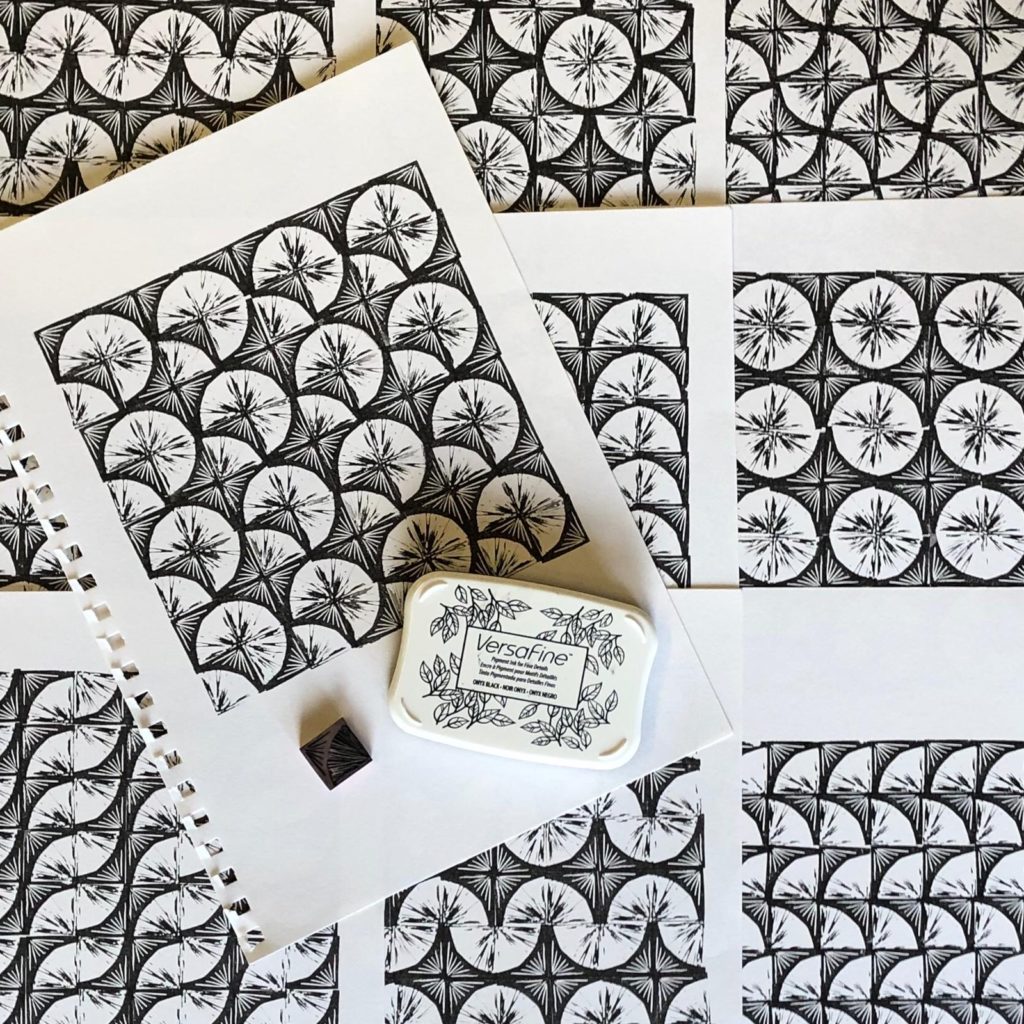
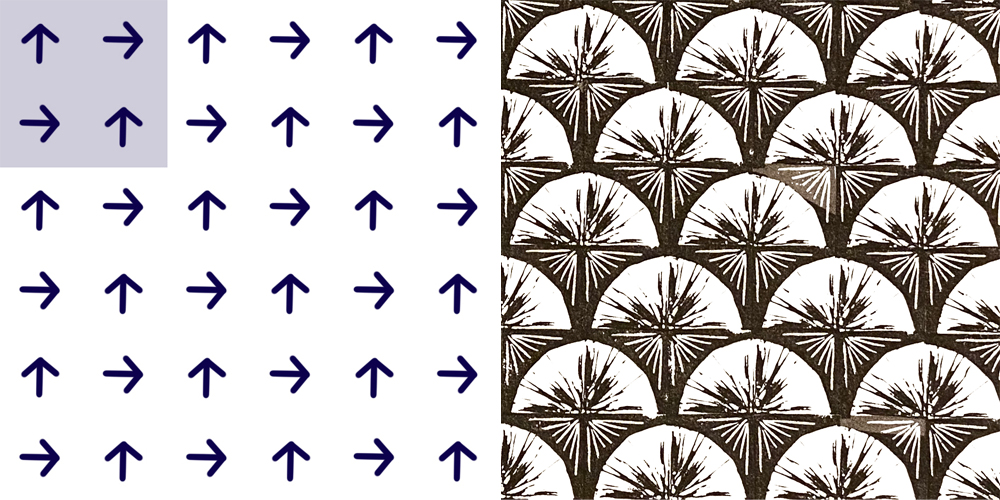
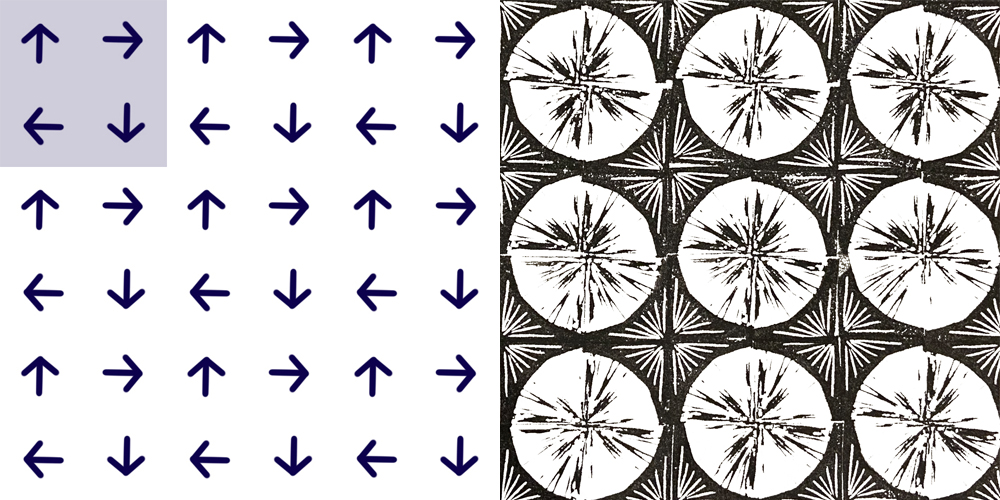
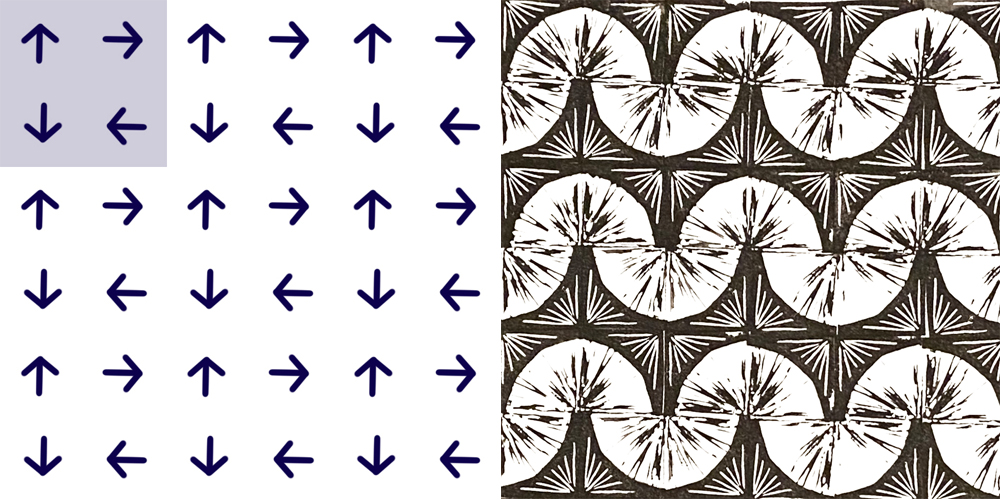
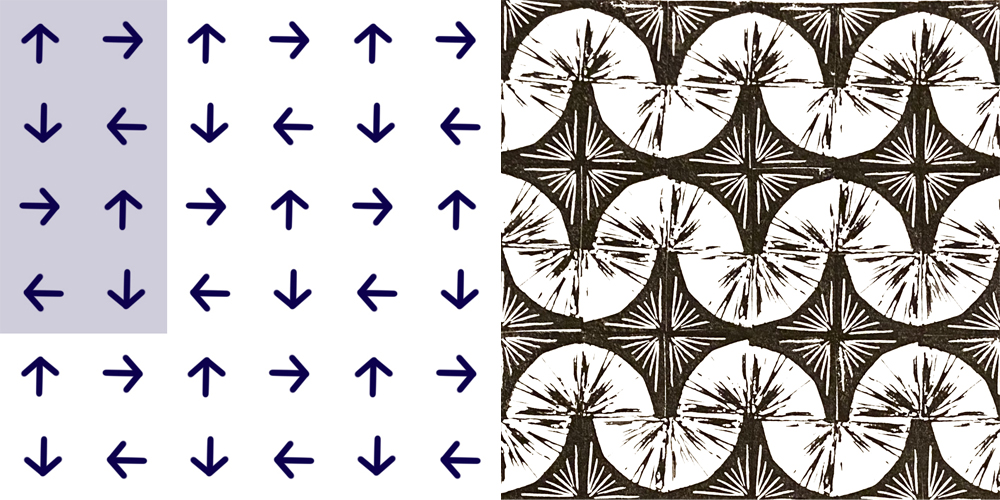
Using a simple square block can create a myriad of possibilities of pattern.

We have used Speedy Carve and Versafine inks for this project.

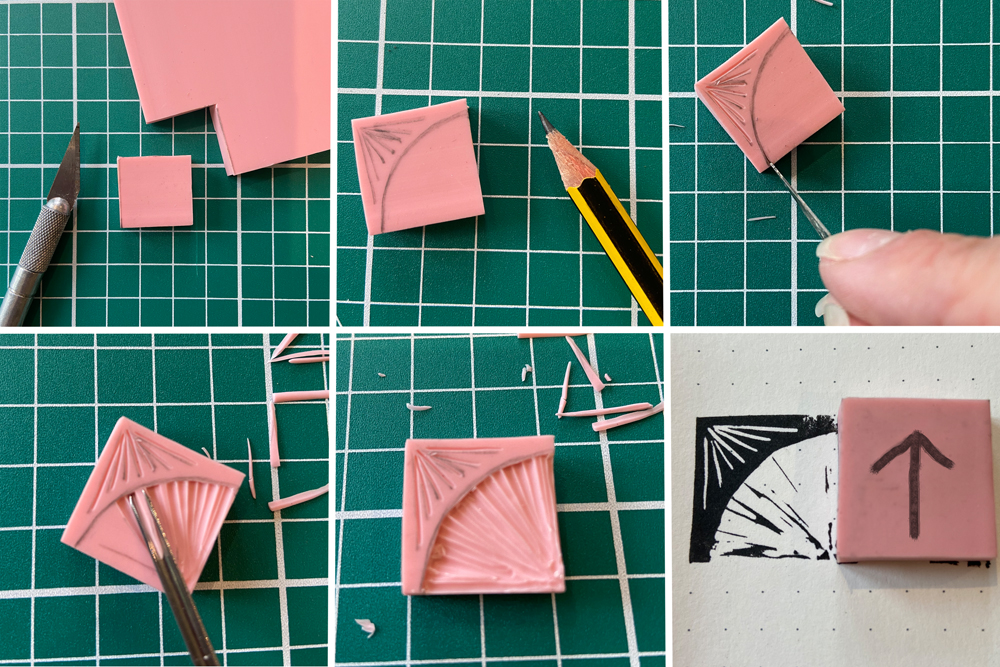
  1. Cut a square from the Speedy Carve using a scalpel.
  2. Draw a quarter circle curve on the block using a pencil. Above the curve draw some simple lines fanning from the corner towards the curve.
  3. Cut along the curved line with a scalpel – don’t press too hard as you only want to cut down about 1mm. Use a fine V lino tool to cut along the fan lines – we used a Pfeil 12/1.
  4. Using a wider U gouge – we used a Pfeil 11/3 to clear away the underside of the curve – cut from the corner towards the curve to create a fan design. We wanted to cut most of the block away here.
  5. The finished block
  6. Draw an arrow on the back of your block to know which direction it will print.

Now the fun begins!

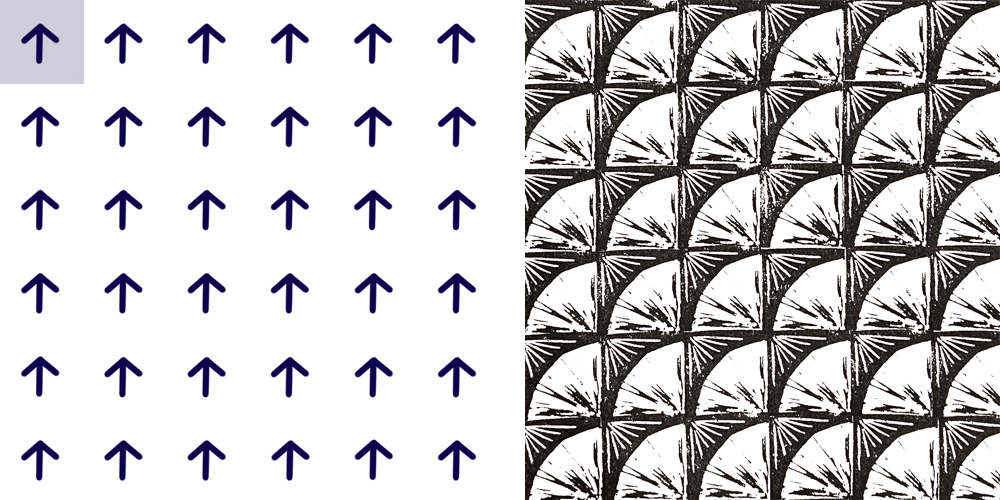
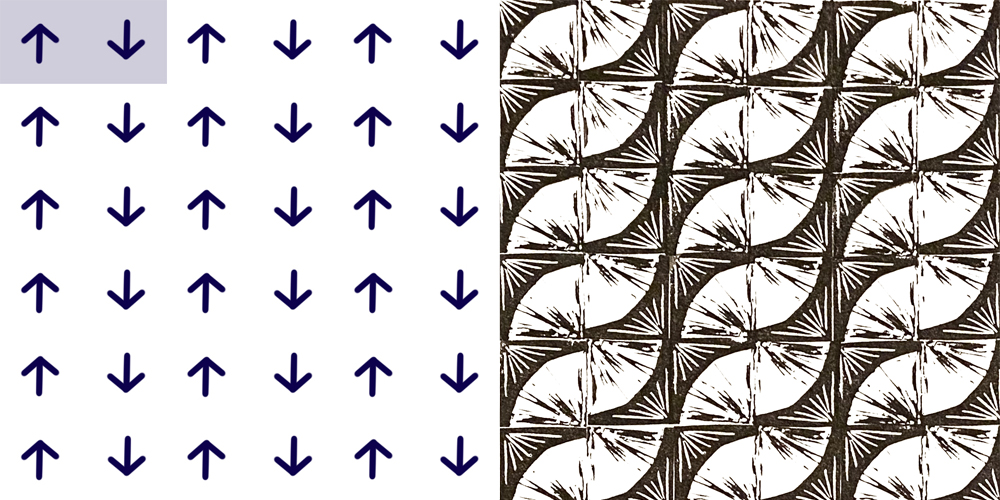
A simple straight design – keeping the arrow pointing up. The lilac square will indicate how to position the block.

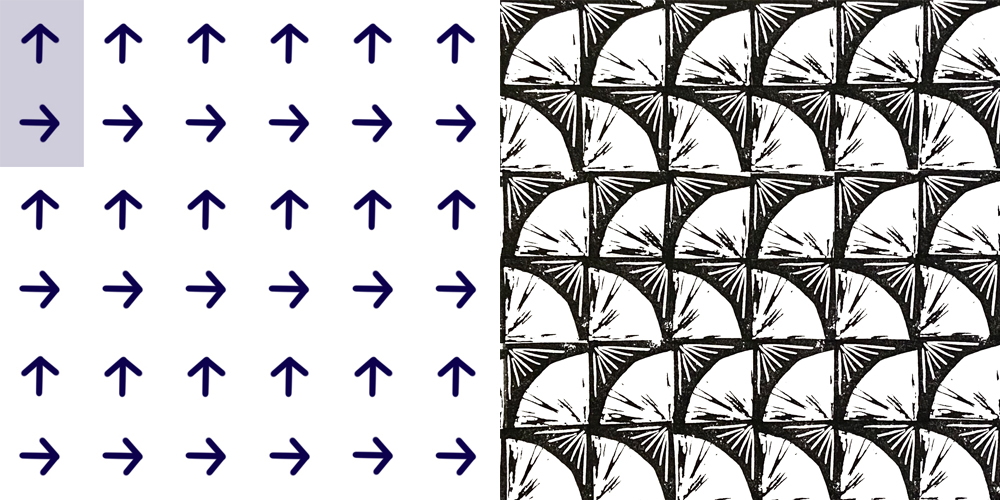
Alternate rows.

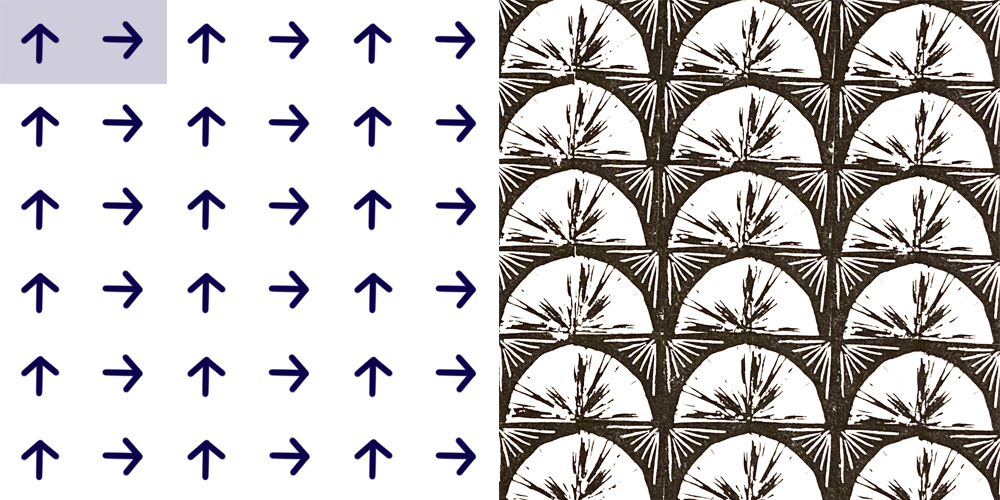
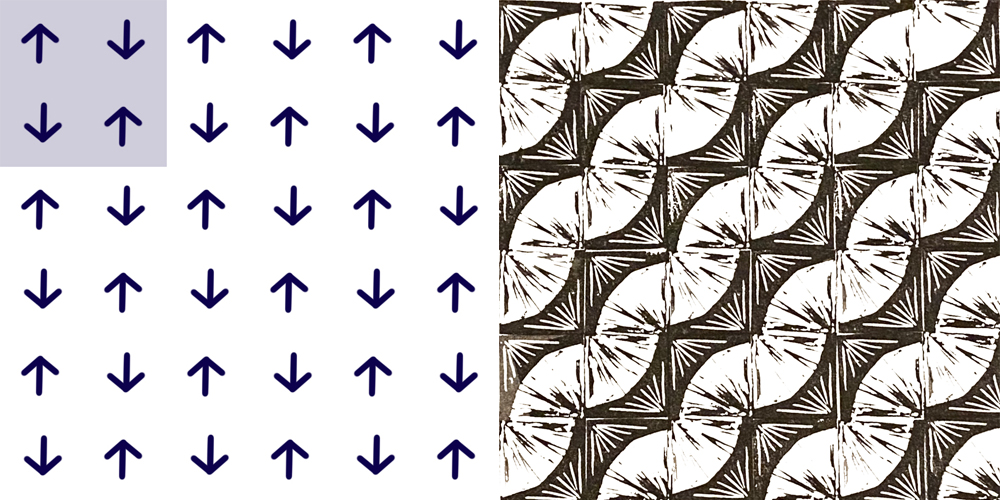
Alternate columns will create a semi-circle repeat.

Alternate semi-circle repeat.

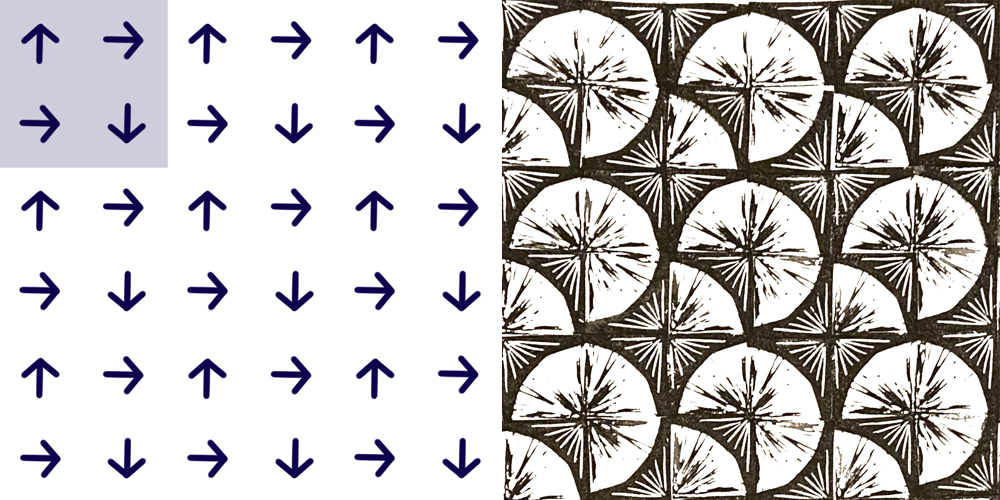
Full circle repeat. This is a rotating square.

Staggered full rotation. This is a repeating square.

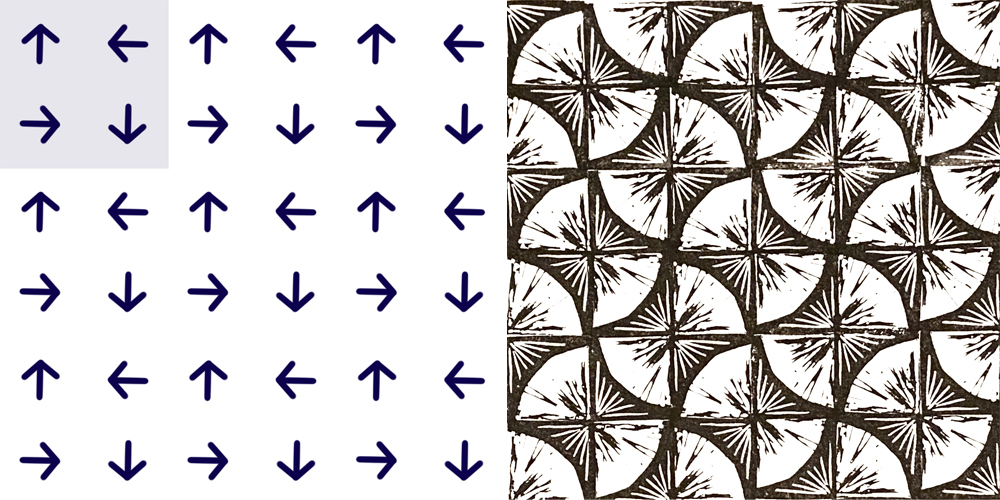
Staggered full rotation – alternate rows. This is a repeating rectangle.

Half turn repeat.

Half turn repeat – alternate rows.

Three Quarter turn repeat.

Rotating Weave repeat

Rotating Weave repeat turned 90′ – this one is mind-boggling!

Meet the Maker: Yasmine Charlotte

My name is Yasmine, founder of Yasmine Charlotte. I create block prints and printed goods, inspired by nature, human forms and daily life.

Describe your printmaking process.

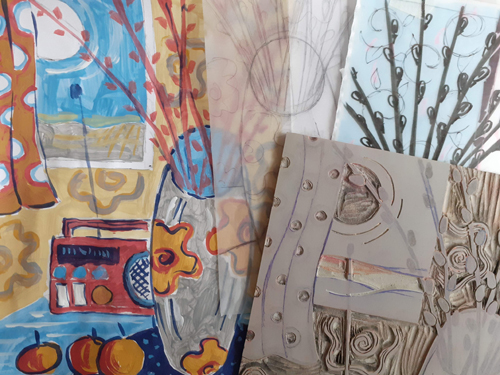
Depending on what I am working on, I would either sketch straight onto the lino first in pencil, and then in a thicker black pen.

How and where did you learn to print?

I learnt the basics of how to print when I was at college doing my fine art a-levels, but I actually hated it, it was a few years later when I decided to buy a kit on a whim from my local art shop.

Why printmaking?

I chose printmaking as a way to connect with my Indian heritage. Also, I loved the idea of being able to create a repeating pattern, as well as the versatility of being able to print on both textiles and paper.
Where do you work?

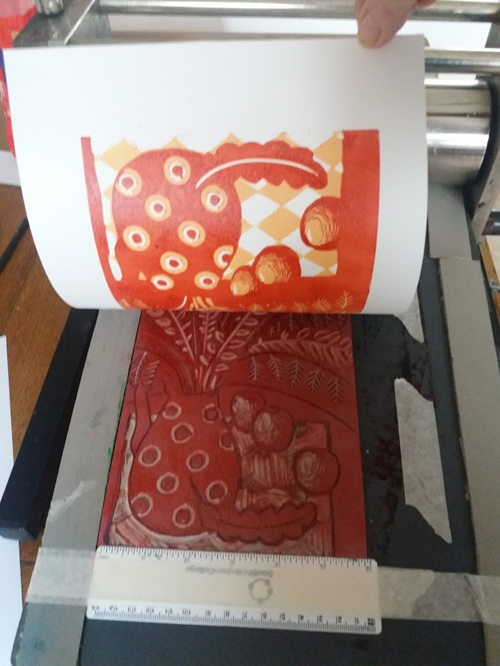
I’m currently working from my dining table, and there are prints drying all over the house. Once things settle down, I will go and search for a new studio space.

Describe a typical day in your studio.

A typical day would usually start with me walking my dog, as it gives me time to clear my head and work out what I am carving that day, as I normally plan and sketch out my lino a few days ahead of carving. If I manage to carve it all in one day, then I would test print it in black first, as I feel it shows up any mistakes or imperfections better. Once any corrections are made, I will either print the final print (if printing in black) or clean the block and then print in its final colour.
How long have you been printmaking?

I’ve been printing for around 8 years now.

What inspires you?

Lots of things inspire me. The nature of the countryside where I live, world events, people, events in my own personal life, in some ways my art is like my diary.

What is your favourite printmaking product?

There are so many printmaking products that I love, it’s impossible to choose. Right now it’s probably my Cranfield relief inks, of course my Japanese Powergrip tools, and I’d be lost without my Pfeil tools too.

What have you made that you are most proud of?

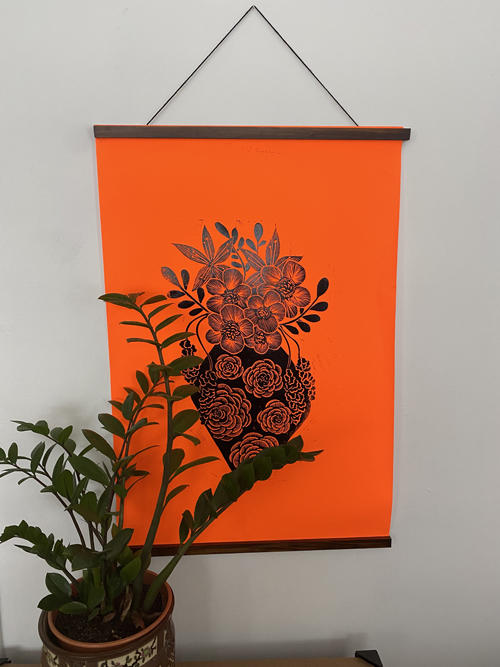
What I’m most proud of is forever changing, as my work changes and evolves. Currently, I am very proud of my neon series, they have come out so much better than I could have ever have hoped.

Where can we see your work? Where do you sell?

You can find my work on my website.

What will we be seeing from you next?

I am currently working on a course so that I can pass on my knowledge to other people, more textiles, a return to clothing as well as potentially some wallpaper.

Do you have any advice for other printmakers and creatives?

The main advice I’d give is not to be afraid to try new things and don’t be afraid to ask for help. It doesn’t make you any less creative.

To see more from Yasmine follow her on Instagram.

Meet the Maker: Rosanna Morris

I am an illustrator and printmaker, working mainly with relief. I work from my small barn studio set in a friend’s smallholding in the Herefordshire countryside. I also run a printmaking studio in Bristol from which (in pre epidemic times) I ran workshops and printmaking events.

Describe your printmaking process.

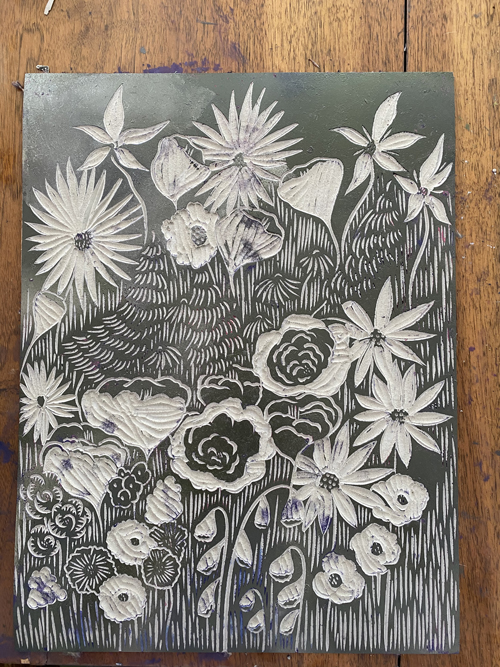
I usually start with a pencil drawing, followed by a looser ink painting to design my prints. I then make my prints by using Japanese or Swiss carving tools to carve away the areas that I don’t want to be seen. I then ink up and print them on handmade papers using my huge hand-built etching press, Bubolina.

How and where did you learn to print?

I started making prints when I was 19 years old on an Art Foundation at Bristol School of Art. I wanted to turn my pen and ink drawings into large scale posters to wheat paste locally but couldn’t afford the digital printing costs. At the time, it made total sense to me that I should just transfer my images and carve them out of wood to make a giant stamp. I didn’t really consider it a mammoth undertaking, but my first print was a meter long and half a meter wide.  After that I became pretty addicted to the process and hand burnished all my prints for years until my partner persuaded me that he could build a press, and then Cato press, our printmaking studio, was built.

Why printmaking?

It’s an addictive process in itself, carving away areas methodically once an image is designed for me is a kind of meditation. And then, of course, the moment you make your first proof of a design is always very satisfying.

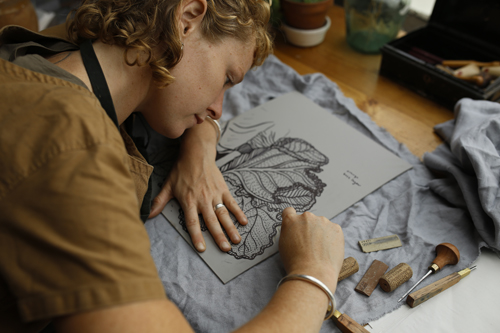
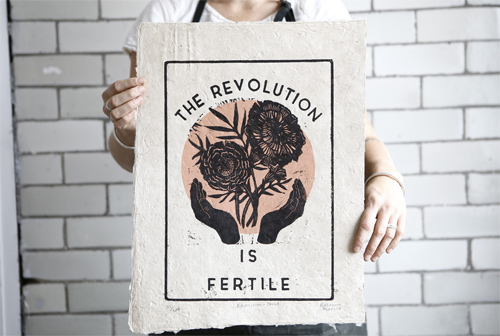
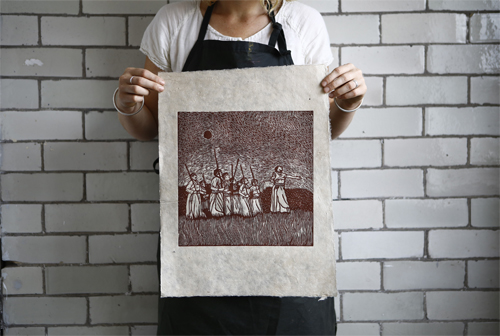
I think for me it’s the political place print lies in the art world that draws me to it. Printmaking with relief is, in my opinion, the most democratic of art forms. You need very little in the way of tools or specialist material to make prints and yet the medium allows anyone using it to get their ideas out there and seen by the people. I’ve always been fascinated with the way print was used during the Mexican peasant revolution to educate and inform the revolt.

Where do you work?

From my little barn room set on a friend’s beautiful six-acre smallholding. It’s got thick stone walls and thankfully an insulated roof, so hopefully, the winter won’t be too harrowing. My neighbours are two geese called Horace and Myfanwy and a flock of beautiful runner ducks. Its all pretty new to me still as we only recently moved to the area from Bristol, but I’m already in love with it.

Describe a typical day in your studio.

I usually arrive at the studio after dropping my kids at school, just after 9, make a coffee and open up my sketchbooks. There’s no internet in my little barn, which I’ve found has been immensely productive for me. If I need to look something up or contact someone I have to walk down the country lane and perch next to the geese to get any signal. I generally spend time drawing, reading and carving, going for a walk when I get a bit stuck or need to work through an idea. The farm dog Bludwen, an ancient black spaniel often comes and keeps me company whilst I carve and listen to audiobooks in the background. The working day ends at 3 when I rush off across the fields to pick my kids up from school.

How long have you been printmaking?

Over ten years now, on an off.  

What inspires you?

My main inspiration over the years has been farming and where it lies in our collective modern culture. I grew up in a very urban environment, on a council estate, completely disconnected from my food and where it comes from. I think my work has always revolved around going back to the land, a simpler and more rural way of life, the importance of this and our own responsibility for taking care of the land on which we rely.

What is your favourite printmaking product?

I couldn’t survive without my caligo safewash inks, I love them so much and it was such a revolution for me to be able to move away from oil based. I also love my Pfeil carving tools. 

What have you made that you are most proud of?

I think the three calendars I have worked on for the Landworkers’ Alliance would be one of my biggest achievements. Working for such a brilliant organisation, whose work I believe in has been such an honour over the years.

Where can we see your work? Where do you sell?

On my website and in some lovely small shops around the UK, there should be a list on my site.

What will we be seeing from you next?

I am working on some seed sowing guides for flowers and vegetables and really excited to be releasing them later this year.

Do you have any advice for other printmakers and creatives?

Just keep going, keep dedicated and believe that if you spend your days doing what you love it will all be worth it. I had some very rough and very poor times starting out where I wanted to throw it all in and get a job in a cafe, I’m so glad now that I had the support I needed and persevered.

To see more from Rosanna follow her on Instagram.

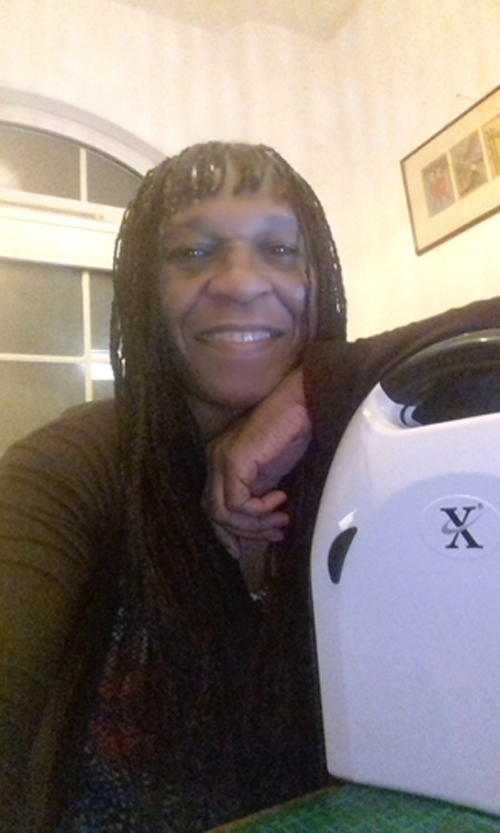
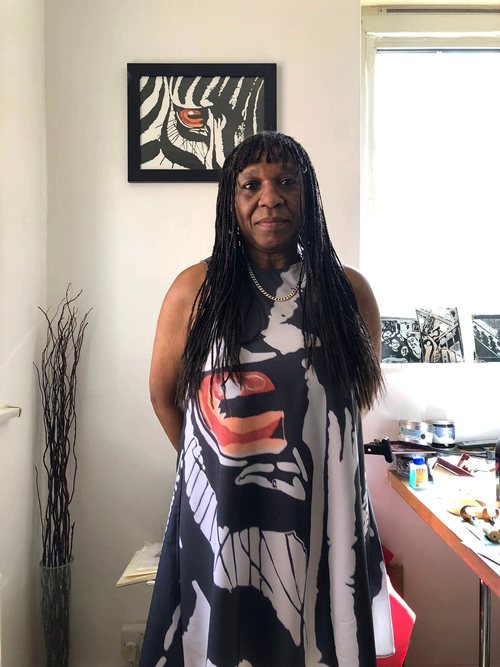
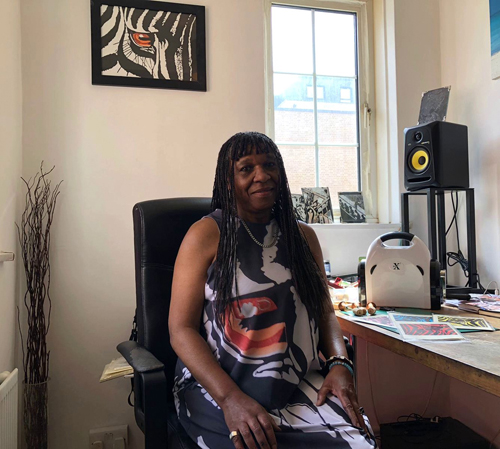
Meet the Maker: Sandra King

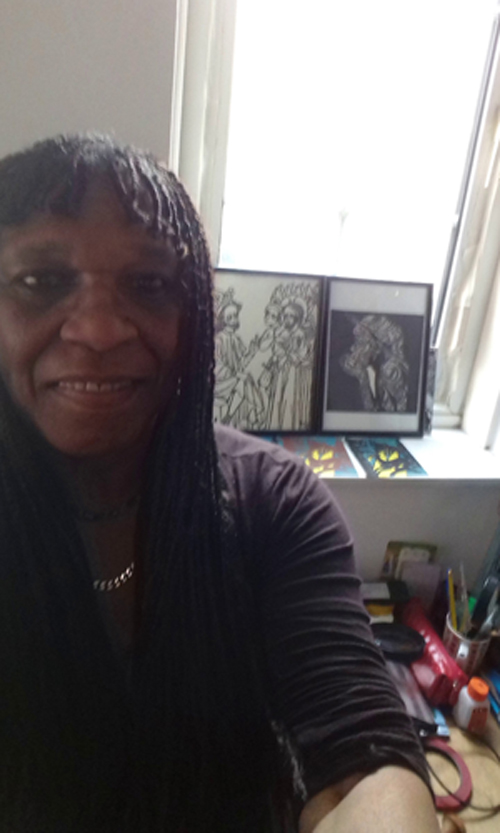
I was born in London and my parents are from Trinidad and Tobago. I have always been creative: I listened to a lot of Jazz, Soul and Reggae music growing up, and later in my life I had the great opportunity of going to the Guildhall School of Music and Drama to study Jazz. I started singing with a Jazz band in pubs and clubs around London in the late 80s, early 90s.

Describe a typical day in your studio?

First a cup of Yogi Tea. Since the lockdown I have been printing a lot, improving my ink to roller ratio (I usually put too much). I try practising with different amounts, using different types of paper and keeping it simple. I usually start early in the morning and think about the photo or picture I want to create onto the lino, and whether I want to use colour or just black and white. Nowadays, I am able to spend most of my time drawing, printmaking, carving, inking and pressing in my small workplace while listening to Chill out, Jazz Blues, Soul and Reggae music.

How and where did you learn to print?

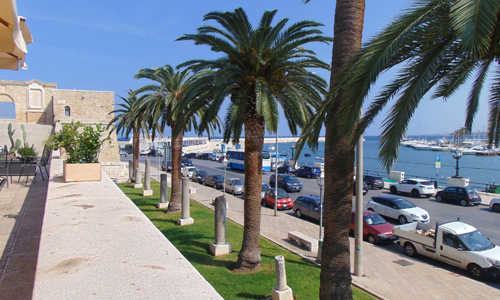
I started to learn about printmaking in the South of Italy in Bari, in 2018. I was living and teaching in Italy. I remembered I had brought with me a pack of tarot cards by Michael Goepferd and Brian Williams called ‘The Light and Shadow’. The pictures on the cards are done in woodcuts and I loved them. I began to find out the history of printmaking (thank goodness for YouTube), this was where I learnt a lot about lino printmaking. I watched every video I could find on YouTube from the cutting to printing, the different types of tools, inks, paper etc. Finally, I ordered what I needed to begin my printmaking journey. By the time my order arrived I couldn’t wait to start, I was hooked.

Why printmaking?

I love printmaking because I like working alone. For me, it is another way of being creative beside playing music, where I would normally sing, I now use printmaking to draw, design, experiment with inks and paper plus relax and just be quiet sometimes.

Where do you work?

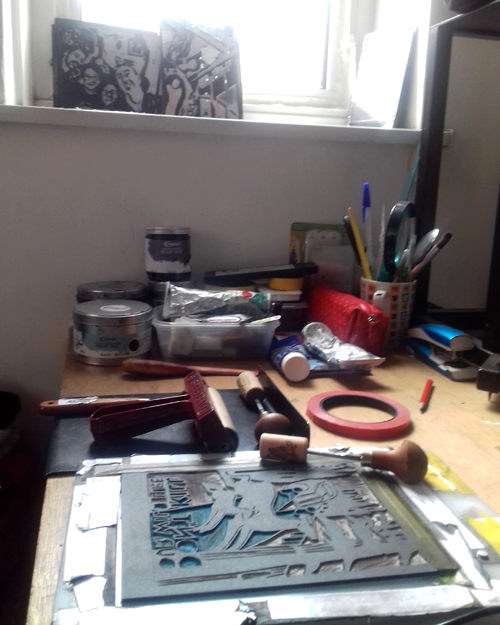
Since being back in London I work from home in my living room. I have lots of windows and lots of light, it is very comfortable. I am messy so I try to be a bit more organised with the inks, lino, and keeping my Pfeil cutting tools nice and sharp. I am still learning about printmaking therefore working from home suits me.

Describe your printmaking process?

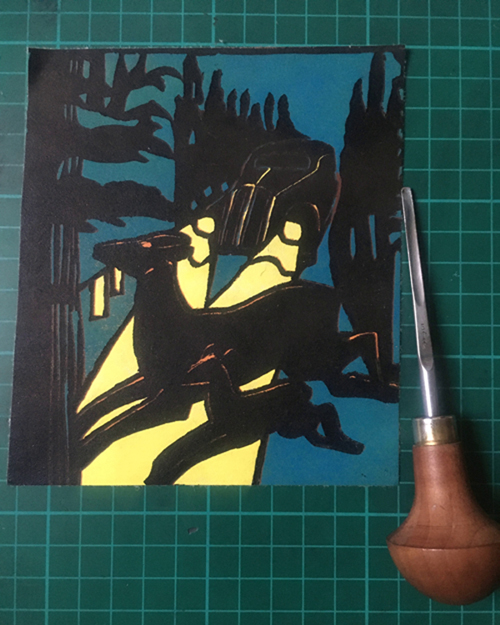
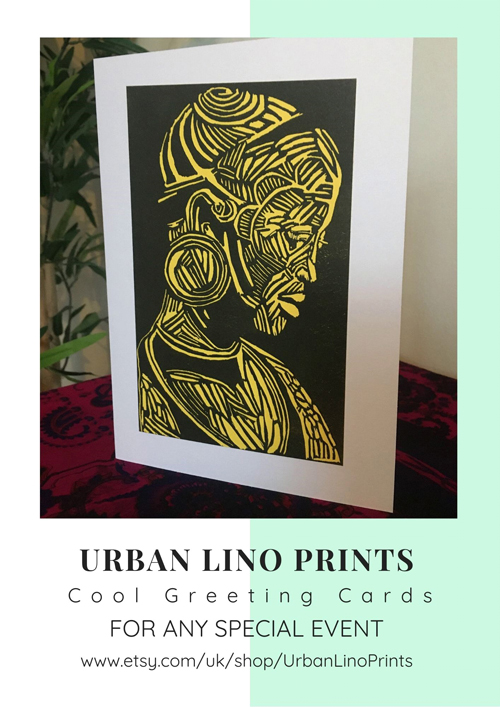
I mostly use hessian backed lino and occasionally softcut lino. I look through many types of images, illustrations, and photos (old and new) to create threads of ideas. I sometimes mix up ideas to see the effect they have when I am designing my greeting cards. There is not a particular plan.

How long have you been printmaking?

Not very long, since January 2018. I still have so much to learn. I want to improve my relief printing and learn how to make better registration prints and use different colour combinations.

What inspires you?

Music, photography, children, travelling. Other printmakers like Elizabeth Catlett (pictured above). Her images and storytelling, using black and white prints reflect my Caribbean roots which inspires me as well as my English roots.

What’s your favourite printmaking product?

Oh Wow, I have to say my Xcut press. It is by far the most awesome piece of machinery I have ever bought. With a little of bit experimenting it can produce some very decent prints.

What have you made that you are most proud of?

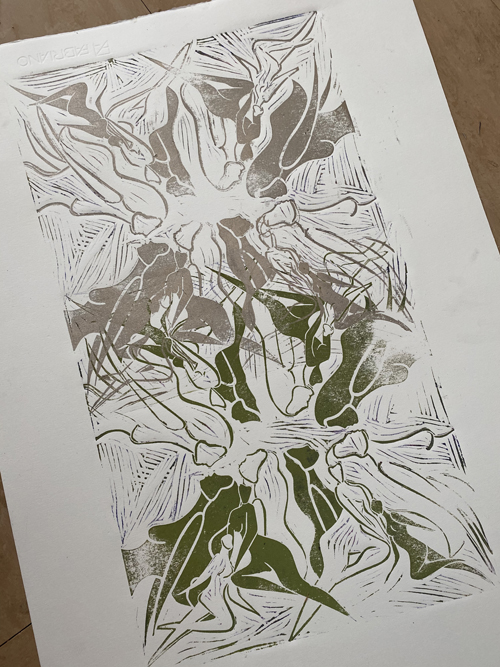
My first ever reduction block was on a course I did with Steve Edwards at The East London Printmakers Studios, it is called “The Zebra Head”. I loved being in the studio with the other printmakers, using the big old press for the first time and getting 6 good prints at the end of it. I later had the print made into a dress.

What will we be seeing from you next?

What’s next for me is building up my Etsy online shop. Getting traffic and sales, trying different marketing ideas, improving quality and creative content for my greeting cards, getting feedback from customers, in the UK, Europe and around the world.

Do you have any advice for other printmakers and creatives?

Make the things that excite you, try not to follow the norm. When something is not working or gets really hard – stop, do something else or leave it till the next day (if you can). Come back and start again and if you are still not happy, ask for help.

To see more from Sandra follower her on Instagram.

Relief Printing with Schmincke Gloss Medium

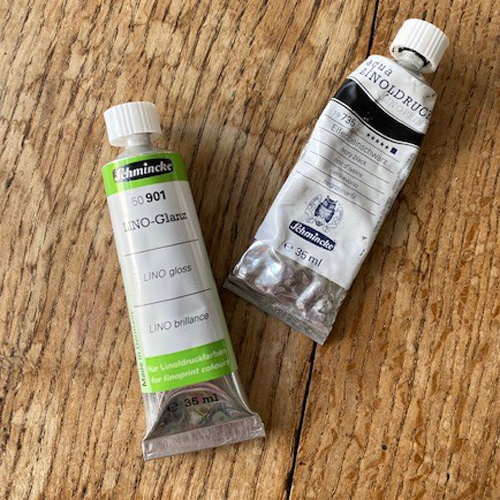
Schmincke Gloss Medium can be used to add a glossy finish to your prints. We tested the medium in a few different ways to see how the results that can be achieved.

Gloss Medium can be added into Schmincke inks to produce a finish with a sheen that is more like an oil-based ink. Combining ink with and without Gloss Medium in a multi-layered print could create interesting textures.

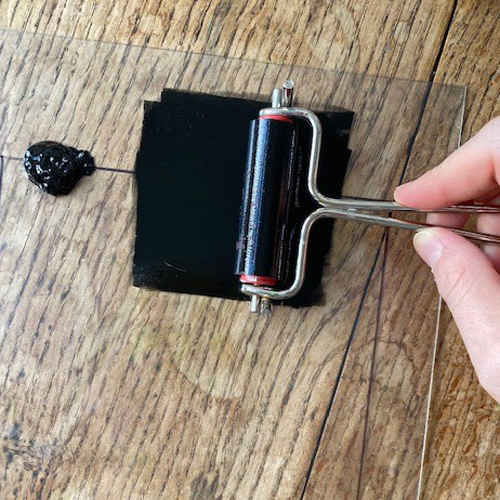
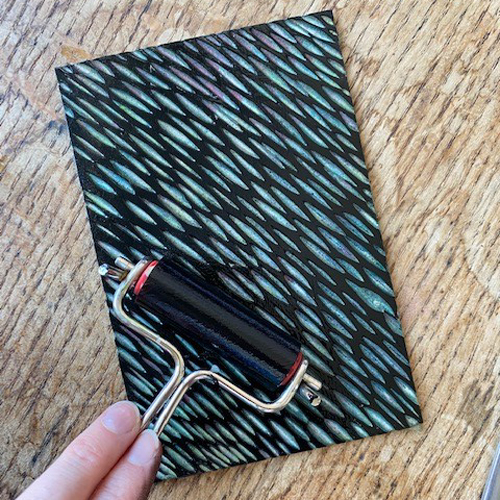
We also tested printing the Gloss Medium over the top of prints. In the image below, we printed undiluted Gloss Medium which is uncoloured over the top of a plain black print. The results (although hard to photograph!) create an interesting finish with contrasts between the matte and glossy surfaces.

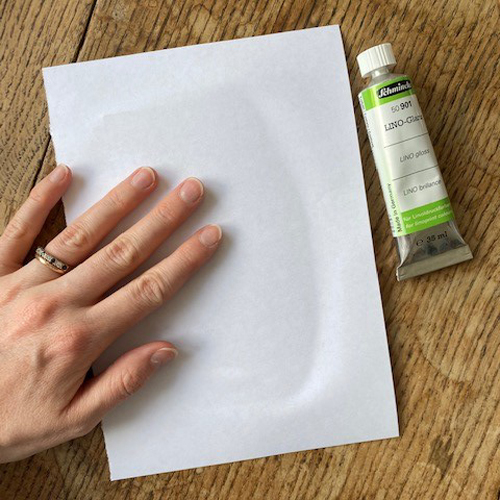
We also tried printing a flat layer of gloss medium underneath a print. The colourless Gloss Medium creates a slightly sheeny finish to the paper to peep through gaps in prints. This works well under Schmincke Ink as well as Caligo Safewash ink.

Want to have a go? Gloss Medium can be found here with the Schmincke Inks.

Meet the Maker: Beth Harris

I’m a Bristol based illustrator and designer with a love of bold colour. I am an advocate for diverse representation, challenging taboos and stereotypes. My work comments on recurring social issues in modern society.

How and where did you learn to print?

I learnt to print in Bristol during my time on UWE’s illustration course. The print rooms were just downstairs from my studio so I was able to nip down and spend the day experimenting. Often I won’t come out of the studio with “perfect” prints but instead ideas, tests and happy accidents that I can feed into my work outside of the print room.

Why printmaking?

For me printmaking has always been about experimentation. Blocking out that time to just play with techniques, colours and shape. I use a lot of cut collage work that heavily relies on bold shapes. Moving my screen directly around the bed to create different compositions was a fun way to capture how I work. My work has moved on in recent months from printmaking, but I think I’ve learnt a lot from it, such as the use of a limited palette, and an open mindedness to play.

Where do you work?

I’m currently back home in Oxfordshire but hoping to be back in Bristol very soon. For now I’ve set up a little studio in the spare room where I can still keep busy creating and generating ideas.

Describe a typical day in your studio.

Each day varies but I like starting the day with idea generation and sketchbook work as I tend to feel the most free in the mornings. Before moving onto things I’ve got to finish up that day.

What inspires you?

I take a lot of inspiration from Matisse’s collages and Noma Bar’s use of negative space. I also take a lot of inspiration from the things going on around me as I take a hands-on approach to both the making and the research of my projects.

What have you made that you are most proud of?

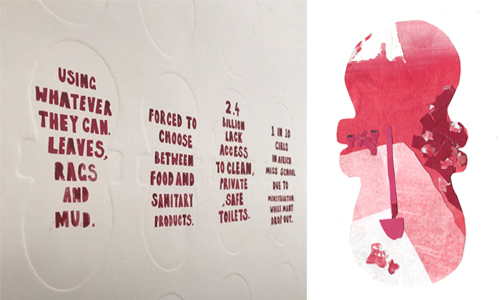
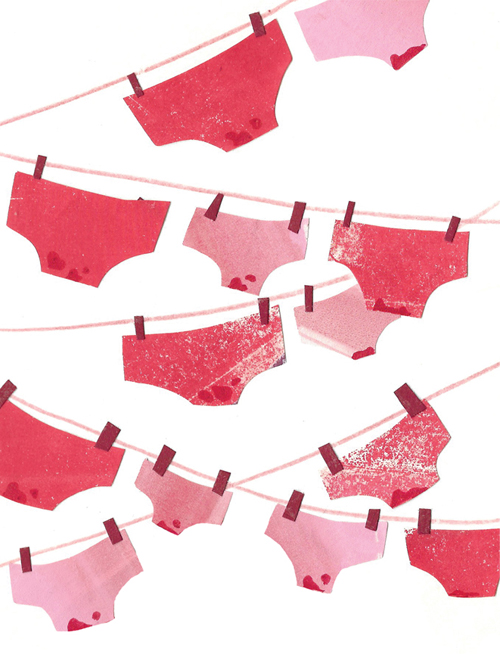
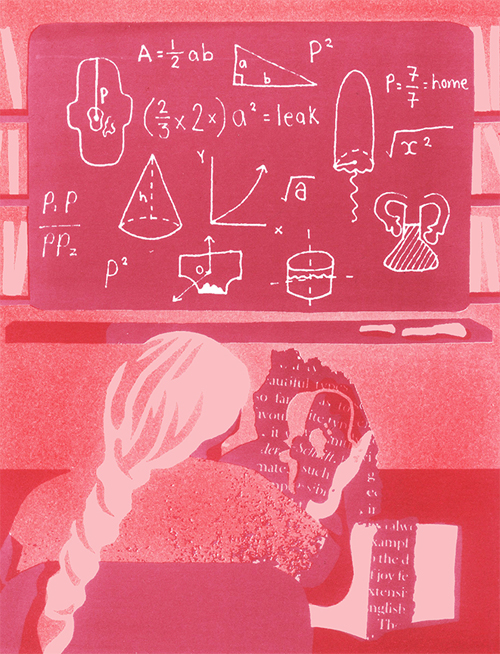
I’m a big advocate for representing social issues within my work. One of the pieces I felt was really brought to life with print techniques was my ‘Periods without Privilege series’, focusing on period poverty. It was a mixture of blind embossed period pads with collagraphed narratives and statistics into each pad. I loved experimenting with the different textures made using mono screen printing which I later used to collage with. Using a limited palette really made me utilise texture and shape more.

Where can we see your work? Where do you sell?

My full portfolio is on bethsuzanna.com, which I’m hoping to launch an online shop on very soon!

What will we be seeing from you next?

Bold, colourful and uplifting work that makes complex issues easy to digest in a playful manner!

Do you have any advice for other printmakers and creatives?

I’d always say to other creatives to make the work that you care about and that excites you. When doing this it’s easy to keep feeling inspired and motivated. For me my work comes from a place of genuine interest or experience, creating honest representations and elevating voices. When you marry this with the experimentation and play that comes naturally to you as a creative, your work will keep evolving!

Follow Beth on Instagram and Twitter or head over to her website.

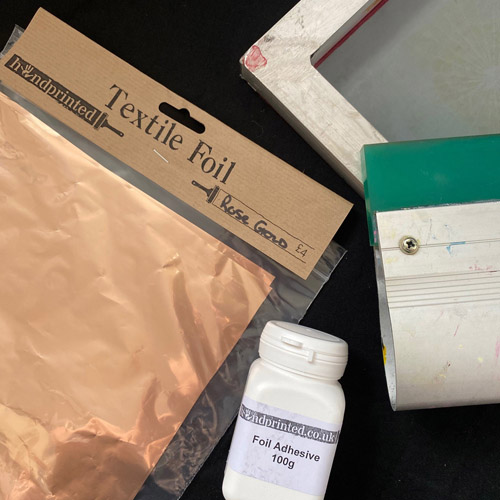
Rose Gold Textile Foil

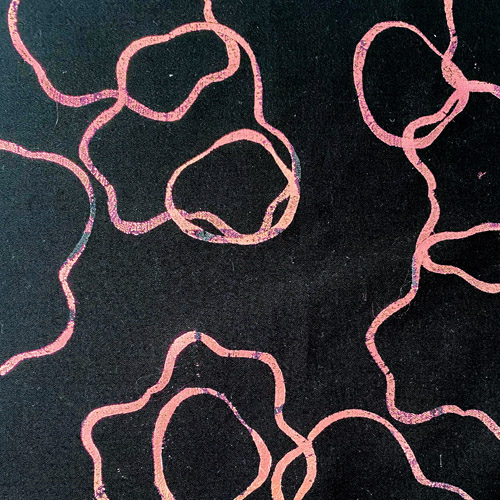
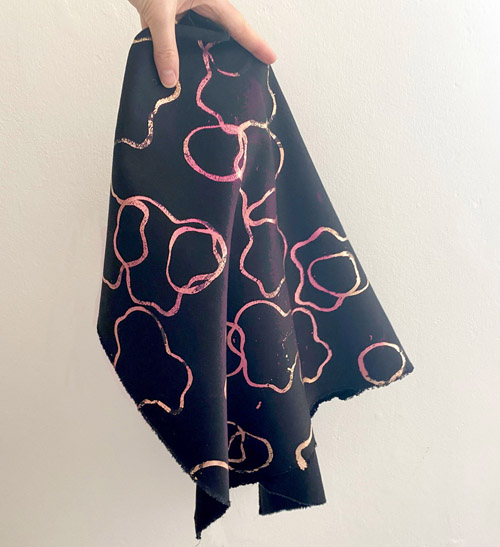
We are really pleased to add rose gold to our textile foil collection. Foils add an extra shine to fabrics and work particularly well on dark coloured cloth. Read on for an easy screen printing foil project.

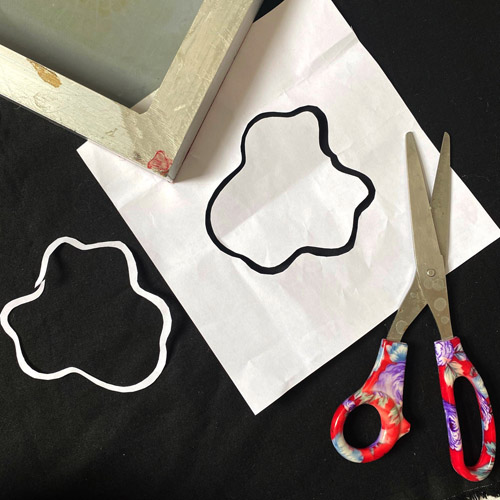
Start by cutting a paper stencil. 80gsm copy paper works perfectly – this is a great use of scrap paper. make sure the design fits easily within the size of the screen. We are using a small 20 x 20 cm screen. 43T mesh is perfect for printing foil adhesive. For this small screen, we are not taping the edges, just making sure the paper stencil is larger than the mesh area. If using a large screen, tape the edges so there is no gap between the stencil and the frame.

You can use a combination of stencils and masks to create the design. The paper does not need to be all one piece. Here, we are using a stencil with an infill piece to create a thin line design.

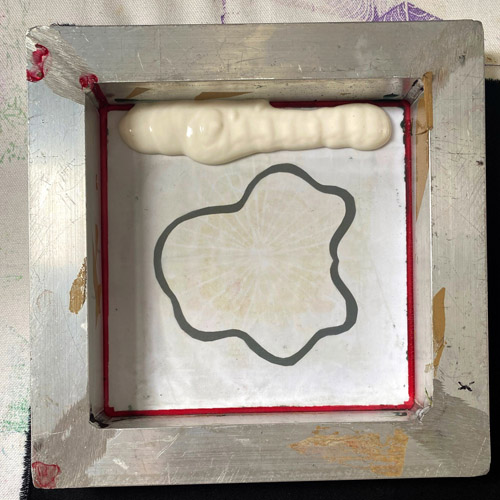
Pin the fabric onto a slightly padded surface. We are using black cotton. Lay down the stencil and then the screen on top. Pour a line of foil adhesive at the top of the screen, slightly wider than the design.

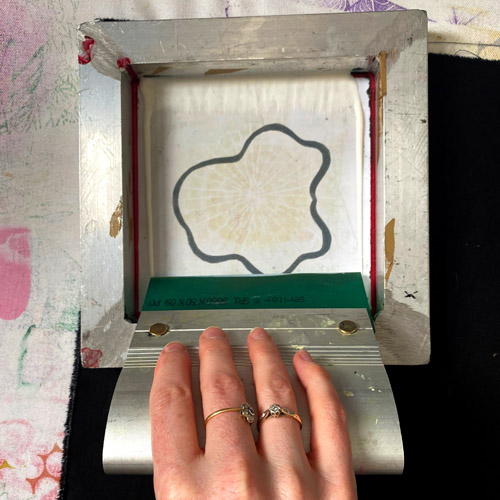
Use a squeegee at a 45′ angle to drag the adhesive down the screen. Repeat, pressing more firmly this time. We want to lay down more adhesive than we normally would with ink.

Continue to add prints to your fabric whilst the first prints dry. Do not print too much fabric at a time or the adhesive will become too dry by the time you start foiling. When finished printing, scrape any excess adhesive from the mesh and peel the stencil from the screen. Wash the screen in cool water immediately as we don’t want any adhesive drying in the mesh.

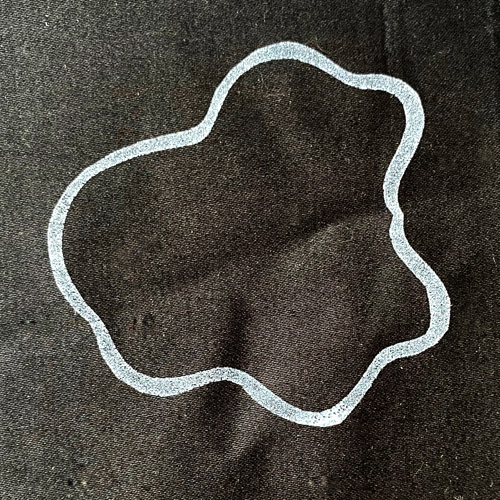
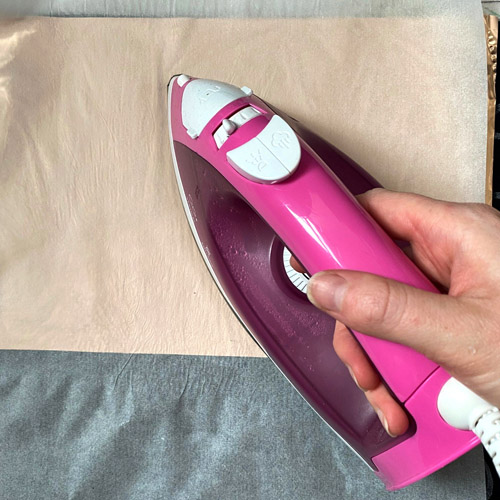
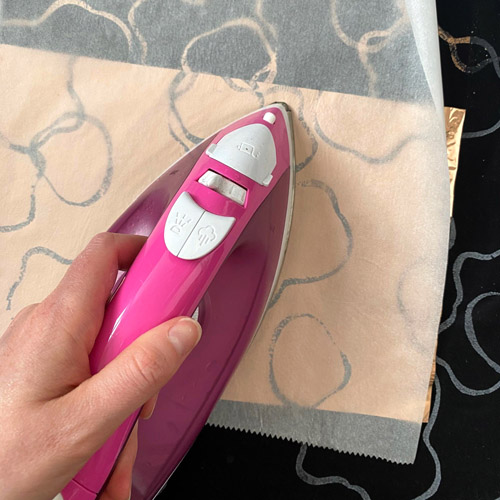
Wait for 15 minutes or until the adhesive is just touch dry. Lay the foil shiny side up on the print. Lay a sheet of grease-proof paper over the top and then iron for around 30 seconds.

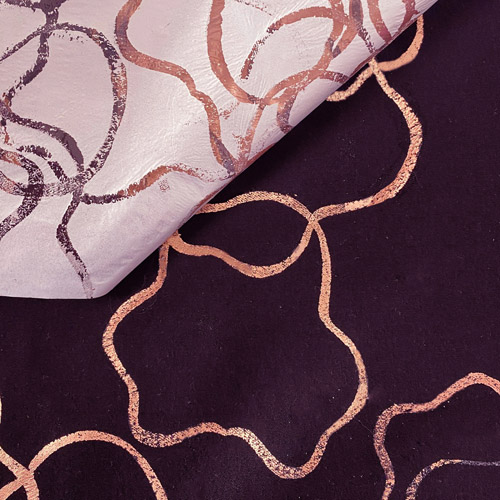
When the foil has cooled, peel the sheet away from the fabric. If the design is fairly small or sparse, you can then lay the same sheet down over another area and continue to use it. Be aware, that there are now gaps in the foil sheet so be mindful of this when placing it down.

The fabric is now washable in cool water (up to approximately 40’C).

For this project you will need:

Meet the Maker: Helen Bulmer

 Hi. My name is Helen Bulmer and I am a printmaker living in Nottingham.

Describe your printmaking process.

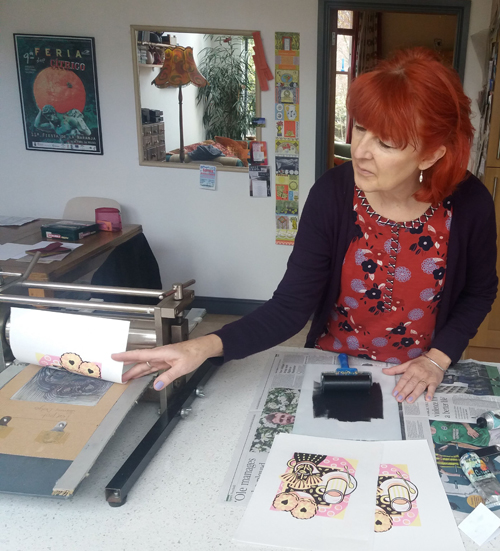
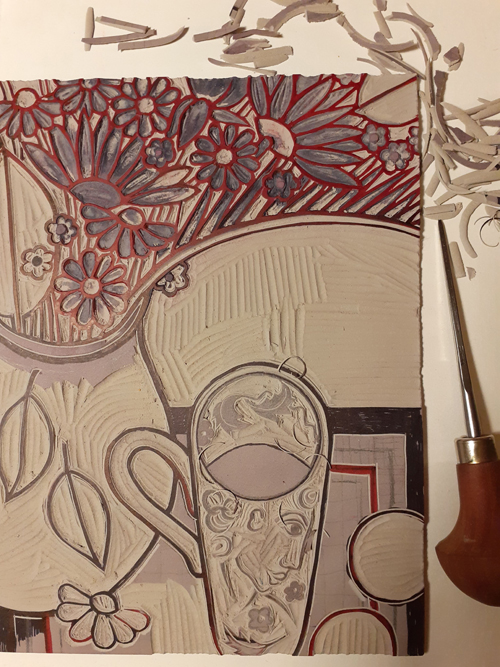
I start with a sketch or photograph then play around with it until I’m happy with the composition. I spend quite a long time on this part. I draw it onto lino with a permanent marker to form a key block and then use a second block for the reduction. I plan the colours using gouache which I like as it is opaque so I can paint over an area easily if I feel a colour isn’t working. I usually use about 7 colours in total and print from the lightest colour finishing with the key block which will be in a dark colour though not necessarily black. Maybe purple or prussian blue which are my current favourites. I find the hardest part is getting the registration accurate.

How and where did you learn to print?

I first printed when I did screenprinting for my A level Art which I loved doing. I then completed a degree in Graphic Design during which I worked in a range of printmaking techniques although not lino! My lino printing is largely self–taught and I subsequently developed skills through my work as an Art teacher teaching mono, relief and screen print as part of our art courses.

Why printmaking?

I enjoy the process of developing a drawing into a print and the different stages that the image goes through as it becomes more stylised and simplified. I love the tactile nature of carving the lino which is quite  meditative and is probably my favourite part of the process. I always look forward to starting on a new design and as soon as I finish I’m itching to start on another. I enjoy the technical side of the process and working out how to solve problems as they arise. It’s also about that element of surprise when you pull back the paper and the print is revealed. It is only at the end when all the elements are combined that I can really see what I have produced.

Where do you work?

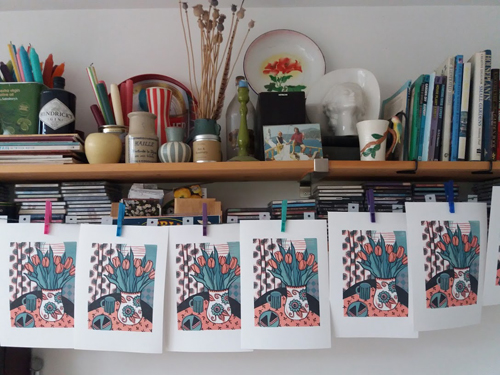
I’m lucky to have a workroom (bedroom) where I can leave everything out. I tend to do the planning, designing and cutting in here. I do my printing in the kitchen where I have access to water and more surface space. I have a small etching  press which has taken up permanent residence on the dining table and my drying prints are usually festooned around the room.

Describe a typical day in your studio.

I don’t have a typical day.  I always have a print on the go but the ink layers take days to dry even though I use a cobalt drier to help speed up the process. While I’m waiting I will work on one of my new designs which could be in a variety of different stages. If I see some flowers or a group of objects that look interesting I will spend time drawing or I could be planning, carving, working out colourways. As I do the messy printing in the kitchen I tend to fit my work around what else is going on.

How long have you been printmaking?

 In various ways for about 40 years! I got a lot of satisfaction from sharing printmaking techniques with my pupils, which they really enjoyed, but didn’t have the time to think about doing anything myself. It was only after I finished working that I felt I had the time and space to start to develop my own work.

What inspires you?

Mainly still life and the combination of shapes and colours in a group of objects. I’ve amassed a collection of jugs over the years and always have flowers and foliage in the house. I particularly love tulips and decorative patterned textiles and am inspired by the way Matisse uses colour and pattern. Sometimes its just an accidental combination of objects and shapes that attracts me. I also love the work of printmakers from the Grosvenor School of Art and was inspired by last years exhibition at Dulwich Gallery.

What is your favourite printmaking product?

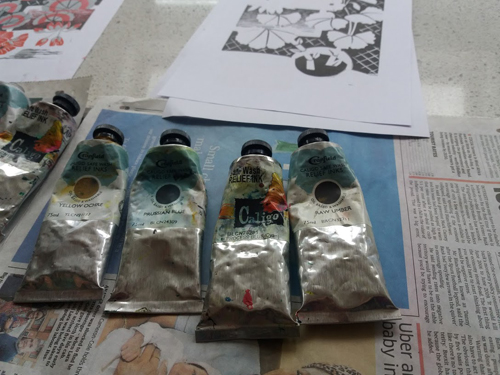
I’ve been collecting my kit gradually over the last few years and wouldn’t want to be without any of it. My favourite product has to be my Pfeil cutters which are comfortable and lovely to handle and a revelation after having used basic equipment for so long. My best discovery has been Ternes Burton pins and tabs which are brilliant for accurate registration. I always use Caligo Safewash Inks as the colours are vibrant and they are easy to mix. The big advantage is that they are water washable which makes clearing up safer and chemical free.

 What have you made that you are most proud of?

I am always excited about each new print until I start to experience difficulties  and then my mind wanders to the next one and the excitement starts again!

Where can we see your work? Where do you sell?

I regularly post work in progress on Instagram and exhibit and sell at local events, fairs and shops. I had a number of events planned for this year which are obviously not now happening so looking forward to 2021!

What will we be seeing from you next?

I have been experimenting with repeat pattern design and am keen to develop some of my designs as repeats which I plan to have digitally printed and use on soft furnishings.

More flowers!

Do you have any advice for other printmakers and creatives?

 Don’t give up and always finish a print. It’s easy to be discouraged when things don’t worked out as planned but persevere and complete the print. Although you might achieve a different outcome to the one intended it could be a pleasant surprise and someone else might like it!

For more from Helen, head over to Instagram: @proofprintpress