Reduction linocut is one of the printmaking methods favoured by Picasso. To make a reduction linocut we use only a single piece of lino. Layers of colour are printed on top of one another, each from the same block which is carved between each colour.
A reduction linocut can be easier to register than a multi-block linocut as it does not rely on several blocks cut accurately to line up. By using Ternes Burton Registration Pins and Tabs we can ensure that our layers line up exactly each time. This style of linocut can also mean that we don’t need to rely too heavily on our original drawing whilst carving because the decisions we make will be constant throughout each layer.
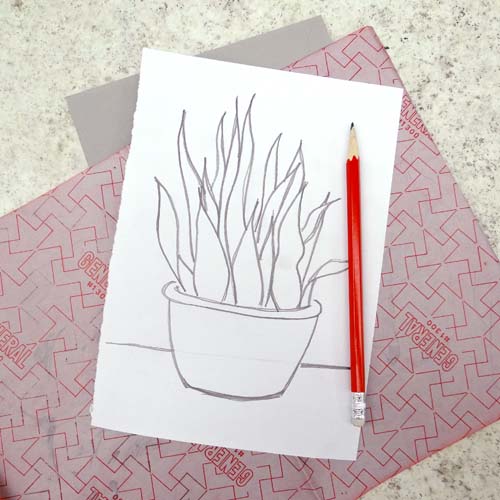
Plan the design by drawing directly onto the block or transfer a drawing using carbon paper. We are using Red Carbon Paper to draw onto a single sheet of 152 x 203mm Traditional Grey Lino. Remember that the drawing must be reversed as it will print as a mirror image.
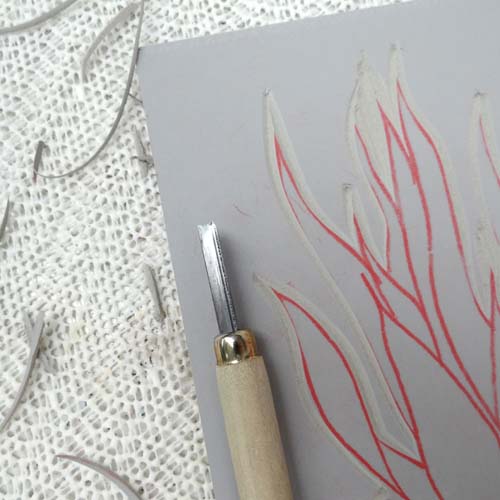
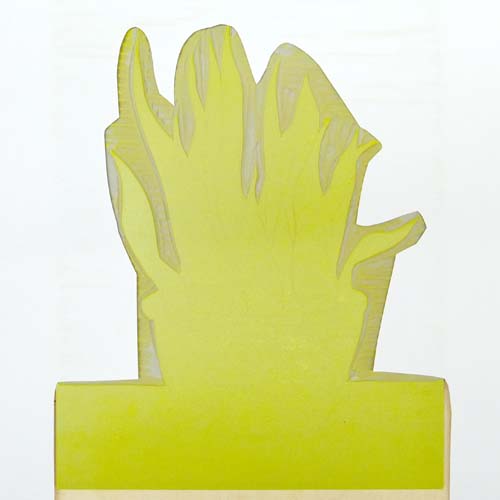
The first carving will decide the areas that we want to appear paper-white in the final design. Anything that is carved now will stay white throughout the whole process. In this design, the background behind the plant will be white. We are using a set of Japanese Cutting Tools.

A V tool is useful for outlining detail. This way, we can make sure that the important lines of the designs are crisp and are not accidentally cut into. Remember to cut only the areas that are to remain white. We are not outlining the whole design here, just the edge of the plant where it meets the white background.
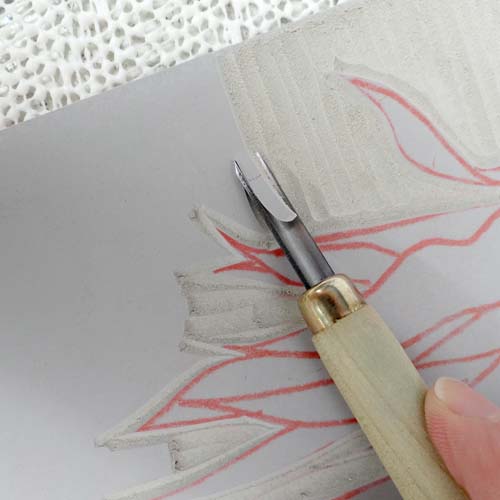
A larger U tool can be used to clear large areas of lino. Choosing a consistent direction in which to carve will help tie the design together if these areas pick up ink when printing. Alternatively, if the design has a large area to be carved away, the whole section can be cut out carefully with a scalpel.
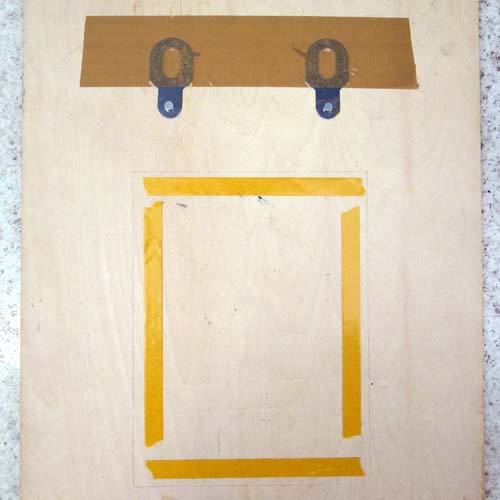
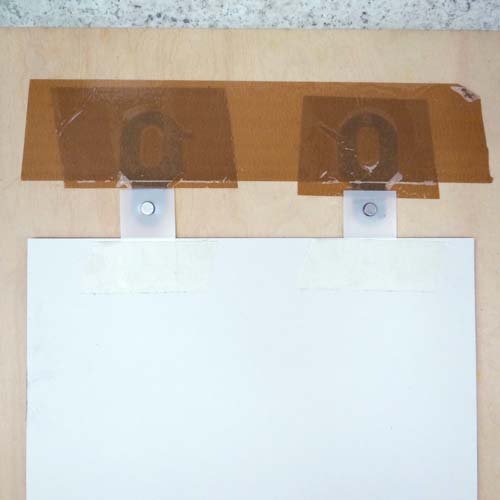
In order to ensure the design lines up perfectly, we can prepare a registration board using our Ternes Burton Pins. A piece of ply is perfect for this, or board from the back of a picture frame works well.
Draw around where you would like the paper to sit first so that we can choose a good position for our lino and pins. Use parcel tape to firmly stick down two Ternes Burton Pins. Decide on the position of the lino block and use double-sided tape to stick it down. The pins need to sit just above the top of the paper. These will stay here throughout the whole process.
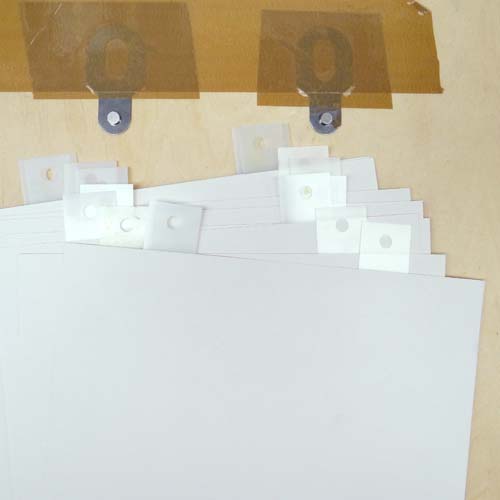
The nature of a reduction linocut means that we cannot go back to print more of an edition once we have reached the second layer. We need to decide how large our print edition will be and prepare all the paper for the while edition. It is sensible to make the edition a little larger than your desired size as we may lose a few along the way.
Place two tabs onto the Ternes Burton Pins. Lay the paper over the top of the lino, using the pencil marks made earlier. Slip the paper underneath the tabs and use masking tape to stick them onto each piece of paper.
Prepare paper for the whole edition. We are using A4 Kent.
We will be inking up our block whilst it is stuck to the board. In order to keep the board free of ink (which may then transfer to the print), a mask can be helpful. Magazine pages work well as they are strong and wipable (and free!). Stick four pieces together to surround the block. This can then be removed to print.
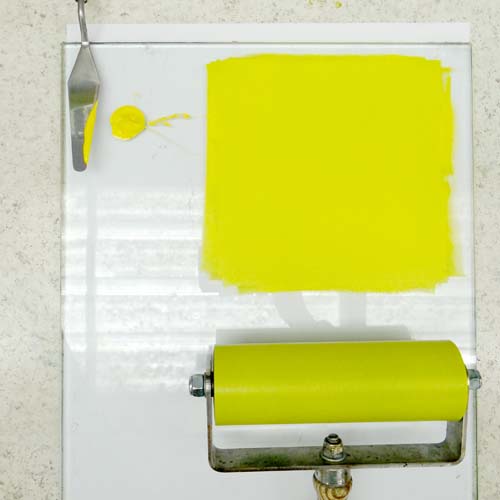
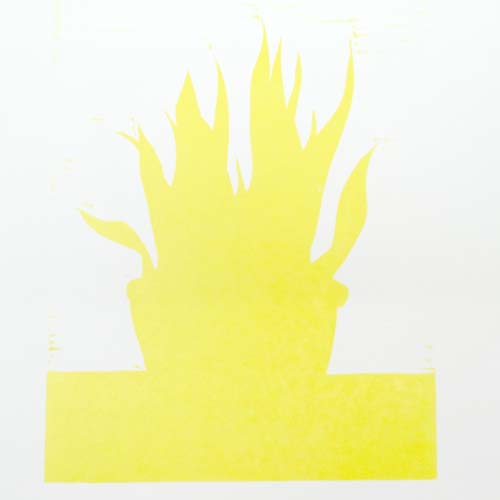
Prepare the ink for the first layer. We will be printing each layer over the top of the last so it is usual to print from light colours through to dark. We are starting with Caligo Safe Wash Relief Printing Ink in Process Yellow. As we are using a pale colour, it is sensible to remove most of the carbon drawing on the block as it can show through the ink when printed. Using Zest-It will clean most of the drawing.
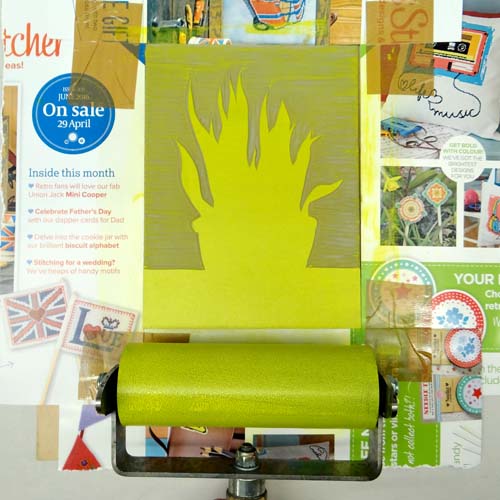
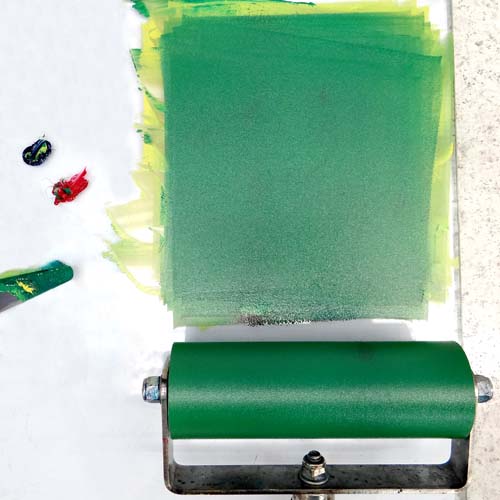
Roll out a thin layer of ink onto an inking plate. The rolled-out area of ink only needs to be a square the same width as the roller. We are using a Hawthorn Inking Roller which is slightly soft – this should give us an even layer of ink. The rolled ink should have a very slight texture to it but not be squelchy. The roller should make a zzz sound as it rolls across the ink.
Using the magazine paper mask to protect the board, roll the ink onto the block. If any unwanted ink is picked up by the carved lines it can be cleaned with a dry cloth.
Attach a piece of paper to the board by clipping the Ternes Burton Stripping Tabs onto the pins. Gently lay the paper down onto the inked surface.
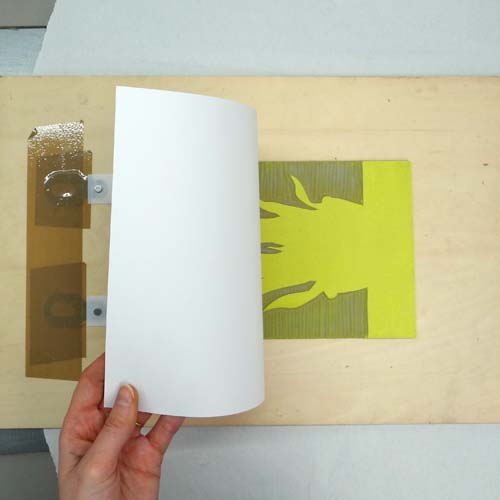
Print by putting the whole board through a press or hand burnish with a baren. The Ternes Burton Pins can go through an etching press as
the pins are slightly lower than the lino. Gently test the pressure to make sure it is not too tight. Long strips of lino known as runners can be used on either side of the plate to help a piece of lino go smoothly through an etching press.
If the design has a large area that you do not want to print, a paper mask can be used to stop unwanted ‘noise’ from the carved area transferring to the paper. Print the first layer for the whole edition.
We can now wait for this layer to dry and print subsequent layers another day, or we can choose to print wet on wet. Printing wet on wet can result in slightly blobby-looking layers or improper ink adhesion so if you are after a perfect, flat finish it can be best to wait for each layer to dry. Using water-based inks will speed up drying times significantly but will also reduce the working time of the ink on the slab. Our printed layers are thin and even, so we are going to print wet on wet.
When the whole edition has been printed with the first layer, the block can be carved again. Leave the block stuck down onto the board. It is important that it stays in the same place so our layers line up when printed.
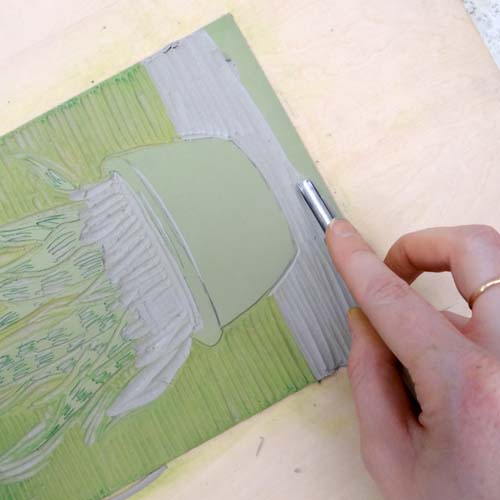
In this second carving, we are removing all the areas that we wish to remain our first colour; in this case, yellow. Everything that is already carved will remain white. There is often not very much to carve away between each layer. Here, we are using a small U tool to carve lines of a consistent width.

This second colour will be pale green. These inks are translucent so some of the colour underneath will show through. It’s important, therefore, to choose colours that will print well over one another. An easy way to do this is to work through a colour spectrum – the first three layers of this print will be yellow – light green – dark green. We know that these will print well over one another.
This pale green can be mixed using the yellow already rolled out onto the slab. Here, we have mixed in a tiny amount of Process Blue to our Process Yellow. For more information about colour mixing with Process Colours, see our recent blog post.
Using the magazine page mask, roll the ink onto the block. Clip a print into the tabs and gently lower it down onto the inked up block (using a mask to cover up background noise if you like).
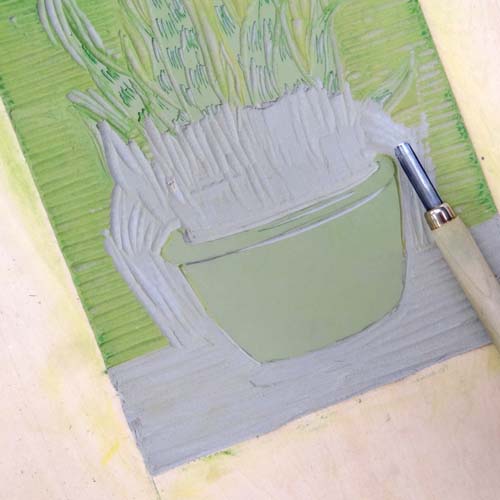
Print the whole edition with this colour. The next layer of our print will add pattern to the leaves of this snake plant. A V tool can be used to create small textural marks. See more on mark making with carving tools here.
Again, we can add to our previous ink colour to create a new shade. Here, we have added a little more Process Blue to darken the green and a tiny, tiny amount of Process Red to create a more natural shade.

Print the whole edition with this colour. The final layer of this print will be the plant pot. The rest of the lino needs to be carved away. Again, a large U tool is useful for clearing large areas like the ground here.
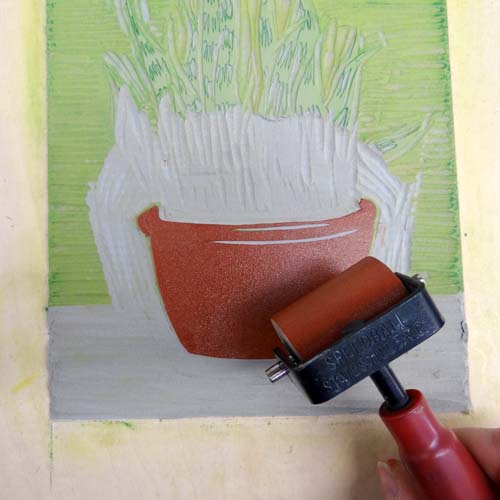
To speed up this process, we can choose to ink up with a smaller roller and leave some of the block uncarved. As it is only the pot that needs inking, we need only clear an area of lino around it.
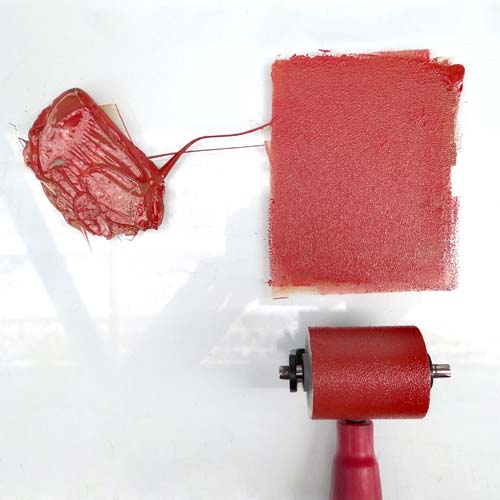
We are mixing a fresh colour for this layer. We will be printing over the top of dark green which will show through. This dark red should print over the green to make a brown. This colour has been mixed using Process Red with Process Yellow and a tiny touch of Process Blue.
This 1.5 inch Deluxe Rubber Roller by Speedball enables us to ink up a small area of the lino at a time.
Here we can see where the red ink appears brown on the print where it shows through a little of the dark green. The final layer on a reduction print is often black or another very dark colour. Print the whole edition with this layer.
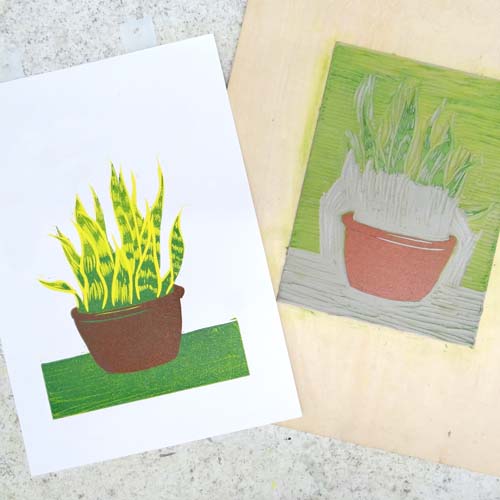
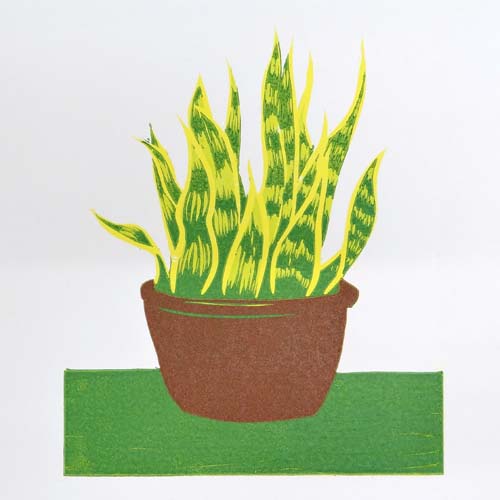
The final print:
These inks can be washed up with water and washing up liquid or with Zest-It.
To make a reduction linocut you will need:
– Single sheet of traditional grey lino
– Ternes Burton Pins and Tabs
– Board for mounting pins, tabs and lino
– Lino Cutting Tools
– Carbon paper (optional)
– Double-sided tape
– Parcel tape
– Caligo Safe Wash Relief Inks
– Baren or press
– Paper to print on (such as Kent)
– Magazine pages
– Inking Plate
– Roller (plus smaller roller for detailed inking – optional)
– Palette knife
– Zest-It