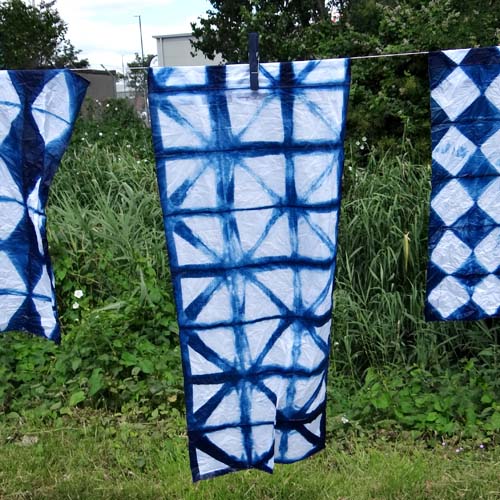
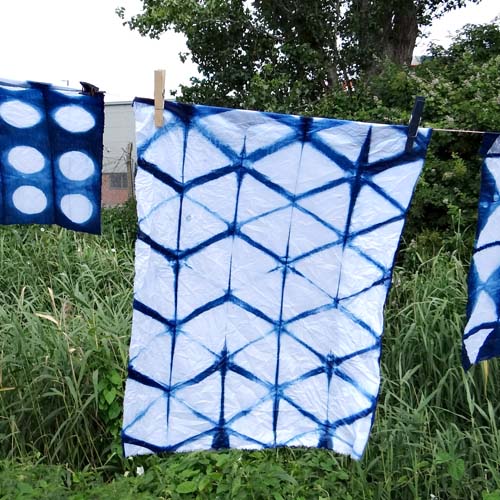
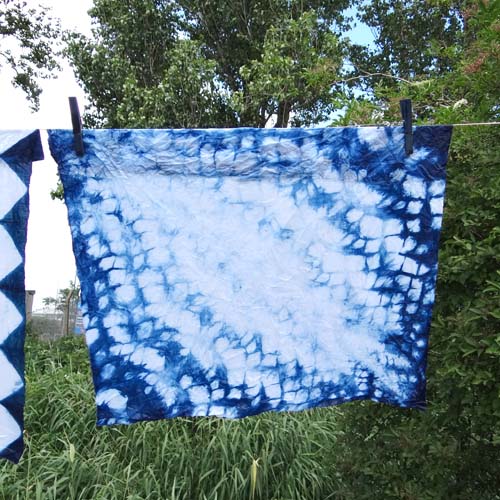
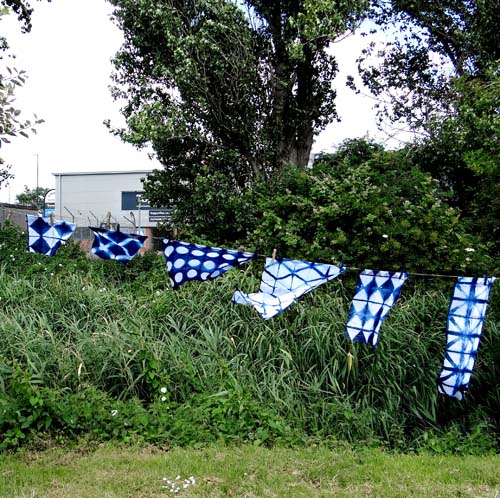
Indigo has been used to dye fabric in many cultures for centuries. Traditional Shibori folding techniques combined with indigo dye can create beautiful fabrics with intricate patterns with both subtle and bold shades of blue.
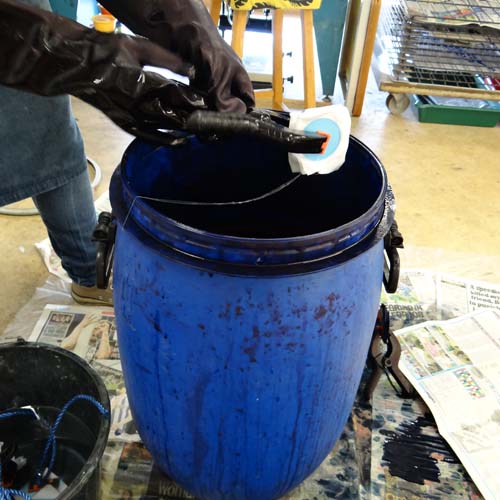
Begin by preparing your dye vat. We are using an Indigo Dye Kit that includes all the ingredients for a dye vat as well as full instructions. You will need:
- Indigo Dye Kit
- 19L plastic bucket with lid
- Stirring stick long enough to reach the bottom of your bucket
- Water
- Natural fibre fabrics
- Plastic covering on the floor of your working area
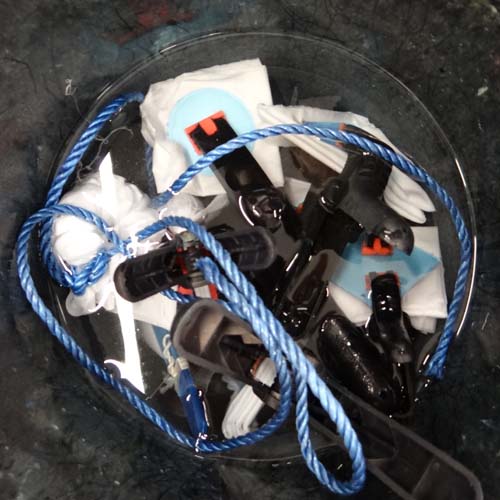
- Shibori Shapes
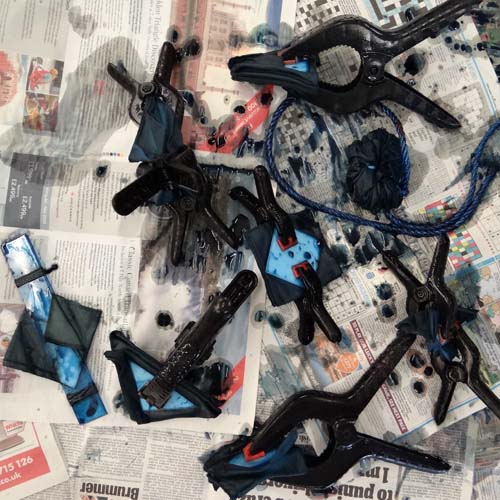
- Clamps or pegs
- Rubber bands or string
- Rubber gloves
When the dye vat is prepared (according to the instructions in the kit), begin with your piece of fabric laid flat.

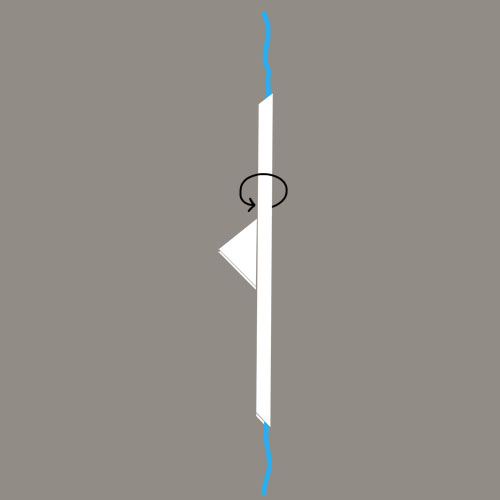
Divide the cloth into equal sections in one direction using a concertina fold.
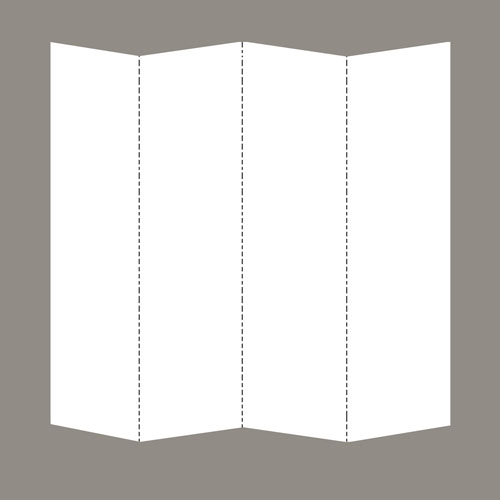
Concertina fold the cloth in the opposite direction.
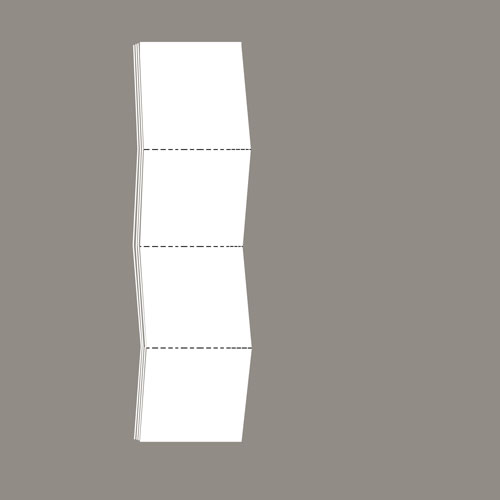
If you begin with a square piece of fabric you should finish with a square like this.

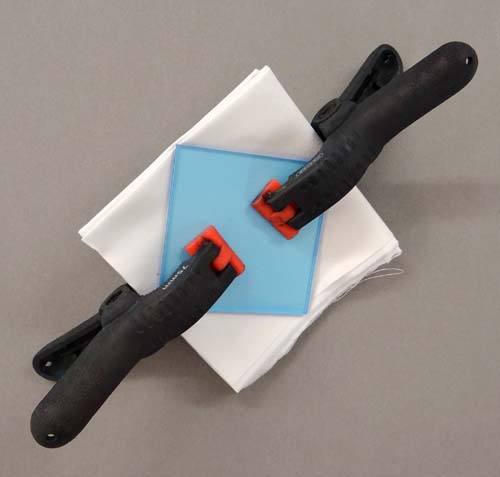
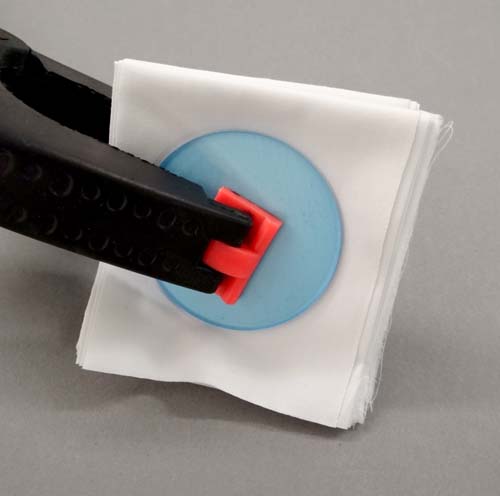
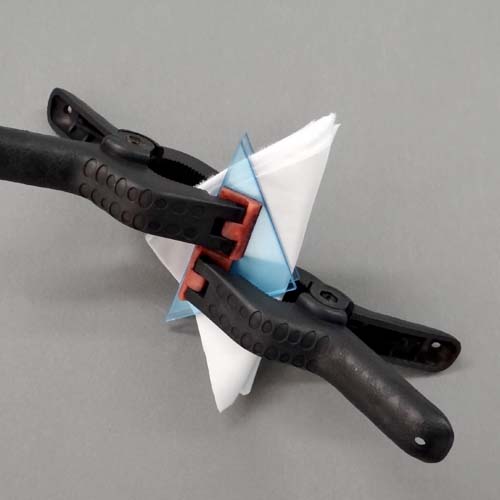
This square can then be clamped in a number of different ways using a variety of objects. These Shibori Shapes are perfect for creating patterns. Use the same shape on the front and the back of the wad of fabric. Try to ensure they are roughly lined up. Clamp them tightly with clamps or pegs, bearing in mind that if the clamp causes the fabric to gather at all, this may come out mottled in the finished pattern.
The plastic shapes are forcing the fabric together, making it difficult for the dye to reach the fabric inside. The exposed areas of fabric will dye, leaving the clamped areas white.
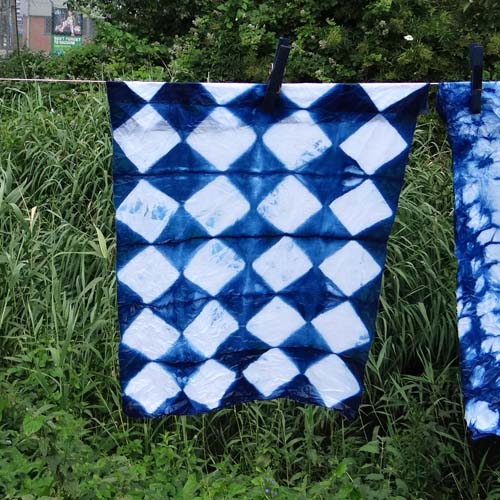
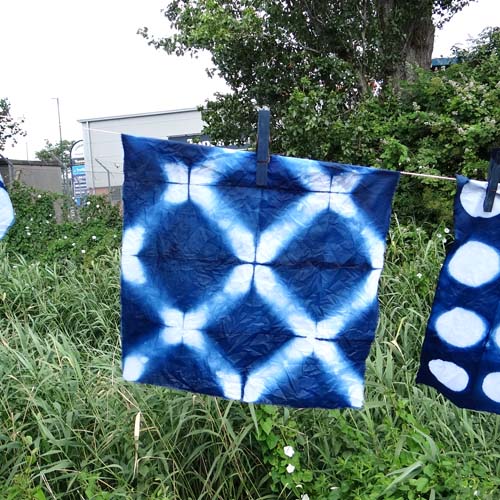
Squares clamped either side of the fabric on the diagonal will create diamond pattern:
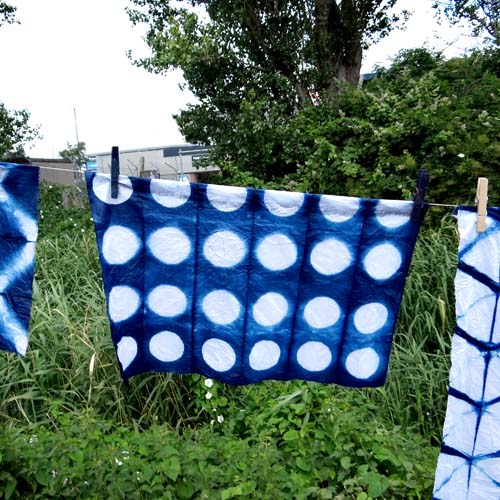
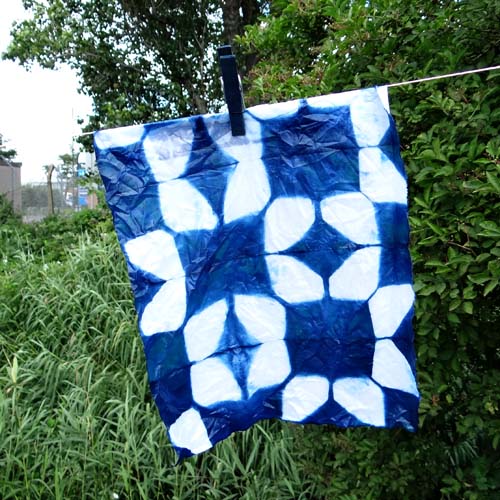
Circles will create a grid of polka dots:
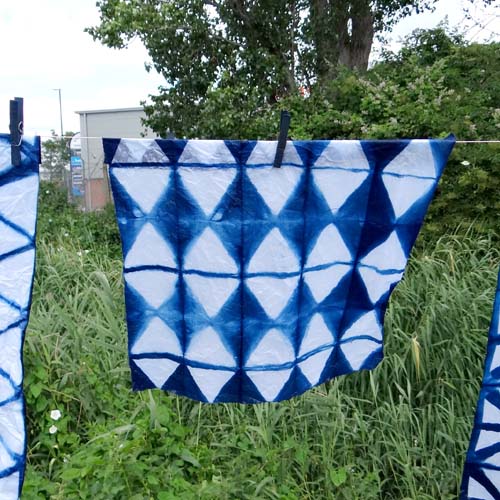
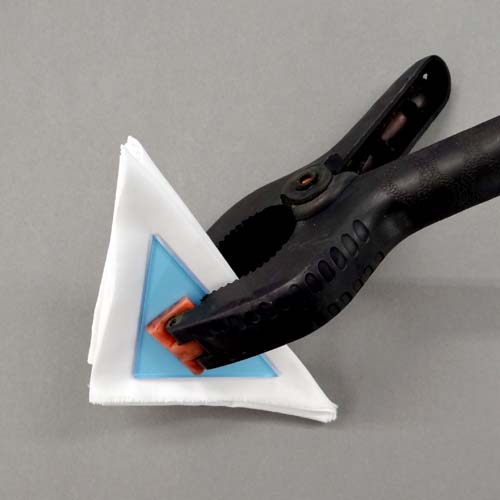
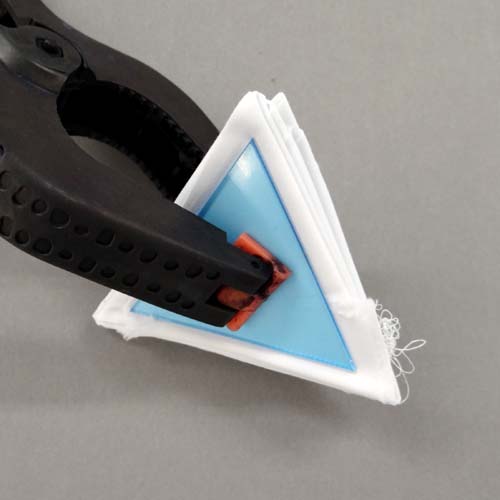
These triangles will create diamonds.

Shapes can also be tied on with string or rubber bands. Tying two rectangles either side of the wad of fabric like this will create a diagonal grid pattern.
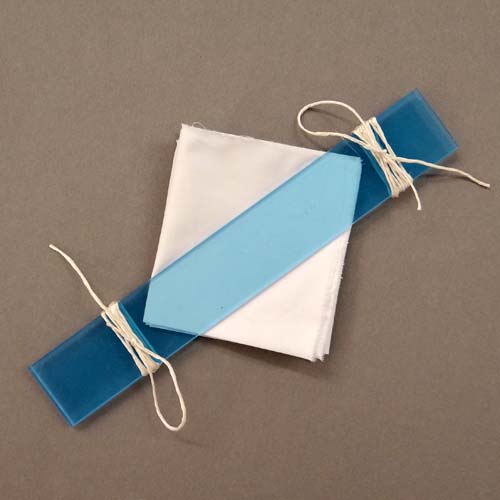
The string is not holding the shapes on as tightly as a clamp might, so some dye can get to the fabric underneath. The indigo dye creates the subtle shades of blue where a small amount of dye can reach the fabric.
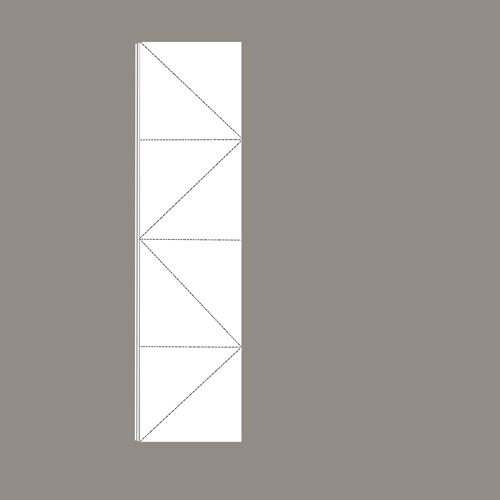
For more types of patterns, begin with a concertina fold as before.

Concertina fold along the length of the fabric in a triangle pattern.

This right-angled triangle of fabric can be clamped with a smaller right-angled triangle to produce intricate patterns:
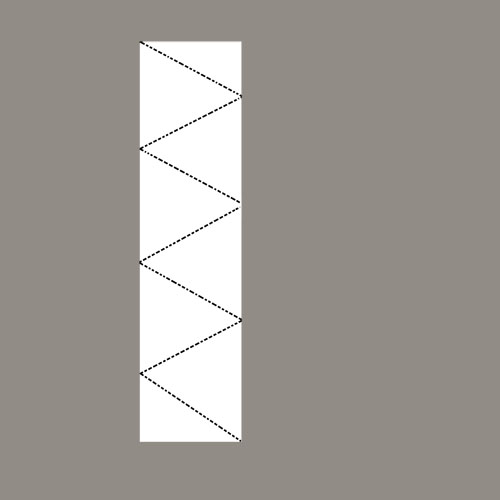
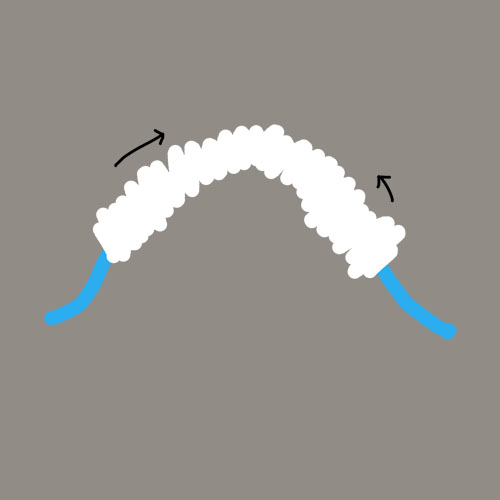
To fold the fabric into equilateral triangles, first concertina fold the fabric as before.

Next, concertina fold the fabric in the following pattern. You may have ends that you need to tuck in.

Clamp this triangle with a slightly smaller equilateral triangle to create a complex hexagon design where the exposed edges are open to dye:
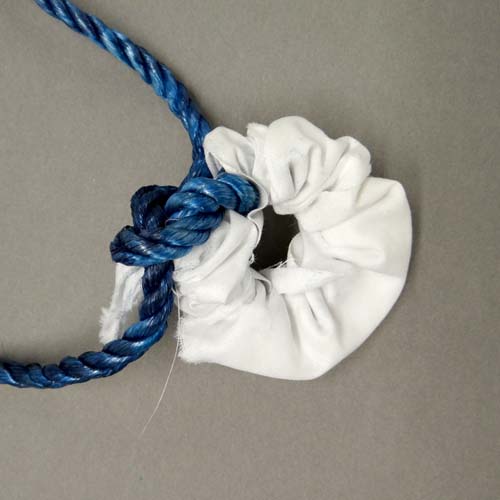
For a more random, scrunched pattern, fold the fabric in half over a piece of rope.

Roll the fabric up around the rope.
Begin gathering the fabric up on the rope, scrunching it up.
Tie the two ends of the rope together creating a bundle of fabric like a hair scrunchy. Don’t scrunch and tie too tightly as this will not leave enough fabric exposed to the dye leaving large areas of white in the finished design.

When all your pieces are clamped or tied, they are ready to be dyed. Begin by thoroughly wetting the fabric bundles in cold water.
Gently squeeze the bundles to remove any excess water and air.
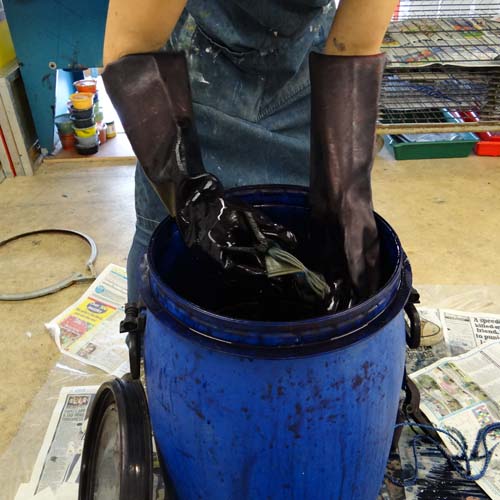
Wearing gloves, gently place the fabric bundles into the dye vat.

Leave the fabric in the dye vat for at least five minutes.
Wearing gloves, carefully remove the fabric from the dye vat. Gently squeeze the fabric before it comes out.
When it comes out, the fabric should be green in colour. Set the bundle down and leave it to oxidise for about 20 minutes. The colour should turn from green to dark blue.
To achieve a darker colour, dip the bundles into the dye vat again, repeating the steps above.
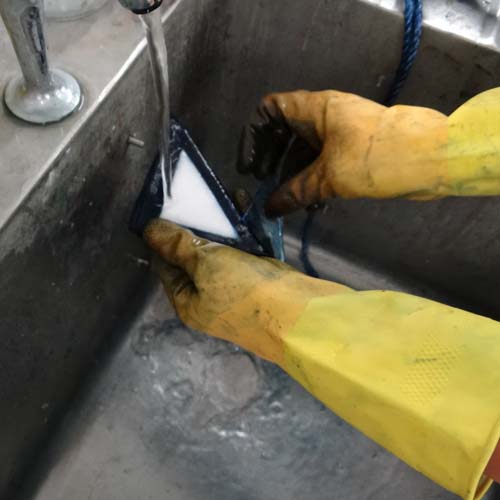
When you are happy with the shade of blue, it is time to rinse out the excess dye. Wearing gloves, rinse the fabric in cold running water.
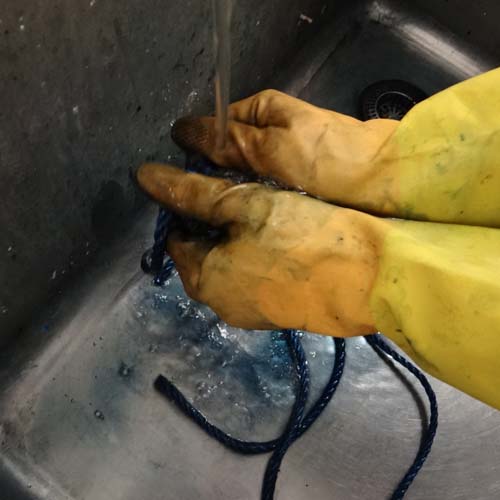
Untie the bundle as you rinse.

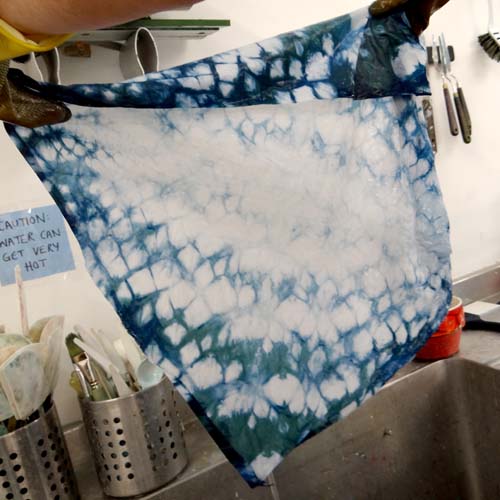
Leave the fabric to dry. The fabric is now washable. Wash the fabric separately for the first time with a non-bio detergent.
The dye vat can be used again a few times over the next few days. When you have finished your dyeing session, gently stir the vat with a stick. Place a lid on the vat and leave it to settle.