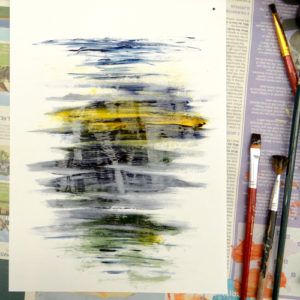
Transfer printing is a fantastic way of getting colour and designs onto synthetic fabric. You’ll need hardly any equipment and materials to get started – you can just use an iron at home! Here’s our simple method:

You can use Transfer Dyes (disperse dyes). The dyes come in powdered form and need to be mixed with water. To mix up a transfer dye, sprinkle 2tsp of Transfer Dye onto 100ml of water (please wear a mask for this part). Mix and leave for five minutes. Mix up all the colours that you want to use – you can combine dye colours to make your own shades too! These will keep for a long time in a lidded pot.

Paint your dyes onto paper. Standard 80gsm copy paper works perfectly but you can try others if you like.

You can create different marks and textures on your papers, or paint full designs and patterns.


Transfer dyes appear dull when painted onto paper but become very vibrant when heat transferred onto fabric. If you want more subdued colours, mix up more muddy looking shades. Paler shades can be achieved by adding less dye to the water when mixing them up. Leave your papers to dry. These will keep for a very long time so you can keep these to use another day.

Assemble a collection of objects. Feathers, seed heads and leaves work really well. These objects need to be able to be pressed completely flat to the fabric. Thick stems won’t work. The materials need to be dry too – plants with water content will make a wet steamy mess when heated!

You will need to use synthetic fabrics for transfer dyeing for the best results. Polyester works perfectly. In order to use natural fibres, Transfix can be painted onto the surface and left to dry before use.
Lay your objects over the fabric. Place a sheet of dry painted transfer paper face down on top of your assemblage. Cover with baking paper and iron on a hot setting. You can also use a heat press or a trouser press. After a minute or two (less with a heat press or trouser press), the dye will have transferred to the fabric with the objects acting as a mask. This fuchsia pink appeared as a dusty mauve on the painted paper. The print is dry and heat set immediately, making this technique pretty instant and mess free!

Create layered designs by placing different papers onto the fabric and ironing over the top. You can layer the designs as much as you like.

This blue layer was added next, using the same leaves to mask areas. You can cut shapes from the transfer papers and place them face down before covering and ironing again.

Your design will build up as you add more layers.


The design below was created using a dried hydrangea flower between the dark green paper and the fabric. Pink stripes of paper were placed down before the green paper.

After being pressed against the transfer papers, your objects will pick up colour of their own. Turn them over and iron them onto the fabric.


You can use paper masks and stencils between your paper and fabric.


You can see that the vibrancy of the transfer dye intensifies when it is heat pressed onto the fabric. Each piece of painted paper can be used several times. The intensity of the colour will decrease each time until very little dye will be transferred.

The hydrangea print below was heat pressed onto cotton that had been painted with Transfix and left to dry. First the fabric was pressed with a hydrangea and pink paper, then the flower was moved slightly and pressed with green paper. Both the pink and green papers had been used several times before this print was made, giving subtler shades. The Transfix treated cotton produces paler shades than a synthetic fabric would.


To create transfer dyed fabrics of your own you will need:
- Transfer Dyes
- Measuring jug and measuring spoons if using transfer dyes
- Paper – 80gsm copy paper is perfect
- Paintbrushes
- Synthetic fabric such as polyester (or natural fabrics painted with Transfix)
- Objects to print with such as leaves, seed heads and feathers
- Scissors
- Baking Paper
- Iron (or heat press or trouser press)
- Ironing board or padded surface
