Meet the Maker: Jane Dignum

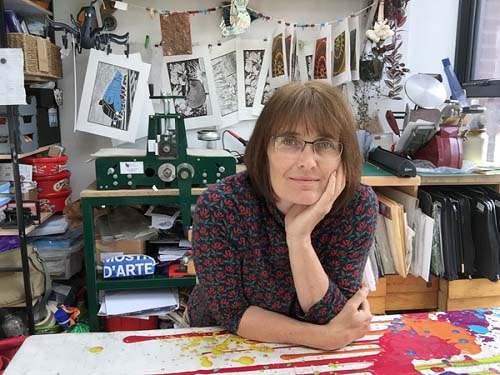
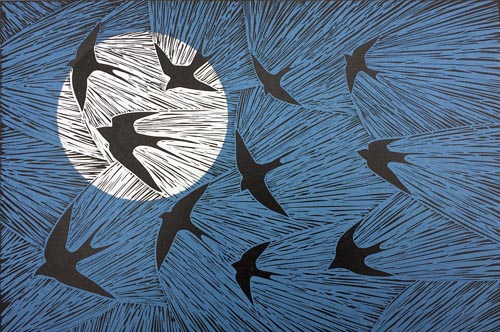
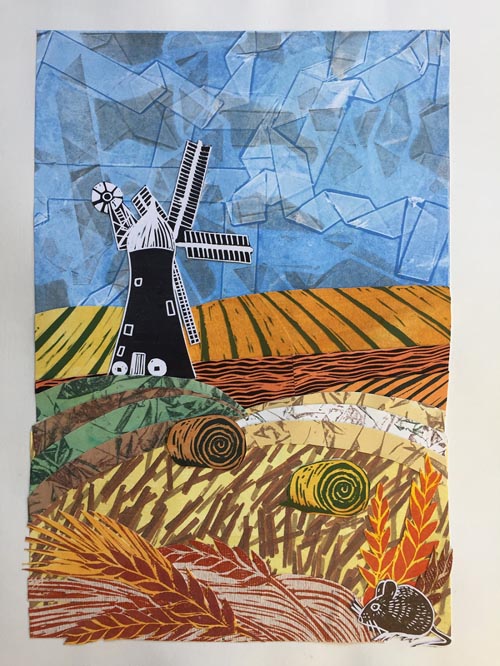
My name is Jane Dignum and I am a printmaker living in York, North Yorkshire. Although I like to try out lots of printmaking techniques, I tend to focus on Linocut and I also make collages from pieces of my prints. The city of York and the county of Yorkshire are great sources of inspiration for my work as is my allotment and the wildlife that I see there.

How and where did you learn to print? How long have you been printmaking?

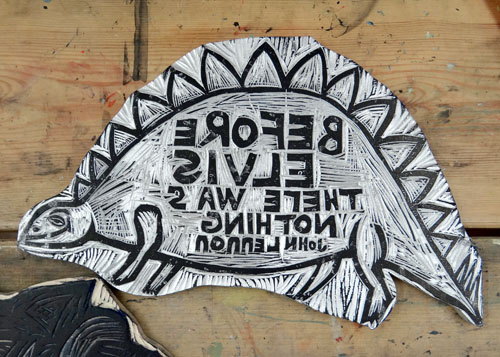
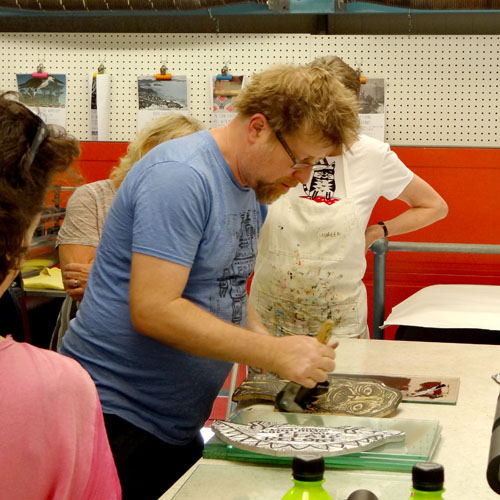
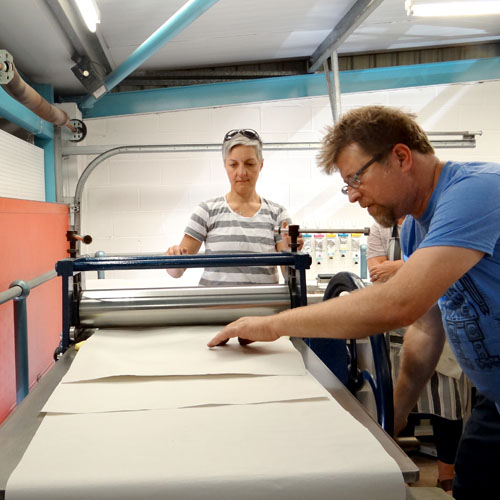
I have been printmaking on and off for at least twenty years. I used to mainly draw and paint but I have a tendency to become obsessed with fine detail. Printmaking allows for more stylistic freedom and to a degree, you are out of control of some of the process which is very exciting. I taught myself to relief-print as all I needed was a material such as Lino, a few tools, paper and ink. It is a very accessible form of printing and I was able to achieve satisfactory results just by working at the kitchen table. Then I completed a degree in Fine Art at Leeds College of Art. I was working full-time as a teacher and so the part-time course took six years to complete as tutorials were held in the evening and other study units were fitted into school holidays. It was aimed at people who were working and you had to be pretty dedicated to finish it. It was here that I was introduced to printmaking using all of the facilities that a print studio had to offer and I was hooked. Following this, when I left college, I did not have access to the same resources and so I stopped printmaking for a while. Then, I attended a Linocut workshop in York where I was introduced to the Hawthorn etching presses which are made locally. I took the plunge, invested in a press and this was the real start of my printmaking journey.

Describe your printmaking process.

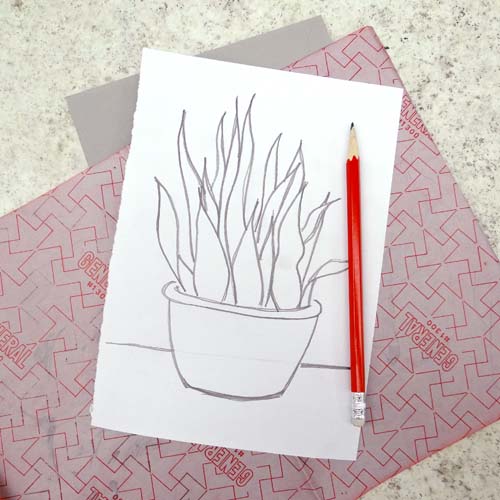
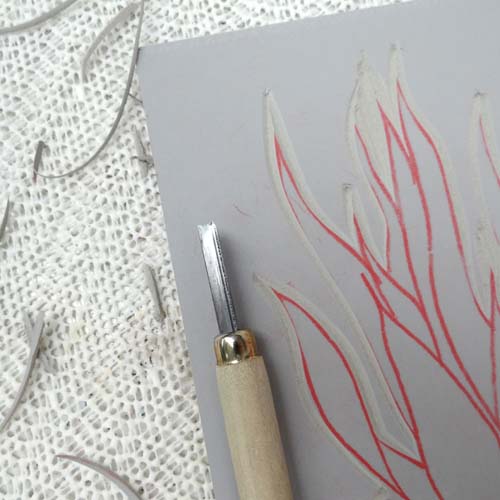
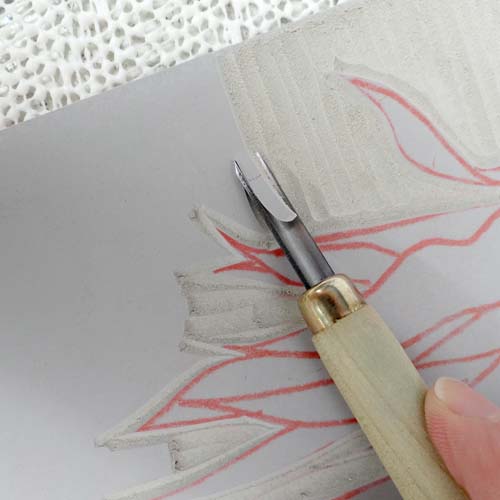
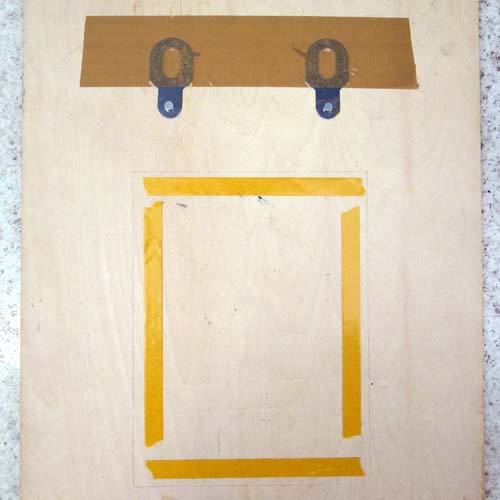
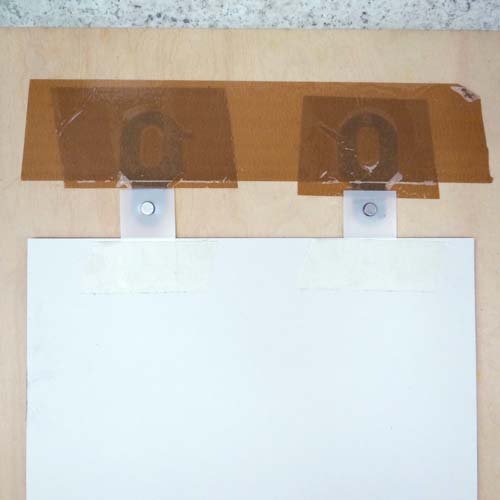
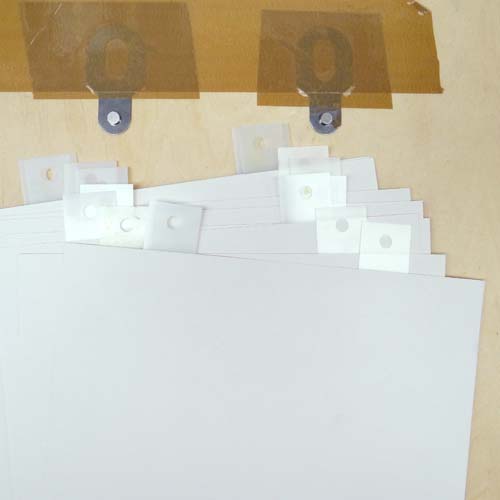
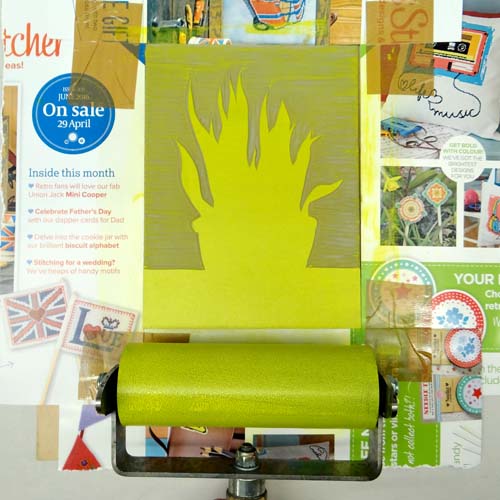
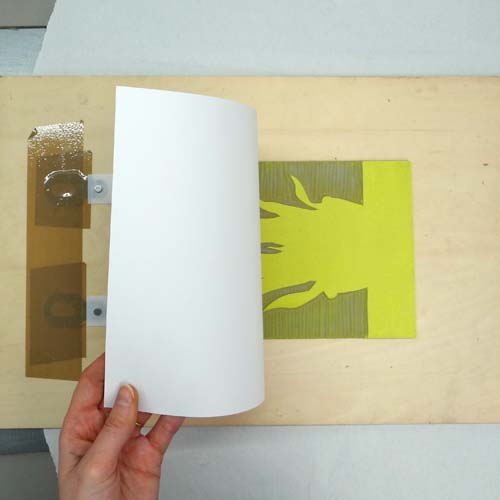
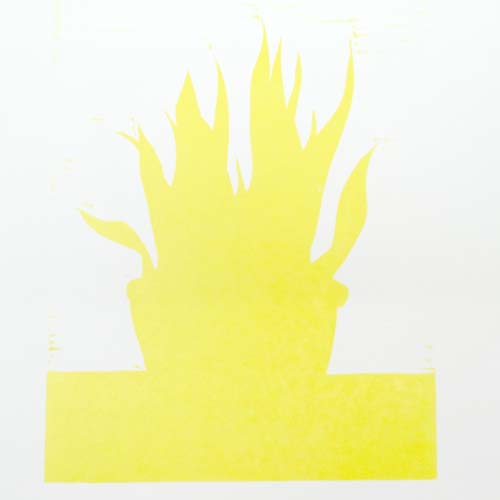
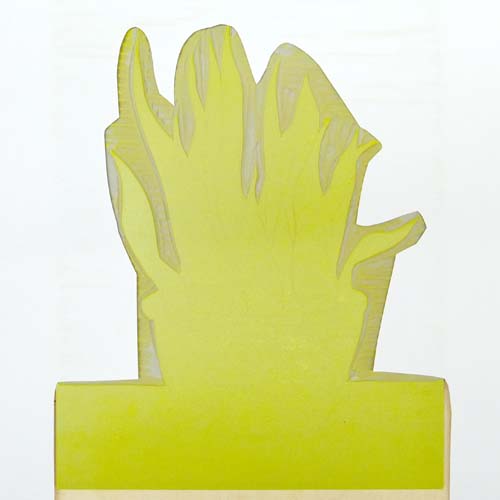
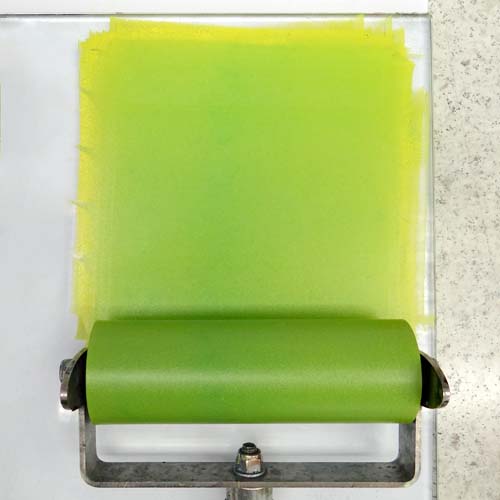
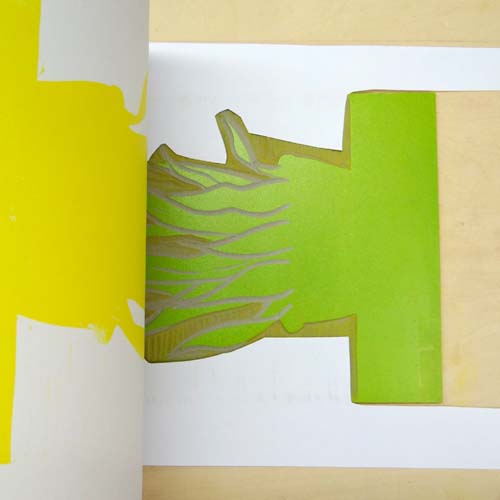
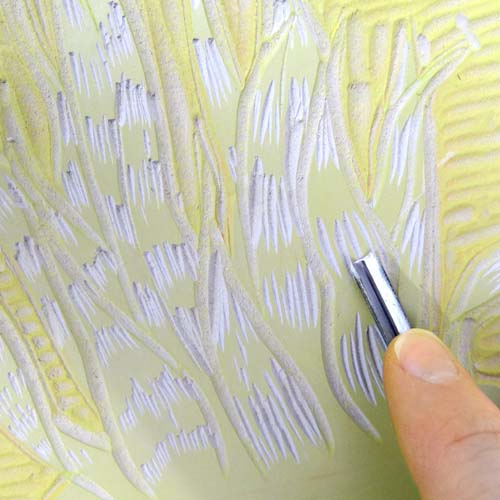
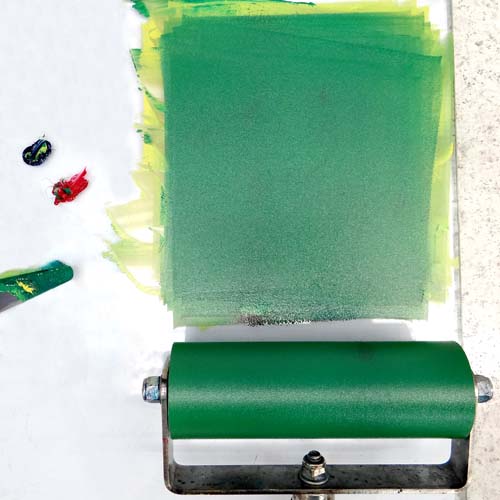
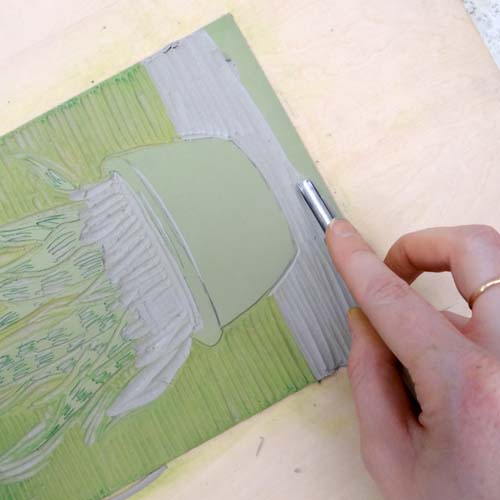
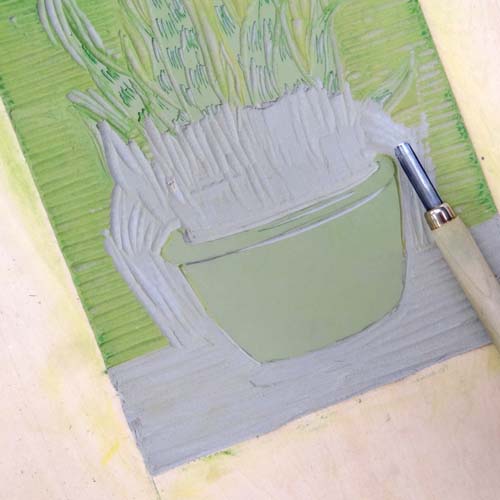
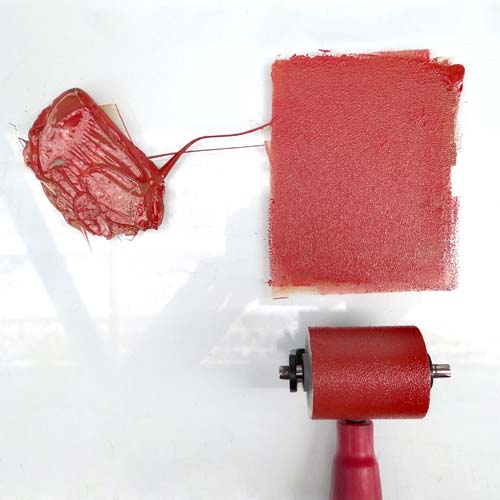
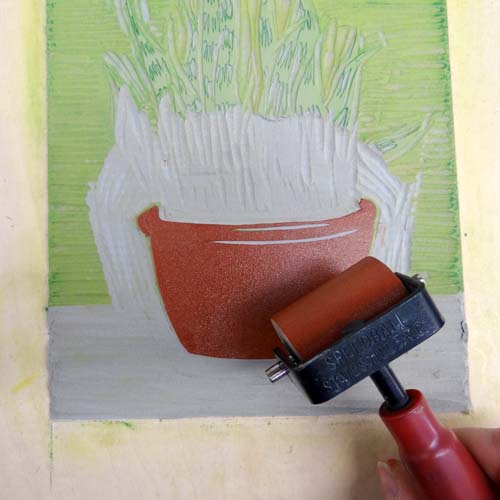
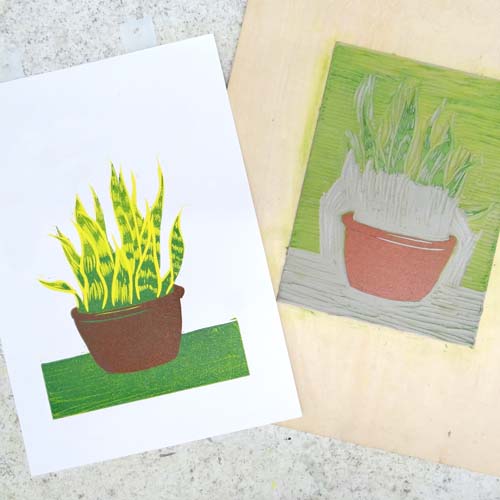
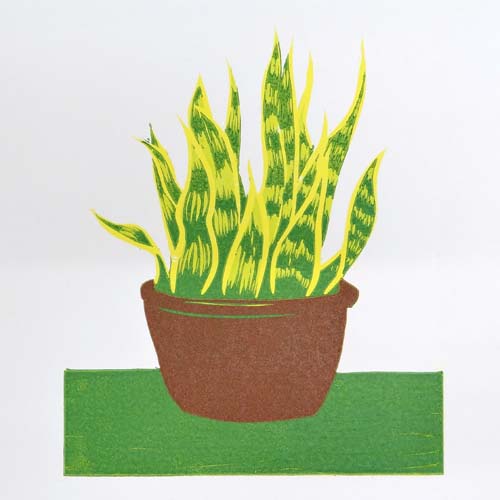
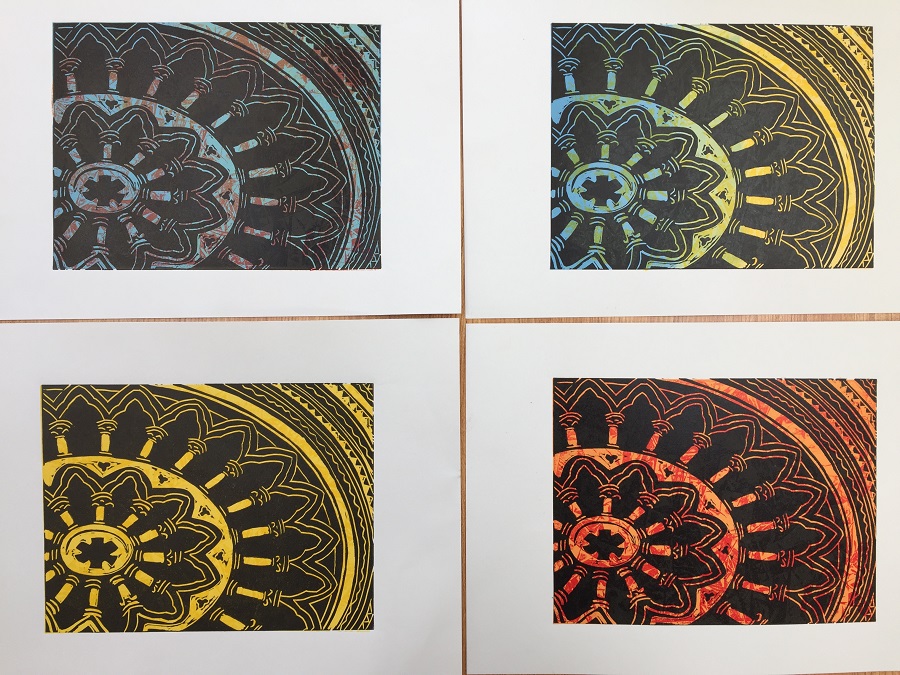
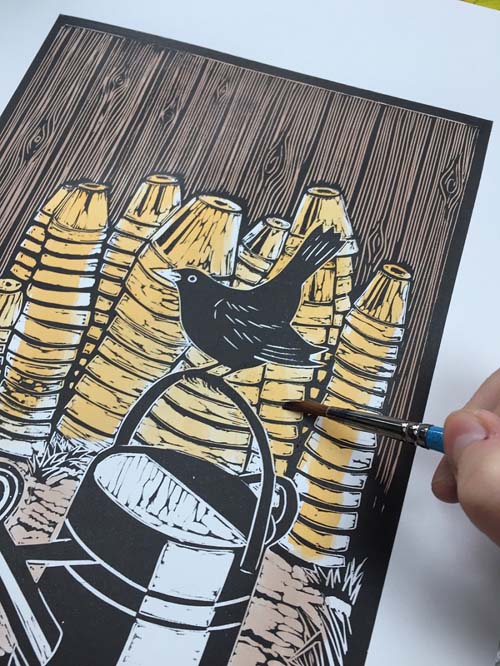
I have various ways of working and I often combine different methods. I always carry a small sketchbook and a camera with me wherever I go and am constantly on the lookout for interesting images and ideas. I then work out a design on paper or using an iPad. The iPad is useful for loading up my photographs and layering them to create a new composition. I then trace the design onto vinyl which I then carve. Sometimes I feel that a design works best just in simple black and white but at other times I feel that some colour is needed and I have various ways of achieving this. The ink that I use is oil-based so it allows me to hand-colour after the ink has dried using a water-based medium. I enjoy this as it combines my love of printing as well as painting. Another method I use is to transfer my design by printing it using Perspex onto another piece of vinyl. I then create separate printing plates for each colour, using the trusted Ternes Burton pins and tabs to register each one.

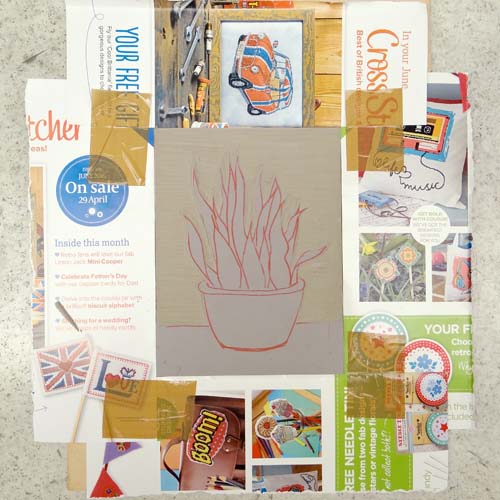
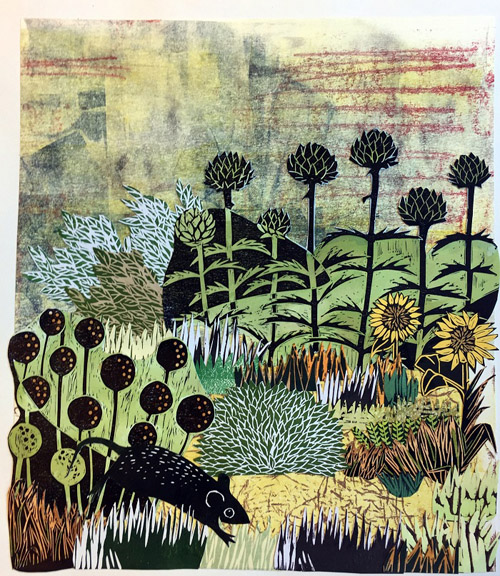
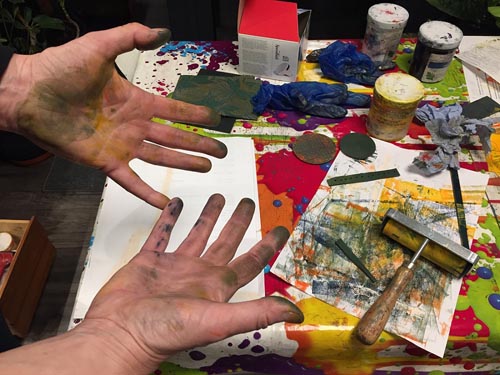
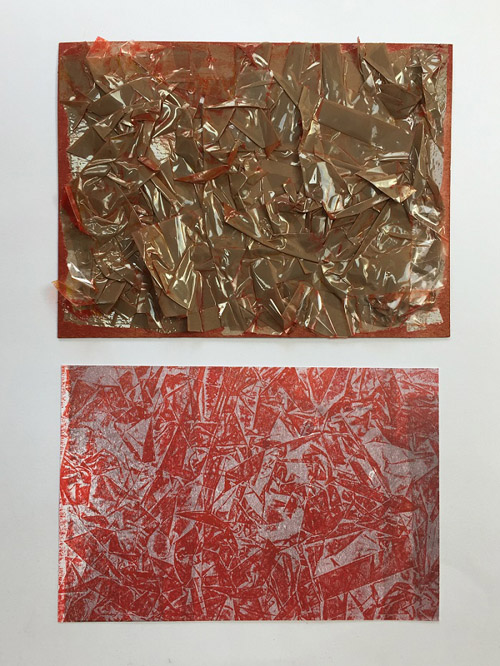
Although I don’t strictly create collagraph prints, I like to use collagraph techniques to create textures and interesting backgrounds. I stick all manner of materials onto card and try printing from them. Matchsticks, bubble wrap, cellotape, sandpaper all work very well. I am always on the lookout for different materials and keep examples of the results in my sketchbook. Sometimes, I chop up these experimental pieces to rearrange to make collages. I also use prints where maybe one corner hasn’t printed well but the rest is fine. I reuse the good bits and combine them all to create a unique piece. Nothing is wasted!
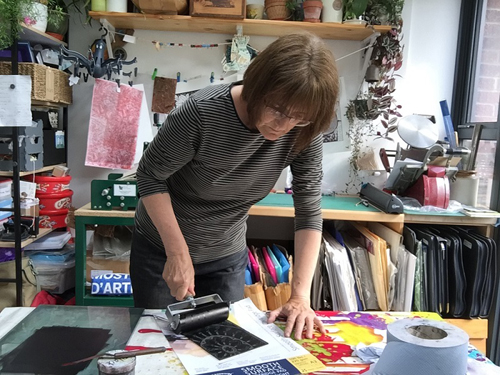
Where do you work?

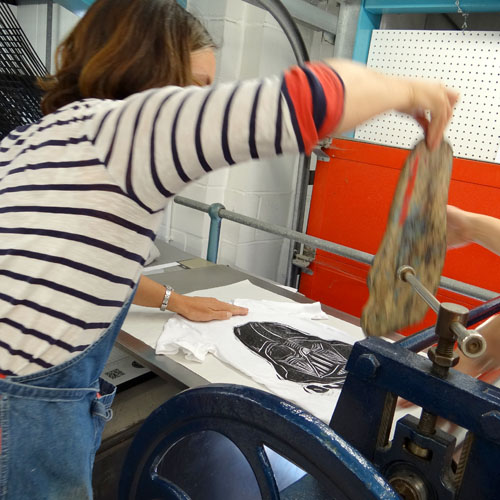
I work in my studio which has been purpose-built at the back of my house. It is there that I create my prints on my wonderful etching press. I usually spend my days carving, printing, collaging and experimenting with new ideas. I work in isolation which is why I have joined a local group of printmakers. We meet each month and discuss ideas, techniques and share tips. I believe that this is very important, so that your work does not become stale. We are a very active group, organising talks about printmaking, print fairs and exhibitions.

What inspires you?

I love to visit art exhibitions of all kinds and I have been influenced by too many artists to list them all. I have always loved David Hockney’s work and am fascinated by his etchings of The Fairy Tales of the Brothers Grimm. I also admire the Linocuts of Edward Bawden especially those showing architectural structures such as Borough Market and Covent Garden. I must also mention Robert Taverner, who is probably the greatest influence of all on me. His atmospheric countryside scenes with the sweeping grasses and stylised trees are just fantastic.

What is your favourite printmaking product?

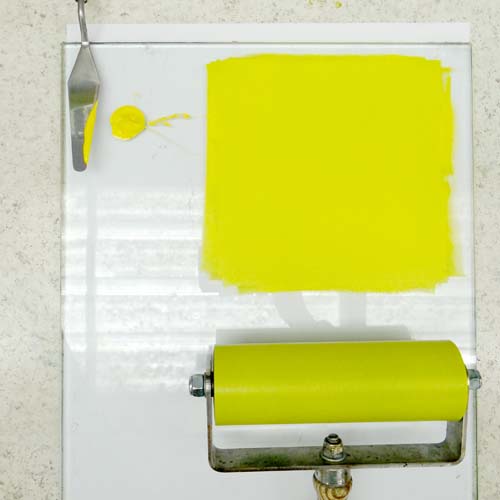
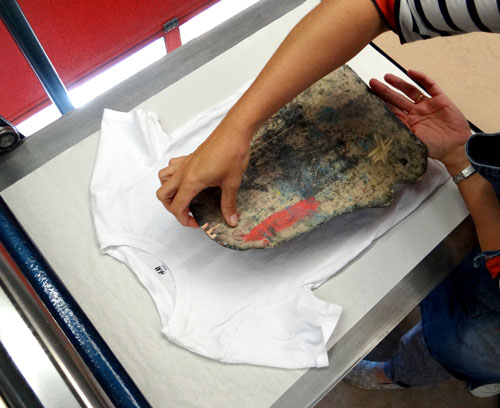
My favourite printmaking product is probably the range of Hawthorn Stay Open Inks. I use them all the time. I print with them onto all types of paper as well as on occasion, fabric. I can’t vouch for how well they would wash however! I have a printed onto a large white piece of fabric which I occasionally use as a screening off curtain at shows. I used scrunched up parcel tape stuck onto a large piece of card which I inked up and then printed over the entire piece of fabric. Once this was dry, I then printed ammonites in a range of sizes and colours all over the top of the background print. I had to print each ammonite separately. Lots of people admire this when they see it and I am probably the most proud of this work. It took about two weeks to create and dry.

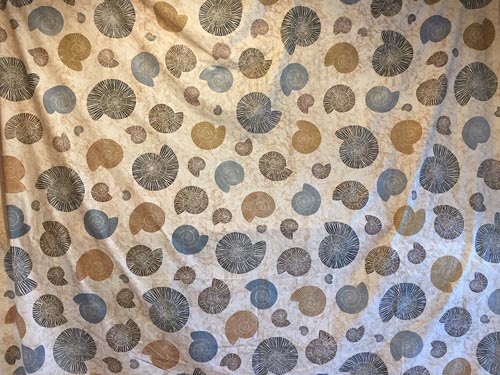
I often feature ammonites in my work as I see them set into the rocks along the coast at Whitby where I like to walk and fossil hunt. In 2015, I submitted some images to become part of the York Open Studios annual art event. It was a requirement to submit digital images as well as one actual physical piece. I submitted a print which featured ammonites and was successful at being selected. I have exhibited at York Open Studios three more times since then. I feel that the ammonite has been a lucky image for me and I use it as a logo on business cards and my online shop.

Where can we see your work? Where do you sell?

I sell my prints on Etsy and my designs are transferred onto a range of items by Redbubble. Both of these are available online. I also supply my prints to local galleries such as the Blossom Street Gallery in York and the Craft Centre and Design Gallery which is situated in the centre of Leeds. I also sell at art and print fairs in the Yorkshire area and I always use social media to show my latest work as well as to announce my up and coming events. Many of my designs are published as greetings cards and other items of stationery by Green Pebble, a greetings card company who sell throughout the UK as well as abroad. In the near future, I intend to run Linocut workshops in my studio for small groups of up to four. I will post the dates on social media platforms as well as on my website.

What will we be seeing from you next?

I am about to start working on some prints which incorporate stencils. This was inspired by some bold monoprints that I recently saw at the Venice Biennale by an artist called Ulrike Müller.

Do you have any advice for other printmakers and creatives?

My advice to other creatives would be to always be looking out for new ideas, never be afraid to try new things and just keep on creating.

Find me at:
Website:  www.janedignum.com
Etsy shop: JaneDignumArtworks
Redbubble.com : Jane Dignum
Instagram: janedignum
Twitter:  @janedignum
Facebook: Jane Dignum Artworks

Making a Reduction Linocut

Reduction linocut is one of the printmaking methods favoured by Picasso. To make a reduction linocut we use only a single piece of lino. Layers of colour are printed on top of one another, each from the same block which is carved between each colour.

A reduction linocut can be easier to register than a multi-block linocut as it does not rely on several blocks cut accurately to line up. By using Ternes Burton Registration Pins and Tabs we can ensure that our layers line up exactly each time. This style of linocut can also mean that we don’t need to rely too heavily on our original drawing whilst carving because the decisions we make will be constant throughout each layer.

Plan the design by drawing directly onto the block or transfer a drawing using carbon paper. We are using Red Carbon Paper to draw onto a single sheet of 152 x 203mm Traditional Grey Lino. Remember that the drawing must be reversed as it will print as a mirror image.

The first carving will decide the areas that we want to appear paper-white in the final design. Anything that is carved now will stay white throughout the whole process. In this design, the background behind the plant will be white. We are using a set of Japanese Cutting Tools.

A V tool is useful for outlining detail. This way, we can make sure that the important lines of the designs are crisp and are not accidentally cut into. Remember to cut only the areas that are to remain white. We are not outlining the whole design here, just the edge of the plant where it meets the white background.

A larger U tool can be used to clear large areas of lino. Choosing a consistent direction in which to carve will help tie the design together if these areas pick up ink when printing. Alternatively, if the design has a large area to be carved away, the whole section can be cut out carefully with a scalpel.

In order to ensure the design lines up perfectly, we can prepare a registration board using our Ternes Burton Pins. A piece of ply is perfect for this, or board from the back of a picture frame works well.
Draw around where you would like the paper to sit first so that we can choose a good position for our lino and pins. Use parcel tape to firmly stick down two Ternes Burton Pins. Decide on the position of the lino block and use double-sided tape to stick it down. The pins need to sit just above the top of the paper. These will stay here throughout the whole process.

The nature of a reduction linocut means that we cannot go back to print more of an edition once we have reached the second layer. We need to decide how large our print edition will be and prepare all the paper for the while edition. It is sensible to make the edition a little larger than your desired size as we may lose a few along the way.

Place two tabs onto the Ternes Burton Pins. Lay the paper over the top of the lino, using the pencil marks made earlier. Slip the paper underneath the tabs and use masking tape to stick them onto each piece of paper.

Prepare paper for the whole edition. We are using A4 Kent.

We will be inking up our block whilst it is stuck to the board. In order to keep the board free of ink (which may then transfer to the print), a mask can be helpful. Magazine pages work well as they are strong and wipable (and free!). Stick four pieces together to surround the block. This can then be removed to print.

Prepare the ink for the first layer. We will be printing each layer over the top of the last so it is usual to print from light colours through to dark. We are starting with Caligo Safe Wash Relief Printing Ink in Process Yellow. As we are using a pale colour, it is sensible to remove most of the carbon drawing on the block as it can show through the ink when printed. Using Zest-It will clean most of the drawing.

Roll out a thin layer of ink onto an inking plate. The rolled-out area of ink only needs to be a square the same width as the roller. We are using a Hawthorn Inking Roller which is slightly soft – this should give us an even layer of ink. The rolled ink should have a very slight texture to it but not be squelchy. The roller should make a zzz sound as it rolls across the ink.

Using the magazine paper mask to protect the board, roll the ink onto the block. If any unwanted ink is picked up by the carved lines it can be cleaned with a dry cloth.

Attach a piece of paper to the board by clipping the Ternes Burton Stripping Tabs onto the pins. Gently lay the paper down onto the inked surface.

Print by putting the whole board through a press or hand burnish with a baren. The Ternes Burton Pins can go through an etching press as
the pins are slightly lower than the lino. Gently test the pressure to make sure it is not too tight. Long strips of lino known as runners can be used on either side of the plate to help a piece of lino go smoothly through an etching press.

If the design has a large area that you do not want to print, a paper mask can be used to stop unwanted ‘noise’ from the carved area transferring to the paper. Print the first layer for the whole edition.

We can now wait for this layer to dry and print subsequent layers another day, or we can choose to print wet on wet. Printing wet on wet can result in slightly blobby-looking layers or improper ink adhesion so if you are after a perfect, flat finish it can be best to wait for each layer to dry. Using water-based inks will speed up drying times significantly but will also reduce the working time of the ink on the slab. Our printed layers are thin and even, so we are going to print wet on wet.

When the whole edition has been printed with the first layer, the block can be carved again. Leave the block stuck down onto the board. It is important that it stays in the same place so our layers line up when printed.

In this second carving, we are removing all the areas that we wish to remain our first colour; in this case, yellow. Everything that is already carved will remain white. There is often not very much to carve away between each layer. Here, we are using a small U tool to carve lines of a consistent width.

This second colour will be pale green. These inks are translucent so some of the colour underneath will show through. It’s important, therefore, to choose colours that will print well over one another. An easy way to do this is to work through a colour spectrum – the first three layers of this print will be yellow – light green – dark green. We know that these will print well over one another.

This pale green can be mixed using the yellow already rolled out onto the slab. Here, we have mixed in a tiny amount of Process Blue to our Process Yellow. For more information about colour mixing with Process Colours, see our recent blog post.

Using the magazine page mask, roll the ink onto the block. Clip a print into the tabs and gently lower it down onto the inked up block (using a mask to cover up background noise if you like).

Print the whole edition with this colour. The next layer of our print will add pattern to the leaves of this snake plant. A V tool can be used to create small textural marks. See more on mark making with carving tools here.

Again, we can add to our previous ink colour to create a new shade. Here, we have added a little more Process Blue to darken the green and a tiny, tiny amount of Process Red to create a more natural shade.

Print the whole edition with this colour. The final layer of this print will be the plant pot. The rest of the lino needs to be carved away. Again, a large U tool is useful for clearing large areas like the ground here.

To speed up this process, we can choose to ink up with a smaller roller and leave some of the block uncarved. As it is only the pot that needs inking, we need only clear an area of lino around it.

We are mixing a fresh colour for this layer. We will be printing over the top of dark green which will show through. This dark red should print over the green to make a brown. This colour has been mixed using Process Red with Process Yellow and a tiny touch of Process Blue.

This 1.5 inch Deluxe Rubber Roller by Speedball enables us to ink up a small area of the lino at a time.

Here we can see where the red ink appears brown on the print where it shows through a little of the dark green. The final layer on a reduction print is often black or another very dark colour. Print the whole edition with this layer.

The final print:

These inks can be washed up with water and washing up liquid or with Zest-It.

To make a reduction linocut you will need:

Single sheet of traditional grey lino
Ternes Burton Pins and Tabs
– Board for mounting pins, tabs and lino
Lino Cutting Tools
Carbon paper (optional)
– Double-sided tape
Parcel tape
Caligo Safe Wash Relief Inks
Baren or press
Paper to print on (such as Kent)
– Magazine pages
Inking Plate
Roller (plus smaller roller for detailed inking – optional)
Palette knife
Zest-It

Meet the Maker: Sean Starwars

We were extremely lucky to be joined by Mississippi-based woodcut printmaker Sean Starwars in our Sussex studio on the 4th of July. Sean joined us for an artist’s talk, demonstration and workshop in which participants could print a woodblock or linocut t-shirt using Speedball Inks!

Sean achieved his MFA in Printmaking from Louisiana State University and has been making woodcuts for over 25 years. He works in his own studio in Franklinton, Louisiana, relocating there after 5 years in downtown Laurel, Mississippi. During his presentation, Sean described printmaking as ‘the umbrella that goes over my whole life’.

Sean chooses to work in large scale woodcut because it ‘best suits my energy charged, caffeine induced, aggressive approach to image making.’ We were thrilled to rummage through the piles of vibrant prints that Sean brought along for us to see.

Drawing directly onto the woodblock with a permanent marker, Sean works from an idea in his head and rarely from photographs. He works quickly, using his intuition to guide the design. The blocks are then carved before being inked up and printed through a press. Using his large variety of coveted carving tools, Sean demonstrated his carving technique on a sheet of traditional lino before everyone had a go at creating their own linocut design.

When asked to describe a typical day in his studio, Sean stated
‘I like to stay up late working so I sleep in a bit in the mornings, so I typically roll in around 10 am and start cutting blocks wherever I left off. Go in and out of the shop all day taking breaks to play with my five kids or hang out with my wife Julie then I go back for more cutting. Eventually I might have to print something or answer emails or whatever, but I spend most of my time looking at old magazines /doing research and cutting!’

Much of Sean’s inspiration comes from advertising; specifically food packaging. Sean collects Mountain Dew packaging and has fond memories of cereal boxes of the 70s, particularly the Monster Cereals characters ‘Frankenberry’, ‘Count Chocula’ and ‘BooBerry’. Sean explains that ‘Charles Bukowski, Ms Pacman, Phillip Guston and Neil Blender are among my influences.’

Among Sean’s favourite products are Speedball Profesional Relief Inks and Speedball Fabric Block Printing Ink! He also ‘can’t say enough about the Shina Japanese Plywood – it is an amazing wood that is easy to cut and holds great detail!!!’

We were lucky enough to use some of Sean’s woodblocks to print onto t-shirts. We were given an amazing selection of blocks to choose from.

We inked the blocks up using Speedball Fabric Block Printing Ink…

…and put them through the etching press face down on a t-shirt all within a sandwich of newsprint.

Next on the cards for Sean is a ‘series of lifesized Blues greats from Mississippi … Legends such as John Lee Hooker, Muddy Waters, Bo Didley, and more. These are gonna be a lot of fun when they’re all done up and installed in one place!’

We all left the workshop feeling inspired and eager to get back to our own printing projects. Sean has pledged to make a print a week, urging us all to make as much work as we can and to worry less about what is good and bad when we’re making. He claimed to be ‘cheerleading for what [printmaking] can be in your life’ and left us with the following advice:

“stay active in the studio, take advantage of every minute you have – don’t just wait till you have a big block of time to work, and lastly be willing to reach out for opportunities – don’t wait for them to come to you! and VERY LAST – HAVE FUN !!!!”

For find more of Sean Starwars’s work, head over to seanstarwars.com or seanstarwars on Instagram. There are also lots of galleries in the US that sell his prints.

Indigo Shibori Dyeing

Indigo has been used to dye fabric in many cultures for centuries. Traditional Shibori folding techniques combined with indigo dye can create beautiful fabrics with intricate patterns with both subtle and bold shades of blue.

Begin by preparing your dye vat. We are using an Indigo Dye Kit that includes all the ingredients for a dye vat as well as full instructions. You will need:

When the dye vat is prepared (according to the instructions in the kit), begin with your piece of fabric laid flat.

Divide the cloth into equal sections in one direction using a concertina fold.

Concertina fold the cloth in the opposite direction.

If you begin with a square piece of fabric you should finish with a square like this.

This square can then be clamped in a number of different ways using a variety of objects. These Shibori Shapes are perfect for creating patterns. Use the same shape on the front and the back of the wad of fabric. Try to ensure they are roughly lined up. Clamp them tightly with clamps or pegs, bearing in mind that if the clamp causes the fabric to gather at all, this may come out mottled in the finished pattern.

The plastic shapes are forcing the fabric together, making it difficult for the dye to reach the fabric inside. The exposed areas of fabric will dye, leaving the clamped areas white.

Squares clamped either side of the fabric on the diagonal will create diamond pattern:

Circles will create a grid of polka dots:

These triangles will create diamonds.

Shapes can also be tied on with string or rubber bands. Tying two rectangles either side of the wad of fabric like this will create a diagonal grid pattern.

The string is not holding the shapes on as tightly as a clamp might, so some dye can get to the fabric underneath. The indigo dye creates the subtle shades of blue where a small amount of dye can reach the fabric.

For more types of patterns, begin with a concertina fold as before.

Concertina fold along the length of the fabric in a triangle pattern.

This right-angled triangle of fabric can be clamped with a smaller right-angled triangle to produce intricate patterns:

To fold the fabric into equilateral triangles, first concertina fold the fabric as before.

Next, concertina fold the fabric in the following pattern. You may have ends that you need to tuck in.

Clamp this triangle with a slightly smaller equilateral triangle to create a complex hexagon design where the exposed edges are open to dye:

For a more random, scrunched pattern, fold the fabric in half over a piece of rope.

Roll the fabric up around the rope.

Begin gathering the fabric up on the rope, scrunching it up.

Tie the two ends of the rope together creating a bundle of fabric like a hair scrunchy. Don’t scrunch and tie too tightly as this will not leave enough fabric exposed to the dye leaving large areas of white in the finished design.

When all your pieces are clamped or tied, they are ready to be dyed. Begin by thoroughly wetting the fabric bundles in cold water.

Gently squeeze the bundles to remove any excess water and air.

Wearing gloves, gently place the fabric bundles into the dye vat.

Leave the fabric in the dye vat for at least five minutes.

Wearing gloves, carefully remove the fabric from the dye vat. Gently squeeze the fabric before it comes out.

When it comes out, the fabric should be green in colour. Set the bundle down and leave it to oxidise for about 20 minutes. The colour should turn from green to dark blue.

To achieve a darker colour, dip the bundles into the dye vat again, repeating the steps above.

When you are happy with the shade of blue, it is time to rinse out the excess dye. Wearing gloves, rinse the fabric in cold running water.

Untie the bundle as you rinse.

Leave the fabric to dry. The fabric is now washable. Wash the fabric separately for the first time with a non-bio detergent.

The dye vat can be used again a few times over the next few days. When you have finished your dyeing session, gently stir the vat with a stick. Place a lid on the vat and leave it to settle.